Table of Contents
Advertisement
Quick Links
Advertisement
Table of Contents

Related Manuals for Skoda Infotainment Navigation Columbus


Summary of Contents for Skoda Infotainment Navigation Columbus
- Page 1 SIMPLY CLEVER Infotainment Navigation Columbus Owner's Manual...
- Page 2 Structure of this Owner's Manual (explanations) This Owner's Manual has been systematically designed to make it easy for you to search for and obtain the information you require. At the beginning of this manual you will find a table of contents where all the top- ics described are arranged sequentially.
- Page 3 Preface You have chosen a ŠKODA vehicle, which is fitted with the Infotainment Navigation Columbus (hereafter called the unit) – we thank you for your confidence in us. The new operating concept allows you to make vehicle settings and to operate electronic systems centrally from the unit.
-
Page 4: Table Of Contents
Settings Navigation Table of Contents Switch on/off traffic programme TP Digital radio reception DAB Navigation Introductory information Preface to navigation Media Operation Introduction (familiarisation with the unit) Media settings Main menu Operation Introductory information Set-up Sources Vehicle equipment Navigation settings Safety information Map display DVD video... -
Page 5: Table Of Contents
Auxiliary heater and ventilation Vehicle settings Other functions Introductory information Selecting driving mode Climatronic settings Index Table of Contents... -
Page 6: Introductory Information (Familiarisation With The Unit)
Component protection Introductory information (familiarisation with the unit) Some electronic control units are factory-equipped with component protection. The component protection was developed as a protection mechanism for: › Introductory information impairment of factory- or garage-fitted control units after installation in another vehicle (for example, after a theft);... - Page 7 To protect the screen, you can use a suitable screen protector for touchpads ■ that does not affect the function of the touch screen. The brightness of the screen is adjusted automatically depending on the bright- ■ ness of the interior lighting. The automatic setting can be adjusted manual- »...
-
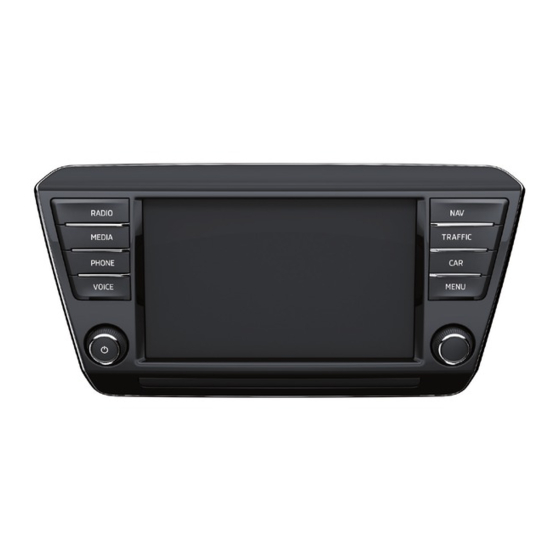
Page 8: Unit Overview And Operation
Note Unit overview and operation Some functions can be operated via the multifunction steering wheel » Vehicle ■ Unit overview Owner's Manual, chapter Communication or the rocker switch in the multifunc- tion lever » Vehicle Owner's Manual, chapter Instruments and warning lights. Some information and features are shown on the display of the instrument ■... - Page 9 Selecting menu/menu item Note › Drag your finger over the screen in the required direction › Turn the menu knob » Fig. 1 on page 6 The volume change is displayed on the screen of the unit. ■ When the sound is muted, the symbol appears in the display. ■...
- Page 10 - Sound setup Description of the function keys ■ Sound - Volume setting ■ Volume Button Description - Sets the bass, mid and treble ■ Bass - Mid - Treble Returns to the higher-level menu - Sets the balance between left and right, front and rear ■...
- Page 11 Input screen with numeric keypad Fig. 5 Input screen with numeric keypad The input screen with keypad is used for number entry » Fig. - Input screen in phone mode » page 36 - Input screen in navigation mode Description of the function keys in navigation mode: Button Description...
-
Page 12: Unit Menus
Unit menus Main menu Fig. 6 Unit menus: Main menu First and foremost, pay attention to the safety instructions » page Select and confirm all functions as described at the beginning of this man- » page Call up the main menu ›... -
Page 13: Unit Setup
Software: - Software version ■ Unit setup Navigation database: - Version of the navigation data ■ - Information on licences and copyrights used (only displayed in ■ Copyright info English) Main menu Sound setup Fig. 7 Unit settings: Main menu First and foremost, pay attention to the safety instructions »... -
Page 14: Screen Settings
- Setting the reduction of the volume when the park distance - Switches confirmation tone on/off by pressing a function sur- ■ Audio lowering: ■ Confirmation tone control is active face - switches off - Time and date displayed on the screen when the igni- ■... -
Page 15: Settings For Voice Control
- Distance units - Switch on/off the audible signal that is output when ■ Distance: ■ Voice control session end tone - Kilometres voice control is ended ■ km - Miles - Switch on/off the audible signal that is output to sig- ■... -
Page 16: Voice Control Of The Unit
› Press a button on the unit (with the exception of brief pressing of the button Voice control of the unit VOICE › By speaking the voice command Cancel voice control. Introductory information Operation You can use voice control only in phone or navigation mode. Voice control set- tings »... - Page 17 The symbol displayed on the device screen or in the information display changes from to . Restarting voice command input The procedure for voice command input can be restarted in one of the following ways: › by pressing the function key ...
-
Page 18: Entertainment
Symbols in the display Entertainment Symbol Description Sound is muted Traffic information station Radio Station without traffic information Radio station from the station list is a station from the Main menu preset list Selected radio station ... -
Page 19: Settings
Station finding - Sound setup » page 11, Sound setup ■ Sound › Press the button → - Auto-play all stations in the current frequency band, each station for RADIO ■ Scan around five seconds. Press again to stop the auto-play function at the current Storing radio stations in the preset list radio station. -
Page 20: Switch On/Off Traffic Programme Tp
DAB (Digital Audio Broadcasting) Digital radio reception DAB DAB is the digital transmission of radio programmes based on the DAB, DAB+ or DMB standards. It allows multiple stations to be transmitted in a single frequency in the form of a so-called ensemble. Main menu It also allows for the transmission of additional data and information (e.g. - Page 21 Note Station information In regions without DAB coverage, the following symbol appears in DAB Radio mode . Fig. 11 Station information Operation Station finding › Press the button → RADIO Storing radio stations in the preset list › Set the desired radio station or press and hold the desired station in the station list →...
- Page 22 DAB programme tracking If a DAB station is a member of several ensembles, when the signal is poor, the same station is searched in a different ensemble. Auto-change DAB -FM If the DAB signal is poor, the unit will try to find a corresponding FM station for the DAB station you are currently listening to.
-
Page 23: Media
Operation Media Operation Introduction Fig. 12 First and foremost, pay attention to the safety instructions » page Media: Using the system Select and confirm all functions as described at the beginning of this man- » page You can use the unit to play audio and video files in different formats »... -
Page 24: Sources
Description of the function keys for the audio source Note Button Action Operation If the traffic programme (TP) » page 18 or DAB traffic announcements » page 19 ■ Play/Pause: The play are switched on, the playback is interrupted during the announcement. You can function is stopped at the interrupt or switch off a traffic announcement by pressing the relevant function current position and the... - Page 25 Adjusting the playback volume of the source Select source The playback volume of the source can be changed by turning the knob Depending on the connected source, the output volume on this source can be Fig. 14 changed. Select source WARNING Never place external sources on the dash panel.
- Page 26 Audio files Video files MPEG-1/2 (layer Windows Media MPEG-2/4 FLAC, WAW, MPEG-1/2 ISO-MPEG4; ISO-MPEG4 H. Windows Media Codec type (file for- Audio 7, 8, 9 and DivX 3, 4 and 5; 264 (MPEG4 Video 9 mats) Xvid AVC) flac mpeg divx File suffix Playlists...
- Page 27 Select and confirm all functions as described at the beginning of this man- Display memory capacity: » page When importing or deleting files, the current memory capacity is displayed on the screen. You can use the Jukebox menu to load music and videos to the unit memory from the supported media.
- Page 28 Note WARNING ® Note any pairing requests shown in the Bluetooth player. On the manufacturing date, this unit was classified as a class 1 laser product in ■ You only need to enter the PIN code once. Bluetooth devices that have already accordance with the national/international standards DIN EN 60825-1: ■...
- Page 29 If a CD/DVD is soiled, never clean it with circular movements but rather from the SD memory card empty or data not readable ■ inside to the outside with a soft lint-free cloth. For heavy stains, we recommend If an SD memory card is inserted and no data or no legible data has been stored that you clean the CD/DVD with a commercially available medium cleaner and al- on the card, the unit will not be switched to the SD memory card mode after the low it to dry.
- Page 30 It is only possible to connect specification 1.x and 2.x or higher specification devi- - Set the TV standard ■ AV standard: ces. USB 2.x devices are supported and the data transfer speed is then the maxi- - Automatic selection of standard ■...
-
Page 31: Dvd Video
Start and playback video DVD video › Video playback starts automatically once the medium is inserted in the CD/DVD slot. Main menu › Fig. 18 Press the button → → » Fig. 18 on page 29. MENU DVD video: Main menu - Select the inserted DVD ■... -
Page 32: Operating The Dvd Menu
Operating the DVD menu Fig. 19 DVD menu The DVD menu is displayed after the inserted DVD video medium has been read › Automatically after pressing during playback. Explanation of graphic Function keys for the DVD menu The displayed DVD menu ... -
Page 33: Images
Operation Images Displaying images Main menu Button Action Operation Press Display the previous image Fig. 20 Press Switching on/off the slideshow / Images: Main menu Press Display the next image Rotate the image 90° anticlock- Press wise Press Rotate the image 90°... - Page 34 ■ 15 s ■ 30 s - Switch on/off the slideshow repeat function. (After the last ■ Repeat slide show image is displayed, the slideshow starts from the beginning.) Entertainment...
-
Page 35: Phone
Possible error messages Phone Message Action To use the Bluetooth function, please Switch on the ignition. switch the ignition on. Phone ® Switch on the Bluetooth func- Please switch on Bluetooth. tion » page Introductory information Pair the mobile phone with the hands- No Bluetooth devices paired. -
Page 36: Connecting Mobile Phone With Hands-Free System
Possible symbols in the list of found or paired devices Connecting mobile phone with hands-free system Symbol Description Devices that support the functionality of the hands-free sys- Introductory information ® tem (Bluetooth profile HFP) Devices that are connected to the hands-free system via ®... -
Page 37: Speed Dialling A Telephone Number
› At the end of the search, or even during the search, press the button You can cancel the pairing at any time by pressing Results Cancel ® The system displays a list of found Bluetooth devices. (If you do not press the button , the system displays the list after 25 seconds). -
Page 38: Direct Entry Of A Phone Number
Downloading and updating the phone book Direct entry of a phone number Upon the first connection of the mobile phone with the hands-free system, the system begins to download the phone book from the phone and from the SIM card into the memory of the control unit. -
Page 39: Call Lists
- User profile settings ■ User profile Call lists - Assign function keys to allow speed dialling of contacts; you ■ Manage favourites can also add and delete contacts here - Enter the mailbox number ■ Mailbox number: Fig. 23 - Enter the phone number of the mailbox ■... -
Page 40: Information Display
Incoming call Depending on your type of mobile phone, you can perform the following func- During the ring tone of the incoming call, the screen displays the phone number tions: or contact name. Participants - Display details of participants ■ You can select the following functions: ■... - Page 41 Button Current call Action Operation Hang up - End a call ■ Hold - Hold the call Switch on voice control, cancel acoustic message, new voice ■ Press briefly ■ Answer - Return to the held call command possible ...
- Page 42 Symbol Description Incoming call Outgoing call Missed call Phone...
-
Page 43: Navigation
WARNING (Continued) Navigation The driving recommendations provided may vary from current situations, ■ e.g. due to road works or out-of-date navigation data. The volume should be adjusted to ensure that acoustic signals from outside, Navigation ■ e.g. sirens from vehicles which have the right of way, such as police, ambu- lance and fire brigade vehicles, can be heard at all time. -
Page 44: Main Menu
You can define the target address in one step by speaking the city, the street and Information display the house number. You do not have to speak this information step by step. The navigation data must contain the house number. House numbers made up of dif- ›... - Page 45 The last opened menu opens in navigation mode. If a menu other than the main menu » Fig. 26 on page 46 is opened, the main menu can be opened by pressing again. Function keys for navigation mode: Button Description Enter a new destination »...
-
Page 46: Set-Up
- Switch on/off manual selection of the route type (eco- ■ Suggest 3 alternative routes Set-up nomical, fast, short) » page 57 - Automatic selection of the preferred route type (manual route selection ■ Route: is switched off) Navigation settings - Calculate the most economical route with shortest travelling time ■... - Page 47 - Switch on/off the display of the information window ■ Note: national border crossed Fuel options with speed limits when crossing the national border - Switch on/off guidance in demo mode ■ Demo mode › From the main menu of navigation mode, press →...
-
Page 48: Map Display
› - Displays the overview map to the destination. (After the route is calculated, Map display the unit displays the route from the vehicle location to the destination. The scale is adjusted to the length of the route.) › - Map display with light or dark background Introductory information Day/Night... -
Page 49: Split Screen
Autozoom can be switched off by touching or by changing the map → Split screen scale. When you touch again (function key highlighted in green), autozoom is switched back on. Autozoom can also be switched on/off in the navigation settings »... - Page 50 Audio Compass Fig. 27 Fig. 28 Split screen: Audio Split screen: Compass In the Audio split screen, the playback of the currently selected audio source can The Compass split screen displays the current vehicle position in relation to the be operated »...
- Page 51 › Distance and time to the city with the following navigation instruction including numeric indication of the remaining distance; › Information on the next points of interest (e.g., fuel stations, car parks) is dis- played. Fig. 31 Split screen: GPS Traffic signs Fig.
- Page 52 Map options › - Changing the map orientation - North is oriented towards the top of the screen, and the arrow » Fig. 26 on page 46 points in the direction of travel or the map rotates and the direction-pointing arrow points to the top of the screen.
-
Page 53: Navigation
Address Navigation Fig. 34 Entering a new destination Destination entry by address Destination entry options Fig. 33 Destination entry options › In the main menu of navigation mode, press → → Options Address › In the main menu of navigation mode, press →... -
Page 54: Entering From Stored Destinations
› When entering the street, instead of a street name, it is possible to select the In the main menu of navigation mode, press → Other POIs → Options → centre of the entered city by touching . Then it is no longer necessary to Centre On map enter the house number or junction. -
Page 55: Special Destinations
The menu is used to select the type of destinations stored in the unit memo- A list of possible data import sources is displayed » page » Fig. Select the source and confirm the menu itemImport all vCards of this folder to ›... - Page 56 Upon confirmation of a menu item, the destination details and the following Search area for POIs items are displayed: ® - Start a phone call (If a phone is connected via Bluetooth and the ■ Dial number Fig. 38 destination has been entered including the contact telephone number) Search area for POIs - Start route calculation »...
- Page 57 Searching near the current position, near the destination, near Searching near the entered address or near the entered map the stopover destination and along the route Fig. 39 Search area for POIs Fig. 40 POI search: near the entered address entered/near the entered map point The figure applies to the following search area options »...
- Page 58 Airports Railway stations Emergencies Rest stops Car parks Func- Func- Car rental SKODA dealers tion Description Description tion key SKODA service Ferries and motorail trains Tourist Information Chemists Medical services ...
-
Page 59: Route Guidance
Other destinations displayed in the map It is not necessary to wait for the calculation of all route types. It is possible to select an already calculated route before the calculation of the remaining routes Symbol Description Symbol Description is completed. Home address Favourite ... - Page 60 The symbols shown in the route Information Navigation announcements Symbol Description The navigation announcements are started as soon as the route calculation is Arrival time at destination/stopover complete or a route type has been selected. Remaining travelling time to destination or stopover ...
-
Page 61: Destination Management
Destination management The menu is displayed: › by touching at the menu item in the list of found POIs; › by touching the POI symbol on the map. Destination details ® - Start a phone call (If a phone is connected via Bluetooth and the ■... -
Page 62: My Tours
Start direct route guidance My tours Open the destination details » page 59 Stopover with sequential number Destination New tour Arrival time at destination/stopover Distance to destination or stopover When you press the name of the destination or stopover, the system displays a menu where you can edit the destination (, , ). -
Page 63: Traffic Programme (Traffic)
Dynamic route switched on Traffic programme (TRAFFIC) Information on traffic problems received via TMC which affect the route are dis- played in the map by means of a coloured symbol (e.g., , , , etc.) along with the route section. Traffic (TMC) Route sections that lie along the route are displayed in red. -
Page 64: Setting Vehicle Systems
Vehicle data Setting vehicle systems Setting vehicle systems Main menu First and foremost, pay attention to the safety instructions » page Select and confirm all functions as described at the beginning of this man- » page The vehicle systems setup functions can only be used when the ignition is Fig. -
Page 65: Auxiliary Heater And Ventilation
- Display up to three consumers which have the largest share of Set the preset times 1 to 3 and the duration (10 - 60 minutes) ■ Conv. consumers fuel consumption and displays the fuel consumption to run all convenience con- When the heating or ventilation is running, the windows are highlighted in sumers »... -
Page 66: Parking And Manoeuvering
- Settings for units of measurement » page 12 Front Assist (ambient traffic monitor. sys.) - Set the assistant for distance mon- ■ Units ■ - Service interval display, VIN » page 66 itoring to the vehicles ahead ■ Service - Reset to factory settings »... -
Page 67: Mirrors And Wipers
Displays the selected lane depending on the steering angle - Activate/deactivate daytime running lights ■ Daytime running lights - Activate/deactivate lane change flashing ■ Lane change flash An obstacle in the selected lane which is currently outside of the collision - Travel mode on/off ■... -
Page 68: Multifunction Display
Central locking - Settings for opening and closing of doors - Switch on/off the display of speed warning in the display of the ■ ■ Speed warning Door unlocking: - Set the door unlocking feature instrument cluster ■ - All doors - Switch on/off the display of oil temperature in the display of the ■... -
Page 69: Other Functions
- Activates the fuel-saving mode ■ Eco Other functions - Cancel the menu to select the driving mode ■ Cancel - Display the mode settings ■ Information - Activates the Individual mode ■ Individual Introductory information - Cancel the menu to select the driving mode ■... -
Page 70: Climatronic Settings
Climatronic settings Fig. 48 Climatronic: Main menu If Climatronic is switched on, the system displays the desired temperature for the driver's side and front passenger side» Fig. 48. Depending on the desired temper- ature, the airflow from the air outlet vents is shown in blue (temperature under 21.5 °C) or red (temperature above 22 °C). -
Page 71: Index
Index Factory settings 13, 66 Operation File formats Data Convenience consumers Address Frequency band Trip Adjust image display Fuel options Vehicle status Advanced setup Function keys Date Destination details Anti-theft protection Destination entry Audio Address Graphical navigation instructions 48, 57 Information display Custom destination Media... - Page 72 mode New tour Radio Mode Keypad Setting vehicle systems On map Unit setup Operation More keypad languages Images Multifunction steering wheel 38, 42 Lane guidance Media Mute Lever for multifunction switch Video My destinations Menu My tours Main menu Edit a tour Pairing a mobile phone DVD video New tour...
- Page 73 Route guidance Main menu Settings Mirrors and wipers Voice control Route info Multifunction display Telephone conference Route options Opening/closing Telephone conversation Parking and manoeuvering Time Restore factory settings Seats Safety information Traffic TMC Service Screen 4, 12 Touch screen Tyres Screen display Tour memory Setup...
- Page 74 ŠKODA AUTO a.s. pursues a policy of constant development of Infotainment ra- ŠKODA AUTO a.s. expressly reserves all rights relating to copyright laws. dios and navigation systems. We trust that you will understand that changes to Subject to change. models in terms of shape and engineering may be introduced at any time. The de- Issued by: ŠKODA AUTO a.s.
- Page 75 Columbus Infotainment anglicky 11.2012 S00.5614.05.20 5E0 012 151 H...
Need help?
Do you have a question about the Infotainment Navigation Columbus and is the answer not in the manual?
Questions and answers