Table of Contents
Advertisement
Advertisement
Table of Contents

Subscribe to Our Youtube Channel
Related Manuals for Skoda RADIO NAVIGATION SYSTEM DX - FOR FABIA


Summary of Contents for Skoda RADIO NAVIGATION SYSTEM DX - FOR FABIA
- Page 1 SIMPLY CLE VER ŠkodaAuto RADIO NAVIGATION SYSTEM DX...
- Page 2 Introduction You have opted for a Škoda vehicle, which is fitted with a radio navigation system DX, (designated in the following as RNS DX ) - we thank you for your confidence in us. We recommend that you read this Owner's Manual attentively to enable you to become familiar with your RNS DX and all that it offers as quickly as possible.
-
Page 3: Table Of Contents
Contents Contents Layout of this Owner's Manual Enter destination - To the flagged destination ......(explanations) . -
Page 5: Layout Of This Owner's Manual (Explanations)
Layout of this Owner's Manual (explanations) Layout of this Owner's Manual (explanations) The Owner's Manual has been systematically designed, in order to make Caution it easy for you to find and absorb the information you require. A Caution note draws your attention to the possibility of damage to your Chapters, table of contents and subject index vehicle or points out general risks of an accident . -
Page 6: General Comments
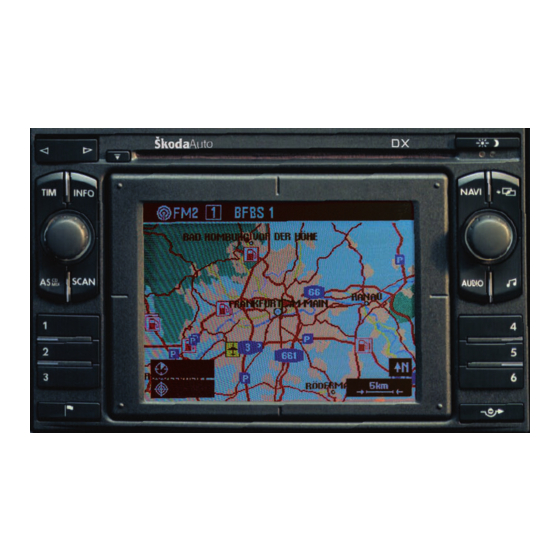
General comments General comments General view Fig. 1 Functional description of the buttons for the operation of audio and navigation functions The button is designed to retrieve from upto nine automatically recording period and for activating the recording function as well as stored traffic announcements with maximum four minutes and total aborting a traffic information. - Page 7 General comments − Rocker button for automatic and manual station finding − for marking (turn) and confirming (press) the respective menu fields − Rocker button for selecting and repeating recorded radio traffic − Perform basic settings of sound, sound field and volumes in the reports sound menu.
-
Page 8: Radio Navigation System Dx
General comments Radio navigation system DX Special equipment Fig. 2 Special equipment The radio navigation system DX offers you an easy handling of the convenience equipment radio and navigation in the vehicle. Additionally the system can be equipped with an original 6-compartment CD changer, a digital sound package, a package for dynamic navigation and a TV/Video module. -
Page 9: Important Information
General comments Important information Navigation The navigation system is your “intelligent front passenger”. You can Warranty reach the desired destination quickly, easily and reliably without time- consuming map searching from the starting point of your trip. In unknown locations it saves you time by guiding you to the next filling station. You The same warranty terms apply for the equipment as for new vehicles. -
Page 10: Changing The Navigation Cd
General comments “AUX”. More detailed information is available from your Škoda Service If the information “SAFE” appears in the display after switching on the unit, Partner. it can only be operated again by entering the correct code. Operating the radio navigation system when the Before using the navigation system and the map vehicle is moving. - Page 11 General comments Carefully insert the new navigation CD with the inscription upwards as far Switch over to night display as possible into the CD case until it can be drawn in automatically by the The display switch over is performed either manually by pressing the unit.
-
Page 12: Map And Symbol Displays
General comments Map and symbol displays The menus displayed on the screen result from the following standard fields: • If the navigation is active the status of the functions radio or CD Map display changer is displayed in the status bar . -
Page 13: Switching The Unit On And Off
General comments tion. You can select via the map type if e.g. the current vehicle position – If the key is pulled out of the ignition lock when the system is should be shown together with the destination. The move mode makes it switched on, the system switches off autmatically. -
Page 14: Audio
Audio Audio • Overview of audio menu TP1 and TP2 - radio station in two memory levels • • TV/VIDEO - vehicles with TV Tuner or Display of audio functions • AUX (off) - vehicles without TV Tuner ⇒ page 13 •... - Page 15 Audio RDS Name TIM standby Setting the RDS station name to “fixed” or “variable” (changes in the Setting the TIM standby time displays are indicated on the screen, e.g. weather reports or advertise- Mark and confirm the menu field “TIM standby”. ments).
-
Page 16: Overview Of Sound Menu
Audio Overview of sound menu all up the menu “Adjust sound” – Press button sound System equipment without digital sound package Changing scale value (DSP) – You can mark and confirm the desired menu field (e.g ⇒ fig. “Treble”) 8. - Page 17 Audio • System equipment with DSP Bass • Treble • Balance - the volume ratio of the loudspeaker on the right/on the left is adjusted. • Fader - the front/rear volume ratio is adjusted. • Volume setup Adjust volume (menu field “Volume setup”) ⇒...
-
Page 18: Radio Mode
Audio Radio mode utomatic storing of radio stations (AS function ) The six best RDS stations can be automatically stored from the Station finding respective service area (radio data system, which makes it possible together with the radio program to transfer additionally Automatic station finding more information). - Page 19 Audio – While the station to be stored is being listened to, the desired Playing radio station (Scan) station button must be held as long as possible until a short signal tone confirms the storing. Stations of a waveband (TP, FM and AM) can be played briefly one after the other (for ten seconds).
- Page 20 Audio PS-Code (e.g for advertisement purpose ), there is the possibility to First of all the unit attempts to set only alternative frequencies of the change the RDS station name in the menu “Audio Settings ” (call up via selected station. menu field “Settings”).
- Page 21 Audio • RDS evaluation is not possible if the signal is too weak. In this case it Interrupting a traffic information is the frequncy which appears in the status bar or in the info field instead If a traffic information was interrupted, press the button .
- Page 22 Audio • Replaying the random traffic report The beginning is overwritten, if a report lasts more than four minutes. A signal tone sounds as information that the entire report could not be The traffic reports can also be replayed in the random order. stored.
- Page 23 Audio – Afterwards the play function starts in the order of the CDs Select track inserted in the magazine. – Press the rocker button to select the track. If the rocker button on the right is pressed, the play function of the following Interrupting the CD play function track starts.
- Page 24 Audio Information on how to use a CD changer CD to jump Uneven road surfaces and strong vibrations may cause the CD to jump. In such cases wait with the CD mode until there is a better road surface to drive on.
-
Page 25: Navigation
Navigation Navigation • Overview of navigation basic menu Info mode ⇒ page 44 • Route options ⇒ page 38 • Settings ⇒ page 41 Call up navigation basic menu • Travel guide ⇒ page 52 Note • If the button is pressed during the guidance, the menu field NAVI “Start guidance”... -
Page 26: Enter Destination
Navigation Enter destination Now you can select via the menu fields between the following possibilities of the “Enter destination”: • ⇒ fig. 14 Destination memory Overview • Destination on the map ⇒ page 36 • Special destinations ⇒ page 30 •... - Page 27 Navigation • Therefore ensure that the destination is detected by the navigation system Editing field with standard names (highlighted) or the entry marking and a route is calculated. (still no destination is selected) • List range with four destination entries Symbols of control field Editing menu - Symbol for blank spaces und for erasing the marked characters...
-
Page 28: Enter Destination - Town
Navigation Enter destination - Town Enter town name – Enter the desired town completely in the editing field or only Select a town as destination its initial letters. An existing entry is deleted when entering the first characters. Simultaneously a new line is stamped into the editing list. -
Page 29: Enter Destination - Street And Intersection
Navigation Enter destination - Street and – Scroll through the list by moving the the selection bar over the last entry (scrolling forwards) or the first entry (scrolling back- Intersection wards). Select a street as destination You can select the desired street in the menu “Street” with the aid of this possibility and then precisely determine the destination address in the street sub-menu. -
Page 30: Enter Destination - Town Centre
Navigation Enter destination - Town centre Select an intersection as destination Select a town centre (part of the town) as destination Fig. 18 Precise definition of the destination address Fig. 19 Menu field - Town The destination address can be precisely determined in the street sub- centre menu: •... -
Page 31: Enter Destination - Special Destination
Navigation – Select a list. Other destinations can be entered when selecting the menu field “Special destinations” in the destination entry menu. – Mark and confirm the desired town centre in the list. Then the navigation basic menu is called up. Select menu field “Special destinations”... -
Page 32: Select Supraregional Destinations
Navigation Select destination in the address surroundings containing the information for the corresponding destination addresses and destination distances. The destinations in the surroundings of the current address for the selected column are entered in this list. In addition, the distance between the address and the destination is given. -
Page 33: Vehicle Position
Navigation – Mark and confirm the menu field “Supraregional destina- This special destination has not been assigned to any previously ⇒ page 31, fig. tions” 22. The column list is called up. selected destination. It relates to the immediate surrounding of the current vehicle position. -
Page 34: Enter Destination - Destination Memory
Navigation Enter destination - Destination memory Select menu field “Store destination” – Confirm the menu field (in case of menu call up, the menu field ⇒ fig. “Store destination” is already marked) 24. Then the Store a destination in the destination memory editing menu is called up for the entry of a short name. -
Page 35: Enter Destination - To The Flagged Destination
Navigation Note Note • • If an already existing short name is changed (highlighted) it is deleted Non-assigned memory spaces are designated in the Top 10 memory when entering the first characters. with “free”. • • If the destination memory is full, one or several destinations must be The guidance can also be started directly from the memory. - Page 36 Navigation Store flagged destination Take over standard name – Confirm the entry “Flagged destination (hh:mm)” by pressing the menu knob for more than two seconds. Enter your own position name – Enter a position name with the aid of the register. The standard name is deleted when entering the first characters.
-
Page 37: Enter Destination - Select Destination From The Map
Navigation – Mark and confirm in the destination entry menu the menu field 50 km 1 : 5 000 000 “To flagged destination”⇒ page 35, fig. 27. The navigation 100 km 1 : 10 000 000 basic menu is called up. In the destination field there is the 200 km 1 : 20 000 000 name “Flagged destination (hh:mm)”. - Page 38 Navigation Select functions – Press the menu knob as often as it is necessary. After the destination confirmation, the navigation basic menu is called up and the name “Map destination (hh:mm)” appears in the The map is shown with a crosshair and a selection window. The destination field.
-
Page 39: Route Options
Navigation Route options – Mark and confirm the menu field “Route option” in the navi- gation basic menu. The menu for the route option is called up. Plan route guidance and calculate route list – Select another setting in which first of all the desired menu field is marked and confirmed. -
Page 40: Start Guidance
Navigation Start guidance Scroll the route list: • to below - turn menu knob to the left • to above - turn menu knob to the right Begin guidance To exit the route list: Button calls up again the menu “Route option”. ... - Page 41 Navigation Route calculation In this case follow the display of the direction of travel which points in the direction of the destination. You will obtain acoustic and optical driving recommendations as soon as you are driving on a digitalized street. WARNING For the guidance these are only driving recommendations.
-
Page 42: Carry Out The Settings In The Map Menu
Navigation ⇒ page 40, fig. 33 Carry out the settings in the map menu The symbol display shows the number of GPS satellites to be received and the status of the tailback function, the estimated arrival time or the length of the trip and the distance Call up map menu to the destination, the display of the direction of travel, the distance markings to the intersection/junction with the distance... -
Page 43: Select Menu Field "Map Detail
Navigation Zoom setting (reduce/enlarge): Note • Call up the sub-menu auto zoom for setting the scale on auto zoom • If the segment A has been marked and confirmed, the map is displayed in the auto zoom mode. This means that the map is shown auto- matically in the correct scale. - Page 44 Navigation Select menu field “Map type” Select menu field“Zoom setting” – Mark and confirm the menu field “Map type”. – Mark and confirm the desired map type in the sub-menu called up below. Then the map is displayed. Location map - Display of the map detail with the current vehicle position. Scale and alignment of the map are not changed.
-
Page 45: Info Mode
Navigation The distance information (after the road category) gives the scale in which the map was shown during auto zoom. Note The distance information for the individual road categories is fixed and cannot be changed. Info mode Fig. 37 Symbol display Select menu field “Info mode”... -
Page 46: Destination Memory
Navigation Destination memory Destination memory - Enter/change short name Overview The destination menu calls up directly from the navigation basic menu via the menu field “Destination memory”. The destination memories are the alphabetical destination memory and the Top 10 memory. The alphabetical destination memory contains all destination memory entries. - Page 47 Navigation – Mark and confirm the menu field “Change short name” in the Edit the Top 10 memory sub-menu. Select list entry – Mark and confirm the desired entry in the respective destina- tion memory list. The editing menu is called up. –...
- Page 48 Navigation Sort Top 10 destination entries – The menu “Edit Top 10” is called up again by pressing the button Note The white triangular below the last entry on the first page of the Top 10 list refers to the following page. Copy destination from the destination memory in the Top 10 memory Fig.
-
Page 49: Automatic Tailback Function (For Units With Dynamic Navigation)
Navigation Delete a destination from the destination memory Note If the destination to be deleted is also entered in the TOP 10 memory, the You can remove the destinations which are no longer needed message “N.B. Top 10 destination” appears in the menu bar. When from the alphabetical destination memory and the Top 10 confirming the menu field “Del. - Page 50 Navigation The traffic reports are shown in the map display by means of symbols: • slow-moving traffic • traffic jam • closed road The corresponding stretch of the journey is shown in the map display by a dotted line. So that you can use the dynamic navigation, a radio station must be able to receive the traffic reports emitted via TMC.
- Page 51 Navigation Switching on and off the dynamic navigation – Press the menu knob to switch the dynamisation on or off. The active condition is shown as highlighted and marked with a triangular. The condition of the tailback function is shown in the symbol and map display: •...
-
Page 52: Manual Tailback Function (For Units With Dynamic Navigation)
Navigation – Mark and confirm the menu field “Text messages”. In addition the blocked stretch of the road is shown as dotted in the map display. – The first traffic report is indicated. Other reports can be retrieved by pressing the menu knob Call up tailback function The number of received messages is shown in the top bar, e.g. -
Page 53: Travel Guide
Navigation Exclude alternative route Travel information can be price information, equipment and telephone/fax numbers for hotel arrivals. – Press the button tailback function . The tailback menu If your navigation CD contains several travel guides, a sub-menu is called appears. up via the menu field “Travel guide”, in which the desired travel guide can be selected. - Page 54 Navigation In the navigation basic menu you can select various basic settings for the Setting clock • ⇒ page 52, fig. navigation system via the menu field “Settings” the clock is automatically set via the GPS. The GPS system transmits the universal time UTC This results in a time lag of two hours compared Select between the following possibilties: to the middle european summer time and of one hour compared to the...
-
Page 55: Anti-Theft Coding
Navigation Anti-theft coding Enter code - Cancel electronic lock Description Each time when: • the unit is disconnected from the power supply of the vehicle • the battery is disconnected • the electrical fuse for the radio was blown The information “SAFE” appears in the display after switching on the unit. Then the unit can only be operated again by entering the correct code. - Page 56 Navigation Note • You can also confirm the code by pressing the menu knob more than two seconds. Entry of an incorrect code number After confirmation of the incorrect code number, the logo “SAFE” flashes in the numerical fields and then indicates also the entered code. The message “1st code entered is wrong!”...
-
Page 57: Tv Tuner
TV Tuner * TV Tuner * – If you are in the navigation mode, the button must AUDIO be pressed twice. Introduction – Select and confirm the menu field “TV/VIDEO”. The last selected TV station appears on the screen and the logo “AUX” If the vehicle is stationary you have the possibility with the TV Tuner to receive television programs. - Page 58 TV Tuner * • 2nd possibility: SETTINGS - calls up a sub-menu, in which the TV standard (video) is selected. – Turn the menu knob to the right (or left), in order to set the next (or the previous) channel. Set screen For information the station and the belonging channel is indicated.
- Page 59 TV Tuner * – Press the button , in order to take over the new – Select and confirm the menu point “VIDEOTEXT” in the oper- setting. ator menu. If the current station transmits video text data, the panel 100 appears in the full picture mode. –...
-
Page 60: Index
Index Index Code ......9, 54 incorrect ......55 Anti-theft coding . - Page 61 Index Memory Route ......38 Destination ..... . . 45 Alternative .
- Page 62 Index Warranty ......8 Zoom ......37, 43...
- Page 63 Information Unit name The unit map must be discon- nected and safe - never store in the Unit Radio navigation system DX vehicle. name If the unit map with the code num- Serial no. ber may get lost, please contact your Škoda Service Partner or importer.
- Page 64 Information The unit map must be disconnected and safe - never store in the vehicle. If the unit map with the code number may get lost, please contact your Škoda Service Partner or importer. There one will be glad to assist you without any cost.
- Page 65 Škoda Auto is constantly working on the further development of all types and models. Please understand that, for this reason, changes to the scope of supply in terms of shape, equipment and engineering may be introduced at any time. It is therefore not possible to derive any claims from the information, illustrations and descriptions contained in this Owner ´...
- Page 66 Radionavigační systém DX Škoda Auto anglicky 05.06 S00.5610.43.20 6Y0 012 151 F...
Need help?
Do you have a question about the RADIO NAVIGATION SYSTEM DX - FOR FABIA and is the answer not in the manual?
Questions and answers