Skoda Octavia Owner's Manual
Infotainment navigation columbus
Hide thumbs
Also See for Octavia:
- Workshop manual (456 pages) ,
- Owner's manual (348 pages) ,
- Operating instructions manual (264 pages)
Table of Contents
Advertisement
Advertisement
Chapters
Table of Contents

Related Manuals for Skoda Octavia


Summary of Contents for Skoda Octavia
- Page 1 SIMPLY CLEVER Infotainment Navigation Columbus Owner's Manual...
- Page 2 Notes Structure of this Owner's Manual (explanations) WARNING This Owner's Manual has been systematically designed to make it easy for you The most important notes are marked with the heading WARNING. These to search for and obtain the information you require. WARNING notes draw your attention to a serious risk of accident or injury.
-
Page 3: The Unit Is Equipped With A So-Called Touch Screen 11 » Fig
Preface You have chosen a ŠKODA vehicle, which is fitted with the Infotainment Navigation Columbus (hereafter called the unit) – we thank you for your confidence in us. The new operating concept allows you to configure vehicle settings and to operate some electronic systems centrally from the unit. -
Page 4: Table Of Contents
Table of Contents Navigation Description of the navigation system Abbreviations Preface to navigation Settings Familiarization with the unit Operating the map Introductory information Extra window Important notes Navigation Unit overview Enter new destination Unit operation Entry of saved destinations Concerning the device screen operation Operation through the MAXI DOT display POI categories Voice control... - Page 5 Abbreviation Definition Abbreviations Station identification of the RDS system, for example when Abbreviation Definition setting a different radio station a software profile for the one-way audio data transfer via System for the transmission of additional information for FM A2DP ® Bluetooth radio reception Adaptive cruise control...
-
Page 6: Familiarization With The Unit
WARNING (Continued) Familiarization with the unit Adjust the volume to ensure that acoustic signals from outside, e.g. sirens ■ from vehicles which have the right of way, such as police, ambulance and Introductory information fire brigade vehicles, can be heard at all time. High volumes can cause hearing damage! ■... -
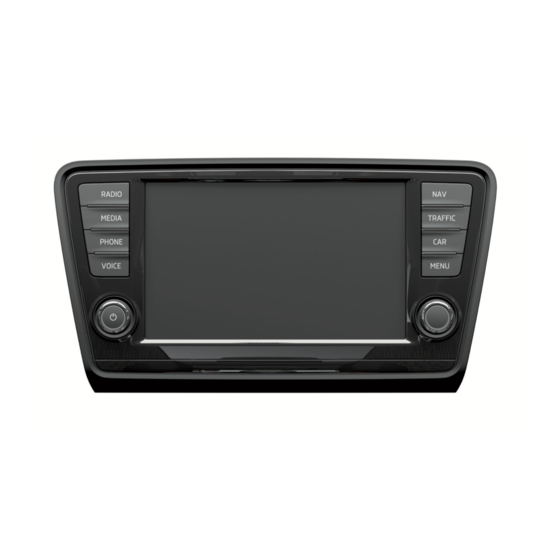
Page 7: Unit Overview
Description of the device Unit overview - Control for switching on/off, volume adjustment Introduction Menu button for calls and confirmations - Menu Radio » page 21 This chapter contains information on the following subjects: - Menu Media »... -
Page 8: Switching The Unit On/Off
Sound - Sound settings » page 18 Switching the unit on/off Setup - Unit settings » page 17 › Press the knob to switch the device on or off. Vehicle - Vehicle system settings » page 68 ... -
Page 9: Unit Operation
Greyed out function keys are not active. Unit operation Proximity sensors Concerning the device screen operation At the bottom of the device there are proximity sensors. When approaching to the screen using the hand, the device changes the display mode in the operat- ... - Page 10 The numbers 1-99 indicate the quantity of matching entries that were found. If Input screen with keyboard for searching even more entries were found, ** is indicated instead of a number. If less than 6 entries were found, a list of the found entries opens automatically. Fig.
-
Page 11: Operation Through The Maxi Dot Display
- Input screen in the Telephone menu » page Note If the ignition and the side light are switched on, the buttons and dials on the - Input screen in the Navigation menu » page 55 multifunction steering wheel will also be illuminated. Operation through the MAXI DOT display Operate with the control lever buttons ... - Page 12 ■ Media/DVD video Name ■ Buttons and wheels of the Radio or Media menus/DVD video Button/ Function wheel Action Radio Media DVD video » Fig. 8 Press briefly Change source (change frequency bands and connected sources) Switch between the Radio and Media menus or DVD video and open the last context status (e.g. the last radio station Press and hold button or track to be played) Switch off sound and stop track playback or switch on sound and continue...
-
Page 13: Operation With The Buttons And Wheels On The Multifunction Steering Wheel - Telephone
Button/ Function wheel Action Radio Media DVD video » Fig. 8 Press briefly Return to a previous level on menu Press and hold button Return to Main Menu Does not apply for AUX. The sound is turned on again by pressing or turning wheel . -
Page 14: Operation With The Buttons And Wheels On The Multifunction Steering Wheel - Navigation
Button/wheel » Fig. 9 Action Function Press briefly Return to a previous level on menu Press and hold button Return to Main Menu Telephone call function in the MAXI DOT display Symbol Meaning Depending on the context, the following functions can be carried out in the in- A phone is connected to the unit ... -
Page 15: Voice Control
Turn setting wheel » Fig. 10 on the multifunction steering wheel to display If the home address is not defined when the menu item Home address is se- the Last destinations menu. lected, the following message appears: Please enter the home address on the infotainment system. - Page 16 WARNING Note Please pay attention to the traffic first and foremost! As the driver you During voice control, no navigation announcements and traffic announce- ■ ■ are fully responsible for road safety. Only use the system so that you are in ments are played.
- Page 17 Help for voice control not recognizing a voice command Read and observe on page 14 first. Read and observe on page 14 first. Start introduction If a voice command is not recognised, the system answers with Pardon? and When you give the voice command Start tutorial, the unit plays one of the sev- you can give a new command.
- Page 18 Voice commands for the symbols in the Settings menu for map display Not in the help voice commands Symbol Voice command Read and observe on page 14 first. Map “2 D” Voice commands to call control menus, folders and directories in each menu. Map “3 D”...
-
Page 19: Unit Settings
Unit settings Main menu Setup menu Fig. 12 Unit settings: Main menu Introduction This chapter contains information on the following subjects: Main menu Sound settings Screen settings Time and date settings Keyboard settings From the main menu, the basic parameters of the device can be set. Additional keypad language settings Call up the main menu Unit settings... -
Page 20: Sound Settings
Update software - Manual software update (for more information see the Quiet - Low volume ■ ■ ŠKODA Website www.infotainment.skoda-auto.com) Medium - Medium volume ■ ■ Copyright - Information on licences and copyrights are only available in Eng- ■... -
Page 21: Time And Date Settings
■ Switch off screen (in 10 seconds) - Activate/deactivate energy-saving mode ■ ABC - keys arranged alphabetically for the display QWERTY - Arrangement of the keys as per the QWERTY system (in accord- ■ Brightness: - Adjusts the brightness of the screen ance with computer keyboard arrangement) ■... -
Page 22: Voice Control Settings
■ Gas consumption: - Gas consumption units ■ Navigation - Restore default settings for navigation kg/100km - Kilograms per 100 km System - Restore the system default settings ■ ■ km/kg - Kilometres per kilogram ■ ® ■ m³/100km - Cubic metres per 100 kilometres Bluetooth settings km/m³... -
Page 23: Audio/Video/Images Radio
Mainmenu Audio/Video/Images Radio Fig. 14 Radio: Main menu Operation Introduction This chapter contains information on the following subjects: Mainmenu List of available stations Search for radio stations and store Read and observe on page 21 first. Search available stations (Scan) Explanation of graphic »... -
Page 24: List Of Available Stations
Information symbols in the display Symbol Meaning Symbol Meaning Signal is not available (DAB) Traffic information station Radio stations with picture representation (slideshow) (DAB) Traffic information signals are not available or the selected sta- Update station list tion is not a traffic information station The station list is continually updated automatically. -
Page 25: Search Available Stations (Scan)
You can switch between memory groups of individual preset buttons using the A menu with preset buttons for radio stations is displayed. function keys › Press the preset button for the station, which a logo is to be assigned to. A menu of media (CD, SD card, USB) is displayed. -
Page 26: Radio Settings
First and foremost, pay attention to the safety instructions » page 4, Impor- Station information DAB) tant notes. The basic setting of the radio functions is the same for all broadcast ranges. Fig. 16 The Advanced setup menu is different for FM and DAB. The AM broadcast area Station information does not have this menu. - Page 27 › RDS Regional: - Switch on/off the automatic tracking of related regional While the station is being received on the FM band, ( ) is displayed after the ■ stations station name. The () marker disappears when the relevant DAB station can Fixed - Maintains the selected regional station continuously.
-
Page 28: Media
Call up the main menu Media › Press the button. Operation Explanation of graphic Information for the current file (e.g., artist, track title) Introduction selected source / display of the album image (cover art), with only your finger over the surface of the function key, you can scroll the album list This chapter contains information on the following subjects: Display of the playing time / remaining time and the playing time axis is Main menu... -
Page 29: Title / Folder List
Title / folder list Track/folder database Fig. 18 Track/folder list Fig. 19 Track/folder database Menu display The unit is capable of classifying files according to the information in the ID3 › Press the function key in the menu Media . tag file properties into the various categories of Database. -
Page 30: Playback
Track - Sorted by the track title The scanning feature can also be cancelled by switching to another file / signal source or a function key is pressed for playback. Video - Files containing a video recording Note Note The function keys listed in the table are different depending on the currently In the title / folder database a maximum of 1000 files / folders can be dis-... -
Page 31: Signal Sources
signal sources Sources and file formats supported Read and observe on page 29 first. Introduction Supported signal sources This chapter contains information on the following subjects: SD memory card SD, SDHC, SDXC Sources and file formats supported Requirements and restrictions USB stick, USB MP3 player, HDD (without spe- USB devices cial software) - Page 32 › The remaining playback time indicated does not correspond to the actual re- max. 320 kb/s Bitrate File maining playback time for audio files with variable bitrates. Sampling › properties max. 48 kHz Files that are protected by Digital Rights Management (DRM) technology can- rate not be played back by the device.
- Page 33 The following information is displayed: ® Bluetooth player Free: - Amount of memory used ■ Read and observe on page 29 first. In use: - Amount of memory free ■ Free files: - Number of files that can be imported (maximum 3000) ■...
- Page 34 › Press the symbol button - the CD/DVD is ejected. SD memory card If the ejected medium is not taken out within 10 seconds, it will be retracted again for safety reasons. However, the unit will not change to the CD/DVD source.
- Page 35 The standard 3.5 mm stereo jack plug is used for the AUXinput. If the external CAUTION audio source does not have this jack plug, you must use an adapter. Only use standard sizeSD cards. When using smaller SD cards with the adapt- ■...
-
Page 36: Dvd Video
Open the DVD menu Note Video settings The operation of the external device and its connection with other devices can be seen in the operating instructions of the respective manufacturer. CAUTION For safety reasons, the video display is switched off at speeds over 5 km/h ■... -
Page 37: Images
■ 14:9 - 14:9 format But- 47:20 - 47:20 format ■ Audio channel: - Select the audio channel from the menu displayed ■ » Fig. 24 Action Function ■ Subtitles: - Select the subtitles from the menu displayed No selection - No subtitles ■... -
Page 38: But- Ton
Supported file types Settings File type Supported formats › Press the button → → . Images jpg, jpeg, png, bmp, gif Image view: - Image view settings ■ Full - Display the maximum image size while retaining the aspect ratio ■... -
Page 39: Phone Communication
ŠKODA website www.infotain- ment.skoda-auto.com. With some phones, it is necessary to set the connection to the device as "authorised" in order for the automatic connection to be successful. If this is not set, the system will prompt you for a confirmation each time you attempt to connect to the telephone. - Page 40 Read and observe on page 37 first. Introductory information Explanation of graphic Read and observe on page 37 first. Name of the mobile network provider The device allows for a wireless connection to the telephone. Your telephone Name of the connected telephone, press to open a list of paired tele- can be operated from the device.
- Page 41 Inserting the telephone into the Phonebox Message Importance › Press on the edge of the lid in the direction of the arrow, and open the The telephone searches for available Network search... storage compartment. GSM networks. › Place the telephone in the storage compartment with its back on the in- The telephone is not connected to duction panel.
-
Page 42: Connect To The Device To The Mobile Telephone
Import contacts - Start the update of the phone book; the number of im- ■ WARNING ported contacts and number of contacts stored in the phone is displayed The device may require confirmation of certain features in the telephone Delete other user profiles - Delete up to three previous user profiles (con- ■... - Page 43 ŠKODA website www.infotain- › ment.skoda-auto.com. Confirm the 6-digit PIN code displayed on the device screen and the tele- phone display within 30 seconds on both the device and the telephone.
- Page 44 ® Depending on the telephone's Bluetooth , conformation is in one of the fol- If the desired telephone is not in the list of previously paired telephones then lowing ways. the telephone is to be paired with the device » page ›...
-
Page 45: Telephone Functions
› By removing the ignition key (or switching off the ignition and opening the Symbol Meaning driver's door in vehicles with the KESSY system). ® ® Bluetooth players (Bluetooth profiles A2DP and AVRCP) › ® By disconnecting the hands-free system or switching off the Bluetooth ®... - Page 46 Select assigned contact telephone number A screen appears to enter the telephone number » Fig. › Press the desired function key to speed dial the telephone number of a con- You can select the following functions: tact » Fig. 27 on page 38.
- Page 47 If the imported telephone book from the telephone contains more than Call-lists 2000 contacts, loading is stopped and the message Contacts not completely imported. appears on the screen. Only the contacts already loaded are availa- Fig. 30 ble, these are in the menu . Call lists The first 200 contacts along with the telephone contact data, including the picture associated with the contact, are downloaded onto the device...
- Page 48 Answer the incoming call Conference details During a conference, press the conference symbol to display a list of other Ignore the incoming call (mute ring tone) conference participants. The following functions can be selected depending on Reject the incoming call ...
-
Page 49: Navigation
WARNING (Continued) Navigation The nav. announcements provided may vary from the actual situations, ■ e.g. due to road works or out-of-date navigation data. Description of the navigation system The volume should be adjusted to ensure that acoustic signals from out- ■... -
Page 50: Settings
Button Meaning Main menu Media/radio playback » page 21 / Call up the main menu Setting the navigation menu » page 48 › In the Navigation main menu, press . Navigation data Setting: Route options - Set the parameters for route calculation »... - Page 51 ■ Avoid routes requiring toll stickers - Switch use of routes requiring toll Navigation announcements stickers on/off › Show available toll stickers - select from the list of routes requiring toll In the Navigation main menu, press → Nav. announcements ■...
-
Page 52: Operating The Map
■ Define home address - Display/enter/edit the home address Introductory information Current position - Set the home address to the current vehicle position ■ Address - Enter a new address » page 51. If the home address has al- ■ Fig. - Page 53 Day/night Map display with light or dark background The autozoom can be switched off by touching → or off by changing the map scale. Touching again the (function key highlighted in green) turns Split screen Switches the split screen on/off in the map »...
-
Page 54: Extra Window
■ Man. - Displays the next or following navigation instructions (manoeuvres), Extra window the next POIs or an intersection detail » page Traffic signs - Displays traffic signs that are stored in the navigation data of ■ Introduction the maps or that are recognised by the front camera »... - Page 55 Displayed information: Function key Action Operation › When approaching the manoeuvre area (e.g., junction), details of the naviga- Plays the next track Press briefly tion instruction are displayed in the split screen. Once you have passed this from the start area, the unit displays information on the next navigation instructions again;...
- Page 56 Map options - Context-dependent change in the map orientation ■ 2D map display - the map rotates and the direction of travel arrow ■ Fig. 37 » Fig. 32 on page 50 points to the top of screen, or the north is aligned Split screen: GPS with the top edge of the screen, and the arrow shows the direction of...
-
Page 57: Navigation
Make sure that the destination has been entered correctly, for example, by Navigation checking that the destination is displayed in the map. Some names of places and other destinations can occur at several places. Enter new destination Address Introduction This chapter contains information on the following subjects: Input destination possibilities Address... - Page 58 › In the Navigation main menu, press → Other POIs → Options → Address. Some address positions are already pre-filled with the data of the last destina- tion. The pre-filled positions can be adjusted by touching the item and then adjust- ing it in the input screen »...
-
Page 59: Entry Of Saved Destinations
Crosshairs My destinations The crosshairs indicate the position of the pre-filled address. Drag the desired destination to the centre of the crosshairs on the map with Fig. 42 your finger. My destinations menu Touch the map with your finger to move the point of contact in the crosshair while adjusting the latitude and longitude valuesfor the entered point. -
Page 60: Poi
If the preferred route type has been set, then touching the Home address will First and foremost, pay attention to the safety instructions » page 4, Impor- start the calculation and route guidance, or after the calculation, you need to tant notes. - Page 61 Search area for POIs Quick select a POI › In the Navigation main menu, press . Fig. 44 Speed dial Search area for POIs Car park Restaurant Petrol stations When you touch a menu item, a list of the nearest POIs in the selected catego- ry is displayed.
-
Page 62: Poi Categories
Motorway services Car parks The menu items in the search area by map point entry are for information only Car rental Skoda dealers and cannot be changed. Skoda service Ferries and motorail trains ... -
Page 63: Route Guidance
Switch display of company logos on/off. Attractions and leisure Dining and shopping Sym- Meaning Symbol Meaning Sym- Meaning Symbol Meaning Autostadt Golf Casinos Cinemas Electronics Cafes Museums Monuments Shopping centres Nightlife ... - Page 64 Interrupt and continue route guidance Route calculation If the ignition is switched off and on again and the key was left in the ignition The route is calculated automatically according to the entered destination. The (in vehicles with the KESSY system, when the ignition was switched off): ›...
-
Page 65: Traffic Reports
The timing of the navigation announcement depends on the type of road and Lane guidance the driving speed. For example, on motorways the first announcement is made about 2000 m (6000 ft) before the location where you want to leave the mo- torway. - Page 66 › Traffic programme TP in the FM frequency range » page Dynamic route switched on › Traffic programme in the DAB frequency range Information on traffic problems received via TMC which affect the route are › TMC traffic information with a dynamic adjustment for the current route displayed in the map by means of a coloured symbol (e.g., , , , etc.).
-
Page 67: My Tour
■ - zoom out window with described traffic obstruction Explanation of graphic - show previous traffic information ■ Enter a new destination - show the following traffic information ■ Select a destination from the list of stored destinations »... -
Page 68: Destination Management
Destination management n details Introduction Fig. 49 Destination details This chapter contains information on the following subjects: Stopover n details First and foremost, pay attention to the safety instructions » page 4, Impor- tant notes. Stopover The following information and functions are displayed in the destination de- It is possible to add up to ten stopovers to the route during route guidance. - Page 69 › by touching the menu item in the list of found POIs; › by touching the POI symbol on the map. ® Dial No. - Start a telephone call (If a telephone is connected via Bluetooth ■ and the destination has been entered including the contact telephone num- ber) Start - Start route calculation »...
-
Page 70: Vehicle Vehicle Systems
Selection of travel mode (Driving Mode Selection) Vehicle Vehicle systems Vehicle settings Introduction This chapter contains information on the following subjects: Selection of travel mode (Driving Mode Selection) Vehicle data Auxiliary heater and ventilation Fig. 50 Button for selecting the driving mode: Version 1/version 2 ESC-and ASR systems Tyre The menu for the selection of the driving mode allows you to select one of the... -
Page 71: Vehicle Data
■ Engine: - Set the engine (drive) characteristics Fig. 52 Normal - Normal ■ TPMS - Display example: the sys- Sport - Sports ■ tem indicates a tire pressure ■ Eco - Economical change on the rear right ACC: - Set the vehicle acceleration when adaptive cruise control is activa- ■... -
Page 72: Auxiliary Heater And Ventilation
Convenience consumers - Displays up to three consumers which have the Set-up ■ largest share of fuel consumption (such as air conditioning) and displays the Departure time: Day and time when the vehicle is to be ready for fuel consumption to run all convenience systems »... -
Page 73: Assistance Systems
Assistance systems Parking and manoeuvring › Press the button → → Driver assistance. ACC (adaptive cruise control) - Sets the adaptive cruise control ■ Driving programme: - Set the vehicle acceleration when adaptive cruise ■ control is activated Normal - Normal ■... -
Page 74: Light
Rear tone setting - Setting the pitch of the beeps for the rear obstacle de- ■ mirrors and wiper tection › Audio lowering: - lowering the volume of the speakers (audio) Press the button → → Mirrors and wipers. ■... -
Page 75: Multifunction Display
■ Store seat position - Store the driver's seat position and exterior mirror posi- In this menu you have the possibility to reset the menu items in the settings of tion in the remote control key when locking the vehicle the vehicle systems to factory settings. - Page 76 - Settings for Climatronic ■ Air con. profile: - Set the Climatronic operating mode ■ Light - Low power, quiet operation ■ Medium - Base power ■ Strong - High power ■ Automatic air recirculation - Automatic recirculated air mode on/off ■...
-
Page 77: Index
Device screen Index Important notice Maintenance Climatronic Operation automatic air recirculation Digital radio reception Automatic operation Settings Additional keyboard languages mode Display 5, 7 Address COMING HOME Display in instrument cluster Adjusting Communication Telefon Volume Phonebox Display in the instrument cluster Adjust vehicle systems Component protection ESC system... - Page 78 External input List of available stations Radio Images 21, 35 Display Extra window Main menu Audio Main menu Operation Compass DVD video Select source Geographical coordinates Images Settings Media Important notes Manoeuvre Navigation Important notice Telephone Touch screen Menus Unit settings Navigation announcement Import destinations Manage memory...
- Page 79 Operation Navigation data Playback Nav. announcements Navigation 47, 55 Requirements and restrictions New destination Advanced settings Scan New tour Destination details SD memory card Destination management Select input source Enter address Settings Operation Enter a POI Supported media Images Explanation of graphic navigation instructions 62 Track list Radio Fuel options...
- Page 80 Emergencies Screen 5, 18 Voice control Other destinations Volume SD memory card proactive passenger protection Setting vehicle systems Search area Auxiliary heater and ventilation Select in the map Parking and manoeuvring Seats Restore factory settings Settings Radio Setup Select frequency range Automatic scan Set vehicle systems DAB - settings...
- Page 81 Telephone conversation Telephone functions vCard Tilting the mirror surface - lowering in reverse Vehicle equipment Time Declaration of conformity Tiredness recognition Vehicle identification number Vehicle settings traffic information Vehicle systems Touch screen vehicle systems settings Tour memory mirrors and wiper TP (Traffic programme) Opening and closing Traffic...
- Page 82 ŠKODA AUTO a.s. pursues a policy of constant product and model develop- Reprinting, reproduction, translation, or any other use, either in whole or in ment. We trust that you will understand that changes to models in terms of part, is not permitted without the written consent of ŠKODA AUTO a.s. shape, equipment and engineering, may be introduced at any time.
- Page 83 Columbus: Octavia Infotainment anglicky 11.2014 S65.5614.03.20 5E0012720GD 5E0012720GD...
Need help?
Do you have a question about the Octavia and is the answer not in the manual?
Questions and answers