Table of Contents
Advertisement
Advertisement
Table of Contents
Troubleshooting

Related Manuals for BEST ACCESS SYSTEMS V Series


Summary of Contents for BEST ACCESS SYSTEMS V Series
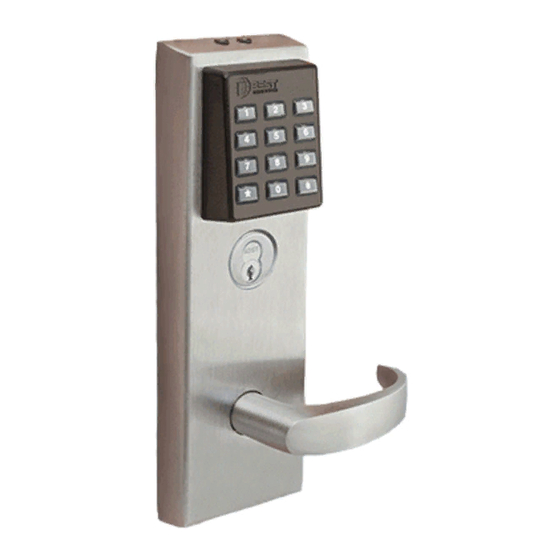
- Page 1 SERVICE MANUAL...
- Page 2 However, as with any publication of this complexity, errors or omissions are possible. Please call your Best Lock distributor or Best Lock Corporation at (317) 849-2250 if you see any errors or have any questions. No part of...
-
Page 3: Table Of Contents
8KV/9KV exploded chassis diagram 2–8 8KV/9KV chassis parts list 2–9 34/35HV magnetic stripe trim exploded diagram 2–10 34/35HV magnetic stripe trim parts list 2–11 34/35HV keypad trim exploded diagram 2–13 34/35HV keypad trim parts list 2–14 V Series Service Manual... - Page 4 How do you enable communications if you have lost the token or forgotten the password? 3–1 How do you open a lock after a complete battery failure? 3–2 Troubleshooting the V Series Electronic Lock 3–4 Troubleshooting the V Series Controller 3–7 For readers with red and green LEDs and no sounder 3–7 For readers with a dual red/green LED and sounder 3–9...
- Page 5 Contents Alarm troubleshooting 3–11 A–1 LOSSARY B–1 ECURITY EVICE ISTORY VENT YPES C–1 NSTALLATION NSTRUCTIONS D–1 NDEX V Series Service Manual...
- Page 6 Contents V Series Service Manual...
- Page 7 Removing the inside trim 2–38 Orienting the communication port 2–41 Prying one corner of the PROM part way out of the socket [V Series electronic lock shown] 2–45 Prying the opposite corner of the PROM 2–45 Inserting the new PROM 2–46...
- Page 8 Figures ROUBLESHOOTING Enabling communications using the DIP switches 3–2 Connecting the palmtop cable to the base of the lock 3–3 V Series Service Manual...
-
Page 9: Getting Started
ETTING TARTED NTRODUCTION The V Series Service Manual contains essential information to help you maintain your 8KV, 9KV, 30HV stand-alone locks, and the XV Controller. ERTIFICATIONS AND STANDARDS HV and KV The strike fits the standard door frame cutout as Locks specified in ANSI A115.1. -
Page 10: Series Controller
OCUMENTATION PACKAGE The following documentation is available to help you with the installation, start-up, and maintenance of the V Series System. To order a document, contact your BEST representative. The installation instructions for the locks and controller also can be... -
Page 11: Technical Support
Support When you have a problem with the V Series Lockset, your first resource services for help is the V Series Service Manual. If you cannot find a satisfactory answer, contact your local BEST representative. Telephone A factory-trained Certified Product Specialist (CPS) is available in your technical area whenever you need help. -
Page 12: Training Seminars
Getting Started Best Access Systems Representatives provide telephone technical support for all V Series products. You may locate the representative nearest you by calling (317) 849-2250 Monday through Friday, between 7:00 a.m. and 4:00 p.m. eastern standard time; or visit the web page, www.BestAccess.com. -
Page 13: Security Device Maintenance
EVICE AINTENANCE The following pages contain exploded diagrams for all V Series Security Devices. These diagrams detail all field serviceable mechanical and electronic parts. Use the diagrams and parts lists on the following pages to find the part numbers you need. -
Page 14: 8Kv/9Kv Magnetic Stripe Trim Exploded Diagram
8KV/9KV MAGNETIC STRIPE TRIM EXPLODED DIAGRAM Figure 2.1 8KV/9KV magnetic stripe trim exploded diagram... -
Page 15: 8Kv/9Kv Magnetic Stripe Trim Parts List
Battery cover screw (torx with post head) or A61428 Battery cover screw (McGard head) a. Refer to the H Series Service Manual for knob and lever part numbers. b. For 8KV/9KV chassis parts, see Figure 2.4. V Series Service Manual 2–3... -
Page 16: 8Kv/9Kv Keypad Trim Exploded Diagram
8KV/9KV KEYPAD TRIM EXPLODED DIAGRAM Figure 2.2 8KV, 9KV keypad trim exploded diagram... -
Page 17: 8Kv/9Kv Keypad Trim Parts List
Battery cover screw (torx with post head) or not shown A61428 Battery cover screw (McGard head) a. Refer to the H Series Service Manual for knob and lever part numbers. b. For 8KV/9KV chassis parts, see Figure 2.4. V Series Service Manual 2–5... -
Page 18: 8Kv/9Kv Proximity Trim Exploded Diagram
8KV/9KV PROXIMITY TRIM EXPLODED DIAGRAM Figure 2.3 8KV/9KV proximity trim exploded diagram... -
Page 19: 8Kv/9Kv Proximity Trim Parts List
Battery cover screw (torx with post head) or not shown A61428 Battery cover screw (McGard head) a. Refer to the H Series Service Manual for knob and lever part numbers. b. For 8KV/9KV chassis parts, see Figure 2.4. V Series Service Manual 2–7... -
Page 20: 8Kv/9Kv Exploded Chassis Diagram
8KV/9KV EXPLODED CHASSIS DIAGRAM Figure 2.4 8KV/9KV chassis exploded diagram... -
Page 21: 8Kv/9Kv Chassis Parts List
Chassis frame and retractor assembly for 9KV A25359 Latch screw A55687 Keyed sleeve assembly D55571 Outside hub A55505 Chassis screws A55603 Outside liner and stud assembly C60473 Motor mount A61012 Motor B60520 Spindle and plunger sub assembly V Series Service Manual 2–9... -
Page 22: 34/35Hv Magnetic Stripe Trim Exploded Diagram
34/35HV MAGNETIC STRIPE TRIM EXPLODED DIAGRAM Figure 2.5 34/35HV magnetic stripe trim exploded diagram... - Page 23 Inside wire harness with deadbolt sensing C61401 35HV inside escutcheon with turn knob not shown C61421 34HV inside escutcheon with turn knob not shown C61409 35HV inside escutcheon without turn knob not shown C61406 34HV inside escutcheon without turn knob V Series Service Manual 2–11...
- Page 24 Battery cover screw (torx with post head) or not shown A61428 Battery cover screw (McGard head) a. Refer to the H Series Service Manual for knob and lever part numbers. b. For 30HV case parts, see Figure 2.8 Figure 2.9. 2–12 V Series Service Manual...
-
Page 25: 34/35Hv Keypad Trim Exploded Diagram
34/35HV KEYPAD TRIM EXPLODED DIAGRAM Figure 2.6 34/35HV keypad trim exploded diagram... -
Page 26: 34/35Hv Keypad Trim Parts List
Programmed PROM for keypad (VP15KP) C61401 35HV inside escutcheon with turn knob not shown C61421 34HV inside escutcheon with turn knob not shown C61409 35HV inside escutcheon without turn knob not shown C61406 34HV inside escutcheon without turn knob 2–14 V Series Service Manual... - Page 27 Battery cover screw (torx with post head) or not shown A61428 Battery cover screw (McGard head) a. Refer to the H Series Service Manual for knob and lever part numbers. b. For 30HV case parts, see Figure 2.8 Figure 2.9. V Series Service Manual 2–15...
-
Page 28: 34/35Hv Proximity Trim Exploded Diagram
34/35HV PROXIMITY TRIM EXPLODED DIAGRAM Figure 2.7 34/35HV proximity trim exploded diagram... - Page 29 Concealed cylinder for 2 3/4″–3″ thick doors A61411 Battery cover screw (torx with post head) or not shown A61428 Battery cover screw (McGard head) A61433 Plastic bushings A61642 Inside wire harness B62099 Programmed PROM (VP_S15) V Series Service Manual 2–17...
- Page 30 Battery cover screw (torx with post head) or not shown A61428 Battery cover screw (McGard head) a. Refer to the H Series Service Manual for knob and lever part numbers. b. For 30HV case parts, see Figure 2.8 Figure 2.9. 2–18 V Series Service Manual...
-
Page 31: 34/35Hv Case With Deadbolt Exploded Diagram
Security Device Maintenance 34/35HV CASE WITH DEADBOLT EXPLODED DIAGRAM Figure 2.8 34/35HV case with deadbolt exploded diagram V Series Service Manual 2–19... -
Page 32: 34/35Hv Case With Deadbolt Parts List
A35004 Latch lever A35000 Turn knob hub M2 0.4 × 10 m screws A61250 A61607 Deadbolt sensing switch & wire assembly A35257 Clamp plate B61302 Case sub-assembly #8–32 × 1/4″ screws A34045 C34053 Armored front 2–20 V Series Service Manual... -
Page 33: 34/35Hv Case Without Deadbolt Exploded Diagram
Security Device Maintenance 34/35HV CASE WITHOUT DEADBOLT EXPLODED DIAGRAM Figure 2.9 34/35HV case without deadbolt exploded diagram V Series Service Manual 2–21... - Page 34 B35018 Latchbolt (knob) A34048 Stop pin A35004 Latch lever M2 0.4 × 10 m screw A61250 A41172 Special mortise cam C210 A35257 Clamp plate B61302 Case sub-assembly #8–32 × 1/4″ screws A34045 C34053 Armored front 2–22 V Series Service Manual...
-
Page 35: Controller Exploded Diagram
1777517 1 Grounding screw with washer B62098 Programmed PROM (VP_ _XV) or B62075 Programmed PROM for XV keypad (VPXVKP) B61664 Micro-controller circuit board 1772640 4 #4-40 X 3/8″ phil–pan head screws C80221 XV Enclosure box V Series Service Manual 2–23... -
Page 36: External Communications Exploded Diagram
Item Part No. Qty. Description parts list 1767451 1 Wall plate A10055 #6-32 X 3/8″ screws 1767493 Nine (9) pin male connector not shown 1768015 Nine (9) pin female connector 2–24 V Series Service Manual... -
Page 37: Programming Parts Diagram
Item Part No. Description 1760849 Intelligent Programmer Software 1760922 IPS interface cable 1760964 IPS crossover cable 1746981 Handheld terminal 1754552 Handheld charge cable adapter 1754594 Handheld terminal charger 1751829 Handheld terminal to lock cable V Series Service Manual 2–25... -
Page 38: Card Encoder Parts Diagram
Item Part No. Description 1762170 External power supply battery pack 1762139 External power supply adapter cable 1711519 External power supply 1762212 External power supply electronics 2–26 V Series Service Manual... -
Page 39: Special Tools Diagram
Item Part No. Description 1723791 ESD kit 1702829 McGard driver bit 1503525 Standard driver bit 1724093 Magnetic stripe reader cleaning card (shipped 50 to a box) V Series Service Manual 2–27... -
Page 40: Function Descriptions
Inside lever/knob is always unlocked Outside lever/knob locked by: internal motor drive mechanism operated by time–activated electronic signal or by valid card/PIN 2–28 V Series Service Manual... -
Page 41: Kv Lock
Inside lever/knob is always unlocked Outside lever/knob locked by: internal motor drive mechanism operated by time–activated electronic signal or by valid card/PIN V Series Service Manual 2–29... -
Page 42: Function Conversion
A61250 M2 0.4 x 10 m screw (2 needed for FV and LV, 1 needed for EV and NV) Wire strain relief A34236 Wire strain relief (2 needed for FV and LV, 1 needed for EV and NV) 2–30 V Series Service Manual... -
Page 43: 34Hv/35Hv Knob/Lever Conversion
Lower auxiliary spring A34065 Lower auxiliary spring Upper auxiliary spring A34066 Upper auxiliary spring Auxiliary return lever B34020 Auxiliary return lever (2 needed) a. Refer to the H Series Service Manual for additional trim parts. V Series Service Manual 2–31... -
Page 44: Reader Conversion
B61646 Card reader C60325 Keypad assembly with cable and connector C60342 HID proximity bezel with antennae & IR assembly C60337 Motorola proximity bezel with reader assembly Outside wire harness A61643 Outside wire harness B60305 Outside wire harness 2–32 V Series Service Manual... - Page 45 B60339 HID proximity reader with wake up electronics assembly B60338 Motorola proximity wake up electronics assembly Escutcheon gasket A60316 Escutcheon gasket a. Magnetic stripe reader b. Keypad reader c. HID proximity reader d. Motorola proximity reader V Series Service Manual 2–33...
-
Page 46: Kv Reader Conversion
B62076 Programmed PROM for keypad (VP15KP) Reader gasket B60321 Reader gasket Retaining ring A60318 Retaining ring Sealing lens cover A60317 Sealing lens cover Reader mounting screws A60348 Reader mounting screws Adhesive tape for A60324 Adhesive tape for sounder sounder 2–34 V Series Service Manual... - Page 47 B60339 HID proximity reader with wake up electronics assembly B60338 Motorola proximity wake up electronics assembly Escutcheon gasket A60316 Escutcheon gasket a. Magnetic stripe reader b. Keypad reader c. HID proximity reader d. Motorola proximity reader V Series Service Manual 2–35...
-
Page 48: Replacing Parts
Then, after the new battery pack is connected, the battery pack resumes maintenance of the clock and memory. 2–36 V Series Service Manual... -
Page 49: Disconnecting The Old Battery Pack
2. Remove the battery pack from the compartment. 3. Disconnect the old battery pack, as shown in Figure 2.17, and connect the new battery pack. Disconnect here Battery pack Figure 2.17 Disconnecting the old battery pack V Series Service Manual 2–37... -
Page 50: Removing And Reinstalling The Inside And Outside Trim
7. Feed the outside wire harness to the outside of the door through the wire hole in the door. 8. Remove the outside knob or lever. Note: For 8V and 9V, remove the core and depress the knob keeper with a screwdriver blade. 9. Remove the outside trim. 2–38 V Series Service Manual... -
Page 51: Replacing The Wire Harnesses
Disconnect the motor connector and the deadbolt sensing connectors (30HV with deadbolt only). 6. Unfasten the coin–cell battery from the inside trim. 7. Release the wires from the wire clamp on the inside trim. V Series Service Manual 2–39... - Page 52 Swing the door closed. Install the security screw. 18. Use the temporary communication token to enter the programming mode. 19. Reprogram the security device. See the V Series Handheld Terminal User Manual or the V Series Intelligent Programmer Software User Manual for more information. 2–40...
- Page 53 12. Reinstall the inside and outside trim. For instructions, see To reinstall the inside and outside trim: on page 2-39. V Series Service Manual 2–41...
-
Page 54: Replacing The Inside Circuit Board
3. Disconnect the outside wire harness from the circuit board on the card reader. 4. Remove the card reader. 5. Position the new card reader in the outside trim and secure it with the two mounting screws. Do not tighten the left screw. 2–42 V Series Service Manual... - Page 55 14. Reinstall the gasket over the electronics assembly with the adhesive side towards the electronics assembly. 15. Reinstall the inside and outside trim. For instructions, see To reinstall the inside and outside trim: on page 2-39. V Series Service Manual 2–43...
-
Page 56: Replacing The Prom
The Programmable Read-Only Memory (PROM) stores the program that PROM controls the operation of the V Series Security Device. From time to time, BEST might upgrade the PROM either to add new features and functions or to fix problems. Follow the instructions below to upgrade the security device by replacing the PROM. -
Page 57: Prying One Corner Of The Prom Part Way Out Of The Socket
T L O Figure 2.20 Prying one corner of the PROM part way out of the socket [V Series electronic lock shown] 4. Insert the PROM tool in the opposite notched corner. Pry the PROM the rest of the way out of the socket, as shown in Figure 2.21. - Page 58 3. Reconnect the inside wire harness and outside wire harness to the circuit board in the inside trim. 4. Reinstall the inside and outside trim. For instructions, see To reinstall the inside and outside trim: on page 2-39. 2–46 V Series Service Manual...
-
Page 59: Troubleshooting
1. Connect the handheld terminal to the security device. For instructions, see the V Series Handheld Terminal User’s Manual. 2. Turn on the handheld terminal. 3. Remove the inside and outside trim from the door. For more... - Page 60 Note: The low battery alarm may have to be cancelled. To do this, use the terminal mode in the IPS software, or connect the handheld terminal, and follow the prompts. 3–2 V Series Service Manual...
- Page 61 2. To open the door, use a valid operating token for the lock. 3. Replace the lock’s battery pack. For more instructions, see Replacing batteries on page 2-36. 4. Disconnect the palmtop cable from the lock. V Series Service Manual 3–3...
-
Page 62: Troubleshooting The V Series Electronic Lock
(The most likely cause is first, and so forth.) Another helpful tool to use when troubleshooting the V Series Electronic Lock and the V Series Controller is the lock’s history of events. Appendix B lists the types of events recorded in the history and their meaning. - Page 63 Replace the card reader or keypad reader. b. Circuit board is b. Replace the circuit board. malfunctioning. Granted a. LEDs are damaged. a. Replace the card reader or keypad reader. b. Circuit board is b. Replace circuit board. malfunctioning. V Series Service Manual 3–5...
- Page 64 Communications cable(s) is a. Check cable connections. between a PC or palmtop (are) not connected properly. and a V Series Security b. If the device is an electronic b. Check the outside wire harness. If it’s Device, or between a PC lock, the lock’s outside wiring...
-
Page 65: Troubleshooting The V Series Controller
Before troubleshooting problems with the V Series Controller, it’s a good practice to confirm that the DIP switches on the controller board are set properly. For instructions, see Figure 1–Controller board wiring diagram in the V Series Controller Installation Instructions, which are included in Appendix C. - Page 66 Cannot plug the a. Foreign object is jammed in a. Clear the object from the communications handheld the communications port. port. connector into b. Communications port is b. Replace the communications port. the controller’s damaged. communications port. 3–8 V Series Service Manual...
-
Page 67: For Readers With A Dual Red/Green Led And Sounder
Set the switches to the OFF position. switches are in the ON position. Green/ Denied Sounder is damaged. Replace the card reader or keypad reader. flashing Denied LEDs are damaged. Replace the card reader or keypad reader. V Series Service Manual 3–9... - Page 68 Cannot plug the handheld a. Foreign object is jammed in a. Clear the object from the communications terminal connector into the the communications port. port. controller’s communications port. b. Communications port is b. Replace the communications port. damaged. 3–10 V Series Service Manual...
-
Page 69: Alarm Troubleshooting
Set the alarm output duration properly. with the IPS program or handheld terminal. b. Alarm wiring is disconnected, b. Secure all of the alarm wiring. loose, or cut. c. Alarm device is bad. c. Replace the alarm device. V Series Service Manual 3–11... - Page 70 Troubleshooting 3–12 V Series Service Manual...
-
Page 71: Glossary
Door mode One of five types of security device operation that determines what access is currently provided. Door unlock door Door mode that sets a security device to unlock and mode remain unlocked. V Series Service Manual A–1... - Page 72 Programmer Software. Personal Sequence of digits, which generally includes a facility code and an access identification code. A user enters a PIN to access a door controlled by a V Series Keypad number (PIN) Security Device. PROM Programmable read-only memory, which is the integrated circuit that stores the security device program.
- Page 73 Glossary Temporary Token for temporary use that lets you communicate with a V Series Security communication Device programmed with factory default settings. token Temporary Token that gives people temporary access to locks before the devices in a operator token V Series System are permanently programmed.
- Page 74 Glossary A–4 V Series Service Manual...
- Page 75 YPES The table on the following pages describes in alphabetical order each history event that can be recorded at a V Series Security Device. For information about retrieving, viewing, printing, and deleting device history records, see the IPS User Manual.
-
Page 76: Security Device History Event Types
The device updated the issue code recorded for the indicated token in the device’s user database. DEADBOLT LOCKED The V Series Electronic Lock denied access to the indi- cated token because the lock’s deadbolt was locked and the token did not have the deadbolt override privilege. - Page 77 The passage mode feature was used to unlock the door. PC DEVICE CONFIG Using the IPS, programming settings were transferred from the PC to the device. PC DEVICE USERDB Using the IPS, a user database was transferred from the PC to the device. V Series Service Manual B–3...
- Page 78 SHUTDOWN The controller lost power and shut down. STARTUP The controller restarted after it lost power and shut down. TAMPER CLEARED The device protected by the controller’s tamper feature was secured after having been opened. B–4 V Series Service Manual...
-
Page 79: Installation Instructions
NSTALLATION NSTRUCTIONS The following pages contain the KV Installation Instructions, HV Installation Instructions, and the V Series Controller Installation Instructions. V Series Service Manual C–1... - Page 80 Installation Instructions C–2 V Series Service Manual...
- Page 81 Installation Instructions for V Series 83KV/93KV–85KV/95KV Locksets Overview Drill holes and install latch Note 1: If the door is a fabricated hollow metal door, determine whether it is properly reinforced to support the lock. If the door rein- forcement is not adequate, consult the door manufacturer for informa- tion on proper reinforcement.
- Page 82 2 Drill two 5/16“ diameter holes halfway into Note 1: Make sure that the locking pin fully Caution: Make sure that there is clear- the door. locks into the rose liner. ance for the motor wire between the rose liner and the door. 3 Turn the boring jig over and repeat steps 1 Note 2: Locksets will fit doors 1 3/4“...
- Page 83 5 Making sure that the connector is properly Install battery Install strike plate aligned, connect the outside wire harness connector to the lower-right circuit board compartment door connector in the inside trim. Press firmly Caution: The deadlocking plunger of on the connector until it is fully seated. the latchbolt must make contact with 1 Insert the tabs of the battery compartment the strike plate, as shown in Figure 15.
- Page 84 PINs. Figure 20 These temporary operator cards and PINs will only work on factory default V Series locks. 2 Turn the lever or knob and open the door. 3 Insert and turn the key to unlatch the door.
- Page 85 Installation Instructions for V Series 34HV–35HV Locksets Overview 2 Mark the vertical centerline of the lock on the door edge. 3 Mark the vertical centerline of the lock on both sides of the door as measured from the vertical centerline on the door’s edge.
-
Page 86: Drill Holes
Case set Concealed Drill holes screw inside cylinder Caution: Check the lock for the correct Deadbolt function, hand, and bevel before drill- sensing ing. wires Drill only those holes required for the func- tion. Wire hole Cylinder hole 7/8“ diameter 1 1/4“... - Page 87 5 Making sure that the connector is properly Caution: If installing a lock with the 2 Slide the inside lever onto the inside spin- aligned, connect the outside wire harness turn knob function, make sure that the dle and secure it with the set screw. connector to the lower right circuit board battery wires are not rubbing against 3 Tighten the trim mounting screws (see...
- Page 88 PINs. Temporary operator card These temporary operator cards and PINs will only work on factory default V Series locks. Proximity reader For details on programming the lock for access control, refer to the V Series Intelligent Programming Software User Manual or the V Series Handheld Terminal User Manual.
- Page 89 Use these installation instructions to install a V Series Controller. The remote RS-232 connector (optional) controller allows the V Series electronics to be separate from a door’s temporary access cards (for magnetic stripe and proximity read- locking mechanism and to be located up to 500 feet away from the lock- ers only) ing mechanism.
- Page 90 Output that supplies 10 mA at 5 volts, and provides signals cor- Set controller DIP switch 1. RLED terminal responding to the V Series Electronic Lock’s green LED, red LED, Note: For readers with a single two-color GLED terminal and sounder. This output can be connected to the reader and LED, set DIP switch 1 ON.
- Page 91 Program the controller for remote unlock oper- REMOTE terminal the door. A remote unlock device, such as a button, can be con- ation. For instructions, see the V Series Intelli- GND terminal nected to this input. This device can be located away from the gent Programmer Software User Manual.
-
Page 92: Specifications
Install the enclosure door. Programming the controller You can use either a V Series Handheld Terminal or an IBM-compatible PC running the V Series Intelligent Programmer Software (IPS) to pro- gram the controller. To program the controller using a handheld terminal: a Connect the handheld cable to the controller’s handheld connector,... - Page 93 Caution: To avoid injury, do not Caution: To prevent damage, Handheld To communicate with a touch the heat sink. It may be hot. always wear a properly grounded connector handheld, connect to electrostatic discharge (ESD) handheld cable. wrist strap when installing the HANDHELD controller.
- Page 94 Figure 2—Block diagram Figure 3—RS–232 wiring diagram T61920/Rev A 1768984 ER-7991-1 BEST ACCESS SYSTEMS Indianapolis, Indiana...
- Page 95 2–22 and see magnetic stripe card readers auxiliary return spring spacer 2–20, 2–22 and see proximity card readers definition of A–1 foreign object jammed into 3–6 batteries cards expected life of 2–36 damaged 3–4, 3–7, 3–9 V Series Service Manual...
- Page 96 & wire as- for external communications if can’t insert 3–6 sembly 2–20 2–24 case assemblies deadlocking lever 2–20, 2–22 for V Series Controller 2–23 part numbers for 2–11, 2–14, deadlocking spring 2–20, 2–22 external communications 2–24 2–17 diagrams, exploded exploded diagrams 2–24...
- Page 97 2–26 knob/lever conversion 2–8 external communications 2–24 for 34/35HV 2–31 for external communications lock external power supply 2–24 2–26 for V Series Controller 2–23 programming 2–25 passage mode privilege A–2 latch special tools 2–27 passwords 3–2, A–2 part number for 2–3, 2–5, numbers, lock serial 1–9...
- Page 98 3–7, 3–9 part numbers for 2–7, 2–17, 2–11, 2–15, 2–18 V Series Controller 3–7 2–24 electronics 2–3, 2–5, 2–7, V Series Electronic Lock 3–4 proximity reader electronics assem- 2–11, 2–14, 2–17 turn knob hub 2–20 blies faceplate 2–11, 2–14, 2–17, part numbers for 2–7,...
Need help?
Do you have a question about the V Series and is the answer not in the manual?
Questions and answers