Chapters
Table of Contents

Related Manuals for Leica GEOVID HD-B


Summary of Contents for Leica GEOVID HD-B
- Page 1 LEICA GEOVID HD-B Instructions Bruksanvisning Leica Camera AG Oskar-Barnack-Straße 11 35606 SOLMS DEUTSCHLAND Telefon +49 (0) 6442-208-0 Telefax +49 (0) 6442-208-333 www.leica-camera.com...
- Page 2 USEU bALL US1/EU1 (yds/m) US2/EU2 HOLd (yds/m) Markenzeichen der Leica Camera Gruppe Trademark of the Leica Camera Group Marque du Groupe Leica Camera US12/EU12 (yds) (1MOA) ® = Registriertes Warenzeichen Änderungen in Konstruktion und Ausführung vorbehalten. ® = Registered Trademark Design subject to alterations without notice.
- Page 3 English Norske...
-
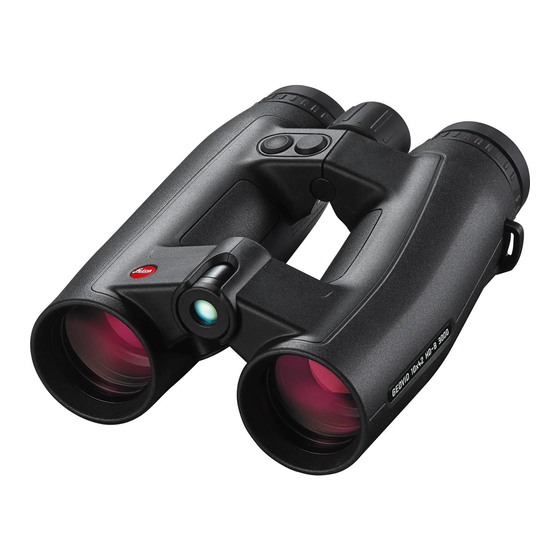
Page 4: Designation Of Parts
1 2. B attery compartment 1 3. M emory card slot 1 4. O bjective lens Warning notice As with any binoculars, avoid looking directly at bright sources of light when using the Leica Geovid HD-B, to prevent eye injury. -
Page 5: Foreword
FOREWORD DISPOSAL OF ELECTRICAL AND ELECTRONIC EQUIPMENT Dear Customer, Throughout the world, the Leica name stands for (Applies within the EU, and for other European countries with segregated waste premium quality, accurate precision mechanics, optimum reliability and long service life. -
Page 6: Table Of Contents
....... 34 Leica Info Service..........52 Adjusting the eye spacing ........34 Leica Customer Service ........53 Focusing / diopter compensation ......35 Appendix / Ballistics tables ........21 0 Basic information on menu system ......36 Setting the unit of measure ........ -
Page 7: Applications
APPLICATIONS ATTACHING THE CARRYING STRAP AND THE EYEPIECE COVER The Leica Geovid HD-B binoculars have a robust magnesium housing, allowing them to be used even under adverse conditions. There’s no need to worry about moisture - they are absolutely waterproof to a depth of 5m and the internal optics do not become fogged thanks to a nitrogen filling. -
Page 8: Inserting And Changing The Battery
Notes: INSERTING AND CHANGING THE BATTERY • Cold conditions impair the battery performance. The Leica Geovid HD-B draws its power supply from a Therefore, at low temperatures the binoculars 3 Volt lithium button cell (type CR2). should be kept as close to the body as possible and 1 . -
Page 9: Battery Charge Level
35) shorten the battery life. A used battery is indicated by a flashing measured value and reticule display. When flashing starts, around another 50 measurements are possible, but with a continuously reduced range. Leica recommends the use of branded batteries. -
Page 10: Adjusting The Eyepiece Cups / Using With And Without Glasses
ADJUSTING THE EYEPIECE CUPS / USING WITH ADJUSTING THE EYE SPACING AND WITHOUT GLASSES Bending the binoculars about the hinged axes (9) The eyepiece cups (1 ) can easily be adjusted by individually adjusts the eye spacing. The right and left turning them, and lock securely in the selected field of vision should merge into a circular image. -
Page 11: Focusing / Diopter Compensation
4. When the reticule appears, while continuing to view with both eyes, adjust the right diopter On the Leica Geovid HD-B binoculars, the focus is set compensation dial (red index) so that the reticule for objects different distances away using the central can be seen in focus in the right optical system. -
Page 12: Basic Information On Menu System
SETTING THE UNIT OF MEASURE The Leica Geovid HD-B can be set to either the imperial unit system commonly used in the USA ( Note: or the metric system ( EU) i.e. yards and inches /... -
Page 13: Range Measurement
RANGE MEASUREMENT 2. Aim at the object while the reticule is lit. 3. Press the main / release button (7). a. The reticule disappears briefly during the measurement. b. The measured value is displayed. As long as the reticule is still lit, a new measurement can be started at any time by pressing the main / release button again. -
Page 14: Scan Mode
SCAN MODE The Leica Geovid HD-B binoculars can be used to measure continuously (scan mode). Hold down the main / release button (7) on the 2nd press. After around 2.5 seconds, the binoculars switch to scan mode and then carry out measurements continuously. -
Page 15: Measurement Range And Accuracy
MEASURING RANGE AND ACCURACY In sunlight and with good vision, the following ranges The measuring range of the Leica Geovid HD-B is up to and accuracies can be achieved: ±1 825m/2000yds. The maximum range is achieved with high reflective target objects and a visual range of Range Approx. -
Page 16: Displaying The Atmospheric Conditions
– Atmospheric pressure 1 0 3 0 Note: If the housing of the Leica Geovid HD-B initially has a significantly different temperature than its surroundings, e.g. when taking it outside, it can take up to 30 minutes before the internal sensor can... -
Page 17: Calculating The Ballistics Curve
Note: To adjust the equivalent horizontal range calculation When using the ballistics function on the Leica Geovid (EHR, see p. 44), the point of aim (HOLd, see p. 44) or HD-B, particularly at ranges of > 300m / 300 yards, the reticule adjustment (MOA, see p. -
Page 18: Setting The Zeroing Distance
4. Repeatedly press the main / release button to SETTING THE ZEROING DISTANCE select the relevant ballistics curve, i.e. Start with step 1 if you have not yet opened the menu – US12 system and with step 3 if you have already set the to EU12, or –... -
Page 19: Displaying The Set Ballistics Curve And
Advanced Ballistic Compensation (AbC) on the Leica To check your settings, e.g. if the hunting situation has Geovid HD-B allows you to display one of the following changed or you have not used the binoculars for some three ballistic values after measuring the range: time, you can quickly display the three values at any –... -
Page 20: Equivalent Horizontal Range
The ballistic values displayed should therefore be seen only as a using conventional hunting reticules). By displaying the point of aim, the Leica Geovid HD-B reference. • Regardless of whether or not you use this... -
Page 21: Windage Correction Using Elevation Adjustment (Click / Moa Adjustment)
Taking into account the measured range, the 1. Press and hold (≥2s) the secondary / menu button trajectory of the bullet and the set zeroing distance (8). (see p. 42), the Leica Geovid HD-B can display the • US.EU appears. -
Page 22: Displaying And Checking The Set
2 x 12 programmed values at any time. ballistics curves on the Leica Geovid HD-B you can To do this, briefly press the secondary / menu button use your own custom ballistics curves. These are (8) twice. - Page 23 C. Retrieving the ballistics curve from the memory card If a memory card containing a ballistics curve is inserted in the binoculars, this curve can be retrieved in exactly the same way as described under "Setting the ballistics curve" on p. 41. •...
- Page 24 • When using ballistics curves from the memory card, ranges up to 925m/1000yds are displayed. • The range of microSD cards is too large for Leica Camera AG to be able to completely test all available types for compatibility and quality.
-
Page 25: Maintenance / Cleaning
MAINTENANCE / CLEANING Attention: Your Leica Geovid HD-B binoculars do not require any The housing may not be opened. special care. Coarse dirt particles, such as sand, should be removed with a fine hair brush or blown away. Marks such as fingerprints on the front lens and... -
Page 26: Troubleshooting
TROUBLESHOOTING Problem Cause Remedy A circular image is not obtained when a. The user's pupils are aligned with the a. Correct the eye position. viewing. eyepiece exit pupil. b. Correct the adjustment: If wearing b. The position of the eyepiece cup glasses, twist the eyepiece cups;... -
Page 27: Technical Data
TECHNICAL DATA Magnification Lens diameter 42mm Exit pupil 5.2mm / " 4.2mm / " Twilight number 18.3 20.5 Geometric luminous intensity 27.5 17.6 Field of vision (at 1,000m) / Approx.128m /142yds / 7.3° Approx. 113m /125yds / 6.5° Objective field of view Exit pupil longitudinal distance 18mm / 45/64“... -
Page 28: Leica Academy
The Leica information service can provide you with an Our various seminars allow participants to discover the Leica values and the fascination of expert use of Leica answer to any technical application questions relating products, all in a practical, contemporary form. The... - Page 29 This equipment has been tested and found to comply with the Model: Geovid HD-B limits for a Class B digital device, pursuant to Part 15 of the Responsible party/ Leica Camera Inc. FCC Rules. These limits are designed to provide reasonable Support contact: 1 Pearl Court, Unit A...
-
Page 30: Betegnelse På Delene
10. Laser-sendeoptikk 11. Lokk til batterirom / minnekortsjakt (lukket) 12. Batterirom 13. Minnekortsjakt 14. Objektivlinse Advarsel Som for alle kikkerter må man unngå å se direkte inn i skarpe lyskilder med din Leica Geovid HD-B, for å unngå skade på øynene. -
Page 31: Forord
Vi ønsker deg glede og lykke til med din nye LEICA Dette utstyret inneholder elektriske og / eller Geovid HD-B. elektroniske komponenter og må ikke kastes i vanlig Denne kikkerten med integrert avstandsmåler sender... - Page 32 Hva skal jeg gjøre dersom ........178 Innlegging og skifte av batteriet......160 Tekniske data ............179 Batteriets ladetilstand .......... 161 Leica Akademie ........... 180 Innstilling av øyemuslingen / Leica infotjeneste ..........180 Anvendelse med og uten briller ......162 Leica kundeservice ..........
-
Page 33: Anvendelsesmuligheter
ANVENDELSESMULIGHETER PÅSETTING AV BÆREREMMEN OG OKULARBESKYTTELSESDEKSELET Leica Geovid HD-B kikkertene har et robust hus av magnesium som tillater bruk under selv vanskelige forhold. Det er her ikke nødvendig å ta hensyn til at det er vått - de er absolutt tette ned til 5 m vanndybde, og optikken som ligger innenfor dugger ikke, takket være nitrogenfyllet. -
Page 34: Innlegging Og Skifte Av Batteriet
Til energiforsyning settes det inn en 3 volt litium- • Kulde reduserer batteriets effekt. Ved lave knappcelle (type CR2) i din Leica Geovid HD-B. temperaturer bør kikkerten derfor bæres så nær 1. Åpne lokket (11) til batterirommet (12) idet du kroppen som mulig og drives med et nytt batteri. -
Page 35: Batteriets Ladetilstand
(se side 163). Et oppbrukt batteri signaliseres med en blinkende måleverdi- og målmerkevisning. Etter første gangs blinking er ennå 50 målinger mulig, men da med stadig kortere rekkevidde. Leica anbefaler å bruke merkebatterier. -
Page 36: Innstilling Av Øyemuslingen
INNSTILLING AV ØYEMUSLINGENE / INNSTILLING AV ØYEAVSTANDEN ANVENDELSE MED OG UTEN BRILLER Ved å bøye kikkerten rundt leddakslene (9) stiller man Okular øyemuslingene (1) er det lett å justere ved å vri inn den individuelle øyeavstanden. Det høyre og på dem, de smekker da forsvarlig i lås i de valgte venstre synsfeltet må... -
Page 37: Innstilling Ava Skarphet / Dioptrikompensasjon
(5) på Leica Geovid HD-B. 5. Deretter stiller du - mens du ennå har målmerket Til kompensasjon av individuell ametropi ved iakttaking innkoplet, men idet du nå... -
Page 38: Grunnregler For Menystyring
/ innstillinger kan nås igjen ved å trykke flere ganger på knappen. INNSTILLING AV ØNSKET MÅLENHET Leica Geovid HD-B kan stilles inn på det imperiale Merk: måleenhetssystemet som er vanlig i USA (US) eller på... -
Page 39: Avstandsmåling
AVSTANDSMÅLING 2. Peil inn objektet mens målmerket lyser. 3. Trykk på hoved- / utløserknappen igjen. a. Målmerket slukker for en kort tid under målingen. b. Måleverdien vises. Så lenge målmerket lyser ennå, kan det når som helst startes en ny måling ved å trykke på hoved- / utløserknappen igjen. -
Page 40: Skannemodus
SKANNEMODUS Med din Leica Geovid HD-B kan du også måle i kontinuerlig drift (skannemodus): Hold hoved- / utløserknappen (7) trykket ved 2. gangs betjening Etter ca. 2,5 sekunder kopler instrumentet seg over til skannemodus og utfører da kontinuerlig målinger. Dette merker du ved at displayet veksler: Hver gang etter ca. -
Page 41: Målerekkevidde Og Nøyaktighet
MÅLINGENS REKKEVIDDE OG NØYAKTIGHET Ved solskinn og god sikt gjelder følgende rekkevidde Målerekkevidden for Leica Geovid HD-B er på inntil eller nøyaktigheter: ±1825m/2000yds. Maksimal rekkevidde oppnås ved godt reflekterende målobjekter og en visuell synsvidde Rekkevidde ca. 10m/yds til 1825m/2000yds på ca. 10 km / 6.2 engelske mil. -
Page 42: Indikering Av Atmosfæriske Betingelser
– lufttrykket 1 0 3 0 Merk: Når huset til din Leica Geovid HD-B eksempelvis har vært oppbevart innendørs og tas med ut i været og derfor først har en temperatur som er tydelig forskjellig fra omgivelsestemperaturen, så kan det ta inntil 30 minutter før den innvendige måleføleren kan... -
Page 43: Fastleggelse Av Den Ballistiske Kurven
For å tilpasse beregningen av den ekvivalente horisontale avstanden (EHR, se side 172), holdepunktet Leica Geovid HD-B fremfor alt på avstander >300m / (HOLd, se side 172) eller siktejusteringen (MOA, se side 300 yards, anbefaler vi å finne frem til din 173) til de forskjellige kalibrene, prosjektiltypene og ammunisjons ballistiske data vha. -
Page 44: Innstilling Av Innskytningsavstanden
4. Ved å trykke kort på hoved-/ utløserknappen flere INNSTILLING AV INNSKYTNINGSAVSTANDEN ganger, velger du ønsket ballistisk kurve, dvs. Begynn med skritt 1., dersom du ennå ikke har hentet – US12 eller opp menystyringen, med skritt 3., dersom du allerede –... -
Page 45: Indikering Av Innstilt Ballistikkurve Og Innskytningsavstand
Funksjonen Advanced Ballistic Compensation (AbC) til Dersom du ønsker å kontrollere innstillingene dine, f. din Leica Geovid HD-B gjør det mulig for deg etter eks. på grunn av en forandret jaktsituasjon eller en ønske å få vist en av de følgende tre ballistiske lengre tid mellom bruken, kan du få... -
Page 46: Den Ekvivalente Horisontale Avstanden
å forstå som hjelpemiddel! Takket være visningen av holdepunktet, kan din Leica • Uavhengig av bruken av denne informasjonen, er Leica Geovid HD-B være en verdifull hjelp for å vurderingen av den jaktmessige situasjonen til plassere så presise skudd som mulig ved jakten. -
Page 47: Treffpunktkorreksjon Vha. Elevasjonsjustering (Klikk-/Moa-Justering)
3., dersom du først Din Leica Geovid HD-B kan – idet det tas høyde for allerede hadde fastlagt innskytningsavstanden og målt avstand, prosjektilets skytebane og den innstilte display ennå... -
Page 48: Indikering Og Kontroll Av De Innstilte Ballistikkparameterne
• Nedenfor målmerket vises (evt. i stedet for Leica Geovid HD-B. Disse regnes først nøyaktig ut på avstanden) den innstilte ballistiske kurven grunnlag av de laboreringsdataene, som kaliber, – etter hverandre i ca. 2s (se side 169) prosjektilvekt etc. - Page 49 C. Nedlasting av den ballistiske kurven fra minnekortet Dersom det er satt et minnekort som inneholder en ballistisk kurve inn i kikkerten, kan denne hentes opp på samme måte som beskrives i avsnitt «Innstilling av den ballistiske kurven» på side 169. •...
- Page 50 • Ved anvendelse av ballistiske kurver fra minnekortet vises avstander på inntil 925m/1000yds. • Tilbudet på MicroSD-kort er så stort at Leica Camera AG ikke kan kontrollere samtlige tilgjengelige typer med hensyn til deres kompatibilitet og kvalitet. Derfor anbefaler vi f.eks.
-
Page 51: Pleie / Rengjøring
Det må ikke brukes alkohol og andre kjemiske løsninger til rengjøring av optikken eller huset. Hver Leica Geovid HD-B er ved siden av typebetegnelser utstyrt med et eget serienummer. For sikkerhets skyld bør du notere dette nummeret i... -
Page 52: Hva Skal Jeg Gjøre Dersom
HVA SKAL MAN GJØRE DERSOM ... Feil Årsak Utbedring Under iakttakingen oppnås det ikke et a. Seerens pupill ligger ikke i okularets a. Korriger øyeposisjonen. sirkelrundt bilde. utgangspupill. b. Korreksjon av tilpasningen: b. Øyemuslingens posisjon samsvarer Brillebrukere vrenger ned ikke med riktig bruk med og uten øyemuslingen, ved iakttakelse uten brille. -
Page 53: Tekniske Data
TEKNISKE DATA Forstørrelse Objektivdiameter 42mm Utgangspupill 5,2mm / “ 4,2mm / “ Demringstall 18,3 20,5 Geometrisk lysstyrke 27,5 17,6 Synsfelt (på 1000m) / objektiv ca.128m /142yds / 7,3° ca. 113m /125yds / 6,5° synsvinkel Avstand utgangspupill 18mm / 45/64“ 16mm / 25/32“ Etterinnstillingsgrense ca. -
Page 54: Leica Akademie
LEICA INFOTJENESTE Anvendelsestekniske spørsmål som gjelder Leica I de forskjellige seminarene lærer deltakerne på en praksisorientert og tidsriktig måte om Leica sin programmet besvares deg skriftlig, over telefonen, via verdiverden og fascinasjonen av en sikker og telefax eller pr. e-post av Leica informasjonstjeneste: fagmessig omgang med Leica produktene. -
Page 55: Leica Kundeservice
LEICA KUNDESERVICE Til vedlikehold av ditt Leica utstyr samt i tilfelle av skade står vår Customer Service Care avdelingen hos Leica Camera AG eller reparasjonstjenesten til en nasjonal Leica-representant til disposisjon (se garantikortet når det gjelder liste over adresser). Leica Camera AG... - Page 56 Note: Bemerkninger: • Nelle tabelle 1, 2 e 3 le distanze sono riportate in metri, le • I tabellene 1, 2 og 3 er avstandene angitt i meter, korreksjo- correzioni balistiche in centimetri, nelle tabelle 4, 5 e 6 risp- nene for holdepunkt er angitt i centimeter, mens de i tabel- ettivamente in iarde e pollici.
- Page 57 TABELLE 1: FLECKSCHUSS-ENTFERNUNG 100M / TABLE 1: ZEROING RANGE 100M / TABLEAU 1: DISTANCE DU TIR DANS LE MILLE100M / TABEL 1: VLEKSCHOTAFSTAND 100M / TABELLA 1: DISTANZA DI AZZERAMENTO 100M / TABLA 1: DISTANCIA DE TIRO IDEAL 100M / TABELL 1: INNSKYTNINGSAVSTAND 100M ТАБЛИЦА 1: РАССТОЯНИЕ ДЛЯ ТОЧНОГО...
- Page 58 TABELLE 2: FLECKSCHUSS-ENTFERNUNG 200M / TABLE 2: ZEROING RANGE 200M / TABLEAU 2: DISTANCE DU TIR DANS LE MILLE 200M / TABEL 2: VLEKSCHOTAFSTAND 200M / TABELLA 2: DISTANZA DI AZZERAMENTO 200M / TABLA 2: DISTANCIA DE TIRO IDEAL 200M / TABELL 2: INNSKYTNINGSAVSTAND 200M ТАБЛИЦА 2: РАССТОЯНИЕ ДЛЯ ТОЧНОГО...
- Page 59 TABELLE 3: FLECKSCHUSS-ENTFERNUNG GEE (GÜNSTIGSTE EINSCHIESS-ENTFERNUNG) / TABLE: 3 ZEROING RANGE GEE (MOST FAVORABLE ZEROING RANGE) / TABLEAU 3: DISTANCE DU TIR DANS LE MILLE GEE (DISTANCE DE TIR LA PLUS FAVORABLE) / TABEL 3: VLEKSCHOTAFSTAND GEE (OPTIMALE INSCHIETAFSTAND) / TABELLA 3: DISTANZA DI AZZERA- MENTO GEE (DISTANZA DI TIRO PIÙ...
- Page 60 TABELLE 4: FLECKSCHUSS-ENTFERNUNG 100Y / TABLE 4: ZEROING RANGE 100YDS / TABLEAU 4: DISTANCE DU TIR DANS LE MILLE 100Y / TABEL 4: VLEKSCHOTAFSTAND 100Y / TABELLA: 4 DISTANZA DI AZZERAMENTO 100Y / TABLA 4: DISTANCIA DE TIRO IDEAL 100 Y / TABELL 4: INNSKYTNINGSAVSTAND 100Y / ТАБЛИЦА 4: РАССТОЯНИЕ ДЛЯ ТОЧНОГО ВЫСТРЕЛА...
- Page 61 TABELLE 5: FLECKSCHUSS-ENTFERNUNG 200Y / TABLE 5: ZEROING RANGE 200YDS / TABLEAU 5: DISTANCE DU TIR DANS LE MILLE 200Y / TABEL 5: VLEKSCHOTAFSTAND 200Y / TABELLA: 5 DISTANZA DI AZZERAMENTO 200Y / TABLA 5: DISTANCIA DE TIRO IDEAL 200 Y / TABELL 5: INNSKYTNINGSAVSTAND 200Y / ТАБЛИЦА 5: РАССТОЯНИЕ ДЛЯ ТОЧНОГО ВЫСТРЕЛА...
- Page 62 TABELLE 6: FLECKSCHUSS-ENTFERNUNG 300Y / TABLE 6: ZEROING RANGE 300YDS / TABLEAU 6: DISTANCE DU TIR DANS LE MILLE 300Y / TABEL 6: VLEKSCHOTAFSTAND 300Y / TABELLA: 6 DISTANZA DI AZZERAMENTO 300Y / TABLA 6: DISTANCIA DE TIRO IDEAL 300 Y / TABELL 6: INNSKYTNINGSAVSTAND 300Y / ТАБЛИЦА 6: РАССТОЯНИЕ ДЛЯ ТОЧНОГО ВЫСТРЕЛА...
Need help?
Do you have a question about the GEOVID HD-B and is the answer not in the manual?
Questions and answers