
Subscribe to Our Youtube Channel
Related Manuals for JVC SP-EXA10


Summary of Contents for JVC SP-EXA10
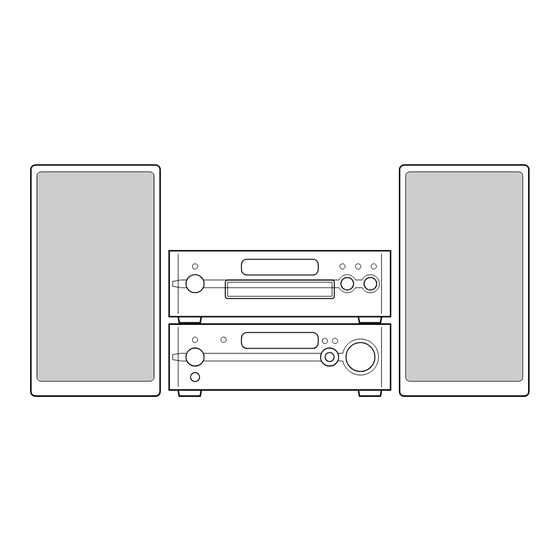
- Page 1 COMPACT COMPONENT SYSTEM EX-A10 Consists of RX-EXA10, SP-EXA10 and XV-EXA10 INSTRUCTIONS LVT1403-011A [A, US, UN, UB, UW, UG]...
-
Page 2: Warnings, Cautions And Others
Warnings, cautions and others CAUTION To reduce the risk of electrical shocks, fire, etc.: 1. Do not remove screws, covers or cabinet. 2. Do not expose this appliance to rain or moisture. CAUTION — F button! Disconnect the mains plug to shut the power off completely (the STANDBY lamp goes off). - Page 3 CAUTION — Proper Ventilation To avoid risk of electric shock and fire and to protect from damage, locate the apparatus as follows: Top/Front/Back/Sides: No obstructions should be placed in the areas shown by the dimensions below. Bottom: Place on the level surface. Maintain adequate air path for ventilation by placing on a stand with a height of 10 cm more.
-
Page 4: Table Of Contents
Table of contents Introduction Supplied accessories ...2 Part description ...3 DVD player ... 3 Receiver... 4 Using the remote control ...5 Inserting batteries into the remote control ... 5 Operating the TV using the remote control... 6 Preparation Connections ...7 Standard setup ... -
Page 5: Introduction
Listening to the sound of other audio equipment Listening to the sound of other audio equipment ...41 Timer Timer ...42 Using the sleep timer ... 42 Using the playback timer ... 43 Reference Using the AV COMPU LINK function ...45 Connection and setup... -
Page 6: Part Description
Part description The numbers refer to the pages in which the parts are explained. DVD player Front panel 13, 14 Rear panel Display window The receiver and the DVD player use the same design for their display windows. 21, 22 See “Display window”... -
Page 7: Receiver
The numbers refer to the pages in which the parts are explained. Receiver Front panel 13, 14 14, 18 * This terminal is for connecting a pair of headphones equipped with a stereo plug (not supplied). When the headphones are connected, the speakers do not produce any sound. Rear panel Display window The receiver and the DVD player use the same design for their display windows. -
Page 8: Using The Remote Control
Using the remote control The numbers refer to the pages in which the parts are explained. 21, 25, 34 24, 25 24, 25 27, 32 28, 30 15, 31, 43 15, 43 Inserting batteries into the remote control 6, 14 24, 25 24, 25 15, 21,... -
Page 9: Operating The Tv Using The Remote Control
Operating the TV using the remote control You can operate your TV using the remote control of this system. CHANNEL Setting the manufacturer code Slide the remote control mode selector to TV. Hold down F TV. • Hold down F TV until you finish step 4. Press ENTER and release. -
Page 10: Preparation
Connections Standard setup Connecting the antennas Connecting the AM loop antenna (supplied) Set up the AM loop antenna. Connect the antenna cord. Receiver (rear panel) White Black Connect the ends of the antenna cord as shown above. Do not turn on the power until you complete the connection. DVD player Speaker Receiver... - Page 11 Connecting the FM antenna (supplied) FM antenna Receiver (rear panel) Stretch out the FM antenna to the best position for radio reception, and then fix the FM antenna with adhesive tape. Receiver 7 When radio reception with the supplied FM antenna is poor, or when using a communal antenna Antenna cord...
-
Page 12: Connecting The Speakers
Connections (continued) Connecting the speakers There is no difference between the left and right speakers. Speaker terminal Speaker cord TWEETER RIGHT TWEETER WOOFER RIGHT Speaker cords WOOFER (supplied) Right speaker (rear panel) • An incorrect connection may damage the speakers. •... -
Page 13: Connecting The Receiver And The Dvd Player
Connecting the receiver and the DVD player Make sure to connect the three supplied cords. DVD player (rear panel) Synchronization cord (supplied) CAUTION • Do not fold the optical digital cord as this may damage the inner wire. Audio cord Optical digital (supplied) cord (supplied) -
Page 14: Connecting Other Equipment
Connections (continued) Connecting other equipment BASS ADJUST Connecting the subwoofer When you connect this system with an amplifier- built-in subwoofer (not supplied), you can enjoy a more dynamic bass sound. Refer to the manual of the subwoofer for details. Audio cord (not supplied) (If an audio cord comes with the amplifier-built-in subwoofer, you can use the audio cord.) Amplifier-built-in subwoofer... -
Page 15: Connecting A Tv
Connecting other audio equipment Output Other audio equipment Audio cord (not supplied) Input Receiver (rear panel) Connecting digital equipment with an optical output terminal MD player or satellite Output receiver To an optical digital output terminal Optical digital cord (not supplied) Input Receiver (rear panel) Connecting a TV... -
Page 16: Connecting The Power Cords
• To check the compatibility of your TV, contact your local JVC customer service center. • All JVC-manufactured progressive TVs and high- definition TVs are fully compatible with this system. • Even if the power cord of the DVD player is disconnected from the AC outlet or the power is interrupted, the video signal type setting is stored. -
Page 17: Basic Operations
Basic operations • DIMMER DISPLAY 0 OPEN/ CLOSE FM/AM CONVERTER CLOCK/ TIMER BASS +/ – Turning on/off the system Remote control mode selector Receiver AUDIO Slide the remote control mode selector to MUTING RECEIVER. AUDIO VOLUME +/ – Press F AUDIO (or F on the receiver). -
Page 18: Setting The Clock
Basic operations (continued) Setting the clock You can set the clock when the receiver is turned either on or off. Example: To set the clock to 10:30 a.m. on Wednesday Slide the remote control mode selector to RECEIVER. Press CLOCK/TIMER. Display on the receiver Press 2 or 3 (cursor) to select the hour. -
Page 19: Dimmer
Dimmer Changing the brightness of the display windows on the receiver and the DVD player You can set the brightness of the display windows on the receiver and the DVD player respectively. 7 When the receiver/DVD player is turned on Slide the remote control mode selector to RECEIVER or DVD. -
Page 20: Adjusting The Bass Sound
Basic operations (continued) Adjusting the bass sound Slide the remote control mode selector to RECEIVER. Press BASS ADJUST. Display on the receiver While the selectable values are flashing, press 2 or 3 (cursor) to select the value of the bass frequency. -
Page 21: Listening To Radio
Listening to radio broadcasts FM/AM FM MODE Setting the AM tuner spacing Some countries space AM stations 9 kHz apart, and other countries use 10 kHz spacing. On the receiver ONLY: SEARCH – Receiver 7 When the receiver is turned off To select 10 kHz spacing, while holding down SEARCH + on the receiver, press F on the receiver to turn on the power. -
Page 22: Tuning In To A Preset Radio Station
Listening to radio broadcasts (continued) Tuning in to a preset radio station Presetting radio stations in the receiver allows you to easily tune in to a radio station. Presetting radio stations You can store up to 30 FM radio stations and up to 15 AM radio stations. -
Page 23: Playing Back Dvds/Cds
Basic operations of the DVD player 0OPEN/CLOSE DISPLAY FM/AM GROUP/TITLE PREVIOUS 4 SLOW MENU/PG RETURN SOURCE SELECT Receiver Remote control Playing back a DVD/CD mode selector F AUDIO F DVD Slide the remote control mode selector to DVD. 3 (play) Press 0 OPEN/CLOSE. - Page 24 Basic operations of the DVD player (continued) This part explains the operation with displays of an MP3 disc as examples. For a JPEG disc, read “track” as “file”. NOTE • When files of different types are recorded on a disc, select the file type to be played back.
- Page 25 ■VCD/SVCD When a disc is played back Track number • PBC (Play Back Control) is a signal recorded in a VCD (version 2.0) for controlling playback. You can enjoy interactive software or software with a search function using a menu screen recorded in a PBC compatible VCD.
-
Page 26: Changing The Display In The Display Window
Basic operations of the DVD player (continued) Changing the display in the display window Receiver Slide the remote control mode selector to RECEIVER. Press DISPLAY repeatedly. • Each time you press DISPLAY, the display toggles between the current source (DVD, FM, AM, AUX-DIGITAL or AUX) and the clock. -
Page 27: Pausing Playback
Pausing playback 7 When a disc is played back Slide the remote control mode selector to DVD. Press 8. • To return to normal playback, press 3 (play). Advancing the picture frame by frame (only for moving image) 7 When a disc is paused Slide the remote control mode selector to DVD. -
Page 28: Playing Back From A Position 10 Seconds Before (One Touch Replay)
Basic operations of the DVD player (continued) Playing back from a position 10 seconds before (One touch replay) 7 When a disc is played back Slide the remote control mode selector to DVD. Press ONE TOUCH REPLAY. NOTE • This operation may not be used for some discs. •... -
Page 29: Skipping At About 5 Minute Intervals
Skipping at about 5 minute intervals You can skip within a file at about 5 minute intervals. This is useful especially when you want to skip within a long file. 7 When a disc is played back Slide the remote control mode selector to DVD. -
Page 30: Selecting A Track From The Menu Screen
Basic operations of the DVD player (continued) Selecting a track from the menu screen (PBC off) 7 When a disc is stopped or played back Slide the remote control mode selector to DVD. Press MENU/PL or TOP MENU/ • The menu screen will be displayed. •... -
Page 31: Convenient Functions Of The Dvd Player
Convenient functions of the DVD player GROUP/ TITLE PREVIOUS SCREEN AUDIO PAGE ZOOM PLAY MODE REPEAT CLOCK/ TIMER DVD player Locking DVD/CD ejection You can lock the disc tray to prevent the disc from being ejected. Setting Turn off the DVD player. And while holding down 7 on the DVD player, press 0 on the DVD player. - Page 32 Convenient functions of the DVD player (continued) Press the number buttons to program chapters/tracks. • Refer to “Using the number buttons” (A page 15). ■Display on the DVD player for DVD VIDEO • Select a title number, and then a chapter number.
-
Page 33: Playing Back A Dvd/Cd In A Random Order (Random Playback)
Playing back a DVD/CD in a random order (Random playback) 7 When a disc is stopped Slide the remote control mode selector to DVD. Press PLAY MODE repeatedly to display “RANDOM” in the display window on the DVD player. • “RANDOM” will also be displayed on the TV screen. -
Page 34: Playing Back A Specified Part Repeatedly (A-B Repeat Playback)
Convenient functions of the DVD player (continued) Playing back a specified part repeatedly (A-B repeat playback) You can play back the desired part repeatedly by specifying a start point (A) and an end point (B). 7 When a disc is played back Slide the remote control mode selector to DVD. -
Page 35: Selecting The Subtitles
Selecting the subtitles (only for moving image) This part explains the operation with displays of a DVD VIDEO as examples. You can use discs of other types in almost the same manner. 7 When a disc contains subtitles and is played back Slide the remote control mode selector to DVD. -
Page 36: Selecting The View Angle
Convenient functions of the DVD player (continued) Selecting the view angle (only for moving image) 7 When a scene containing multi-view angles is played back Slide the remote control mode selector to DVD. Press ANGLE. Example: • Each time you press the button, the angle will be changed. -
Page 37: Adjusting The Picture Quality (Vfp)
Adjusting the picture quality (VFP) 7 When a disc is played back or paused Slide the remote control mode selector to DVD. Press VFP. • The current setting will appear on the TV screen. • The “GAMMA” setting adjusts the brightness of neutral tints while maintaining the brightness of dark and bright portions. -
Page 38: Browsable Still Pictures (B.s.p.)
Convenient functions of the DVD player (continued) Browsable still pictures (B.S.P.) Some DVD AUDIOs may have pictures called B.S.P. (Browsable Still Pictures). The pictures can be viewed as if you are turning pages. NOTE • You can use this function when “B.S.P.” lights up in the display window on the DVD player. -
Page 39: Using The Status Bar And The Menu Bar
Using the status bar and the menu bar 7 When a disc is played back Slide the remote control mode selector to DVD. Press ON SCREEN twice. • “ON SCREEN” will appear in the display window on the DVD player. The status bar and the menu bar will appear on the TV screen. - Page 40 Convenient functions of the DVD player (continued) Function list For functions with no description of the operation, press 5// (cursor) to select and press ENTER to determine the function. Changes the time information in the TIME display window on the DVD player and the status bar.
-
Page 41: Changing The Initial Settings With The Preference Screen
Changing the initial settings with the preference screen SET UP The initial settings of the DVD player can be changed with the preference screen according to the environment where the DVD player is used. NOTE • The top and bottom of the preference screen may not be displayed on a wide TV. -
Page 42: Picture
Changing the initial settings with the preference screen (continued) PICTURE Items Contents ( MONITOR 16 : 9/16 : 9 MULTI: TYPE For an ordinary wide TV. 4 : 3 LB (Letterbox) (Letterbox) : For a TV with conventional 4:3 aspect ratio. When a wide screen picture is input, the black bars appear on the top and bottom of the screen. - Page 43 List of relationships of DIGITAL AUDIO OUTPUT preference items and output signal Playback disc 48 kHz, 16/20/24 bit Linear PCM DVD VIDEO 96 kHz linear PCM DVD VIDEO 48/96/192 kHz, 16/20/24 bit linear PCM DVD AUDIO* 44.1/88.2/176.4 kHz, 16/20/24 bit linear PCM DVD AUDIO* DTS DVD VIDEO/DVD AUDIO* DOLBY DIGITAL DVD VIDEO/DVD 48 kHz, 16 bit stereo linear...
-
Page 44: Audio Equipment
Listening to the sound of other audio equipment MEMORY Connect the other audio equipment to this system in advance (A page 12). Slide the remote control mode selector to RECEIVER. Press AUX to select “AUX-DIGITAL” or “AUX”. • Each time you press AUX, the display on the receiver toggles between “AUX-DIGITAL”... -
Page 45: Timer
Timer CLOCK/ TIMER Remote control Using the sleep timer mode selector When the time you specify elapses, the system will AUDIO be turned off automatically. Slide the remote control mode selector to RECEIVER. Press SLEEP. • Each time you press the button, the time indicated in the display window on the receiver changes (in minutes). -
Page 46: Using The Playback Timer
Timer (continued) Using the playback timer Set the clock beforehand. (A page 15) Slide the remote control mode selector to RECEIVER. Press CLOCK/TIMER. Display on the receiver • If you accidentally pressed CLOCK/TIMER twice or more, press CLOCK/TIMER repeatedly until the display shown above is displayed. - Page 47 Press F AUDIO to turn off the receiver. • The playback timer is available only when the receiver is off. This indicator lights up when the playback timer is activated. NOTE • Complete the playback timer setting at least 1 minute prior to the starting time you have selected in step 4.
-
Page 48: Using The Av Compu Link Function
Using the AV COMPU LINK function When a JVC-manufactured TV with AV COMPU LINK II or III terminals is connected to the DVD player using these terminals, operating either the TV or the DVD player controls the other equipment at the same time. -
Page 49: Special Cautions
Special cautions Notes on handling 7 Important cautions Installation of the system • Select a place which is level, dry and neither too hot nor too cold; between 5°C and 35°C. • Leave sufficient distance between the system and the •... -
Page 50: About Dvds/Cds
About DVDs/CDs Playable DVD/CD types CD-R/ CD-RW Audio CD format Playable VCD/SVCD Playable format MP3/WMA/ Playable JPEG format DVD Video — format DVD VR format — DivX format Playable ASF (Advanced Systems Playable Format) MPEG1/MPEG2 Playable format • Discs should be finalized before being played back. 1 A DVD-R recorded in multi-border format is also playable (except for dual layer discs). - Page 51 Discs that cannot be played back • The following discs cannot be played back: DVD-ROM (except for MP3/WMA/JPEG/ASF/DivX/ MPEG1/MPEG2 format), DVD-RAM, CD-ROM, CD-I (CD-I Ready), Photo CD, SACD, etc. Playing back these discs will generate noise and damage the speakers. Damaged discs and discs in an extraordinary shape (other than a disc of 12 cm or 8 cm in diameter) cannot be played back.
-
Page 52: Disc Structure
About DVDs/CDs (continued) Disc structure DVD VIDEO/DVD VR A DVD VIDEO consists of “titles” and each title may be divided into “chapters”. A DVD VR consists of “original programs” or “play lists” and each original program/play list may be divided into “chapters”. Title 1/Original program 1/ Play list 1 Chapter 1 Chapter 2 Chapter 3 Chapter 1 Chapter 2... -
Page 53: Troubleshooting
Troubleshooting When you encounter a problem that seems to be a fault, check the following points before contacting the JVC service center: Power source 7 Power does not come on. • The power cord of the receiver or the DVD player is not connected to an AC outlet. -
Page 54: Language Codes
Troubleshooting (continued) Other 7 You cannot switch audio or subtitles between languages. • The disc does not contain multiple languages. → If only a single language is recorded on the disc, you cannot switch the current language to another language. (A page 32) 7 No subtitle is displayed. -
Page 55: Specifications
30 W (in operation) 0.9 W (on standby) Dimensions (W x H x D): 245 mm x 80 mm x 297 mm Weight (1 unit): 2.7 kg Speakers (SP-EXA10) Type: 2-way bass-reflex type Magnetically shielded type Tweeter: 2 cm wood dome Woofer: 10.5 cm wood cone... - Page 56 2005 Victor Company of Japan, Limited 1005SKMMODJEM...
Need help?
Do you have a question about the SP-EXA10 and is the answer not in the manual?
Questions and answers