JVC CA-EXD1 Instructions Manual
Dvp3570/f7
Hide thumbs
Also See for CA-EXD1:
- Instructions manual (138 pages) ,
- Service manual (36 pages) ,
- Schematic diagrams (16 pages)
Chapters
Table of Contents

Related Manuals for JVC CA-EXD1


Summary of Contents for JVC CA-EXD1
- Page 1 COMPACT COMPONENT SYSTEM SYSTEME DE COMPOSANTS COMPACT EX-D1 Consists of CA-EXD1 and SP-EXD1 Composée du CA-EXD1 et du SP-EXD1 INSTRUCTIONS MANUEL D’INSTRUCTIONS GVT0143-002A...
- Page 2 CAUTION To reduce the risk of electrical shocks, fire, etc.: 1. Do not remove screws, covers or cabinet. 2. Do not expose this appliance to rain or moisture. CAUTION — STANDBY/ON Disconnect the mains plug to shut the power off completely (the STANDBY lamp goes off). The STANDBY/ON does not disconnect the mains line.
- Page 3 For Canada/pour le Canada CAUTION: TO PREVENT ELECTRIC SHOCK, MATCH WIDE BLADE OF PLUG TO WIDE SLOT, FULLY INSERT. ATTENTION: POUR EVITER LES CHOCS ELECTRIQUES, INTRODUIRE LA LAME LA PLUS LARGE DE LA FICHE DANS LA BORNE CORRESPONDANTE DE LA PRISE ET POUSSER JUSQUAU FOND.
- Page 4 CAUTION • Do not block the ventilation openings or holes. (If the ventilation openings or holes are blocked by a newspaper or cloth, etc., the heat may not be able to get out.) • Do not place any naked flame sources, such as lighted candles, on the apparatus.
-
Page 5: Table Of Contents
Table of contents Introduction About discs...3 Description of parts ...5 Getting started Using the remote control ...6 Putting the batteries in the remote control ... 6 Operating the TV using the remote control... 7 Connecting up ...8 Basic operations Playing discs ...12 Playback ... -
Page 6: Supplied Accessories
Special cautions Notes on handling 7 Important cautions Installation of the system • Select a place which is level, dry and neither too hot nor too cold; between 5°C and 35°C. • Leave sufficient distance between the system and the •... -
Page 7: Introduction
About discs Playable disc types This system has been designed to play back the following discs: DVD VIDEO, DVD AUDIO, VCD, SVCD, CD This system can also play back the following discs: • Finalized DVD-R/-RW discs recorded in the DVD VIDEO format. - Page 8 About discs (continued) Notes on all files • The system can only recognize and play files with one of the following extensions, which can be in any combination of upper and lower case; MP3: “.MP3”, “.mp3” • WMA: “.WMA” , “.wma” •...
-
Page 9: Description Of Parts
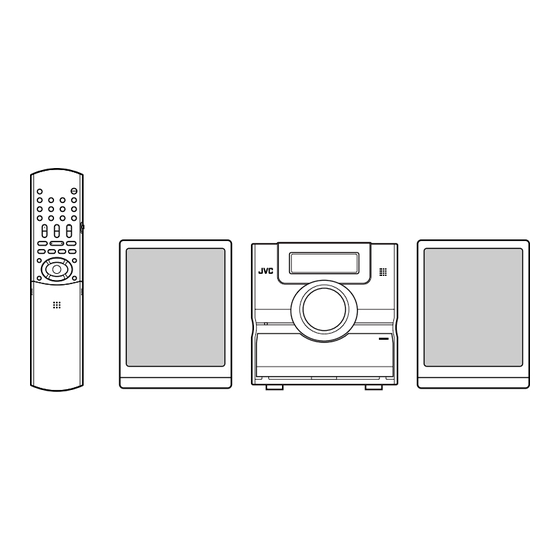
Description of parts The numbers represent the page numbers. Front panel See “Display window” below. In the door USB INPUT PHONES * Connect headphones (not supplied) with a stereo mini plug. If the headphones are connected, the speakers and subwoofer will not produce any sound. Display window S V C DV D - A RESUME... -
Page 10: Using The Remote Control
Using the remote control The numbers represent the page numbers. FM/AM 15, 17 15, 32 19, 28 35, 36 35, 36 Putting the batteries in the remote control 13, 16 7, 13, 14, 16 15, 32 12, 17 25, 26 7, 15 If the range or effectiveness of the remote control decreases, replace the batteries. -
Page 11: Operating The Tv Using The Remote Control
This page is for when operating your TV using the remote control of this product. Operating the TV using the remote control Setting the manufacturer's code Slide the remote control mode selector to the TV side. Keep pressing down NOTE Keep pressing down TV until Step Press ENTER. -
Page 12: Connecting Up
Connecting up Connecting antennas Connecting AM loop antenna (supplied) Set up the AM loop antenna. Connect antenna cords. Main unit How to insert antenna cords (rear panel) LOOP Connect two antenna cords as described above. If the antenna cord is covered with vinyl on the tip, twist and pull the vinyl off and remove. -
Page 13: Connecting Speakers
Connecting up Connecting speakers There is no difference between the left and right speakers. Speaker terminal Speaker cord Speaker cord (supplied) SPEAKERS Without black line With black line Main unit (rear panel) Right speaker (rear panel) CAUTION • DO NOT connect more than one speaker to one speaker terminal. - Page 14 Connecting up (continued) Connecting other devices This page is for when connecting the main unit with other devices. Connecting subwoofer With an amplifier-built-in subwoofer (not supplied), you can enjoy a more dynamic bass sound. Refer to the manual of the subwoofer for details. Amplifier-built-in subwoofer (not supplied) Connecting with other audio device...
-
Page 15: Connecting The Power Cord
Connecting up Connecting with TV Supplied composite video cord Main unit COMPONENT VIDEO S-VIDEO VIDEO OUT CAUTION Connect the main unit directly with a TV (or a monitor) without routing through a VCR. Otherwise it may cause picture distortion while playing. -
Page 16: Playing Discs
Playing discs Playback • The power will be turned on when any of PLAY 3, USB, FM/AM, AUX, or 0 on the main unit and , USB, FM/AM, AUX, or 0OPEN/ DVD/CD CLOSE on the remote control is pressed while the power is off. -
Page 17: To Switch The Display
Display window during disc playback Ex.: When a DVD VIDEO is played S V C DV D Disc type Elapsed playing time Chapter number Ex.: When a DVD AUDIO is played S V C DV D - A Track number If “BONUS”... -
Page 18: Select What You Want To Play By Using The Number Buttons
Playing discs (continued) Select what you want to play by using the number buttons NOTE • Set the remote control mode selector to AUDIO before using the number buttons. • For a VCD or SVCD, this operation can be carried out when the disc is stopped, or during playback without the PBC function. -
Page 19: Playing Back From A Position 10 Seconds
Playing back from a position 10 seconds before (One Touch Replay) Press during playback. NOTE • This operation may not be carried out for some discs. • It is not possible to go back to the previous title. Slow Motion Playback Press SLOW or SLOW pause. -
Page 20: To Change The Brightness Of The Display Window (Dimmer)
Playing discs (continued) To change the brightness of the display window (DIMMER) Press DIMMER repeatedly. • Each time you press the button, the dimmer mode changes as follows: AUTO DIMMER: During the video source playback, the display window dims and the illumination automatically turns off. - Page 21 Playback Display of an MP3/WMA disc is described here as an example. For a JPEG disc, read “track” as “file”. NOTE When playing a disc containing both MP3/WMA and JPEG files, set one of them to be played, then turn on the system again (page 29).
-
Page 22: Resume Playback
Resume Playback NOTE Set the remote control mode selector to AUDIO before using the number buttons. This system can store the stop point, and when you start playback again by pressing DVD/CD (even while on standby), it starts from the position where you have stopped—Resume Play. -
Page 23: Select The Scene To Be Played
Select the scene to be played NOTE Set the remote control mode selector to AUDIO before using the number buttons. Select the scene from the menu Press MENU or TOP MENU while the disc is stopped or during playback • The disc menu screen will be displayed. •... -
Page 24: Program Playback/Random Playback
Program Playback/Random Playback NOTE Set the remote control mode selector to AUDIO before using the number buttons. Play the disc in the desired order (Program Playback) It is possible to program a maximum of 99 chapters or tracks. The same chapter or track can be programmed more than once. -
Page 25: Random Playback
To program on the display window on the main unit, operate as follows: (1) Select a title/group using the number buttons. (2) Designate a chapter/track number using the number buttons. • Refer to “How to use the number buttons” (page 15). •... -
Page 26: Repeat Playback
Repeat Playback Refer to page 17 for Repeat Playback of MP3 and JPEG files. Playing the title/chapter/ group/track/all tracks repeatedly (REPEAT) Press REPEAT during playback. • Each time you press the button, the Repeat mode and its indication change as follows: For DVD VIDEO Repeat items On the TV... - Page 27 Playing the designated part repeatedly (A-B Repeat Playback) Press ON SCREEN twice during playback. The menu bar (page 28) will be displayed. Press cursor to select Press ENTER. ∞ Press cursor to display Other Repeat modes can be selected here. For other Repeat modes, refer to “Playing the title/chapter/group/track/all tracks repeatedly (REPEAT)”...
-
Page 28: Other Convenient Functions
Other convenient functions Selecting the subtitles (only for moving image) Press SUBTITLE during playback of a disc containing subtitles in several languages. Ex.: • Each time you press the button, the subtitle will be alternated between ON and OFF. Press cursor subtitle language. -
Page 29: Enlarging The Picture (Zoom)
Enlarging the picture (ZOOM) (only for moving image) Press ZOOM during playback or while paused. • Each time you press the button, the picture magnification will be changed. • (For a JPEG) You cannot change the picture magnification during slide-show playback. -
Page 30: Creating Realistic Sound (3D Phonic)
Other convenient functions (continued) Creating realistic sound (3D PHONIC) The two speakers produce an effect resembling surround-sound. Press 3D PHONIC during playback. Ex.: 3D PHONIC • Each time you press the button, the 3D PHONIC will be alternated as follows: ACTION : Suitable for action movies, sport programs or other lively... -
Page 31: Functions Specific To Dvd Audio
Functions specific to DVD AUDIO NOTE Set the remote control mode selector to AUDIO before using the number buttons. Advanced operations Playing the Bonus Group There are some DVD AUDIO discs with a special group, called “Bonus Group”, recorded. NOTE This operation can be carried out when “BONUS”... -
Page 32: Using The Menu Bar
Using the menu bar NOTE • Set the remote control mode selector to AUDIO before using the number buttons. • This operation can be carried out when there is a disc loaded. There are some functions that may not work while the disc is stopped. Press ON SCREEN twice. -
Page 33: Preferences
Preferences NOTE The playback status mark has the same meaning of the mark on the On-screen guide (page 15). The initial settings of the system can be changed according to the environment the system is used NOTE • Set the remote control mode selector to AUDIO before using the number buttons. - Page 34 Preferences (continued) AUDIO Items Contents ( DIGITAL Select an output signal type from the AUDIO following in accordance with the device OUTPUT connected to the digital audio output terminal (AV amplifier, etc.). (See the list below for the preference items and output signal.) PCM ONLY: Device corresponding only to linear PCM.
-
Page 35: Country/Area Codes
Country/Area codes Andorra United Arab Emirates Afghanistan Antigua and Barbuda Anguilla Albania Armenia Netherlands Antilles Angola Antarctica Argentina American Samoa Austria Australia Aruba Azerbaijan Bosnia and Herzegovina Barbados Bangladesh Belgium Burkina Faso Bulgaria Bahrain Burundi Benin Bermuda Brunei Darussalam Bolivia Brazil Bahamas Bhutan... -
Page 36: Listening To A Radio Broadcast
Listening to a radio broadcast NOTE Set the remote control mode selector to AUDIO before using the number buttons. Selecting a station Press FM/AM. Each time you press the button, FM and AM change alternately. Press 4/¢ to select the station (frequency). -
Page 37: Tuning In To A Preset Station
Tuning in to a preset station Presetting stations in the system allows you to easily tune in to a station. NOTE Set the remote control mode selector to AUDIO before using the number buttons. Presetting stations The system stores up to 30 FM stations and up to 15 AM stations. -
Page 38: Convenient Functions
Playing Back from the PC This System is equipped with a USB terminal in the door of the front panel. You can connect your PC to this terminal and enjoy the sound out of your When you connect your PC for the first time, follow the procedure below. -
Page 39: Listening To The Sound Of Other Audio Device
Listening to the sound of other audio device Connect the other audio device to this system in advance (page 10). Press AUX. The source changes to AUX. Play the other audio device. For details, refer to the manual of the device connected. -
Page 40: Auto Standby
Setting the Various Timer (continued) How the daily timer works: Once the daily timer has been set, the timer indicator and timer number indicator (1/2/3) are lit on the display window. Daily timer turns on the system at the same time everyday until the timer setting is canceled manually or another daily timer is activated. -
Page 41: Sleep Timer
Sleep Timer When the time you specify elapses, the system will be turned off by itself. Press SLEEP. Each time you press the button, the time indicated on the display window on the main unit changes (in minutes). Changing the time Reselect the time by pressing SLEEP repeatedly. -
Page 42: Reference
Troubleshooting When you encounter a problem that seems to be a fault, check the following points before contacting your JVC service center. Power source 7 Power does not come on. • The power cord is not connected to the main unit or an AC outlet. -
Page 43: Language Codes
Others 7 It is not possible to switch audio or subtitles between languages. • The disc does not contain 2 or more languages. → If only a single language is recorded on the disc, switching to another language is impossible (page 24). 7 No subtitle is displayed. -
Page 44: Specifications
Specifications General Power source: AC 120 V Power consumption: 25 W (in operation) 1.0 W (on standby) Weight: 3.0 kg External dimensions (W x H x D) 150 mm x 152 mm x 246 mm DVD player Playable discs: DVD VIDEO, DVD AUDIO, VCD, SVCD, CD, CD-R/RW (CD, VCD, MP3, WMA, JPEG format), DVD-R/- RW (video format) - Page 45 Table des matières Introduction À propos des disques...3 Description des parties...5 Pour commencer Utilisation de la télécommande ...6 Mise en place des piles dans de la télécommande ... 6 Commande du téléviseur avec la télécommande ... 7 Connexion ...8 Opérations de base Lecture de disques ...12 Lecture...
-
Page 46: Accessoires Fournis
Précautions spéciales Quelques remarques sur le maniement 7 Précautions importantes Installation du système • Posez le système à plat, sur un support adapté, dans un endroit sec, ni trop chaud ni trop froid, c.-à-d. entre 5°C et 35°C. • Maintenez une distance suffisante entre le système et le téléviseur. -
Page 47: Introduction
À propos des disques Types de disques compatibles Ce système a été conçu pour lire les disques suivants : DVD VIDEO, DVD AUDIO, VCD, SVCD, CD Cette chaîne peut aussi reproduire les disques suivants: • Les disques DVD-R/RW finalisés enregistrés au format DVD VIDEO. - Page 48 À propos des disques (suite) Remarques concernant tous les fichiers • Le système peut reconnaître et reproduire uniquement les fichiers munis d’une des extensions suivantes, avec n’importe quelle combinaison de caractères majuscules et minuscules: MP3: “.MP3”, “.mp3” • WMA: “.WMA”, “.wma” •...
-
Page 49: Description Des Parties
Description des parties Le nombre indique le numéro de plage. Panneau avant Référez-vous à “Fenêtre d'affichage” ci-dessous. Derrière la porte USB INPUT PHONES * Connectez un casque d'écoute (non fourni) avec une fichier stéréo mini. Si le casque d'écoute est connecté, les enceintes et le caisson de grave ne produisent aucun son. -
Page 50: Utilisation De La Télécommande
Utilisation de la télécommande Le nombre indique le numéro de plage. FM/AM 15, 17 15, 32 19, 28 35, 36 35, 36 Mise en place des piles dans de la télécommande 13, 16 7, 13, 14, 16 15, 32 12, 17 25, 26 7, 15 Si la plage de fonctionnement de la télécommande... -
Page 51: Commande Du Téléviseur Avec La Télécommande
Cette page explique comment commander votre téléviseur en utilisant la télécommande de cet appareil. Commande du téléviseur avec la télécommande Réglage du code du fabricant Poussez le sélecteur de mode de la télécommande du côté TV. Maintenex pressée REMARQUE Maintenez TV pressée jusqu'à... -
Page 52: Connexion
Connexion – Ne mettez pas l'appareil sous tension avant que les connexions ne soient terminées – Connexion des antennes Connexion de l'antenne cadre AM (fournie) Montez l'antenne cadre AM. Connectez les cordons de l'antenne. Appareil (panneau arrière) Comment insérer les cordons de l'antenne LOOP Connectez les deux cordons d'antenne comme... -
Page 53: Connexion Des Enceintes
Connexion Connexion des enceintes Il n'y a pas de différences entre l'enceinte gauche et droite. Prise d’enceinte Cordons des enceintes (fournis) Sans ligne noire Avec ligne noire Appareil (panneau arrière) Enceinte droite (panneau arrière) ATTENTION • NE tentez PAS de raccorder plusieurs enceintes à... - Page 54 Connexion (suite) – Ne mettez pas l'appareil sous tension avant que les connexions ne soient terminées– Connexion des autres appareils Cette page explique comment connecter l'appareil à d'autres appareils. Connexion d'un caisson de grave Avec caisson de grave avec amplificateur intégré (non fourni), vous pouvez un son grave plus dynamique. Référez-vous au mode d'emploi du caisson de grave pour les détails.
- Page 55 Connexion Connexion à un téléviseur Cordon vidéo composite fourni Appareil COMPONENT VIDEO S-VIDEO VIDEO OUT ATTENTION Connectez l'appareil directement au téléviseur (ou moniteur) sans le faire passer par un magnétoscope. Sinon, l'image peut être déformée pendant la lecture. Appareil Connexion directe De plus, si vous connectez l'appareil à...
-
Page 56: Lecture De Disques
Lecture de disques Lecture • L'appareil est mis sous tension quand vous appuyez sur une touche PLAY 3, USB, FM/AM, AUX ou 0 sur l'appareil et DVD/CD FM/AM, AUX ou 0OPEN/CLOSE sur la télécommande quand l'appareil est hors tension. Si vous appuyez sur une autre touche que 0 or 0OPEN/CLOSE, la source change aussi (si un disque est en place, sa lecture démarre). -
Page 57: Pour Changer L'affichage
Fenêtre affichée pendant la lecture d'un disque Ex.: Quand un DVD VIDEO est reproduit S V C DV D Type de disque Temps de lecture écoulé Numéro du chapitre Ex.: Quand un DVD AUDIO est reproduit S V C DV D - A Numéro de la piste Si “BONUS”... -
Page 58: Choisissez Ce Que Vous Souhaitez Reproduire En Utilisant Les Touches Numériques
Lecture de disques (suite) Choisissez ce que vous souhaitez reproduire en utilisant les touches numériques REMARQUE • Réglez le sélecteur de mode de télécommande sur AUDIO avant d'utiliser les touches numériques. • Pour un VCD ou SVCD, cette opération peut être réalisée quand le disque est à l'arrêt ou pendant la lecture sans la fonction PBC. -
Page 59: Lecture À Partir D'une Position Située 10 Secondes
Lecture à partir d'une position située 10 secondes en arrière (Relecture par une simple pression) Appuyer sur pendant la lecture. REMARQUE • Cette opération ne peut pas être réalisée pour certains disques. • Il n'est pas possible de retourner au titre précédent. Lecture au ralenti Appuyez sur SLOW ou SLOW... -
Page 60: Pour Changer La Luminosité De La Fenêtre D'affichage (Dimmer)
Lecture de disques (suite) Pour changer la luminosité de la fenêtre d'affichage (DIMMER) Appuyez répétitivement sur DIMMER. • Chaque fois que vous appuyez sur la touche, le mode de gradateur change comme suit: AUTO DIMMER: Pendant la lecture de la source vidéo, la fenêtre d'affichage s'assombrit et l'éclairage se met automatiquement hors service. - Page 61 Lecture L'affichage d'un disque MP3/WMA est décrit ici comme exemple. Pour un disque JPEG, le mot “plage” est utilisé pour désigner un “fichier”. REMARQUE Lors de la lecture d'un disque contenant à la fois des fichiers MP3/WMA et JPEG, réglez le type de fichier à reproduire, puis remettez la chaîne sous tension (page 29).
-
Page 62: Reprise De Lecture
Reprise de lecture REMARQUE Réglez le sélecteur de mode de télécommande sur AUDIO avant d'utiliser les touches numériques. Cette chaîne peut mémoriser le point d’arrêt de façon que quand vous reprenez la lecture en appuyant sur DVD/CD (même à partir du mode d’attente), elle reprend à... -
Page 63: Sélection De La Scène À Reproduire
Sélection de la scène à reproduire REMARQUE Réglez le sélecteur de mode de télécommande sur AUDIO avant d'utiliser les touches numériques. Choisissez la scène à partir du menu Appuyez sur MENU ou TOP MENU pendant que le disque est à l'arrêt ou pendant la lecture •... -
Page 64: Lecture Programmée/Lecture Aléatoire
Lecture programmée/lecture aléatoire REMARQUE Réglez le sélecteur de mode de télécommande sur AUDIO avant d'utiliser les touches numériques. Lecture du disque dans l'ordre souhaité (lecture programmée) Il est possible de programmer un maximum de 99 chapitres ou plages. Le même chapitre ou la même plage peut être programmé... - Page 65 Pour réaliser la programmation sur la fenêtre d'affichage de l'appareil, procédez comme suit: (1) Choisissez un titre/groupe en utilisant les touches numériques. (2) Choisissez un numéro de chapitre/plage en utilisant les touches numériques. • Référez-vous à “Comment utiliser les touches numériques” à la (page 15). •...
-
Page 66: Lecture Répétée
Lecture répétée Référez vous à la page 17 pour la lecture répétée de fichiers MP3 et JPEG. Lecture répétée d'un titre/chapitre/groupe/ plage ou de toutes les plages (REPEAT) Appuyer sur REPEAT pendant la lecture. • Chaque fois que vous appuyez sur la touche, le mode de lecture répétée et son indication changent comme suit: Pour DVD VIDEO... - Page 67 Lecture du passage choisi répétitivement (Lecture répétée A-B) Appuyez deux fois sur ON SCREEN pendant la lecture. La barre de menu (page 28) est affichée. Appuyez sur le curseur 2/3 pour choisir Appuyer sur ENTER. Appuyez sur le curseur 5/∞ pour afficher Les autres modes de répétition peuvent être choisis ici.
-
Page 68: Autres Fonctions Pratiques
Autres fonctions pratiques Sélection des sous-titres (uniquement pour les images animées) Appuyez sur SUBTITLE pendant la lecture d’un disque contenant des sous-titres en plusieurs langues. Ex.: • Chaque fois que vous appuyez sur la touche les sous-titres sont mis alternativement en (MARCHE) et hors (ARRET) service. -
Page 69: Agrandissement De L'image (Zoom)
Agrandissement de l'image (ZOOM) (uniquement pour les images animées) Appuyer sur ZOOM pendant la lecture ou une pause. • Chaque fois que vous appuyez sur la touche, le taux d'agrandissement de l'image change. • (Pour un disque JPEG) Vous ne pouvez pas changer le taux d'agrandissement pendant la lecture de diaporama. -
Page 70: Création D'un Son Réaliste (3D Phonic)
Autres fonctions pratiques (suite) Création d'un son réaliste (3D PHONIC) Les deux enceintes produisent un effet proche du son Surround. Appuyez sur 3D PHONIC pendant la lecture. Ex.: 3D PHONIC • Chaque fois que vous appuyez sur la touche, le mode 3D PHONIC change comme suit: ACTION : Convient aux films d'action, aux émissions sportives et aux... -
Page 71: Fonctions Spécifiques Des Dvd Audio
Fonctions spécifiques des DVD AUDIO REMARQUE Réglez le sélecteur de mode de télécommande sur AUDIO avant d'utiliser les touches numériques. Opérations avancées Lecture d'un groupe bonus Certains disques DVD AUDIO contiennent un groupe spécial, appelé “groupe bonus”. REMARQUE Cette opération peut être réalisée quand “BONUS” est allumé... -
Page 72: Utilisation De La Barre De Menu
Utilisation de la barre de menu REMARQUE • Réglez le sélecteur de mode de télécommande sur AUDIO avant d'utiliser les touches numériques. • Cette opération peut être réalisé quand un disque est en place. Certaines fonctions ne peuvent pas être utilisées quand le disque est à l'arrêt. Appuyer deux fois sur ON SCREEN. -
Page 73: Préférences
Préférences REMARQUE La marque de l'étape de la lecture a la même signification que la marque du guide sur l'écran (page 15). Les réglages initiaux de la chaîne peuvent être changés en fonction de l'environnement dans lequel la chaîne est utilisée. REMARQUE •... - Page 74 Préférences (suite) AUDIO Éléments Contenu ( SORTIE Choisissez un type de signal de sortie par les AUDIO NUM. suivant en fonction de l'appareil connecté à la prise de sortie audio numérique (amplificateur AV, etc.). (Référez-vous à la liste ci-dessous pour les réglages des préférences et le signal de sortie.) SEULEMENT PCM: Appareil correspondant uniquement à...
-
Page 75: Codes Des Pays/Régions
Codes des pays/régions Andorre Erythrée Emirats Arabes Unis Espagne Afghanistan Ethiopie Antigua-et-Barbuda Finlande Anguilla Fidji Albanie Iles Malouines Arménie Micronésie (Fédération Antilles néerlandaises Fro (ou Faroe) (les) Angola France Antarctique France métropolitaine Argentine Gabon Samoa-Américaines Royaume-Uni Autriche Grenade Australie Géorgie Aruba Guyane française Azerbaïdjan... -
Page 76: Écoute D'une Émission De Radio
Écoute d'une émission de radio REMARQUE Réglez le sélecteur de mode de télécommande sur AUDIO avant d'utiliser les touches numériques. Sélection d'une station Appuyez sur FM/AM. Chaque fois que vous appuyez sur la touche, FM et AM changent alternativement. Appuyez sur 4/¢ pour choisir la station (fréquence). -
Page 77: Accord D'une Station Préréglée
Accord d'une station préréglée Prérégler des stations dans la chaîne vous permet de les accorder facilement par la suite. REMARQUE Réglez le sélecteur de mode de télécommande sur AUDIO avant d'utiliser les touches numériques. Préréglage des stations La chaîne peut mémoriser un maximum de 30 stations FM et de 15 stations AM. -
Page 78: Fonctions Pratiques
Lecture à partir de l'ordinateur Cette chaîne est munie d'une prise USB derrière la porte du panneau avant. Vous pouvez connecter votre ordinateur à cette prise et écouter les sons sortis par votre ordinateur. Pour connecter votre ordinateur pour la première fois, suivez la procédure ci-dessous. -
Page 79: Écoute Du Son D'un Autre Appareil Audio
Écoute du son d'un autre appareil audio Connectez d'abord l'autre appareil audio à cette chaîne (page 10). Appuyez sur AUX. La source change sur AUX. Reproduisez l'autre appareil audio. Pour plus d’information, référez-vous au mode d’emploi fourni avec l'autre appareil. Ajustez le volume et la qualité... -
Page 80: Mise En Attente Automatique
Réglage des diverses minuteries (suite) Comment fonctionne la minuterie quotidienne: Une fois que la minuterie quotidienne a été réglée, l'indicateur de minuterie et l’indicateur de numéro de minuterie (1/2/3) s’allument sur la fenêtre d'affichage. La minuterie quotidienne met la chaîne sous tension à la même heure chaque jour de la semaine jusqu'à... -
Page 81: Minuteur De Mise En Attente
Minuteur de mise en attente Quand la durée spécifiée est écoulée, la chaîne se met automatiquement hors tension. Appuyez sur SLEEP. Chaque fois que vous appuyez sur la touche, la durée indiquée sur la fenêtre d'affichage de l'appareil change (en minutes). Modification de la durée Choisissez de nouveau la durée en appuyant répétitivement sur SLEEP. -
Page 82: Références
Guide de dépannage Si vous rencontrez un problème qui ressemble à une panne, vérifiez les points suivants avant de contacter votre centre de service après vente JVC. Source d'alimentation 7 Le système ne s’allume pas. • Le cordon d'alimentation n'est pas branché à... -
Page 83: Codes Des Langues
Autres 7 Il n'est pas possible de changer la langue des dialogues ou des sous-titres. • Le disque ne contient pas 2 langues ou plus. → Si une seule langue est enregistrée sur un disque, il n'est pas possible de changer la langue (page 24). -
Page 84: Spécifications
Spécifications Généralités Source d'alimentation: Secteur 120 V Consommation: 25 W (en fonctionnement) 1,0 W (en attente) Poids: 3,0 kg Dimensions extérieures (L x H x P): 150 mm x 152 mm x 246 mm Lecteur de DVD Disques reproductibles: DVD VIDEO, DVD AUDIO, VCD, SVCD, CD, CD-R/RW (format CD, VCD, MP3, WMA, JPEG), DVD-R/-RW... - Page 85 MEMO...
- Page 86 MEMO...
- Page 87 MEMO...
- Page 88 EN, FR 2005 Victor Company of Japan, Limited 0305AIMMDWJEM...
Need help?
Do you have a question about the CA-EXD1 and is the answer not in the manual?
Questions and answers