
Related Manuals for JVC EX-AK1


Summary of Contents for JVC EX-AK1
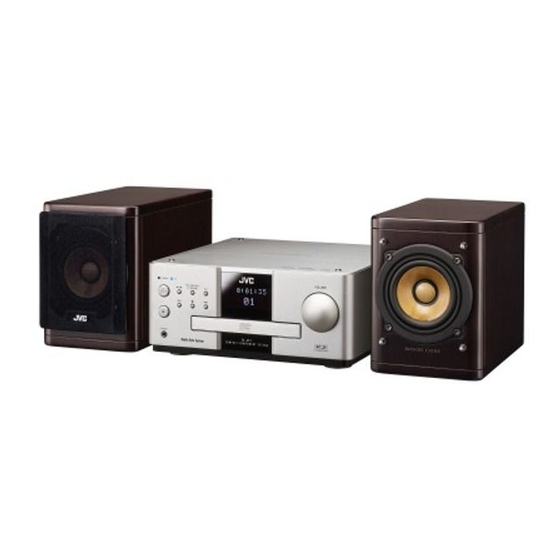
- Page 1 COMPACT COMPONENT SYSTEM EX-AK1 Consists of CA-EXAK1 and SP-EXAK1 INSTRUCTIONS LVT1763-002A...
-
Page 2: Warnings, Cautions And Others
Warnings, cautions and others CAUTION To reduce the risk of electrical shocks, fire, etc.: 1. Do not remove screws, covers or cabinet. 2. Do not expose this appliance to rain or moisture. CAUTION — F button! Disconnect the mains plug to shut the power off completely (the STANDBY lamp goes off). - Page 3 Introduction CAUTION — Proper Ventilation To avoid risk of electric shock and fire and to protect from damage, locate the apparatus as follows: Top/Front/Back/Sides: No obstructions should be placed in the areas shown by the dimensions below. Bottom: Place on the level surface. Maintain adequate air path for ventilation by placing on a stand with a height of 10 cm more.
- Page 4 (Business users) European Union. If you wish to dispose of this product, please visit our web page www.jvc- europe.com to obtain information about the take-back of the product. [Other Countries outside the European Union] If you wish to dispose of this product, please do so in accordance with applicable national legislation or other rules in your country for the treatment of old electrical and electronic equipment.
- Page 5 Dear Customer, This apparatus is in conformance with the valid European directives and standards regarding electromagnetic compatibility and electrical safety. European representative of Victor Company of Japan, Limited is: JVC Technology Centre Europe GmbH Postfach 10 05 52 61145 Friedberg Germany...
-
Page 6: Table Of Contents
Table of contents Introduction Selecting the audio language ......29 Selecting a view angle........29 Warnings, cautions and others....G-1 Enlarging the picture (ZOOM) ......30 Special cautions ..........2 Adjusting the picture quality (VFP) ....30 About discs/files ..........3 Creating realistic sound (SURROUND MODE)........31 Selecting the headphone surround mode..31 Getting started Adjusting playback level (DVD LEVEL) .....31 Functions specific to DVD AUDIO....32... -
Page 7: Special Cautions
Special cautions Introduction Care of the cabinet When cleaning the system, use a soft cloth and follow the Notes on handling relevant instructions on the use of chemically-coated cloths. Do not use benzene, thinner or other organic solvents including disinfectants. These may cause 7 Important cautions deformation or discoloring. -
Page 8: About Discs/Files
Recording (VR) format. be played back. * 3 A CD-R/CD-RW recorded in multi-session format (up • JVC does not guarantee the operation and sound to 20 sessions) is playable. quality of discs not authorized by CD-DA, which is a * 4 A DVD-R recorded in multi-border format is also CD specification. - Page 9 Introduction • If data has been processed, edited or restored with computer image editing software, the data may not be Data hierarchy displayed. • This system cannot play back animations such as DVD VIDEO/DVD VR MOTION JPEG files, still pictures (TIFF etc.) other A DVD VIDEO consists of “titles”...
-
Page 10: Description Of Parts
Description of parts The numbers represent the page numbers. Front panel Play/Pause: 14, 17 Look at “Display window” below. 37, 43 Remote control 12, 14 sensor: 7 STANDBY/ON : 14 VOLUME Open/Close control: 19 : 14, 44 Headphones jack* Disc tray: 14 17 17, 44 17 * Connect a pair of headphones (commercially available) with a stereo mini plug. - Page 11 Getting started Features of the main feet and studs The use of three main feet on the bottom of the In addition, the two studs on the bottom help main unit enables higher sound quality while stabilize the main unit and prevent it from wobbling maintaining the stability of the main unit.
-
Page 12: Using The Remote Control
Using the remote control The numbers represent the page numbers. Putting the batteries in the remote control Insert the batteries into the remote control by matching the polarity (+ and −) correctly. 18, 21 Remote control mode selector: 8 17, 21 21, 26 R6P(SUM-3)/ AA(15F) -
Page 13: Operating The Tv Using The Remote Control
Getting started This page is for when operating your TV using the If there are more than one manufacturer’s codes, try them in turn and select the one that causes the remote control of this product. product to work properly. Manufacturer Code Manufacturer... -
Page 14: Connecting Up
Connecting up – Do not turn on the power until the connection is complete – Connecting antennas Connecting AM loop antenna (supplied) Connecting FM antenna (supplied) FM antenna Setting up the AM loop antenna Main unit (rear view) Stretch out the FM antenna to the best position for radio reception. - Page 15 Getting started Connecting speakers There is no difference between the left and right speakers. Speaker Speaker terminal cord If the tips of the speaker cord are covered with insulation, twist and pull off the insulation. Speaker cord Speaker cord (supplied) (supplied) Without Without black line...
- Page 16 Connecting up (continued) – Do not turn on the power until the connection is complete – Connecting other devices This page is for when connecting the main unit with other devices. Connecting subwoofer With an amplifier-built in subwoofer (sold separately), you can enjoy a more dynamic bass sound. Refer to the manual of the subwoofer for details.
- Page 17 Getting started Connecting a TV with the COMPONENT CAUTION VIDEO OUT terminals • For details of signals to be output, refer to page • If the main unit is connected to equipment with a Dolby Digital decoder, the “D. RANGE COMPRESSION”...
- Page 18 • To check the compatibility of your TV, contact your local JVC customer service center. • All JVC-manufactured progressive TVs and high- definition TVs are fully compatible with this system. • Even if the power cable of the main unit is disconnected from the AC outlet or the power is interrupted, the video signal type setting is stored.
-
Page 19: Basic Operations
Playing discs/files Basic operations Playback (Refer to page 20 for playing MP3/WMA/WAV/JPEG/MPEG1/MPEG2 file.) Place a disc with the label side page 5 facing up. • Place an 8 cm disc in to the hollow part in the cen ter. Press F AUDIO. •... - Page 20 Playing discs/files (continued) Example: When a CD is played Elapsed playing time Track number Example: When an MP3/WMA/WAV/MPEG1/ MPEG2 file is played Elapsed playing time Track number Display window during disc/file playback Example: When a JPEG file is played File number Group number Example: When a DVD VIDEO or DVD AUDIO is played Elapsed...
-
Page 21: To Switch The Display
Basic operations To switch the display Press UPPER or LOWER. Each time you press the button, the display will be alternated. Display examples DVD VIDEO UPPER: 0:00:03 Elapsed playing time T1 C3 (Title and Chapter number) No display LOWER: 03 Chapter number T1 Title number DVD AUDIO UPPER:... -
Page 22: Select What You Want To Play By Using The Number Buttons
Playing discs/files (continued) Designate the chapter number or track number to play during playback. Refer to “How to use the number buttons” on page 18. To stop playback Press 7 during playback. To pause playback DVD/CD 3 Press 8 during playback. To resume normal playback, press DVD/CD 3. -
Page 23: Playing Back From A Position 10 Seconds
Basic operations Playing back from a position Skip to the beginning of 10 seconds before the selection (One Touch Replay) Press during playback. Press PREVIOUS 4 or NEXT ¢ during playback. NOTE • Press GROUP/TITLE to select the title or •... -
Page 24: To Change The Brightness Of The Display Window (Dimmer)
Playing discs/files (continued) Press K2 on the remote control or To change the on the main unit. brightness of the display • When the K2 function is activated, the K2 lamp window (DIMMER) on the main unit lights up. • Each time you press K2, the display changes as follows. -
Page 25: Advanced Operations
Playing MP3/WMA/WAV/JPEG/MPEG1/MPEG2 file Advanced operations Playback Display of an MP3 file is described here as an example. For a JPEG file, read “track” as “file”. NOTE When files of different types (audio/still picture/video) are recorded on a loaded disc, select the file type before playback. -
Page 26: Repeat Playback
Playing MP3/WMA/WAV/JPEG/MPEG1/MPEG2 file (continued) Press DVD/CD 3 or ENTER. Repeat playback NOTE • GROUP/TITLE can also be used in Step 2. • The number buttons can also be used in Step 4. In this case, Steps 3 and 5 are not needed. (For how Press REPEAT while the disc/ to use the number buttons, refer to page 18). -
Page 27: Resume Playback
Resume Playback Advanced operations How to suspend playback Perform any of the following operations during playback. When playback is stopped in the middle, playback can be started from the stopped scene. Press 7 once.* This is called Resume function. Press F AUDIO to turn off the power. Change the source to FM/AM, AUX or TV SOUND.* * Even if the power is turned off by pressing... -
Page 28: Select The Scene To Be Played
Select the scene to be played Press TOP MENU/PG to display the original program or press MENU/PL to display the play list while the disc is stopped or during playback. Original program 5///2/3 No Date Time Title /ENTER 1 03/12/04 12:15 La fleur 2 09/12/04... -
Page 29: Designate The Time (Time Search)
Advanced operations Designate the time (Time search) (PBC off) Press ON SCREEN twice during playback The menu bar will be displayed (A page 33). Press 2 or 3 to select Press ENTER. Input the time using the number buttons (1-9, 0). Example: When you want to play a DVD VIDEO from the position of (0 hour) 23 minutes 45 seconds,... -
Page 30: Program Playback/Random Playback
Program Playback/Random Playback Play the disc/file in the desired order (Program Playback) It is possible to program a maximum of 99 tracks or chapters. The same track or chapter can be programmed more than once. While the disc/file is stopped, press PLAY MODE repeatedly to display “PROGRAM”... -
Page 31: Playing The Disc/File In A Random Order (Random Playback)
Advanced operations To program on the display window on the main Playing the disc/file unit, operate as follows. in a random order (1) Select a group/title using the number buttons. (Random Playback) Display example of the upper display window: T2 C-- Press PLAY MODE repeatedly (2) Designate a track/chapter number using the to display “RANDOM”... -
Page 32: Repeat Playback
Repeat Playback Refer to page 21 for Repeat Playback of MP3/ For DVD VR WMA/WAV/JPEG/MPEG1/MPEG2 file. Indicator on the display Display on the TV Repeat types window on the main unit screen Repeats the current CHAP chapter Repeats the current program 5///2/3 Repeats the current... -
Page 33: Playing The Designated Part Repeatedly (A-B Repeat Playback)
Advanced operations Playing the designated part repeatedly (A-B Repeat Playback) Press ON SCREEN twice during playback. The menu bar (A page 33) will be displayed. Press 2 or 3 to select Press ENTER. Press 5 or / to display Other Repeat modes can be selected here. For other Repeat modes, refer to “Playing the title/chapter/group/track/all tracks repeatedly (REPEAT)”... -
Page 34: Other Convenient Functions
Other convenient functions Selecting the audio language 5///2/3 /ENTER Press AUDIO during playback of a disc containing several audio languages. Example: TV screen • Each time you press the button, the audio language will be alternated. Also, the audio language can be changed by pressing 5 or •... -
Page 35: Enlarging The Picture (Zoom)
Advanced operations Press 5 or / to select an item Enlarging the picture to be adjusted. (ZOOM) - “GAMMA” Controls the brightness of neutral tints while maintaining the brightness of dark (only for moving image) and light portions. (Setting range: –3 to +3) Press ZOOM during playback or - “BRIGHTNESS”... -
Page 36: Creating Realistic Sound (Surround Mode)
Other convenient functions (continued) Selecting the headphone surround mode You can listen to surround sound via headphones connected to the PHONES terminal. • This function is activated when a loaded disc is selected as the source. ■When headphones are connected to the PHONES terminal Press SURROUND MODE. -
Page 37: Functions Specific To Dvd Audio
Functions specific to DVD AUDIO Advanced operations NOTE Set the remote control mode selector to AUDIO before using the number buttons. Playing the Bonus Group There are some DVD AUDIO discs with a special group, called “Bonus Group”, recorded. NOTE This operation can be carried out when “BONUS”... -
Page 38: Using The Status Bar And The Menu Bar
Using the status bar and the menu bar NOTE • Set the remote control mode selector to AUDIO before using the number buttons. • This operation can be carried out when there is a disc loaded. There are some functions that may not work while the disc is stopped. - Page 39 Advanced operations Functions list Information displayed on the status bar For the functions with no special description for the DVD VIDEO/DVD AUDIO/DVD VR (the example operations, press 5 or / to select, and press below is for a DVD VIDEO) ENTER to determine.
-
Page 40: Preferences
Preferences Items Contents MENU LANGUAGE Select the language for the DVD VIDEO menu. AUDIO LANGUAGE Select the audio language for the DVD VIDEO. Select the subtitle language for the DVD SUBTITLE VIDEO. ON SCREEN Select the language displayed on the preference LANGUAGE screens. - Page 41 Advanced operations PICTURE AUDIO OTHERS Items Contents ( : initial setting) Items Contents ( : initial setting) DIGITAL Select an output signal type from the RESUME Select /OFF. (A page 22) AUDIO following in accordance with the device ON SCREEN Select /OFF.
-
Page 42: Listening To A Radio Broadcast
Listening to a radio broadcast You can tune in to FM or AM. Selecting a station Press FM/AM/AUX/TV SOUND to select “FM” or “AM” on the display window on the main unit. Each time you press the button, the source will be alternated among “FM”, “AM”, “AUX”... -
Page 43: Tuning In To A Preset Station
Tuning in to a preset station Listening to radio Select the number you want to store by pressing PRESET PRESET while the memory number is blinking. • You can also select the number by using the number buttons. • Refer to “How to use the number buttons” (A page 18). -
Page 44: Radio Data System
Radio Data System Receiving FM stations with Radio Data System Radio Data System allows FM stations to send an additional signal along with their regular program signals. For example, the stations send their station names, as well as information about what type of program they broadcast, such as sports or music, etc. - Page 45 Listening to radio Changing the Radio Data Press SEARCH when the source System information is FM. You can see Radio Data System information on the display window on the main unit while listening to an FM station. Press DISPLAY repeatedly while listening to an FM station.
- Page 46 Radio Data System (continued) PTY codes: None : Undefined. Finance : Stock market reports, commerce, trading, etc. News : News. Affairs : Topical program expanding or enlarging Children : Programs targeted at a young audience. upon the news _ debate, or analysis. Social : Programs about sociology, history, Info :...
- Page 47 Listening to radio To cancel the Enhanced Other Networks function, press TA/News/Info repeatedly until Switching to a program the program type indicator (TA/News/Info) type of your choice turns off on the display window. temporarily • The Enhanced Other Networks function will also be canceled when you change the source or when you turn off the main unit.
-
Page 48: Listening To The Sound Of Other Audio Devices
Listening to the sound of Auto Standby other audio devices If there is no operation for 3 minutes while the disc is stopped, the power will be automatically turned off. Connect other audio devices to this system in You cannot use this function when a radio advance (A page 11). -
Page 49: Sleep Timer
Sleep Timer Tray Lock You can lock the disc tray to prevent the disc from being ejected. Setting Turn off the power. And while holding down 7 on the main unit, press 0. “LOCKED” appears on the display window on the main unit. -
Page 50: Reference
Troubleshooting ■General Reference Problem Possible cause Possible solution page Power does not come The power cable is not con- Connect the power cable correctly. nected to an AC outlet. You cannot operate any Some specific operations are This is not a malfunction. –... - Page 51 ■For a loaded disc Reference Problem Possible cause Possible solution page A disc cannot be played If “REGION CODE ERROR!” Confirm the region code number back. appears on the TV screen, the compatible with this system. region code number of a disc is not compatible with this system.
-
Page 52: Language Codes
Language codes Code Language Code Language Afar Maori Abkhazian Macedonian Afrikaans Malayalam Ameharic Mongolian Arabic Moldavian Assamese Marathi Aymara Malay (MAY) Azerbaijani Maltese Bashkir Burmese Byelorussian Nauru Bulgarian Nepali Bihari Dutch Bislama Norwegian Bengali, Bangla Occitan Tibetan (Afan) Oromo Breton Oriya Catalan Panjabi... -
Page 53: Specifications
Specifications General Audio input Power source: AC 230 V , 50 Hz Sound input: AUX M 1 Power consumption: 24 W (in operation) Level 1: 250 mV/50 kC 0.9 W (on standby) Level 2: 500 mV/50 kC Weight: 3.1 kg External dimensions Tuner (W M H M D):... - Page 54 2007 Victor Company of Japan, Limited 0707SKMMODJMM...
Need help?
Do you have a question about the EX-AK1 and is the answer not in the manual?
Questions and answers