JVC UX-A52 Instructions Manual
Jvc micro component system instructions
Hide thumbs
Also See for UX-A52:
- Instructions manual (42 pages) ,
- Service manual (82 pages) ,
- Instructions manual (42 pages)
Table of Contents
Advertisement
Quick Links
MICRO COMPONENT SYSTEM
UX-A52
COLOR
DIMMER
STANDBY/ON
CLOCK
/TIMER
FM MODE
SLEEP
1
2
3
4
5
6
DISPLAY
7
8
9
10
0
10
SET
+
CANCEL
REV.MODE
REPEAT
PLAY MODE
CD
FM/AM
TAPE
AUX/MD
BEEP
SOUND
AHB
MODE
PRO
VOLUME
RM-SUXA52U
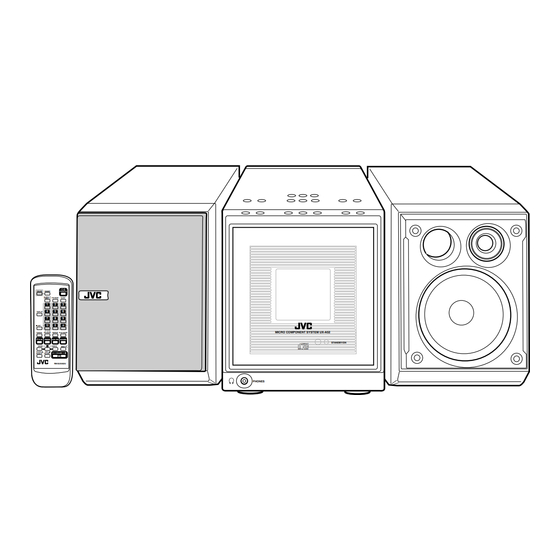
— Consists of CA-UXA52 and SP-UXA52
CA-UXA52
MICRO COMPONENT SYSTEM UX-A52
STANDBY/ON
COMPACT
DIGITAL AUDIO
PHONES
INSTRUCTIONS
SP-UXA52
For Customer Use:
Enter below the Model No. and Serial
No. which are located either on the rear,
bottom or side of the cabinet. Retain this
information for future reference.
Model No.
Serial No.
GVT0071-003A
[UN, US, UJ]
Advertisement
Chapters
Table of Contents
Troubleshooting

Related Manuals for JVC UX-A52


Summary of Contents for JVC UX-A52
-
Page 1: Micro Component System
BEEP SOUND MODE VOLUME RM-SUXA52U — Consists of CA-UXA52 and SP-UXA52 CA-UXA52 SP-UXA52 MICRO COMPONENT SYSTEM UX-A52 STANDBY/ON COMPACT DIGITAL AUDIO PHONES INSTRUCTIONS For Customer Use: Enter below the Model No. and Serial No. which are located either on the rear, bottom or side of the cabinet. -
Page 2: Warnings, Cautions And Others
Warnings, Cautions and Others Caution –– STANDBY/ON button! Disconnect the mains plug to shut the power off completely (the STANDBY/ON lamp goes off). STANDBY/ON button in any position does not disconnect the mains line. • When the unit is on standby, the STANDBY/ON lamp lights red. •... - Page 3 CAUTION To reduce the risk of electrical shocks, fire, etc.: 1. Do not remove screws, covers or cabinet. 2. Do not expose this appliance to rain or moisture. CAUTION • Do not block the ventilation openings or holes. (If the ventilation openings or holes are blocked by a newspaper or cloth, etc., the heat may not be able to get out.) •...
- Page 4 Place on the level surface. Maintain an adequate air path for ventilation by placing on a stand with a height of 10 cm or more. Front view 15 cm 1 cm 15 cm UX-A52 15 cm 1 cm 15 cm 10 cm – G-3 –...
-
Page 5: Important For Laser Products
IMPORTANT FOR LASER PRODUCTS / REPRODUCTION OF LABELS / 1 CLASSIFICATION LABEL, PLACED ON EXTERIOR SURFACE CLASS LASER PRODUCT 1. CLASS 1 LASER PRODUCT 2. DANGER: Invisible laser radiation when open and interlock failed or defeated. Avoid direct exposure to beam. -
Page 6: About This Manual
Introduction We would like to thank you for purchasing one of our JVC products. Before operating this unit, read this manual carefully and thoroughly to obtain the best possible performance from your unit, and retain this manual About This Manual This manual is organized as follows: •... -
Page 7: Table Of Contents
Contents Location of the Buttons ... 3 Main Unit ... 3 Remote Control ... 5 Getting Started ... 6 Unpacking ... 6 Putting the Batteries into the Remote Control ... 6 Connecting Antennas ... 7 Connecting Speakers ... 8 Connecting Other Equipment ... 8 Adjusting the Voltage Selector ... -
Page 8: Location Of The Buttons
Location of the Buttons Become familiar with the buttons on your unit. Main Unit Top view Front view DAIRY SOUND ST MONO MICRO COMPONENT SYSTEM UX-A52 STANDBY/ON COMPACT DIGITAL AUDIO PHONES F M / A M A U X / M D... - Page 9 • Lights when a cassette is in the cassette loading slot. d AHB (Active Hyper Bass) PRO indicator (12) f SOUND indicator (12) g ST (stereo) and MONO indicators (15) MICRO COMPONENT SYSTEM UX-A52 COMPACT DIGITAL AUDIO PHONES When using the remote control, point it at the remote sensor on the electronic swing panel.
-
Page 10: Remote Control
Remote Control COLOR DIMMER STANDBY/ON CLOCK SLEEP FM MODE /TIMER DISPLAY CANCEL REV.MODE REPEAT PLAY MODE AUX/MD FM/AM TAPE BEEP SOUND VOLUME MODE RM-SUXA52U Remote control 1 DIMMER button (13, 31) 2 COLOR button (9, 13) 3 CLOCK/TIMER button (31 – 33) 4 DISPLAY button (16, 19, 23, 28, 29) 5 SET button (13, 15, 31 –... -
Page 11: Getting Started
Getting Started Unpacking Make sure that you have all the following items. The number in parentheses indicates the quantity of the pieces supplied. • FM antenna (1) • AM loop antenna (1) • AC power cord (1) • Remote control (1) •... -
Page 12: Connecting Antennas
Connecting Antennas FM antenna FM antenna (supplied) Attach the FM antenna to the FM (75 Ω) COAXIAL terminal. Extend the FM antenna. Fasten it up in the position which gives you the best reception. About the supplied FM antenna The FM antenna supplied with this unit can be used as temporary measure. -
Page 13: Connecting Speakers
Connecting Speakers To connect speakers You can connect the speakers by following the procedure below: Speaker terminals SPEAKER IMPEDANCE MIN 4Ω Speaker cord – – Black Rear of the right Rear of the left speaker speaker If cords are covered with insulation, twist the core of the cord at the end of each cord, then remove the insulation. -
Page 14: Adjusting The Voltage Selector
To connect analog audio equipment Be sure that the plugs of the audio cords and the jacks on the rear of the unit are color-coded: White plugs and jacks are for left audio signals, and red ones for right audio signals. -
Page 15: Basic And Common Operations
Basic and Common Operations The buttons emphasized in the illustration below are used and explained in this section (pages 11 to 13.) Remote control COLOR DIMMER Main unit (Top view) STANDBY/ON open/close Main unit (Front view) COLOR DIMMER STANDBY/ON STANDBY/ON CLOCK FM MODE SLEEP... -
Page 16: Turning On The Power
Turning On the Power When you press the play buttons (CD 3 / 8, TAPE 2 3) for a particular source or FM/AM and AUX/MD, the unit automatically turns on (and starts playback if the source is ready.) To turn on the unit without playing, press STANDBY/ON. -
Page 17: Adjusting The Volume
Adjusting the Volume You can adjust the volume level while the unit is turned on. The volume level has no effect on recording. To increase the volume, press VOLUME +. To decrease the volume, press VOLUME –. (Maximum) (Minimum) The volume level meter appears on the display. •... -
Page 18: Setting The Display Illumination
Setting the Display Illumination You can change the color and brightness of the display illumination. To select the color pattern You can select the color pattern by your preference. While the unit is turned on, press COLOR repeatedly until the color pattern you want appears on the display. •... -
Page 19: Listening To Fm And Am Broadcasts
Listening to FM and AM Broadcasts The buttons emphasized in the illustration below are used and explained in this section (pages 15 to 16.) Remote control DISPLAY FM/AM Main unit (Top view) STANDBY/ON open/close COLOR DIMMER STANDBY/ON CLOCK FM MODE SLEEP /TIMER DISPLAY... -
Page 20: Setting The Am Tuner Interval Spacing
Setting the AM Tuner Interval Spacing Some countries space AM stations 9 kHz apart, and some countries use 10 kHz spacing. When shipped, the built-in AM tuner is set to 9 kHz spacing. You can change it to 9 kHz or 10 kHz spacing. On the unit ONLY: To set the AM tuner to the 10 kHz spacing, be sure that the unit is turned off, but is plugged into a wall outlet. -
Page 21: Tuning In A Preset Station
Press the number buttons to select a preset number. Ex. For preset number 5, press 5. For preset number 15, press +10, then 5. For preset number 20, press +10, then 10. For preset number 30, press +10, +10, then 10. •... -
Page 22: Playing Back A Cd
Playing Back a CD The buttons emphasized in the illustration below are used and explained in this section (pages 18 to 21.) Remote control DISPLAY CANCEL Main unit (Top view) STANDBY/ON open/close COLOR DIMMER STANDBY/ON CLOCK FM MODE SLEEP /TIMER DISPLAY CANCEL REV.MODE... -
Page 23: Precautions On Cd Playback
Precautions on CD Playback This unit has been designed to play back discs bearing the following logos: CD ReWritable (CD-RW) CD Recordable (CD-R) Audio CD When playing a CD-R or CD-RW User-edited CD-Rs (CD-Recordable) and CD-RWs (CD-ReWritable) can be played back when they are already “finalized.”... -
Page 24: Basic Cd Operations
To stop during play, press 7. The following information appears. CD indicator Total track number To remove the disc, press CD open/close 0. The electronic swing panel slides upward, and the disc tray comes out. • After removing the CD, press CD open/close 0 again to close the electronic swing panel. -
Page 25: Programing The Playing Order Of The Tracks -Program Play
Programing the Playing Order of the Tracks —Program Play You can arrange the order in which the tracks play before you start playing. You can program up to 32 tracks. On the remote control ONLY: Load a CD. Press CD 3 / 8, then 7. The source is changed to “CD.”... -
Page 26: Playing At Random-Random Play
Playing at Random—Random Play The tracks of a loaded CD will play at random. On the remote control ONLY: Load a CD. Press CD 3 / 8, then 7. The source is changed to “CD.” Press PLAY MODE repeatedly until “RANDOM” appears on the display. -
Page 27: Playing Back A Tape
Playing Back a Tape The buttons emphasized in the illustration below are used and explained in this section (page 23.) Remote control DISPLAY Main unit (Top view) STANDBY/ON open/close COLOR DIMMER STANDBY/ON CLOCK FM MODE SLEEP /TIMER DISPLAY CANCEL REV.MODE REPEAT PLAY MODE FM/AM... - Page 28 Playing Back a Tape You can play back type I, II, and IV tapes. Press TAPE open/close 0 on the unit. The unit automatically turns on, the electronic swing panel slides downward, and the cassette loading slot appears. If a cassette is already in the cassette loading slot, it is ejected.
-
Page 29: Using External Equipment
Using External Equipment The buttons emphasized in the illustration below are used and explained in this section (page 25.) Remote control SOUND MODE VOLUME Main unit (Top view) STANDBY/ON open/close COLOR DIMMER STANDBY/ON CLOCK FM MODE SLEEP /TIMER DISPLAY CANCEL REV.MODE REPEAT PLAY MODE... -
Page 30: Listening To External Equipment
Listening to External Equipment You can listen to external equipment such as an MD recorder. • First make sure that the external equipment is properly connected as follows: SPEAKER IMPEDANCE MIN 4 230V VOLTAGE SELECTOR 127V 110V AC IN Analog audio equipment To output Press AUX/MD. -
Page 31: Recording On Tapes
Recording on Tapes The buttons emphasized in the illustration below are used and explained in this section (pages 28 to 29.) For recording operations, mainly use the buttons on the unit. Main unit (Top view) STANDBY/ON open/close Remote control DISPLAY F M / A M A U X / M D AHB PRO... -
Page 32: Before You Start Recording
Before You Start Recording • It may be unlawful to record or play back copyrighted material without the consent of the copyright owner. • The recording level is automatically set correctly, so it is not affected by the VOLUME control. Thus, during recording you can adjust the sound you are actually listening to without affecting the recording level. -
Page 33: Recording Fm/Am Broadcasts
What’s a Recording Mode and Reverse Mode ? You have two methods (MODE 1/2 and 2/2) to record from some sources onto a tape. Recording Reverse mode mode MODE 1/2 MODE 2/2 : To record the front and reverse sides once. : To only record one side (front or reverse.) In the following procedure, MODE 1/2 ( as a recording method. -
Page 34: Recording External Equipment
To record a single track during play or pause While playing back you want to record, perform steps 3 and 4 . The playback of the track is stopped, and then starts from the beginning again. This time, the cassette deck starts recording the track. -
Page 35: Using The Timers
Using the Timers The buttons emphasized in the illustration below are used and explained in this section (pages 31 to 34.) Remote control DIMMER CLOCK /TIMER CANCEL Main unit (Top view) STANDBY/ON open/close COLOR DIMMER STANDBY/ON CLOCK FM MODE SLEEP /TIMER DISPLAY CANCEL... -
Page 36: Setting The Clock
There are three timers available—Recording Timer, Daily Timer, and Sleep Timer. You need to set the built-in clock to use these timers. Setting the Clock You can set the clock whether the unit is turned on or off (on standby.) On the remote control ONLY: Press CLOCK/TIMER repeatedly until “TIME ADJUST”... -
Page 37: Using Daily Timer
Press 4 to select “ON,” then press SET. Select the source to record. 1) Press ¢ or 4 repeatedly to select the source. • Each time you press the buttons, the source changes as follows: FROM AUX FROM FM FROM AM 2) Press SET. - Page 38 On the remote control ONLY: Press CLOCK/TIMER repeatedly until “DAILY TIMER” appears on the display. The timer ( ) indicator lights, and the DAILY indicator starts flashing on the display. DAILY indicator DAILY Timer indicator Timer mode • Each time you press the button, the timer mode changes as follows: REC TIMER DAILY TIMER...
-
Page 39: Using Sleep Timer
Using Sleep Timer With Sleep Timer, you can fall asleep to your favorite music. • You can set Sleep Timer while the unit is turned on. How Sleep Timer actually works The unit automatically turns off after the specified time length passes. -
Page 40: Maintenance
Maintenance To get the best performance of the unit, keep your discs, tapes, and mechanism clean. General Notes In general, you will have the best performance by keeping your discs and the mechanism clean. • Store discs in their cases, and keep them in cabinets or on shelves. -
Page 41: Troubleshooting
90 dB Wow and flutter: Immeasurable Possible Cause remote sensor on the unit is blocked. unit. positioned. UX-A52 (CA-UXA52 and SP-UXA52) Casstte deck Frequency response Normal (type I): 60 Hz — 14 000 Hz Wow and flutter 0.15 % (WRMS) General... - Page 42 Mains (AC) Line Instruction (not applicable for Europe, U.S.A., Canada, Australia, and U.K.) IMPORTANT for mains (AC) line BEFORE PLUGGING IN, do check that your mains (AC) line voltage corresponds with the position of the voltage selector switch provided on the outside of this equipment and, if different, reset the voltage selector switch, to prevent from damage or risk of fire/electric shock.
- Page 43 PLAY MODE FM/AM TAPE AUX/MD BEEP SOUND MODE VOLUME RM-SUXA52U — Consists of CA-UXA52 and SP-UXA52 MICRO COMPONENT SYSTEM UX-A52 STANDBY/ON COMPACT DIGITAL AUDIO PHONES INSTRUCTIONS MANUAL DE INSTRUCCIONES INSTRUÇÕES For Customer Use: Enter below the Model No. and Serial No.
-
Page 44: Standby/On Button
Warnings, Cautions and Others Avisos, precauciones y otras notas Advertências, precauções e outras notas Caution –– STANDBY/ON button! Disconnect the mains plug to shut the power off completely (the STANDBY/ON lamp goes off). STANDBY/ON button in any position does not disconnect the mains line. - Page 45 CAUTION To reduce the risk of electrical shocks, fire, etc.: 1. Do not remove screws, covers or cabinet. 2. Do not expose this appliance to rain or moisture. PRECAUCIÓN Para reducir riesgos de choques eléctricos, incendio, etc.: 1. No extraiga los tornillos, los cubiertas ni la caja.
- Page 46 Instale-o sobre uma superfície plana. Deverá ser mantido espaço suficiente para a ventilação se este for instalado numa posição que tenha uma altura de 10 cm ou mais. 1 cm 15 cm 15 cm 15 cm 1 cm 15 cm UX-A52 10 cm – G-3 – 15 cm 15 cm UX-A52...
-
Page 47: Laser Product
IMPORTANT FOR LASER PRODUCTS IMPORTANTE PARA PRODUCTOS LÁSER IMPOTANTE PARA PRODUTOS LASER REPRODUCTION OF LABELS / REPRODUCCIÓN DE ETIQUETAS / REPRODUÇÃO DE ETIQUETAS 1 CLASSIFICATION LABEL, PLACED ON EXTERIOR SURFACE 1 ETIQUETA DE CLASIFICACION, PROVISTA SOBRE LA SUPERFICIE EXTERIOR 1 ETIQUETA DE CLASSIFICAÇÃO LOCALIZADA NA PARTE POSTERIOR DA CAIXA DO APARELHO CLASS LASER... - Page 48 Introduction We would like to thank you for purchasing one of our JVC products. Before operating this unit, read this manual carefully and thoroughly to obtain the best possible performance from your unit, and retain this manual About This Manual This manual is organized as follows: •...
- Page 49 Contents Location of the Buttons ... 3 Main Unit ... 3 Remote Control ... 5 Getting Started... 6 Unpacking ... 6 Putting the Batteries into the Remote Control ... 6 Connecting Antennas ... 7 Connecting Speakers ... 8 Connecting Other Equipment ... 8 Adjusting the Voltage Selector ...
-
Page 50: Location Of The Buttons
Location of the Buttons Become familiar with the buttons on your unit. Main Unit Top view Front view DAIRY SOUND ST MONO MICRO COMPONENT SYSTEM UX-A52 STANDBY/ON COMPACT DIGITAL AUDIO PHONES F M / A M A U X / M D... - Page 51 • Lights when a cassette is in the cassette loading slot. d AHB (Active Hyper Bass) PRO indicator (12) f SOUND indicator (12) g ST (stereo) and MONO indicators (15) MICRO COMPONENT SYSTEM UX-A52 COMPACT DIGITAL AUDIO PHONES When using the remote control, point it at the remote sensor on the electronic swing panel.
-
Page 52: Remote Control
Remote Control COLOR DIMMER STANDBY/ON CLOCK FM MODE SLEEP /TIMER DISPLAY CANCEL REV.MODE REPEAT PLAY MODE FM/AM AUX/MD TAPE BEEP SOUND MODE VOLUME RM-SUXA52U Remote control 1 DIMMER button (13, 31) 2 COLOR button (9, 13) 3 CLOCK/TIMER button (31 – 33) 4 DISPLAY button (16, 19, 23, 28, 29) 5 SET button (13, 15, 31 –... -
Page 53: Getting Started
Getting Started Unpacking Make sure that you have all the following items. The number in parentheses indicates the quantity of the pieces supplied. • FM antenna (1) • AM loop antenna (1) • AC power cord (1) • Remote control (1) •... -
Page 54: Connecting Antennas
Connecting Antennas FM antenna FM antenna (supplied) Attach the FM antenna to the FM (75 Ω) COAXIAL terminal. Extend the FM antenna. Fasten it up in the position which gives you the best reception. About the supplied FM antenna The FM antenna supplied with this unit can be used as temporary measure. -
Page 55: Connecting Speakers
Connecting Speakers To connect speakers You can connect the speakers by following the procedure below: Speaker terminals SPEAKER IMPEDANCE MIN 4Ω Speaker cord – – Black Rear of the right Rear of the left speaker speaker If cords are covered with insulation, twist the core of the cord at the end of each cord, then remove the insulation. -
Page 56: Adjusting The Voltage Selector
To connect analog audio equipment Be sure that the plugs of the audio cords and the jacks on the rear of the unit are color-coded: White plugs and jacks are for left audio signals, and red ones for right audio signals. -
Page 57: Basic And Common Operations
Basic and Common Operations The buttons emphasized in the illustration below are used and explained in this section (pages 11 to 13.) Remote control COLOR DIMMER Main unit (Top view) STANDBY/ON open/close Main unit (Front view) COLOR DIMMER STANDBY/ON STANDBY/ON CLOCK FM MODE SLEEP... -
Page 58: Turning On The Power
Turning On the Power When you press the play buttons (CD 3 / 8, TAPE 2 3) for a particular source or FM/AM and AUX/MD, the unit automatically turns on (and starts playback if the source is ready.) To turn on the unit without playing, press STANDBY/ON. -
Page 59: Adjusting The Volume
Adjusting the Volume You can adjust the volume level while the unit is turned on. The volume level has no effect on recording. To increase the volume, press VOLUME +. To decrease the volume, press VOLUME –. (Maximum) (Minimum) The volume level meter appears on the display. •... -
Page 60: Setting The Display Illumination
Setting the Display Illumination You can change the color and brightness of the display illumination. To select the color pattern You can select the color pattern by your preference. While the unit is turned on, press COLOR repeatedly until the color pattern you want appears on the display. •... -
Page 61: Listening To Fm And Am Broadcasts
Listening to FM and AM Broadcasts The buttons emphasized in the illustration below are used and explained in this section (pages 15 to 16.) Remote control DISPLAY FM/AM Main unit (Top view) STANDBY/ON open/close COLOR DIMMER STANDBY/ON CLOCK FM MODE SLEEP /TIMER DISPLAY... -
Page 62: Setting The Am Tuner Interval Spacing
Setting the AM Tuner Interval Spacing Some countries space AM stations 9 kHz apart, and some countries use 10 kHz spacing. When shipped, the built-in AM tuner is set to 9 kHz spacing. You can change it to 9 kHz or 10 kHz spacing. On the unit ONLY: To set the AM tuner to the 10 kHz spacing, be sure that the unit is turned off, but is plugged into a wall outlet. -
Page 63: Tuning In A Preset Station
Press the number buttons to select a preset number. Ex. For preset number 5, press 5. For preset number 15, press +10, then 5. For preset number 20, press +10, then 10. For preset number 30, press +10, +10, then 10. •... -
Page 64: Playing Back A Cd
Playing Back a CD The buttons emphasized in the illustration below are used and explained in this section (pages 18 to 21.) Remote control DISPLAY CANCEL Main unit (Top view) open/close COLOR DIMMER STANDBY/ON CLOCK FM MODE SLEEP /TIMER DISPLAY CANCEL REV.MODE REPEAT... -
Page 65: Precautions On Cd Playback
Precautions on CD Playback This unit has been designed to play back discs bearing the following logos: CD ReWritable (CD-RW) CD Recordable (CD-R) Audio CD When playing a CD-R or CD-RW User-edited CD-Rs (CD-Recordable) and CD-RWs (CD-ReWritable) can be played back when they are already “finalized.”... -
Page 66: Basic Cd Operations
To stop during play, press 7. The following information appears. CD indicator Total track number To remove the disc, press CD open/close 0. The electronic swing panel slides upward, and the disc tray comes out. • After removing the CD, press CD open/close 0 again to close the electronic swing panel. -
Page 67: Programing The Playing Order Of The Tracks -Program Play
Programing the Playing Order of the Tracks —Program Play You can arrange the order in which the tracks play before you start playing. You can program up to 32 tracks. On the remote control ONLY: Load a CD. Press CD 3 / 8, then 7. The source is changed to “CD.”... -
Page 68: Playing At Random-Random Play
Playing at Random—Random Play The tracks of a loaded CD will play at random. On the remote control ONLY: Load a CD. Press CD 3 / 8, then 7. The source is changed to “CD.” Press PLAY MODE repeatedly until “RANDOM” appears on the display. -
Page 69: Playing Back A Tape
Playing Back a Tape The buttons emphasized in the illustration below are used and explained in this section (page 23.) Remote control DISPLAY Main unit (Top view) STANDBY/ON open/close COLOR DIMMER STANDBY/ON CLOCK FM MODE SLEEP /TIMER DISPLAY CANCEL REV.MODE REPEAT PLAY MODE FM/AM... - Page 70 Playing Back a Tape You can play back type I, II, and IV tapes. Press TAPE open/close 0 on the unit. The unit automatically turns on, the electronic swing panel slides downward, and the cassette loading slot appears. If a cassette is already in the cassette loading slot, it is ejected.
-
Page 71: Using External Equipment
Using External Equipment The buttons emphasized in the illustration below are used and explained in this section (page 25.) Remote control SOUND VOLUME MODE Main unit (Top view) STANDBY/ON open/close COLOR DIMMER STANDBY/ON CLOCK FM MODE SLEEP /TIMER DISPLAY CANCEL REV.MODE REPEAT PLAY MODE... -
Page 72: Listening To External Equipment
Listening to External Equipment You can listen to external equipment such as an MD recorder. • First make sure that the external equipment is properly connected as follows: SPEAKER IMPEDANCE MIN 4 230V VOLTAGE SELECTOR 127V 110V AC IN Analog audio equipment To output Press AUX/MD. -
Page 73: Recording On Tapes
Recording on Tapes The buttons emphasized in the illustration below are used and explained in this section (pages 28 to 29.) For recording operations, mainly use the buttons on the unit. Main unit (Top view) STANDBY/ON open/close Remote control DISPLAY F M / A M A U X / M D AHB PRO... -
Page 74: Before You Start Recording
Before You Start Recording • It may be unlawful to record or play back copyrighted material without the consent of the copyright owner. • The recording level is automatically set correctly, so it is not affected by the VOLUME control. Thus, during recording you can adjust the sound you are actually listening to without affecting the recording level. -
Page 75: Recording Fm/Am Broadcasts
What’s a Recording Mode and Reverse Mode ? You have two methods (MODE 1/2 and 2/2) to record from some sources onto a tape. Recording Reverse mode mode MODE 1/2 MODE 2/2 : To record the front and reverse sides once. : To only record one side (front or reverse.) In the following procedure, MODE 1/2 ( as a recording method. -
Page 76: Recording External Equipment
To record a single track during play or pause While playing back you want to record, perform steps 3 and 4 . The playback of the track is stopped, and then starts from the beginning again. This time, the cassette deck starts recording the track. -
Page 77: Using The Timers
Using the Timers The buttons emphasized in the illustration below are used and explained in this section (pages 31 to 34.) Remote control DIMMER CLOCK /TIMER CANCEL Main unit (Top view) STANDBY/ON open/close COLOR DIMMER STANDBY/ON CLOCK FM MODE SLEEP /TIMER DISPLAY CANCEL... -
Page 78: Setting The Clock
There are three timers available—Recording Timer, Daily Timer, and Sleep Timer. You need to set the built-in clock to use these timers. Setting the Clock You can set the clock whether the unit is turned on or off (on standby.) On the remote control ONLY: Press CLOCK/TIMER repeatedly until “TIME ADJUST”... -
Page 79: Using Daily Timer
Press 4 to select “ON,” then press SET. Select the source to record. 1) Press ¢ or 4 repeatedly to select the source. • Each time you press the buttons, the source changes as follows: FROM AUX FROM FM FROM AM 2) Press SET. - Page 80 On the remote control ONLY: Press CLOCK/TIMER repeatedly until “DAILY TIMER” appears on the display. The timer ( ) indicator lights, and the DAILY indicator starts flashing on the display. DAILY indicator DAILY Timer indicator Timer mode • Each time you press the button, the timer mode changes as follows: REC TIMER DAILY TIMER...
-
Page 81: Using Sleep Timer
Using Sleep Timer With Sleep Timer, you can fall asleep to your favorite music. • You can set Sleep Timer while the unit is turned on. How Sleep Timer actually works The unit automatically turns off after the specified time length passes. -
Page 82: Maintenance
Maintenance To get the best performance of the unit, keep your discs, tapes, and mechanism clean. General Notes In general, you will have the best performance by keeping your discs and the mechanism clean. • Store discs in their cases, and keep them in cabinets or on shelves. -
Page 83: Troubleshooting
90 dB Wow and flutter: Immeasurable Possible Cause remote sensor on the unit is blocked. unit. positioned. UX-A52 (CA-UXA52 and SP-UXA52) Casstte deck Frequency response Normal (type I): 60 Hz — 14 000 Hz Wow and flutter 0.15 % (WRMS) General... - Page 84 Mains (AC) Line Instruction (not applicable for Europe, U.S.A., Canada, and U.K.) Instrucción sobre la línea de la red (CA) (no aplicable para Europa, EE.UU., Canadá, ni el Grã-Bretanha) Instrução sobre a tensão da rede eléctrica (CA) (não aplicável para a Europa, os E.U.A., o Canadá, e o Reino Unido) IMPORTANT for mains (AC) line BEFORE PLUGGING IN, do check that your mains (AC) line voltage...
Need help?
Do you have a question about the UX-A52 and is the answer not in the manual?
Questions and answers