
Related Manuals for Hitachi Koki DH 24PX


Summary of Contents for Hitachi Koki DH 24PX
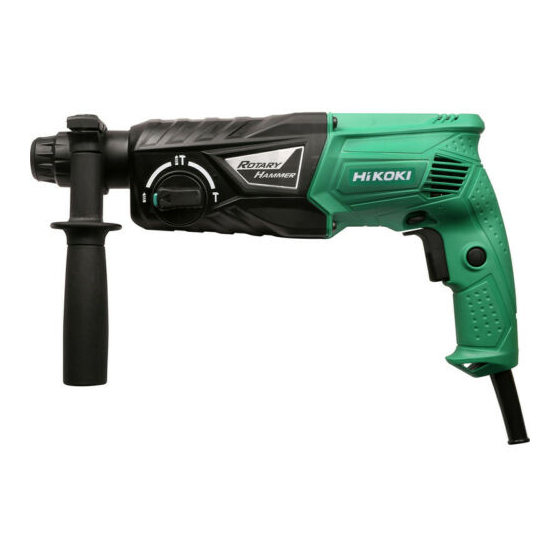
- Page 1 Rotary Hammer DH 24PX DH 26PX DH 28PX • • DH28PX Read through carefully and understand these instructions before use. Handling instructions...
-
Page 2: General Power Tool Safety Warnings
Symbols WARNING The following show symbols used for the machine. Be sure that you understand their meaning before use. Read all safety warnings and all instructions. Only for EU countries Failure to follow the warnings and Do not dispose of electric tools together with instructions may result in electric shock, fire household waste material! and/or serious injury. -
Page 3: Rotary Hammer Safety Warnings
d) Store idle power tools out of the reach of children ROTARY HAMMER SAFETY WARNINGS and do not allow persons unfamiliar with the power tool or these instructions to operate the power tool. Wear ear protectors Power tools are dangerous in the hands of untrained Exposure to noise can cause hearing loss. -
Page 4: Optional Accessories (Sold Separately)
OPTIONAL ACCESSORIES (sold separately) Tool Adapters Use on jobs facing upwards Drilling holes in concrete or tile Dust cup Dust collector (B) Drill bit Drilling anchor holes Taper shank Cotter Drill bit (Taper shank) adapter Large hole boring Core bit shank Guide plate Center pin Core bit Anchor setting... - Page 5 Drilling holes in concrete or tile Large hole boring Core bit Core bit shank Drill bit (slender shaft) Center pin Outer dia. Overall length Outer dia. Overall length Effective length 25 mm* 3.4 mm Not applicable 90 mm 45 mm 29 mm* 3.5 mm 105 mm...
-
Page 6: Prior To Operation
APPLICATIONS Rotation and hammering function Drilling anchor holes Drilling holes in concrete Drilling holes in tile Rotation only function Drilling in steel or wood (with optional accessories) Tightening machine screws, wood screws Grip (with optional accessories) Fig. 2 Hammering only function 5. -
Page 7: How To Use
When turning the rotary hammer on while dust collector (B) is detached from a concrete surface, dust collector (B) will rotate together with the drill bit. Make sure to turn on the switch after pressing the dust cup on the concrete surface. (When using dust Push button collector (B) attached to a drill bit that has more than 190 mm of overall length, dust collector (B) cannot... - Page 8 Grip (2) Driving in wood screws Front cap Prior to driving in wood screws, make pilot holes suitable for them in the wooden board. Apply the bit to the screw head grooves and gently drive the screws into the holes. After rotating the rotary hammer at low speed for a while until the wood screw is partly driven into the wood, squeeze the trigger more strongly to obtain...
-
Page 9: How To Use The Core Bit
(3) Turn the change lever to mark (Fig. 11). HOW TO USE THE CORE BIT Then bull point or cold chisel is locked. (FOR LIGHT LOAD) 7. Using depth gauge (Fig. 14) (1) Loosen the knob on the side handle, and insert the When boring penetrating large holes use the core bit (for depth gauge into the mounting hole on the side light loads). -
Page 10: Maintenance And Inspection
4. Inspecting the carbon brushes For your continued safety and electrical shock protection, carbon brush inspection and replacement on this tool should ONLY be performed by a HITACHI Authorized Service Center. 5. Replacing supply cord Fig. 20 If the supply cord of Tool is damaged, the Tool must... - Page 11 The declared vibration total value has been measured in IMPORTANT accordance with a standard test method and may be Correct connection of the plug used for comparing one tool with another. The wires of the mains lead are coloured in accordance It may also be used in a preliminary assessment of with the following code: exposure.
- Page 15 Precedent Drive, Rooksley, Milton Keynes, MK 13, 8PJ, United Kingdom Tel: +44 1908 660663 Fax: +44 1908 606642 URL: http://www.hitachi-powertools.co.uk Hitachi Power Tools France S. A. S. Prac del’ Eglantier 22, rue des Crerisiers Lisses, C. E. 1541, 91015 EVRY CEDEX, France Tel: +33 1 69474949 Fax: +33 1 60861416 URL: http://www.hitachi-powertools.fr...
- Page 16 EN61000-3-3 in accordance with Directives 2004/108/EC and 2006/42/EC. This product also conforms to RoHS Directive 2011/65/EU. The European Standards Manager at Hitachi Koki Europe Ltd. is authorized to compile the technical file. This declaration is applicable to the product affixed CE marking.
Need help?
Do you have a question about the DH 24PX and is the answer not in the manual?
Questions and answers