Advertisement
Advertisement

Subscribe to Our Youtube Channel
Related Manuals for Lionel Operating Horse Car and Corral


Summary of Contents for Lionel Operating Horse Car and Corral
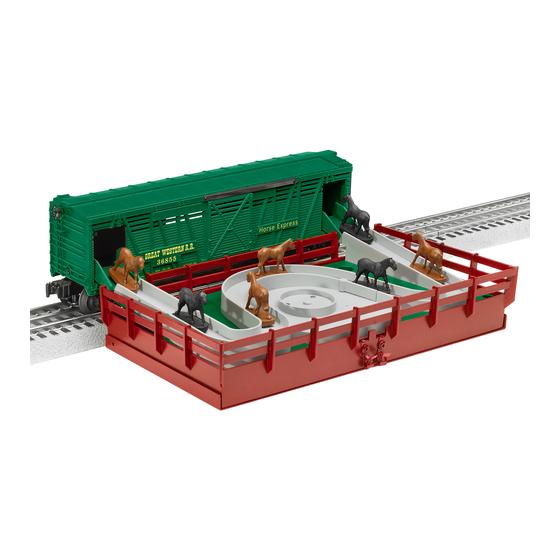
- Page 1 73-6855-250 6/08 Lionel Operating Horse Car and Corral Owner’s Manual...
- Page 2 For FasTrack layouts, use O Gauge Transition sections (available separately, 6-12040) to join the track with a traditional O gauge track section. The following Lionel marks may be used throughout this instruction manual and are protected under law. All rights reserved.
-
Page 3: Table Of Contents
Table of contents Setting up the Corral and OTC Contactor Wiring your Corral and OTC Contactor Operating the Horse Car and Corral Adjusting the Horse Car doors Notes Limited Warranty/Lionel Service... -
Page 4: Setting Up The Corral And Otc Contactor
Setting up the Corral and OTC Contactor ollow these steps to set up the corral and OTC Contactor. For FasTrack layouts, use O Gauge Transition sections (available separately, 6- Note! 12040) to join your track to a traditional O gauge track section for use with the OTC Contactor. - Page 5 Setting up the Corral and OTC Contactor (continued) 2. Position the corral on any straight length of track with a minimum of two O or O-27 gauge straight track sections. Slide the rails into the slots at the ends of the locating arms. See Figure 2.
- Page 6 Setting up the Corral and OTC Contactor (continued) 3. If you have O gauge track, take a moment to install the wire adapters on your OTC Contactor. These adapters will raise the control blades to the proper height. As illustrated in Figure 3, simply insert the short end of the adapter into the control blade until the long end lies flatly on top of the blade.
- Page 7 Setting up the Corral and OTC Contactor (continued) 4. Slide the OTC Contactor under the track, then snap it in place. As illustrated in Figure 4, the contactor should touch the locating arm. OTC Contactor Figure 4. Installing the OTC Contactor...
-
Page 8: Wiring Your Corral And Otc Contactor
Wiring your corral and OTC Contactor our Horse Car and Corral will operate best at 11-14 volts (AC). You will need to adjust the voltage to obtain the optimum operation. Connect the corral and contactor to the transformer terminals that supply power to the track. Refer to Figure 5 as you make these connections. -
Page 9: Operating The Horse Car And Corral
Operating the Horse Car and Corral ollow these steps as you load and unload the Horse Car. 1. Position the car in front of the corral so that the car doors line up with the corral ramps. 2. Line up the horse figures in the corral passage so that they are facing in the direction of the arrows. -
Page 10: Adjusting The Horse Car Doors
Adjusting the Horse Car doors he two small doors on the side of your Horse Car fold down to allow the figures to shuffle over them. Due to the movement that may occur in transit or the variations in your track, you may find that you need to re-adjust these doors so that they rest properly on top of the corral ramp protrusions. -
Page 11: Notes
Notes... -
Page 12: Limited Warranty/Lionel Service
Lionel L.L.C. or an authorized Lionel L.L.C. Service Center, together with proof of original purchase will, at the option of Lionel L.L.C., be repaired or replaced, without charge for parts or labor. In the event the defective product cannot be repaired, and a replacement is not available, a refund of the original purchase price will be granted.
Need help?
Do you have a question about the Operating Horse Car and Corral and is the answer not in the manual?
Questions and answers