Table of Contents
Advertisement
Advertisement
Table of Contents

Related Manuals for Citizen CL-S300


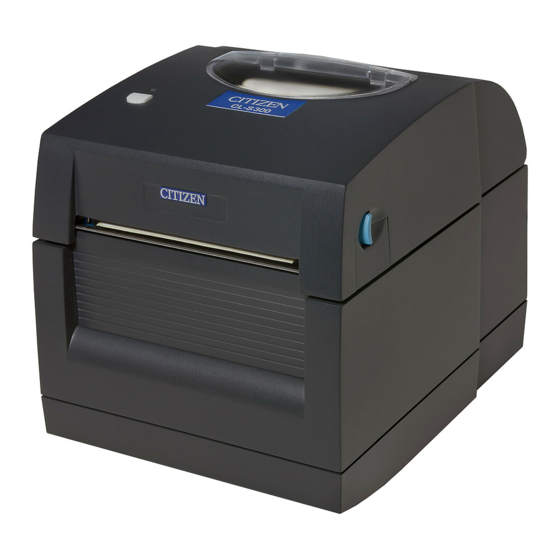
Summary of Contents for Citizen CL-S300
-
Page 2: Fcc Compliance Statement
EN 55024: 2010, IEC 61000- 4 Series EN 61000-3-2 / 2006+A1:2009+A2:2009 & EN 61000-3-3:2008. The equipment also tested and passed in accordance with the European Standard EN55022 for the both Radiated and Conducted emissions limits. CL-S300 TO WHICH THIS DECLARATION RELATES IS IN CONFORMITY WITH THE FOLLOWING STANDARDS... - Page 3 CAUTION Changes or modifications not expressly approved by the party responsible for compliance could void the user's authority to operate the equipment.
-
Page 4: Safety Instructions
Safety instructions Please read the following instructions carefully. Keep the equipment away from humidity. Before you connect the equipment to the power outlet, please check the voltage of the power source. Make sure the printer is off before plugging the power connector into the power jack. It is recommended that you connect the printer to a surge protector to prevent possible transient overvoltage damage. -
Page 5: Table Of Contents
1. BARCODE PRINTER..............4 1-1. Box content ........................4 1-2. Specifications........................4 1-3. Getting to know your printer.................... 6 2. PRINTER SETUP............... 9 2-1. Loading the label roll....................... 9 2-2. Installing the label roll holder ..................11 2-3. Connecting the printer to the host computer..............12 2-4. -
Page 6: Barcode Printer
1-1. Box content Please check that all of the following items are included with your printer: Barcode printer Power cord Quick Start guide CD (with BarTender label software / User’s manual) CL-S300 1-2. Specifications Model CL-S300 Print Method Direct Thermal... - Page 7 ** Minimum print height specification compliance can be dependent on non-standard material variables such as label type, thickness, spacing, liner construction, etc. Citizen is pleased to test non-standard materials for minimum height printing capability.
-
Page 8: Getting To Know Your Printer
1-3. Getting to know your printer LED indicator FEED function button Printer cover Release buttons Print head release lever Label roll holder Print mechanism Label supply hub Label guides Front cover... - Page 9 Platen cover Label sensor Platen roller ON/OFF switch Power jack Feed slot for continuous labels USB port...
- Page 10 Mounting points...
-
Page 11: Printer Setup
2. Printer setup 2-1. Loading the label roll Place the printer on a flat surface and open the printer cover. Lift the label roll holder and pull it out as far as possible. Install the label roll on the label supply hub. Now press the label roll holder down until it clicks into place. - Page 12 Pass the label under the paper guides and pull it forward. Adjust the paper guides to the width of the label liner. Close the printer cover to finish loading the labels.
-
Page 13: Installing The Label Roll Holder
2-2. Installing the label roll holder Pull the label roll holder out as far as it will go. Fold out the label supply hub as shown in the illustration. Now rotate the label roll holder to return the label supply hub to its original position. -
Page 14: Connecting The Printer To The Host Computer
2-3. Connecting the printer to the host computer Please make sure that the printer is switched off. Connect the power code to the printer, then connect to the electrical outlet. Connect the printer with the host computer via the USB port. Switch on the printer. -
Page 15: Installing The Driver
2-4. Installing the driver Insert the product CD in the CD/DVD drive of the host computer and open the "Windows Drivers" folder on the Execute the file with the same icon as the file selected in the illustration on the right. Follow the instructions in the installation wizard. - Page 16 Specify the port used to connect the printer to the host computer. Enter a printer name. The printer will be listed under this name in the "Printers and Faxes" folder. Specify whether or not you want to share the printer with other network users and assign the printer a share name.
- Page 17 11. Once copying is complete, the new printer should be visible in the "Printers and Faxes" folder.
-
Page 18: Operator Panel
3. Operator panel 3-1. FEED button When you press the FEED button, the printer moves the label to the defined stop position. If you are using continuous labels, pressing the FEED button will move label stock until you release the button again. -
Page 19: Self Test
3-4. Self test The self-test function helps you find out whether the printer is functioning normally. The printer prints the following test page:... -
Page 20: Error Alerts
3-5. Error alerts Beeps Description Solution indicator Possible reasons: the print medium has become trapped around the rubber roll; the sensor cannot detect 2 x 2 beeps Media error a gap or black mark between the labels; there is no paper. Please reset the sensor. -
Page 21: Accessories
4. Accessories 4-1. Installing the label dispenser Label dispenser Screws (set of 2) 【 】 Note1 Remember to switch off the printer before installing the label dispenser. 【 】 Note 2 A label liner thickness of 0.006 mm ± 10% and a weight of 65 g/m ±... - Page 22 Pass the dispenser cable through the opening as shown in the illustration. Fit the label dispenser in the recess provided. Turn the printer upside down and take out the screws to open the cover. Open the cover on the bottom of the printer to access the motherboard.
- Page 23 Connect the cable to the motherboard. Close the cover and tighten the screws again. 10. Place the printer the right way up again. 11. Open the dispenser by folding it out. 12. Load the labels, following the instructions in Section 2-1.
- Page 24 13. Remove the first label and pass the label liner over the roller and the tear-off plate. 【 】 Note The label stock should be at least 25 mm high. 【 】 Suggestion When using the label dispenser, set the stop position to 9 mm. 14.
- Page 25 16. Switch on the printer and press the FEED button to measure the label stock.
-
Page 26: Maintenance And Adjustment
5. Maintenance and adjustment 5-1. Cleaning the print head Dirt on the print head or glue residue from the label liner may result in inadequate print quality. The printer cover must therefore always be closed. Keeping dirt and dust away from the paper or labels ensures a good print quality and a longer lifespan of the print head. -
Page 27: Labels With Black Marks
5-2. Labels with black marks If you are using black-mark label stock that has the printer's maximum feed width, the printer may not recognise the black marks because they are outside the sensor range. When using label stock with black marks, you should therefore observe the following restrictions: For 118 mm wide label stock, the black marks should have the following positions and sizes: A >... -
Page 28: Troubleshooting
5-3. Troubleshooting Problem Solution The printer is switched on but the LEDs do not Check the power supply. light up. The LED lights up red (ERROR) and printing Check whether is an error in the software settings or is interrupted. the print commands. - Page 29 The printed image is blurred. Check the darkness setting. Check the thermal print head for glue residue or other dirt. The stripper is not functioning correctly. Check whether there is dust on the label dispenser. Check whether the label stock is positioned correctly. 【...
-
Page 30: Appendix
Appendix A. Printer interfaces USB port Connector type : Type B Pin No. Function VBUS... - Page 31 PXZ00082-00 PMC-1301...
Need help?
Do you have a question about the CL-S300 and is the answer not in the manual?
Questions and answers
не могу настроить печать термоэтикетки размером 20 на 30 мм на принтере cl-s300 Windows-7 64 разрядная система
To set up printing thermal labels sized 20x30 mm on a Citizen CL-S300 printer with a Windows 7 64-bit system, follow these steps:
1. Install the Printer Driver
- Connect the Citizen CL-S300 to your Windows 7 (64-bit) system via USB.
- Install the appropriate Windows driver for the printer.
2. Load the Labels
- Open the printer cover.
- Insert the 20x30 mm thermal labels, ensuring they are aligned correctly.
- Adjust the paper width guides to fit the label size.
- Close the printer cover.
3. Configure Printer Settings in Windows
- Open Devices and Printers from the Control Panel.
- Right-click on the Citizen CL-S300 printer and select Printing Preferences.
- Go to the Page Setup tab and set the label size to 20 mm x 30 mm.
- Ensure the print mode is set to Direct Thermal.
4. Adjust Printing Preferences
- Set the print resolution to 203 DPI.
- Configure the print speed (up to 4 inches per second) as needed.
- Enable Print Peel and Apply if required.
5. Test Print
- Print a test label from a Windows application to check alignment and quality.
This setup ensures proper label formatting and optimal printing performance.
This answer is automatically generated