
Related Manuals for LRS Freedom T7460


Summary of Contents for LRS Freedom T7460
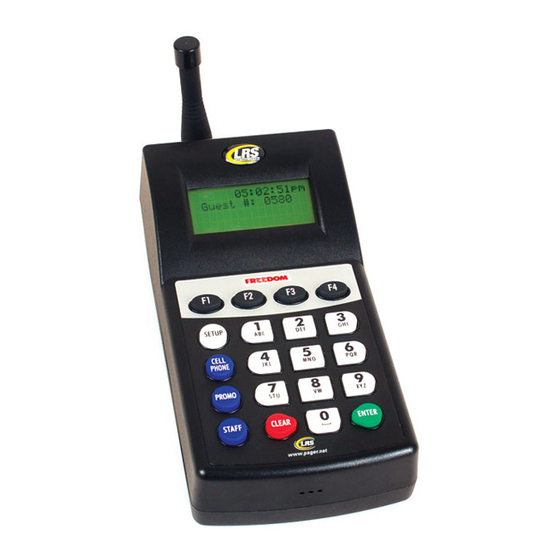
- Page 1 (T7460 Paging System Transmitter) U S E R M A N U A L Long Range Systems, Inc. 4550 Excel Parkway, Suite 200 ddison, TX 75001 800.437.4996 214.553.5308 • www.pager.net...
-
Page 2: Table Of Contents
Table Of Contents Compatible Pagers ............Installation and Setup . - Page 3 Freeform Staff Message ..........Display the Staff Prompt .
-
Page 4: Compatible Pagers
Compatible Pagers Customer Pagers: Staff Pagers: Coaster Call SP5 1-Line Rechargeable lphanumeric Pager www.pager.net lphanumeric Coaster Star Pager dverTeaser (Paddle)Pager RX-E 4-Line lphanumeric Pager (Battery Operated) www.pager.net Pizza Pager Lobster Pager ong Range Systems Freedom User Manual... -
Page 5: Installation And Setup
Installation and Setup Hardware Provided The system contains the transmitter keypad, an instruction booklet, an antenna, a strip of Velcro, rubber feet, and a 12-VDC power adapter. Notice: Operation is subject to the following: • This device may or may not cause interference. •... -
Page 6: Keypad Description
Keypad Description Before using the keypad, read the following keypad descriptions. Note: s the display changes, the keys may perform different functions. Setup Key F Keys The Setup key enables The F (function) keys are menus when checking or the first row of keys under changing the transmitter’s the display. -
Page 7: Basic Paging Operation Guide
Basic Paging Operation Guide The following are the most commonly used procedures for paging. Make sure that all rechargeable guest or staff pagers are not on the charging unit and all battery-operated pagers are turned on. Page Guest Pagers: Non- lphanumeric ( dverTeaser, Pizza, Lobster, Coaster Call pagers) 1. -
Page 8: Page A Cell Phone
ll Staff lpha Page: Page all staff pagers simultaneously. 1. Press STAFF. 2. Press 9-1-1 then ENTER. 3. Enter message number code (000-099). (see Canned Messages Table pg. 8). 4. Press ENTER to send page. 5. Choose F1 (V1), F2 (V2), F3 (V3) or F4 (Exit) for 1, 2 or 3 vibrations. ll Staff SP4 Page: 1. -
Page 9: Canned Message
Canned Message Code Message Phone Call Starter Door Sales Call Service drive Survey Manager Showroom T-nnn Q-mm Customer Parked Call Break Low battery Room Voice Mail Fire Error Visitor Dressing room Unit Exit Call Ext Price check Window MTG Room Department Nurse host... -
Page 10: Special Functions
Special Functions User Password All of the functions that adjust paging preferences are protected by a Password. • To reduce tampering with critical settings, the keypad is password protected. • The Password 56789 allows you to enter most restricted programming screens. •... -
Page 11: Tracking
Tracking This function allows the host to monitor which Guest or Staff pager has been paged, and continues paging, based on a user defined interval and run time setting. The pager number is cleared on the keypad unit when 36 am 36 am 36 am 36 am... -
Page 12: Group Paging
Interval The Interval defines how many seconds of time passes between pages. The default Interval is 10 seconds. The Interval can be set from 10-255 seconds. To set the Interval 1. Press SETUP and enter Password. 2. Press 1) system. 3. -
Page 13: Manager Mapping
Paging Groups 1. Enter the number for the pager or the group. • If only paging staff pagers and have the transmitter default set to Pager, enter the pager or group number directly. • If paging, default is set to Guest, press Staff before entering the pager or group number. 2. -
Page 14: Set Alarms
• Press F1 for Normally Open. T7460 Back View 8. Enter the pager number that will be pager when this event occurs (Pager Num = - - - - ) and press ENTER. 9. Enter a User Message: • Press F2 to create a new message, use the 1-9 keys to enter the text, and then press ENTER to Save. - Page 15 5. From the Alarm menu, select the number of the alarm to set (0 through 9) and press ENTER. 6. The Alarm Display screen shows the status of the selected alarm. Select Change (F1) to en- able/disable or modify the alarm. Note: If the alarm is already enabled as an interval alarm: •...
-
Page 16: Feature Setup Procedures
Feature Setup Procedures User Password All of the functions that adjust paging preferences are protected by a Password. • To reduce tampering with critical settings, the keypad is password protected. • The Password 56789 allows you to enter most restricted programming screens. •... -
Page 17: Set To Page Staff Or Guest Pagers
To turn lphanumeric Guest Paging Vibration On or Off: Select 2) Alphanumeric Vibe. Press F1 (yes) to turn Alphanumeric Vibration On of F2 (No) for Off. Manager Pager - Select: 1) Vibe 1 time. 2) Vibe 2 times. 3) Vibe 3 times. F2 (ON) 1) Vibe continuously. -
Page 18: Setting System Time/Date For Freedom Transmitter (T7460)
Setting Time and Date for Freedom Transmitter (T7460) Set Date: 1. Press SETUP and enter Password. 2. Press 3) Date/Time. 3. Press 3) Set Date. 4. Enter Date (MM/DD/YY) (e.g. March 11, 2010 = 03/11/10) and press ENTER. Set Time: 1. -
Page 19: Repeat Delay
Repeat Delay When using a repeater, it may be necessary to add a delay between pages when paging multiple pagers to allow the repeater time to repeat the signal and detect the next one. To add repeat delay: 1. Press SETUP. 2. -
Page 20: Guest Message
Guest Message The Guest Message is the default canned message sent to Guest Alpha Pagers. To change the message. 1. Press SETUP and enter Password. 2. Press 1 for 1) System. 3. Press F2 (DN) until 1)POCSAG-> is displayed. 4. Press 1 for 1)POCSAG->. 5. -
Page 21: Freeform Messages
Turning ON/OFF Canned Messages in Guest Display Prompt Note: For this feature to be used with Guest Paging, Display Prompt must be enabled. (See pg. 18). To write Freeform messages using the 0-9 keys or USB Keyboard into the Display Prompt, Canned Messages will need to be disabled. -
Page 22: Display The Staff Prompt
Display the Staff Prompt When paging Staff Alpha Pagers, the user is shown the prompt: Freedom Transmitter screen Display Select Page Mode MSG: 035 - - - - Out: Table Ready Exit To enable or disable seeing this prompt while paging, refer to pg. 20. Staff Message The Staff Message is the default canned message sent to Staff Alpha pagers. -
Page 23: Editing Canned Messages In Staff Display Prompt
Editing Canned Messages in Staff Display Prompt The user has the option of locking the canned message part of the Staff Display Prompt. Note: To change the Canned Messages, see Guest Messages on pg. 19. Example: If the user has Canned Messages Enabled, and Edit Message Enabled, in the Display Prompt of 035 123 “Table Ready 123”... -
Page 24: Maintenance Functions
Maintenance Functions Caution: The following features are not normally adjusted unless directed by LRS. Paging Types in Mixed Systems When using different types of pagers, be sure that alphanumeric pagers are numbered higher than the non- alphanumeric pagers. Setting Crossover Points This function is used to set the crossover points where non-alphanumeric end and alphanumeric pagers begin. -
Page 25: Locating Misplaced Pagers
power levels are 1 through 5. Default from the factory is power level 3. Reset only by direction from LRS. To set the power level: 1. Press SETUP and enter Password. 2. Press 1) System, press F2 (DN) until the display shows 2) Transmit Power. 5. -
Page 26: Cell Phone Paging/Messaging
Cell Phone Paging/Messaging Overview The Cell Phone interface is used to extend the capability of the on-premise paging system allowing you to notify people on their cell phones. Cell phone paging is an optional service. This service is not required for normal over-the-air UHF paging op- erations. -
Page 27: Cell Phone Status
1. Press 2) Static. 2. Enter IP Address to assign for the Freedom Transmitter on Network and press ENTER. 3. Enter Netmask address for the Freedom TransmitterT7460 on Network and press ENTER. 4. Enter default gateway address for the Freedom Transmitter on Network and press ENTER. 5. -
Page 28: Programming Pagers
Programming Pagers Pager numbering and mode setup is used to renumber or set up individual pagers. Note: Be sure to refer back to “Paging Types in Mixed Systems” section to ensure that pagers are programmed using appropriate crossover points. Individual Pagers Note: Rechargeable pagers can have their System ID’s changed or their vibration turned on or off as a group. - Page 29 3. At the Select Type menu, press 1 (1: Guest Pagers). 4. Enter Pager Number and press ENTER. 5. Remove the coaster from the charger. 6. When flashing stops, press ENTER. 7. The pager will beep four times to indicate it is being programmed and the screen will display: Example: System ID = 0, Pager ID Number = 99, All Page = 911 •...
-
Page 30: Program Pager Groups
• Prg C3: [0]0 10. Return the Pager to the Charger when Programming is complete. 11. Repeat Steps 2 through 10 for the remaining Pagers. 12. When finished, remove Pagers from the Charger and Page each one. 13. Reprogram any Pagers that do not page. Staff Pagers (Battery Operated lpha Pagers) This procedure is repeated for each pager being programmed. -
Page 31: Alpha Encryption
• Prg System [0]0 • Group [1] 1 • Group [2] 2 9. Return the Pager to the Charger when done (If rechargeable). 10. Repeat steps 2 through 8 for the remaining Pagers. 11. When finished, remove Pagers from the Charger and Page each one. 12. -
Page 32: Program Pager Vibration
• The unit will wait 5 seconds and send out the signal. • The screen will display “prg encryption none” (or 128 bit key) then “Transmitting Key”. • Continue this procedure with the remaining pagers. Program Pager Vibration The Program Vibration feature can program a set of Guest or Staff Pagers all at once to Vibrate or not Vibrate when paged. -
Page 33: System Specifications
System Specifications Notice - Operation is subject to the following: • This device may cause interference. • This device will accept any interference including interference that may cause undesired oper- ation of the unit. Notice - To reduce potential radio interference to other users, the antenna type and gain should be so chosen that the equivalent isotropically radiated power (EIRP) is not more than required for successful communication. -
Page 34: Troubleshooting
Troubleshooting Display Shows Nothing Be sure power supply is plugged in. • If yes – Be sure power supply is good. Substitute the transmitter power supply with the charger supply. – Be sure the outlet circuit is on. – Unplug and re-plug a few times to be sure the unit doesn’t need a reset. •... -
Page 35: Service Questions And Nswers
Service Questions and Answers Should your paging system ever fail or should you need additional paging equipment, call Long Range Systems at (800) 437-4996 or (214) 553-5308 (24/7 days a week) For weekend or night emergencies: • Long Range Systems has 24/7 live technical support available. •... - Page 36 Set OFF 1. Using the UP (or DN) scroll button scroll until display shows “Power OFF?” 2. Press Read/Select button to set power on/off 3. At “Power OFF?” screen, use UP (or DN) Scroll button to select YES 4. Press Read/Select button to set Read Message lphanumeric Pager Screen Read All...
- Page 37 4. Press UP (or DN) scroll button to set on/off time and press Read/Select to move through the segments. Set Key Tone On/Off 1. Using the UP (or DN) scroll button scroll until display shows “Set Key Tone”. 2. Press Read/Select to set key tone on/off. 3.
-
Page 38: Using The Star Pager
Using the Star Pager Charging Any rechargeable pager will require use of an LRS charger. 1. Place the pager in the charger. 2. Allow unit to fully charge overnight. 3. Remove from charger, and pager will vibrate and light all lights as a verification that it is working. 4. - Page 39 SP5 Pager Screen VIBE CONTRAST If you PRESS and RELEASE the SP5 pager button the menu will change to: SP5 Pager Screen VIBE CONTRAST To exit this menu wait 8 seconds. To re-enter the vibe/contrast menu at any time, reset the pager, and then hold the SP5 pager button. Vibe To set the Vibration Level 1.
-
Page 40: Using The Non-Alphanumeric Guest
Settings To view the current pager settings 1. Remove pager from the charger or reset on the T9601, T9100, or T9101 reset terminals. 2. Press the Select Button repeatedly to scroll through the settings: C1: [System ID number] and Pager ID number C2: [System ID number] and All Page number C3: [System ID number] and System ID number G: Group number... -
Page 41: Using The Alphanumeric Coaster Guest
The pagers all use different chargers: • Coasters use the Charger 8 (CH-R8). • AdverTeasers and Star Pagers use the Charger 9 (CH-R9). • Lobster Pagers use the Lobster Charger (CH-LP). • Pizza Pagers use the Pizza Charger (CH-PZ). Programming To program the pager see pg. -
Page 42: Cleaning & Charging Instructions For Lrs Paging Equipment
Cleaning & Charging Instructions For LRS Paging Equipment Cleaning: LRS pagers are made from industrial-strength, polycarbonate material. However, this material is sus- ceptible to hairline cracking if non-approved cleaners are used. When cleaning LRS pagers, we recom- mend only using ISOPROPYL ALCOHOL-BASED CLEANERS. To clean the equipment: 1. -
Page 43: Warranty
Warranty Long Range Systems Inc warrants this product against any defects that are due to faulty material or workmanship for a two-year period after the original date of consumer purchase. The warranty does not include damage to the product re- sulting from accident, misuse, improper electrical connection, or failure to charge the product within 30 days of receipt.
Need help?
Do you have a question about the Freedom T7460 and is the answer not in the manual?
Questions and answers