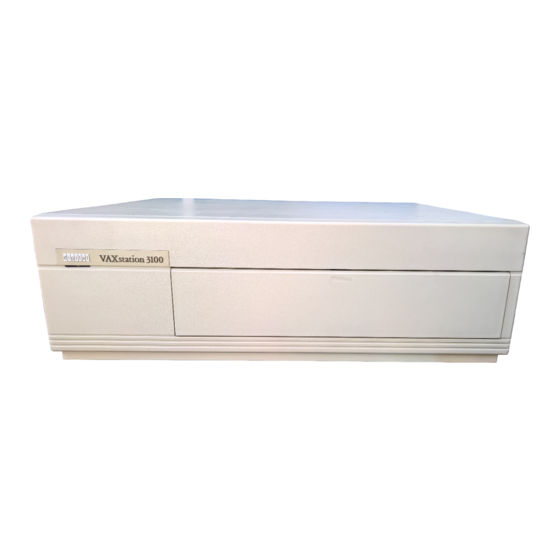
Digital Equipment VAXstation 3100 Upgrade Installation Manual
Upgrading model 30 to 38 and model 40 to 48
Hide thumbs
Also See for VAXstation 3100:
- Maintenance manual (280 pages) ,
- Maintenance manual (128 pages) ,
- Maintenance manual (89 pages)

Subscribe to Our Youtube Channel
Related Manuals for Digital Equipment VAXstation 3100


Summary of Contents for Digital Equipment VAXstation 3100
- Page 1 VAXstation 3100 Upgrade Installation Guide Models 30 to 38 Models 40 to 48 Order Number EK-345AA-IN-002 digital equipment corporation maynard, massachusetts...
- Page 2 Second Edition, January 1990 The information in this document is subject to change without notice and should not be construed as a commitment by Digital Equipment Corporation. Digital Equipment Corporation assumes no responsibility for any errors that may appear in this document.
-
Page 3: Table Of Contents
Contents About This Guide Upgrading a Diskless Model 30 PV11U-AA Kit Contents ......Preparing the System for Installation . - Page 4 iv Contents Upgrading a Model 30 (With Diskette) PV11U-BA Kit Contents ......Preparing the System for Installation .
- Page 5 Contents v Tables Related Documents ....... . viii 3–1 RX23 SCSI ID Switch Settings ..... . .
-
Page 6: About This Guide
This installation guide describes how to install the upgrade options that are available for the VAXstation 3100 systems. The upgrade is available on both the model 30 and model 40 VAXstation 3100 systems. The VAXstation system becomes a VAXstation 3100 system models 38 and 48 once the upgrade is complete. -
Page 7: Tools And Equipment
About This Guide Tools and Equipment You need the following tools to service the VAXstation 3100 systems: Tools and Equipment Part Number Wrist strap and antistatic mat (included in Field Service 29-26246-00 antistatic kit) Related Documents You can order the following documents from Digital:... - Page 8 About This Guide ix Conventions This document uses the following conventions: Convention Meaning Note Provides general information Caution Provides information to prevent damage to the equipment Part number...
-
Page 9: Pv11U-Aa Kit Contents
Upgrading a Diskless Model 30 This chapter contains installation procedures for upgrading a diskless VAXstation 3100 model 30 system to a diskless VAXstation 3100 model 38 system. 1.1 PV11U-AA Kit Contents The following table lists the contents and part numbers of the PV11U-AA... -
Page 10: Preparing The System For Installation
2 Upgrading a Diskless Model 30 1.2 Preparing the System for Installation To prepare the system for installation: Shut Down the System 1. Shut down the system software. 2. Run a self-test to verify the operation of the present configuration. >>>... - Page 11 Upgrading a Diskless Model 30 3 1. Unscrew the two cover screws. C O V E R S C R E W L O C A T I O N S M A - X 0 7 9 6 - 8 8 2.
- Page 12 4 Upgrading a Diskless Model 30 Remove the Memory Module Remove the memory module from the four standoffs, then lift the memory module off the system module. Two connectors will disconnect as you lift the module. M E M O R Y M O D U L E M A - X 0 8 0 4 - 8 8...
- Page 13 Upgrading a Diskless Model 30 5 Remove the Graphic Module (if present) Remove the graphic module from the four standoffs, then lift the graphic module off the system module. Two connectors will disconnect as you lift the module. G R A P H I C S M O D U L E M A - X 0 8 0 3 - 8 8 Remove the System Module...
- Page 14 6 Upgrading a Diskless Model 30 NOTE Before disconnecting the power cable in the next step, be sure to release the connector latch on the back side of the power connector. 2. Disconnect the power cable and the battery cable from the system module.
-
Page 15: Installing The Modules
Upgrading a Diskless Model 30 7 5. Remove the Ethernet ID ROM from the system module you just removed. Set the ROM aside. E t h e r n e t I D R O M K e y E t h e r n e t I D R O M MLO-002918 M A - X 0 8 7 2 - 8 9... - Page 16 8 Upgrading a Diskless Model 30 1. Check the position of the S3 switch next to the LEDs on the back of the system module. Be sure S3 is in the down position. The down position enables the monitor to be the console, and the up position enables a terminal connected to the printer port to be the console.
- Page 17 Upgrading a Diskless Model 30 9 Reinstall the Memory Module Install the memory module(s) on the new system module as shown in the following two figures. The first figure is for 4 or 12 Mbyte (single) memory module; the second figure is for 8 or 16 Mbyte (dual) memory module. After the module(s) are installed, press down on top of the module’s connectors to firmly seat the connectors.
- Page 18 10 Upgrading a Diskless Model 30 8 or 16 Mbyte (dual) Memory Module Installation 8 O R 1 6 M B Y T E M E M O R Y M O D U L E S Y S T E M M O D U L E "...
- Page 19 Upgrading a Diskless Model 30 11 Reinstall the Graphic Module (if present) Reinstall the graphics module on the new system module. After the module is installed, press down on top of the module’s connectors to firmly seat the connectors. GRA P HI CS M OD UL E M A - X 0 8 0 3 - 8 8 A...
-
Page 20: Replacing The Power Supply Screws
12 Upgrading a Diskless Model 30 1.4 Replacing the Power Supply Screws To replace the power supply screws: 1. Remove the two phillips-head screws from the side of the power supply. 2. Install two of the three torx-head power supply safety screws (PN 12-30934-01) from the kit into the side of the power supply using the torx-head screwdriver. -
Page 21: Installing The New Bezel Insert
Upgrading a Diskless Model 30 13 1.5 Installing the New Bezel Insert To install the new bezel insert: 1. Remove the six screws on the cover of the system box, and remove the front bezel from the cover. P H I L L I P S S C R E W S M A - X 0 5 1 7 - 8 9... - Page 22 3. Install the new bezel insert from the kit on the front bezel by reversing steps 1 and 2. 4. Remove the VAXstation 3100 medallion from the system box cover. 5. Install the new VAXstation 3100 M 38 medallion from the kit in the cover.
-
Page 23: Installing The Upgrade Label
1.8 Completing the Installation The VAXstation 3100 replaced components as well as the excess materials (if any) from the upgrade kit are the property of Digital. You and the customer will need to fill out the upgrade forms in Appendix A and return... -
Page 24: Upgrading A Model 30 (No Diskette)
Upgrading a Model 30 (No Diskette) This chapter contains installation procedures for upgrading a VAXstation 3100 model 30 system without a diskette drive to a VAXstation 3100 model 38 system without a diskette drive. 2.1 PV11U-CA Kit Contents The following table lists the contents and part numbers of the PV11U-CA... -
Page 25: Preparing The System For Installation
Upgrading a Model 30 (No Diskette) Kit Item Part Number Two TZ30 plate mounting screws 90-09984-07 2.2 Preparing the System for Installation To prepare the system for installation: Shut Down the System 1. Shut down the system software. 2. Run a self-test to verify the operation of the present configuration. >>>... - Page 26 18 Upgrading a Model 30 (No Diskette) 1. Unscrew the two cover screws. C O V E R S C R E W L O C A T I O N S M A - X 0 7 9 6 - 8 8 2.
- Page 27 Upgrading a Model 30 (No Diskette) Remove the Drive Mounting Plate 1. Disconnect the power cable from the power supply and disconnect the cable on the mass storage controller (MSC) module that goes to the system module. M S C C A B L E P O W E R C A B L E S Y S T E M M O D U L E...
- Page 28 20 Upgrading a Model 30 (No Diskette) 3. Unscrew the four captive screws, loosen the three panhead screws, and remove the drive mounting plate. C A P T I V E S C R E W S ( 4 ) D R I V E P L A T E P A N H E A D S C R E W S...
- Page 29 Upgrading a Model 30 (No Diskette) Remove the Memory Module Remove the memory module from the four standoffs, then lift the memory module off the system module. Two connectors will disconnect as you lift the module. M E M O R Y M O D U L E M A - X 0 8 0 4 - 8 8...
- Page 30 22 Upgrading a Model 30 (No Diskette) Remove the Graphic Module (if present) Remove the graphic module from the four standoffs, then lift the graphic module off the system module. Two connectors will disconnect as you lift the module. G R A P H I C S M O D U L E M A - X 0 8 0 3 - 8 8...
- Page 31 Upgrading a Model 30 (No Diskette) Remove the System Module 1. Disconnect all cables from the back of the system box. 2. Disconnect the MSC cable from the system module. M S C C O N N E C T O R M A - X 0 5 1 4 - 8 9...
- Page 32 24 Upgrading a Model 30 (No Diskette) NOTE Before disconnecting the power cable in the next step, be sure to release the connector latch on the back side of the power connector. 3. Disconnect the power cable and the battery cable from the system module.
- Page 33 Upgrading a Model 30 (No Diskette) 6. Remove the Ethernet ID ROM from the system module you just removed. Set the ROM aside. E t h e r n e t I D R O M K e y E t h e r n e t I D R O M MLO-002918 M A - X 0 8 7 2 - 8 9...
-
Page 34: Installing The Modules
26 Upgrading a Model 30 (No Diskette) 2.3 Installing the Modules To install the modules: Install the New System Module NOTE When installing the new system module, install the connector end first through the openings in the rear of the box. Push the module back to load the connector ground tabs. - Page 35 Upgrading a Model 30 (No Diskette) 3. Install the eight screws on the system module. P O W E R C A B L E P A N H E A D S C R E W S ( 5 ) L O C A T I N G S T A N D O F F G R O U N D...
- Page 36 28 Upgrading a Model 30 (No Diskette) Reinstall the Memory Module Install the memory module(s) on the new system module as shown in the following two figures. The first figure is for 4 or 12 Mbyte (single) memory module; the second figure is for 8 or 16 Mbyte (dual) memory module. After the module(s) are installed, press down on top of the module’s connectors to firmly seat the connectors.
- Page 37 Upgrading a Model 30 (No Diskette) 8 or 16 Mbyte (dual) Memory Module Installation 8 O R 1 6 M B Y T E M E M O R Y M O D U L E S Y S T E M M O D U L E "...
-
Page 38: Upgrading A Diskless Model
30 Upgrading a Model 30 (No Diskette) Reinstall the Graphic Module (if present) Reinstall the graphics module on the new system module. After the module is installed, press down on top of the module’s connectors to firmly seat the connectors. GRA P HI CS M OD UL E M A - X 0 8 0 3 - 8 8 A... -
Page 39: Installing The New Drive Plate
Upgrading a Model 30 (No Diskette) 2.4 Installing the New Drive Plate To install the new drive plate: 1. Connect the MSC cable to the new system module. M S C C O N N E C T O R M A - X 0 5 1 4 - 8 9... - Page 40 32 Upgrading a Model 30 (No Diskette) 2. Loosen the three slide mount screws on the side of the new drive plate. 3. Remove the SCSI terminator from the MSC module on the drive plate. 4. Position the drive plate on the system box, making sure that the MSC cable is not trapped under the drive plate.
-
Page 41: Configuring The Drives On The New Drive Plate
Upgrading a Model 30 (No Diskette) 2.5 Configuring the Drives on the New Drive Plate Determine where you will install the drives on the drive plate as follows: Then You are reinstalling one RZ22/RZ23 the RZ22/RZ23 should be in position 3 drive with the TZ30 tape drive with the TZ30 in position 2. -
Page 42: Installing The Rz22/Rz23 Disk Drive(S)
34 Upgrading a Model 30 (No Diskette) System Back Position 1 SCSI Mass Storage Controller Module Position 4 RZ23 Hard Disk Position 2 RZ23 Hard Disk Position 3 RZ23 Hard Disk System Front MLO-003329 M A - X 0 8 7 4 - 8 9 2.6 Installing the RZ22/RZ23 Disk Drive(s) To install the RZ22/RZ23 disk drive(s): Mount the Drives... - Page 43 Upgrading a Model 30 (No Diskette) 2. Insert the drive (with the power connector towards the front) on the four keyhole slide mount openings in its proper position on the drive plate. NOTE If you are mounting a drive in position 4, you need to remove the MSC module for access to the drive’s mounting holes.
- Page 44 36 Upgrading a Model 30 (No Diskette) Cable the Drives The following figure shows the five connectors of the new power cable from the kit. The connectors are numbered for reference. 1. Connect the male connector to the power supply. SCSI Mass Storage Controller Module Power Supply Cable...
- Page 45 Upgrading a Model 30 (No Diskette) 3. If the larger (100 pin) end of the SCSI signal cable is not already connected to the SCSI port A on the MSC module, then connect it now. SCSI Port A SCSI Mass Storage Controller Module SCSI Signal Cable RZ23 Hard Disk...
-
Page 46: Installing The Tz30 Tape Drive
38 Upgrading a Model 30 (No Diskette) 2.7 Installing the TZ30 Tape Drive To install the TZ30 tape drive: Mount the Drive 1. Install four metric screw/grommets (PN 12-31734-02) on the bottom of the TZ30 tape drive. 2. Install the TZ30 plate on the left side of the drive, using one of the two TZ30 plate mounting screws. - Page 47 Upgrading a Model 30 (No Diskette) 4. Insert the TZ30 tape drive on the four keyhole slide mount openings on the drive plate. Mount TZ30 Tape Drive Keyhole Slide Mount Drive Plate Lever SCSI Mass Storage Controller Module MLO-002891 M A - X 0 8 5 6 - 8 9 5.
-
Page 48: Upgrading The Model
40 Upgrading a Model 30 (No Diskette) Cable the Drive 1. If you have not already connected the power cable’s male connector to the power supply in the previous section, then connect it now. 2. Connect the number connector on the power cable to the TZ30 tape drive. - Page 49 Upgrading a Model 30 (No Diskette) 3. Connect the SCSI signal cable (PN 17-02439-01) to the TZ30 tape drive. SCSI Signal Cable Connector SCSI Port A SCSI Signal Cable SCSI Mass Storage Controller Module TZ30 Tape Drive MLO-002893 M A - X 0 8 5 8 - 8 9 4.
- Page 50 42 Upgrading a Model 30 (No Diskette) Install the New Bezel Insert 1. On the cover of the system box, remove the six screws and remove the front bezel from the cover. P H I L L I P S S C R E W S M A - X 0 5 1 7 - 8 9 2.
-
Page 51: Replacing The Power Supply Screws
1 and 2. 4. Remove the VAXstation 3100 medallion from the system box cover. 5. Install the new VAXstation 3100 M 38 medallion from the kit in the cover. 6. Reinstall the front bezel on the cover and reinstall the six screws. -
Page 52: Changing The Medallion
2. Remove the VAXstation 3100 medallion from the system box cover. 3. Install the new VAXstation 3100 M 38 medallion from the kit in the cover. 4. Reinstall the front bezel on the cover and reinstall the six screws. -
Page 53: Upgrading A Model 30 (With Diskette)
Upgrading a Model 30 (With Diskette) This chapter contains installation procedures for upgrading a VAXstation 3100 model 30 system that contains a diskette drive to a VAXstation 3100 model 38 system with a diskette drive. 3.1 PV11U-BA Kit Contents The following table lists the contents and part numbers of the PV11U-BA... -
Page 54: Preparing The System For Installation
46 Upgrading a Model 30 (With Diskette) Kit Item Part Number RX23 bezel 12-32364-01 RX23 eject button 12-32363-01 3.2 Preparing the System for Installation To prepare the system for installation: Shut Down the System 1. Shut down the system software. 2. - Page 55 Upgrading a Model 30 (With Diskette) 47 1. Unscrew the two cover screws. C O V E R S C R E W L O C A T I O N S M A - X 0 7 9 6 - 8 8 2.
- Page 56 48 Upgrading a Model 30 (With Diskette) Remove the Drive Mounting Plate 1. Disconnect the power cable from the power supply and disconnect the cable on the mass storage controller (MSC) module that goes to the system module. M S C C A B L E P O W E R C A B L E S Y S T E M M O D U L E...
- Page 57 Upgrading a Model 30 (With Diskette) 49 3. Unscrew the four captive screws, loosen the three panhead screws, and remove the drive mounting plate from the system box. C A P T I V E S C R E W S ( 4 ) D R I V E P L A T E P A N H E A D...
- Page 58 50 Upgrading a Model 30 (With Diskette) Remove the Memory Module Remove the memory module from the four standoffs, then lift the memory module off the system module. Two connectors will disconnect as you lift the module. M E M O R Y M O D U L E M A - X 0 8 0 4 - 8 8...
- Page 59 Upgrading a Model 30 (With Diskette) 51 Remove the Graphic Module (if present) Remove the graphic module from the four standoffs, then lift the graphic module off the system module. Two connectors will disconnect as you lift the module. G R A P H I C S M O D U L E M A - X 0 8 0 3 - 8 8...
- Page 60 52 Upgrading a Model 30 (With Diskette) Remove the System Module To remove the system module: 1. Disconnect all cables from the back of the system box. 2. Disconnect the MSC cable from the system module. M S C C O N N E C T O R M A - X 0 5 1 4 - 8 9...
- Page 61 Upgrading a Model 30 (With Diskette) 53 NOTE Before disconnecting the power cable in the next step, be sure to release the connector latch on the back side of the power connector. 3. Disconnect the power cable and the battery cable from the system module.
-
Page 62: Installing The Modules
54 Upgrading a Model 30 (With Diskette) 6. Remove the Ethernet ID ROM from the system module you just removed. Set the ROM aside. E t h e r n e t I D R O M K e y E t h e r n e t I D R O M MLO-002918... - Page 63 Upgrading a Model 30 (With Diskette) 55 1. Check the position of the S3 switch next to the LEDs on the back of the system module. Be sure S3 is in the down position (the down position enables the monitor to be the console and the up position enables a terminal connected to the printer port to be the console).
- Page 64 56 Upgrading a Model 30 (With Diskette) Reinstall the Memory Module Install the memory module(s) on the new system module as shown in the following two figures. The first figure is for 4 or 12 Mbyte (single) memory module installation; the second figure is for 8 or 16 Mbyte (dual) memory module installation.
- Page 65 Upgrading a Model 30 (With Diskette) 57 8 or 16 Mbyte (dual) Memory Module Installation 8 O R 1 6 M B Y T E M E M O R Y M O D U L E S Y S T E M M O D U L E "...
- Page 66 58 Upgrading a Model 30 (With Diskette) Reinstall the Graphic Module (if present) Reinstall the graphics module on the new system module as shown in the following figure. After the module is installed, press down on top of the module’s connectors to firmly seat the connectors. GRA P HI CS M OD UL E M A - X 0 8 0 3 - 8 8 A...
-
Page 67: Installing The New Drive Plate
Upgrading a Model 30 (With Diskette) 59 3.4 Installing the New Drive Plate To install the new drive plate: 1. Connect the MSC cable to the new system module. M S C C O N N E C T O R M A - X 0 5 1 4 - 8 9... - Page 68 60 Upgrading a Model 30 (With Diskette) 2. Loosen the three slide mount screws on the side of the drive plate. 3. Remove the SCSI terminator from the MSC module on the drive plate. 4. Position the drive plate on the system box making sure that the MSC cable is not trapped under the drive plate.
-
Page 69: Configuring The Drives On The New Drive Plate
Upgrading a Model 30 (With Diskette) 61 3.5 Configuring the Drives on the New Drive Plate Determine where you will install the drives on the drive plate as follows: Then You are reinstalling one RZ22/RZ23 drive the RZ22/RZ23 should be in with the RX23 diskette drive position 3 with the RX23 in position 2. -
Page 70: Installing The Rz22/Rz23 Disk Drive(S)
62 Upgrading a Model 30 (With Diskette) 3.6 Installing the RZ22/RZ23 Disk Drive(s) To install the RZ22/RZ23 disk drive(s): Mount the Drives 1. Install four screw/grommets (PN 12-31734-01) on the bottom of the RZ22/RZ23 drive. 2. Insert the drive (with the power connector towards the front) on the four keyhole slide mount openings in its proper position on the drive plate. - Page 71 Upgrading a Model 30 (With Diskette) 63 3. Press the RZ23 hard disk down and slide it in the keyhole slide mount openings to lock it on the drive plate. The drive plate lever should pop up to lock the drive in place. 4.
- Page 72 64 Upgrading a Model 30 (With Diskette) 3. If the larger (100 pin) end of the SCSI signal cable is not already connected to the SCSI port A on the MSC module, then connect it now. SCSI Port A SCSI Mass Storage Controller Module SCSI Signal Cable RZ23 Hard Disk...
-
Page 73: Installing The Rx23 Diskette Drive
Upgrading a Model 30 (With Diskette) 65 3.7 Installing the RX23 Diskette Drive To install the RX23 diskette drive: Assemble the RX23 SCSI adapter assembly 1. Remove the old adapter bracket from the RX23 diskette drive. 2. Install the eject button on the RX23 drive. NOTE Before performing the next step, check the serial number on the RX23 drive. - Page 74 66 Upgrading a Model 30 (With Diskette) Mounting Screws (2) Mounting Screws (2) Switches Positions: SCSI ID 5 Up (Off) Down (On) 1 2 3 MLO-002886 M A - X 0 8 5 1 - 8 9 2. Use a pen or small pointed object to move the switches up or down as necessary to set the switches to the following positions: Switch 1 = down (on) Switch 2 = up (off)
- Page 75 Upgrading a Model 30 (With Diskette) 67 Mount the RX23 SCSI Adapter Assembly 1. Install four screw/grommets on the bottom of the drive. 2. Tuck the SCSI B port terminator cable under the MSC module. This cable terminates the SCSI B port and does not connect to any internal drives.
- Page 76 68 Upgrading a Model 30 (With Diskette) Cable the RX23 SCSI Adapter Assembly The following figure shows the cable connectors numbered for reference. 1. If you have not already connected the male connector to the power supply in the previous sections, then connect it now. 2.
- Page 77 Upgrading a Model 30 (With Diskette) 69 4. Connect the SCSI signal cable (PN 17-02439-01) to the RX23 SCSI adapter module. 50-Pin Connector 100-Pin Connector Cable Key Cable Key Attach SCSI Signal Cable Attach SCSI Signal Cable SCSI Mass Storage Controller Module SCSI Signal Cable Additional...
-
Page 78: Replacing The Power Supply Screws
70 Upgrading a Model 30 (With Diskette) 3.8 Replacing the Power Supply Screws To replace the power supply screws: 1. Remove the two phillips-head screws from the side of the power supply. 2. Install two of the three torx-head power supply safety screws (PN 12-30934-01) from the kit into the side of the power supply using the torx-head screwdriver. -
Page 79: Installing The New Bezel Window
Upgrading a Model 30 (With Diskette) 71 3.9 Installing the New Bezel Window To install the new bezel window: 1. On the cover of the system box, remove the six screws and remove the front bezel from the cover. P H I L L I P S S C R E W S M A - X 0 5 1 7 - 8 9 2. - Page 80 1 and 2. 4. Remove the VAXstation 3100 medallion from the system box cover. 5. Install the new VAXstation 3100 M 38 medallion from the kit in the cover. 6. Reinstall the front bezel on the cover and reinstall the six screws.
-
Page 81: Installing The Upgrade Label
3.12 Completing the Installation The VAXstation 3100 replaced components as well as the excess materials (if any) from the upgrade kit are the property of Digital. You and the customer will need to fill out the upgrade forms in Appendix A and return... -
Page 82: Pv15U-Aa Kit Contents
Upgrading the Model 40 This chapter contains installation procedures for upgrading a VAXstation 3100 model 40 system to a VAXstation 3100 model 48 system. 4.1 PV15U-AA Kit Contents The following table lists the contents and part numbers of the PV15U-AA... -
Page 83: Preparing The System For Installation
Upgrading the Model 40 4.2 Preparing the System for Installation To prepare the system for installation: Shut Down the System 1. Shut down the system software. 2. Run a self-test to verify the operation of the present configuration. >>> TEST F 1 3. - Page 84 76 Upgrading the Model 40 1. Unscrew the two cover screws. C O V E R S C R E W L O C A T I O N S M A - X 0 8 1 3 - 8 8 2.
- Page 85 Upgrading the Model 40 1. Disconnect the power cables and the SCSI bus cables from the drives on the upper drive plate. P O W E R A - B U S S Y S T E M M O D U L E B - B U S M S C M O D U L E...
- Page 86 78 Upgrading the Model 40 2. Remove the RRD40 adapter module from the four standoffs (if installed). 3. Unscrew the five screws on the upper drive mounting panel and lift the top panel from the lower panel. C A P T I V E S C R E W S ( 2 ) U P P E R...
- Page 87 Upgrading the Model 40 Remove the Lower Drive Plate 1. Disconnect the power cable from the TZ30 tape drive (if installed) and disconnect the mass storage controller (MSC) cable. P O W E R D A T A S Y S T E M M O D U L E M S C M O D U L E S C S I - B...
- Page 88 80 Upgrading the Model 40 2. Unscrew the seven screws. L O W E R D R I V E M O U N T I N G P A N E L C A P T I V E S C R E W ( 1 ) C A P T I V E...
- Page 89 Upgrading the Model 40 Remove the Memory Module Remove the memory module from the four standoffs, then lift the memory module off the system module. Two connectors will disconnect as you lift the module. M E M O R Y M O D U L E M A - X 0 8 4 8 - 8 8...
- Page 90 82 Upgrading the Model 40 Remove the Graphic Module (if present) Remove the graphic module from the four standoffs, then lift the graphic module off the system module. Two connectors will disconnect as you lift the module. G R A P H I C S M O D U L E M A - X 0 8 4 7 - 8 8...
- Page 91 Upgrading the Model 40 Remove the System Module 1. Disconnect all cables from the back of the system box. 2. Disconnect the MSC cable from the system module. NOTE Before disconnecting the power cable in the next step, be sure to release the connector latch on the back side of the power connector.
-
Page 92: Installing The Modules
84 Upgrading the Model 40 CAUTION In the next step, be careful not to bend the pins on the Ethernet ID ROM. 5. Remove the Ethernet ID ROM from the system module you removed. Check the position of pin 1 (notched) on the ROM. Install the ID ROM on the new system module in the kit. - Page 93 Upgrading the Model 40 1. Check the position of the S3 switch next to the LEDs on the back of the system module. Be sure S3 is in the down position (the down position enables the monitor to be the console and the up position enables a terminal connected to the printer port to be the console).
- Page 94 86 Upgrading the Model 40 Reinstall the Memory Module Install the memory module(s) on the new system module as shown in the following two figures. The first figure is for 4 or 12 Mbyte (single) memory module installation; the second figure is for 8 or 16 Mbyte (dual) memory module installation.
- Page 95 Upgrading the Model 40 8 or 16 Mbyte Memory Module Installation 8 O R 1 6 M B Y T E M E M O R Y M O D U L E S Y S T E M M O D U L E "...
- Page 96 88 Upgrading the Model 40 Reinstall the Graphics Module (if present) Reinstall the graphics module on the new system module. After the module is installed, press down on top of the module’s connectors to firmly seat the connectors. GR A P HI C S MODU L E M A - X 0 8 4 7 - 8 8 A...
- Page 97 Upgrading the Model 40 Reinstall the Lower Drive Plate 1. Connect the MSC cable to the new system module. 2. Position the lower drive mounting plate and tighten the seven screws. L O W E R D R I V E M O U N T I N G P A N E L C A P T I V E...
- Page 98 90 Upgrading the Model 40 4. Connect the SCSI bus cables and the power cables to the TZ30 (if installed) and connect the power cable to the RRD40 compact disk drive. P O W E R D A T A S Y S T E M M O D U L E M S C M O D U L E...
- Page 99 Upgrading the Model 40 Reinstall the Upper Drive Plate 1. Position the upper mounting drive plate on the system box and tighten the five screws. R R D 4 0 C A P T I V E C O N T R O L L E R S C R E W S B O A R D ( 2 )
- Page 100 92 Upgrading the Model 40 Reconnect the Upper Drive Plate Cables Connect the SCSI bus cables and the power cables to any and all RZ23s and connect the SCSI bus to the RRD40 adapter module. P O W E R A - B U S S Y S T E M M O D U L E B - B U S...
-
Page 101: Replacing The Msc Module
4. Mount the RRD40 adapter module on the four standoffs. 4.5 Changing the Medallion To change the medallion: 1. Remove the VAXstation 3100 medallion from the system box cover. 2. Install the new VAXstation 3100 M 48 medallion from the kit in the cover. -
Page 102: Installing The Upgrade Label
4.8 Completing the Installation The VAXstation 3100 replaced components as well as the excess materials (if any) from the upgrade kit are the property of Digital. You and the customer will need to fill out the upgrade forms in Appendix A and return... -
Page 103: Upgrade And Return Forms
Upgrade and Return Forms The Customer Service Engineer who performs the upgrade must complete two of the three types of forms in this Appendix. The third form must be completed by both the customer and the Customer Service Engineer as decscribed below. - Page 104 96 Upgrade and Return Forms CUSTOMER SERVICE UPGRADE WORKSHEET This form acts as a verification of the work performed on the system and as a check on the procedures used. It can also be used for repricing the customer’s service contract. Return this form to your local contracts administration office for processing.
- Page 105 Upgrade and Return Forms 97...
- Page 106 PHONE NUMBER: CUSTOMER DEC NUMBER: CUSTOMER CONTACT: CUSTOMER ADDRESS: CUSTOMER PHONE NUMBER: SYSTEM UPGRADED: VAXstation 3100 Model 30 ____ VAXstation 3100 Model 40 ____ (check one) DATE INSTALLATION PERFORMED: MODULES PACKAGED FOR RETURN: (fill in appropriate lines) MODULE SERIAL NUMBER...
- Page 107 Upgrade and Return Forms 99...
- Page 108 PHONE NUMBER: CUSTOMER DEC NUMBER: CUSTOMER CONTACT: CUSTOMER ADDRESS: CUSTOMER PHONE NUMBER: SYSTEM UPGRADED: VAXstation 3100 Model 30 ____ VAXstation 3100 Model 40 ____ (check one) DATE INSTALLATION PERFORMED: MODULES PACKAGED FOR RETURN: (fill in appropriate lines) MODULE SERIAL NUMBER...
- Page 109 Upgrade and Return Forms 101...
- Page 110 102 Upgrade and Return Forms RETURNS MATERIAL CHECKLIST This form must be filled out and returned with the old modules/hardware in order to clear the customer’s account. DATE RETURN AUTHORIZATION NUMBER: CUSTOMER DEC NUMBER: CUSTOMER (COMPANY) NAME: CUSTOMER ADDRESS: CUSTOMER CONTACT: CUSTOMER TELEPHONE NUMBER: Include This Form With the Modules/Hardware Returned...
- Page 111 Upgrade and Return Forms 103...
- Page 112 104 Upgrade and Return Forms RETURNS MATERIAL CHECKLIST This form must be filled out and returned with the old modules/hardware in order to clear the customer’s account. DATE RETURN AUTHORIZATION NUMBER: CUSTOMER DEC NUMBER: CUSTOMER (COMPANY) NAME: CUSTOMER ADDRESS: CUSTOMER CONTACT: CUSTOMER TELEPHONE NUMBER: Include This Form With the Modules/Hardware Returned...
- Page 113 Upgrade and Return Forms 105...
- Page 114 106 Upgrade and Return Forms RETURNS MATERIAL CHECKLIST This form must be filled out and returned with the old modules/hardware in order to clear the customer’s account. DATE RETURN AUTHORIZATION NUMBER: CUSTOMER DEC NUMBER: CUSTOMER (COMPANY) NAME: CUSTOMER ADDRESS: CUSTOMER CONTACT: CUSTOMER TELEPHONE NUMBER: Include This Form With the Modules/Hardware Returned...
- Page 115 Index PV11U-CA Upgrade Kit Contents, Model 40 Upgrade Kit Contents, 74 Ethernet ID ROM Location, 7, 25, 54, 84 Related Documents, viii Model 30 Diskless Upgrade Kit Contents, PV11U-BA Upgrade Kit Contents, Tools Required, viii Index 1...
Need help?
Do you have a question about the VAXstation 3100 and is the answer not in the manual?
Questions and answers