
Related Manuals for Jura Capresso Impressa F9


Summary of Contents for Jura Capresso Impressa F9
- Page 1 Impressa F9 Fully Automatic Coffee & Espresso Center with Claris Water Care System Operating Instructions and Warranty Customer Service 1-800-220-5701...
-
Page 2: Important Safeguards / Jura-Capresso
IMPORTANT SAFEGUARDS When using electrical appliances, basic safety precautions should always be followed, including the following: 1. Read all instructions. 2. Do not touch hot surfaces. Use handles or knobs. 3. To protect against fire, electric shock and personal injury, do not immerse cord, plugs or appliance in water or other liquids. - Page 3 NOTICE: Your Impressa F9 has a 3-prong grounded plug. To reduce the risk of electrical shock this plug will fit in an outlet only one way. If the plug does not fit in the outlet contact a qualified electrician. DO NOT modify the plug in any way.
-
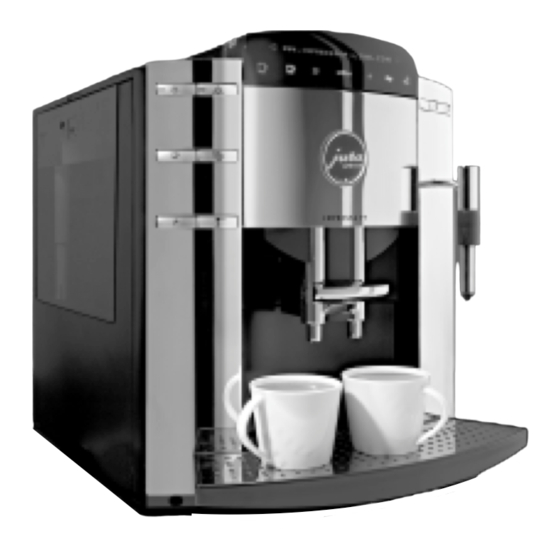
Page 4: Illustrations
Fig. 1 1. Height-Adjustable Coffee Spout 2. Operating Buttons (See Fig. 3) 3. Removable Water Tank 4. Low Water Flotation Device (See Fig. 8.4) 5. Claris Water Care Cartridge (Not Installed) 5a. Service Plug 6. Lid for Water Tank 7. Ground Coffee Funnel 8. -
Page 5: Select Product
Operating Buttons a. On/Off b. Rinse (PRESS MAINT.) c. 1-Cup d. 2-Cup e. Programming f. Pre-Ground Coffee Fig. 3 Fig. 7 Fig. 8 SELECT PRODUCT a. Hot Water b. Steam BIG CUP COFFEE ESPRESSO ST@RT Fig. 4 Fig. 9 MILD NORMAL STRONG Fig. - Page 6 Fig. 12 Fig. 13 Fig. 14 Metal Cylinder Clip-on Connector Dual Frother Plus Fig. 15 Fig. 16...
- Page 7 Frothing: down a. Metal Tube b. Chrome Sleeve c. Steam Nozzle Steaming: Fig. 17 Fig. 18 Fig. 19 Fig. 20 IMPRESIA F9 Fig. 21 Fig. 22 Fig. 23 Fig. 24...
-
Page 8: Table Of Contents
Important Safeguards / Jura-Capresso...2 Illustrations...4–7 1. Product Registration...9 2. Customer Service...9 3. WELCOME TO THE IMPRESSA F9 ...9 a. A Word about "Crema Coffee"...10 b. Pressure Brewing ...10 c. Different Coffee Drinks...10 d. Coffee Facts...10 4. Please Don't / Please Do ...10 5. -
Page 9: Product Registration
The Impressa F9 can prepare one or two cups of crema coffee at a time. The two-step pressure brewing system – well known in commercial applications –... -
Page 10: A Word About "Crema Coffee
3a. A WORD ABOUT "CREMA COFFEE" According to the majority of coffee experts, grinding, tamping and brewing under high pressure is the ideal extracting process for maximum flavor and aroma. Your Jura-Capresso automatic coffee center will always produce espresso and coffee with a thick, foamy layer called "crema."... -
Page 11: Preparing Machine For First Time
beans in the freezer, let them thaw for 3 to 4 hours before filling them into the bean container. • Never fill anything other than coffee beans into the bean con- tainer (no chocolate, rice, nuts, spices, etc.) • Never fill anything but fresh, cold clean water into the water container, except when decalcifying (chapter 20b). -
Page 12: Adding Coffee Beans
• Place a cup underneath the frother (Fig. 15) and push the Hot Water Button. SYSTEM FILLING The machine will pump some water through the frother and stop automatically. YOUR MACHINE IS HEATING PRESS MAINT. • Move the cup underneath the coffee spout (Fig. 14) and press the Rinse Button (Fig. -
Page 13: Daily Preparation
Important: The grinding grade can only be adjusted while the grinder is actually grinding. Attention: Oily beans tend to stick together. Stir beans just before grinding to ensure a proper flow of beans into the burrs. 9. DAILY PREPARATION We recommend filling the water container every morning with fresh, cold water. -
Page 14: Using Hot Water
Important: Do NOT fill this funnel with instant coffee and do not use more than two level scoops of coffee. • Touch one of the three cup symbols to select cup size and then touch ST@RT. While brewing, the display shows (for example) BIG CUP POWDER. -
Page 15: Cleaning The Dual Frother Plus
Steaming and frothing directly in your cappuccino cup: With practice, you can steam and froth directly in your cappuccino cup. First steam and froth the milk, then add your espresso shot. Skim milk will produce the most froth and will let you taste more of the coffee. -
Page 16: Installing And Activating The Claris Cartridge
16a. INSTALLING & ACTIVATING THE CLARIS WATER CARTRIDGE Important: Never install the cartridge before or during the first time preparation of the machine. • Make sure the water tank is empty. • Remove cartridge from its bag. • Open water container lid and pull up the holder for the Claris cartridge (Fig.10). -
Page 17: Adjusting The Water Hardness
The machine beeps and the display shows: WATER PORTION INSERT FILTER • Place a large container underneath the frother (at least 30 oz.) • Push the Hot Water Button. The machine pumps water through the frother, activating the new filter. This will take about 90 seconds. -
Page 18: Programming Aroma
Changing the water hardness level is explained in chapter 17. 18a. PROGRAMMING AROMA The factory setting is STRONG. You can change to NORMAL. In NORMAL the Impressa F9 will grind a little less coffee in each of the three strength selections (coffee bean symbols). • Press the P-Button. -
Page 19: Programming The 1-Cup Button
the three cup symbols are: BIG CUP: ... 240 ML (8 oz.) COFFEE (cup): ... 150 ML (5 oz.) ESPRESSO (cup): .. 60 ML (2 oz.) • Press the P-Button. • Touch the right arrow until the display shows QUANTITY. •... -
Page 20: Setting The Time
ST@RT • Press the P button to return to and the red Please note: The Impressa F9 will keep the time as long as the machine is plugged in. If you unplug the machine or if you have ENOUGH WATER? power interruption, the time will be lost. -
Page 21: Setting Language
• Press the P button to return to SELECT Please note: In order for the machine to turn off automatically it must be in the SELECT PRODUCT mode. If you leave the machine in programming mode (red arrows showing), or in any other mode, the machine will not turn off automatically. -
Page 22: Stones And Beans
• Rinse water tank daily and fill with fresh, cold water. 19f. EMPTYING SYSTEM BEFORE TRANSPORT This procedure is necessary to prevent water and frost damage in case you intend to transport your Impressa F9. • Turn machine off. • Place a cup underneath the frother. -
Page 23: Decalcifying Procedure
• Open the ground coffee lid and drop in one white cleaning tablet (Fig. 24). • Push the Rinse button. The display shows CLEANING. The cleaning program will dispense hot water in intervals through the coffee spout into the drawer. •... -
Page 24: Tips For Better Coffee
"with cream" or with "cream and sugar", add it to the cup first and steam it for a few seconds. Then add the coffee. Extremely hot coffee If you like your coffee extremely hot, the Impressa F9 can accommodate you. Brew your coffee, but reduce the cup size by approx. -
Page 25: Troubleshooting
ground transportation for both ways within the continental United States. For Hawaii and Alaska freight is not covered by this warranty. TRANSPORT: When sending the machine, use the original pack- ing materials, the inner and outer cartons or use approximately 2” of bubblewrap and insert machine in a carton which will hold 40lbs. - Page 26 B. THE DISPLAY READS "FILL WATER" BUT THERE IS ENOUGH WATER IN THE WATER TANK. Reason: The low water floatation device (Fig.8.4) is missing. Solution: Within the water tank is a small compartment (like a mouse trap). Inside is a small black floatation device. On top is a small clear see-through plastic cover.
-
Page 27: Address Information
Jura-Capresso LLC. 81 Ruckman Road Closter, NJ 07624 1-800-220-5701 • 201-767-3999 Fax: 201-767-9684 email: contact@capresso.com Website: www.capresso.com...
Need help?
Do you have a question about the Impressa F9 and is the answer not in the manual?
Questions and answers