Table of Contents
Advertisement
Quick Links
Download this manual
See also:
User Manual
Advertisement
Chapters
Table of Contents

Subscribe to Our Youtube Channel
Related Manuals for SMART 8055i


Summary of Contents for SMART 8055i
- Page 1 SMART Board® 8055i and 8055i-SMP Interactive flat panel Installation guide...
- Page 2 © 2012 SMART Technologies ULC. All rights reserved. No part of this publication may be reproduced, transmitted, transcribed, stored in a retrieval system or translated into any language in any form by any means without the prior written consent of SMART Technologies ULC. Information in this manual is subject to change without notice and does not represent a commitment on the part of SMART.
-
Page 3: Table Of Contents
Installing the speakers Connecting a room control system Connecting computers to your interactive flat panel Connecting peripheral devices to your interactive flat panel Chapter 3: Installing SMART software Installing SMART Meeting Pro software Using a SMART GoWire cable Installing SMART Notebook software Updating SMART Product Drivers... -
Page 5: Chapter 1: Installing Your Interactive Flat Panel
Important mounting considerations for trained installers Choosing a mounting location Choosing a mounting height You need a team of professional installers to install your SMART Board 8055i interactive flat panel. This chapter provides additional considerations and details for installing your interactive flat panel. -
Page 6: What's Included
Two pens with four replacement pen nibs Eraser SMART GoWire™ auto-launch cable (SMART Board 8055i-SMP and 8055ie-SMP interactive flat panels only) CAT 5 USB extender (SMART Board 8055i-SMP and 8055ie-SMP interactive flat panels only) SMART Notebook™ collaborative learning software DVD (SMART Board 8055i interactive flat panels only) -
Page 7: Components Of Your Interactive Flat Panel
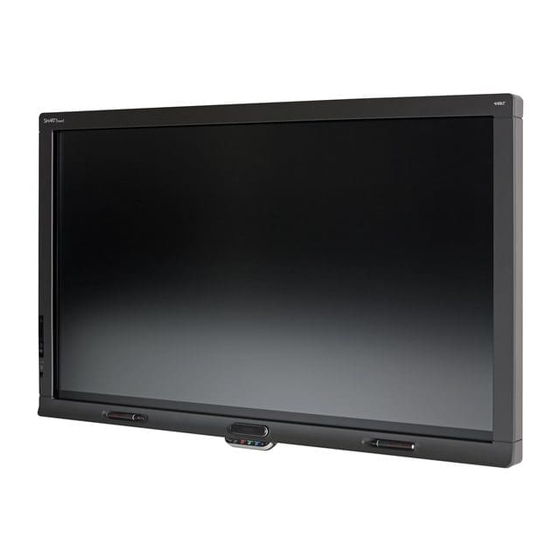
C H A P T E R 1 Installing your interactive flat panel Components of your interactive flat panel The following images identify the components of your interactive flat panel. Front view Back view 3 | 1013787 Rev 03... -
Page 8: Wall-Mounting Your Interactive Flat Panel
N O T E S The computer connected to VGA 1 and USB 1 accesses the USB drive that's connected to the USB A receptacle. To disable the USB A receptacle, see SMART Board 8055i interactive flat panel user’s guide (smarttech.com/kb/170177). Wall-mounting your interactive flat panel Use a team of trained, professional installers to install your interactive flat panel. -
Page 9: Important Mounting Considerations For Trained Installers
C H A P T E R 1 Installing your interactive flat panel packaging from your authorized SMART reseller (smarttech.com/where). Attach the speakers and connect the speaker wires to the interactive flat panel before you wall-mount it. For more information, see Installing the speakers on page 8. -
Page 10: Choosing A Mounting Location
C H A P T E R 1 Installing your interactive flat panel Choosing a mounting location Consider the following when you select a location for the interactive flat panel: The wall must be strong enough to support the interactive flat panel and the mounting equipment. -
Page 11: Chapter 2: Connecting Computers And Peripheral Devices
Chapter 2 Connecting computers and peripheral devices Installing the speakers Connecting a room control system Connecting computers to your interactive flat panel Connecting to power and computer 1 Setting up the computer 2 connection location Connecting a guest laptop Connecting peripheral devices to your interactive flat panel Bottom terminal panel This chapter includes information on connecting your interactive flat panel to computers and other peripheral devices. -
Page 12: Installing The Speakers
C H A P T E R 2 Connecting computers and peripheral devices Installing the speakers Your interactive flat panel comes with two 15 W speakers. To install the speakers 1. Attach the tether to the speaker. 8 | 1013787 Rev 03... - Page 13 C H A P T E R 2 Connecting computers and peripheral devices 2. Above the speaker mounting holes, remove the screw and washer. Retain the screw and washer. 3. Attach the speakers to the speaker mounting holes on the side of the interactive flat panel with the included screws and washers.
- Page 14 C H A P T E R 2 Connecting computers and peripheral devices 6. Run the speaker wires below the bottom terminal panel, and connect them to the speaker wire connections. 10 | 1013787 Rev 03...
-
Page 15: Connecting A Room Control System
I M P O R T A N T Do not use a null modem cable. Use only a standard RS-232 cable. For more information about setting up and programming a room control system, see Remotely managing your SMART Board 8055i interactive flat panel (smarttech.com/kb/170189). 11 | 1013787 Rev 03... -
Page 16: Connecting Computers To Your Interactive Flat Panel
N O T E This document describes the default USB and video connections. To customize the USB and video mapping, see Configuring the video and touch input for your SMART Board 8055i interactive flat panel (smarttech.com/kb/170190). Connect video cables to the bottom terminal panel and connect USB cables to the inside terminal panel. -
Page 17: Connecting To Power And Computer 1
C H A P T E R 2 Connecting computers and peripheral devices Connecting to power and computer 1 To connect your interactive flat panel to power and computer 1 1. Connect the included VGA cable from your computer to the VGA 1 connector on the bottom terminal panel. -
Page 18: Setting Up The Computer 2 Connection Location
You require a USB cable and a VGA cable to set up the computer 2 connection location. W A R N I N G Ensure that any cables extending across the floor to your SMART product are properly bundled and marked to avoid a trip hazard. -
Page 19: Connecting A Guest Laptop
C H A P T E R 2 Connecting computers and peripheral devices To connect a computer to the computer 2 connection location 1. Place the computer beside the end of the wire bundle at the computer 2 connection location. 2. - Page 20 C H A P T E R 2 Connecting computers and peripheral devices To connect a guest laptop 1. Connect an HDMI cable from the guest laptop to the side terminal panel. 2. Connect a USB cable from the guest laptop to the USB 3 connection on the side terminal panel.
-
Page 21: Connecting Peripheral Devices To Your Interactive Flat Panel
Connect peripheral devices to the bottom terminal panel. C A U T I O N The AC power outlet is designated for a component of the SMART Board 8055ie-SMP interactive flat panel with appliance. See Replacing the appliance on your SMART product (FRU - Appliance - SB8) (smarttech.com/kb/170062). -
Page 23: Chapter 3: Installing Smart Software
SMART Product Drivers 11 or later installed. For more information, see Updating SMART Product Drivers on page 22. You need to install SMART software on the computer that’s connected to your interactive flat panel in order to use the interactive flat panel. You can install either SMART Meeting Pro software or SMART Notebook software. -
Page 24: Installing Smart Meeting Pro Software
You can download and install SMART Meeting Pro software from the SMART website. I M P O R T A N T Connect to the Internet before you install SMART software so that you can obtain a software product key and download software updates from smarttech.com/registration. -
Page 25: Installing Smart Notebook Software
I M P O R T A N T Connect to the Internet before you install SMART software so that you can obtain a software product key (smarttech.com/registration) and download software updates. 21 | 1013787 Rev 03... -
Page 26: Updating Smart Product Drivers
Dock (Mac OS X operating system software), and then select Check for Updates and Activation. The SMART Product Update window appears. 4. Follow the on- - screen instructions to update your SMART Notebook software to the latest version. Updating SMART Product Drivers To use touch control and digital ink on your interactive flat panel, you require SMART Product Drivers 11 or later on your computer. -
Page 27: Appendix A: Hardware Environmental Compliance
Contains perchlorate material. Special handling may apply. See dtsc.ca.gov/hazardouswaste/perchlorate. Packaging Many countries have regulations restricting the use of certain heavy metals in product packaging. The packaging used by SMART Technologies to ship products complies with applicable packaging laws. 23 | 1013787 Rev 03... - Page 32 SMART Technologies smarttech.com/support smarttech.com/contactsupport 1013787 Rev 03 *1013787*...
Need help?
Do you have a question about the 8055i and is the answer not in the manual?
Questions and answers