
Related Manuals for Rose electronics MultiVideo


Summary of Contents for Rose electronics MultiVideo
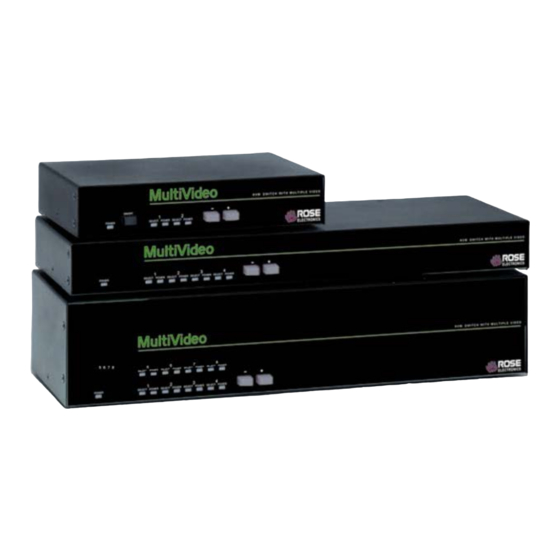
- Page 1 ™ MultiVideo KVM SWITCH WITH MULTIPLE VIDEO INSTALLATION AND OPERATIONS SUPPLEMENT 10707 Stancliff Road Phone: (281) 933-7673 Houston, Texas 77099 WWW.ROSE.COM...
- Page 2 LIMITED WARRANTY Rose Electronics warrants the MultiVideo ™ to be in good working order for one year from the date of purchase from Rose Electronics or an authorized dealer. Should this product fail to be in good working order at any time during this one-year warranty period, Rose Electronics will, at its option, repair or replace the Unit as set forth below.
-
Page 3: Video Connection
Refer to the UltraView Pro manual for detailed switching instructions. If your system demands are greater than a single unit can provide, the MultiVideo can be easily expanded to connect up to 64 computers by chaining units together with expansion cables. All MultiVideo models can easily be expanded by chaining the units together and configuring the system. - Page 4 - Connects to the previous CPU Switches* + Connects to the next CPU * The - and + switches are used when: upgrading the firmware resetting the unit to factory defaults running diagnostics. Table 1. Front panel MULTIVIDEO INSTALLATION AND OPERATIONS MANUAL...
- Page 5 “M” Chassis (2U2V) “B” Chassis (4U2V) “C” Chassis (2U4V) “C” Chassis (4U4V) “C” Chassis (8U2V) Figure 2. Rear panel NOTE: DB9 (LINK) connector on Video expansion units only Power connector not used on Video expansion unit. MULTIVIDEO INSTALLATION AND OPERATIONS MANUAL...
- Page 6 Master to Slave unit cables In systems needing additional CPUs, the MultiVideo can be cascaded to other MultiVideos. To cascade a MultiVideo to other “Slave” units, you will need one DB25M to DB25M, switch-to-switch cable for each cascaded unit. The MultiVideo can also be expanded to add additional Video ports. A DB9M to DB9M, switch-to-switch cable is used with the MultiVideo video expansion units.
- Page 7 Figure 3. 4U2V Unit installation Installation – Cascading units Slave#2 Master Dual video CPUs 5-8 Slave#1 KVM Station Two additional “Slave” units can be added to this configuration. Dual video CPUs (1-4) Figure 4. Cascading units MULTIVIDEO INSTALLATION AND OPERATIONS MANUAL...
- Page 8 Applications VIDEO 8 VIDEO 1 MULTIVIDEO INSTALLATION AND OPERATIONS MANUAL...
- Page 9 Installation – Video Expansion system The MultiVideo can be custom configured to expand the number of video ports. The example below can have up to 16 separate video sources and up to 8 video outputs. The KVM station can switch the video by simple keyboard commands, the push-button switches on the front panel, or from the on-screen display.
- Page 10 Where x = chassis size, M (mini), B (low), C (high) Where y = number of CPUs (2, 4, or 8) Where z = number of monitors (2 or 4) The MultiVideo Video expansion model part numbers are: MPC – 2U4V/MV (Master unit) MPC – 2U4V/SL (Slave unit) Connectors Power –...
- Page 11 • Mounting instructions insert. To rack mount your MultiVideo, attach the two rack mounting brackets to your unit with the short flange against the unit using the four screws provided. Secure the mounting brackets to the rack using the appropriate size bolts, nuts and lock washers.
- Page 12 APPENDICES MULTIVIDEO INSTALLATION AND OPERATIONS MANUAL...
-
Page 13: Table Of Contents
Disclaimer ....................1 Introduction / System overview ..............1 Features ....................2 Package contents ..................2 Compatibility .................... 3 Rose Electronics web site ................ 3 System overview ..................3 KVM station ..................... 3 CPU connection ..................4 Cascading Units ..................4 Menu system ................... - Page 14 Appendix B. Parts and cables............. 40 Appendix C. General Specifications ..........8 Appendix D. Rack mount instructions ......... 42 Appendix E. Rack mount illustration ..........9 Appendix F. Keyboard mapping ..........43 Appendix G. Video distance capability ........44 MULTIVIDEO INSTALLATION AND OPERATIONS MANUAL...
-
Page 15: Disclaimer
Introduction / System overview Thank you for choosing the Rose Electronics UltraView Pro™ Professional KVM switch. The UltraView Pro represents the latest technology in keyboard-video monitor-mouse switching. It features an on-screen display for easy configuration and computer switching. -
Page 16: Features
Installation and operations manual. CPU, KVM, and expansion cables are usually ordered separately. If the package contents are not correct, contact Rose Electronics or your reseller so the problem can be quickly resolved. ULTRAVIEW PRO INSTALLATION AND OPERATIONS MANUAL... -
Page 17: Compatibility
** Available on multi-platform models only Rose Electronics web site Visit our web site at www.rose.com for additional information on the UltraView Pro and other products offered by Rose Electronics that are designed for data center applications, classroom environments and many other switching applications. -
Page 18: Cpu Connection
CPU connection All CPU connectors on the UltraView Pro are DB25F. The CPUs are connected to the UltraView Pro using a CPU cable designed to interface with the CPU type such as a PC, SUN or Apple. A CPU cable is needed for each connected Computer. -
Page 19: Ultraview Pro Models
MODELS UltraView Pro models “M” chassis “B” chassis “C” chassis Figure 6. UltraView models Label Description Power Power LED (Green when unit is on) On/Off “M” chassis only. In = ON Out = OFF LEDs Indicator LEDs; Numbered pairs of LEDs shows status and power of connected computers. -
Page 20: Ultraview Pro Models (Rear)
UltraView Pro models (rear) “M” Chassis “B” Chassis “C” Chassis Figure 7. Rear Panel Label Connector Description Power “M” Chassis only DIN 5F – Power adapter connector. None “B” and “C” Chassis IEC320 power receptacle w/on-off switch. 1 – 4 (“M” chassis) DB25F –... -
Page 21: Ultraview Pro Cables
UltraView Pros. To cascade an UltraView Pro to other “Slave” units, you will need one DB25M to DB25M, switch-to-switch cable for each slave unit. (Rose Electronics switch-to-switch cable part number CAB-CXVSMMnnn.) ULTRAVIEW PRO INSTALLATION AND OPERATIONS MANUAL... -
Page 22: Organizing The System
INSTALLATION Organizing the system It is recommended that before any UltraView Pro configuration or cable connections be made, plan how the system will be laid out, the placement of the CPUs and the placement of the UltraView Pro. Take into consideration the cable lengths needed to connect to the KVM station and each CPU. -
Page 23: Step 3. Connecting The Computers
The green POWER LED will turn on and the power-on diagnostic message will display on the KVM monitor. If the KVM monitor is slow to acquire sync, the power-on diagnostic may not be seen. Computer 1 is automatically connected on power-up. On the front panel, the SELECT 1 LED will light and computer 1’s label will display in the lower left corner of the KVM monitor for 5 seconds, then disappear. -
Page 24: Installation - Cascading Units
CPU 2 CPU 1 UltraView Pro 8 port CPUs 3-8 KVM station (4 CPUs can be connected using a 4-port unit, 16 using a 16-port unit) Figure 8. UltraView Pro to CPUs Installation - Cascading units The UltraView Pro units can be cascaded together to expand the number of computers that can be accessed from the KVM station. -
Page 25: Slave Unit Installation
Connect CPU port #1 on the master unit to the KVM connector on Slave #1 using a DB25 to DB25 expansion cable. (Rose Electronics part number CAB-CXVSMMnnn) Connect the next sequential CPU port on the master unit to the KVM connector on the next sequential Slave unit. - Page 26 Next, select “Expansion width” from the configure system menu and press enter. Enter the number of computer ports on a slave unit and press enter. This setting determines how many computers are on an expansion unit and determines which computer number is associated with which physical connector.
-
Page 27: Main Configuration Menu
CONFIGURATION MENUS Main configuration menu UltraView Pro version UP18 Copyright 2000 – 02 Rose Electronics Main configuration menu Configure computers Configure overlay Configure security Use arrow keys to highlight selection and press enter or press escape to exit View/change keyboard, mouse, expansion, and scanning Figure 10. -
Page 28: Configure System Menu
Configure system menu Configure system Keyboard PC 104/105 Keyboard and mouse type Expansion Maximum computers Expansion width Expansion units Scan settings Scan time (seconds) Scan mode Keyboard settings Rate Delay Fast Sun language Change key mapping from PC keyboard to Sun or Apple computer Figure 11. - Page 29 Expansion If your system consists of cascaded units, the expansion section of the Configure System menu must be properly configured to provide the needed information to manage the slave units. It is recommended that all slave units have the same number of CPU ports. To change the “Maximum computers”, “Expansion width”, and “Expansion units”, use the up/down arrow keys and select the item and press enter.
- Page 30 To change the scan time, highlight “Scan time” and press enter. An input box will display for a new value. Enter the new scan time in seconds and press enter. Valid entries are 1 to 999. Scan mode This value turns scanning on or off. To change this value, select “Scan mode”...
- Page 31 Delay This setting is for PC keyboards only. It is used to adjust how long, after a key is depressed and held, that key starts to repeat. To change the delay value, select “Delay” and press enter. A list box will display showing the choices available.
-
Page 32: Configure Computer Menu
Configure computer menu Configure computers Number Computer name Keyboard Mouse 1 Computer 1 PS/2 2 Computer 2 PS/2 3 Computer 3 PS/2 4 Computer 4 PS/2 5 Computer 5 PS/2 6 Computer 6 PS/2 7 Computer 7 PS/2 8 Computer 8 PS/2 9 Computer 9 PS/2... - Page 33 Keyboard To change a computers keyboard and/or mouse, use the up/down arrow keys to select (highlight) which computer to change the keyboard or mouse. Use the left/right arrow keys to select either the keyboard or mouse to change and press enter. A window will appear listing the keyboard or mouse types available.
-
Page 34: Configure Overlay
Configure overlay Configure overlay Miscellaneous Color scheme Aquarium Resolution PC1 640x480x60Hz Screen saver Black screen Screen saver time (seconds) Computer select window Background color Transparent blue Text color White Position x = 3 y = 3 Computer label Background color Transparent magenta Text color Yellow... - Page 35 Resolution Use this configuration to set the resolution for the KVM stations video if no computer video is present. To change the setting, select “Resolution” and press enter. A selection box will appear listing the choices. The default setting is PC2, 640 x 480 @ 60Hz. DO NOT select a setting that the KVM monitor cannot support The choices are: ...
- Page 36 Configure overlay - Computer select window The “Computer select window” section allows you to change the background and text colors of the computer select window, and the text position on the screen. Use the up/down arrow keys to select the item to configure and press enter. DO NOT set the background and text colors the same.
- Page 37 Background color To change the background color, select “Background color” and press enter. A color selection box will display showing the available background colors. Use the arrow keys to select either a solid or transparent color and press enter. The default background color is Transparent blue. The choices are the same as the background colors for the computer select window.
-
Page 38: Configure Security
Font This item sets the font type for the computer label. To change the font, select “Font” and press enter. Use the up/down arrow keys to select a new font type and press enter. The font choices are: 8 x 16 modern The actual size of the font will vary depending on ... - Page 39 Configuration password To assign a “Configuration password”, select it from the “Configure security” menu and press enter. An input box will appear. Type in the desired configuration password (case sensitive, 8 chars/max) and press enter. A confirmation box will display, re-type the password and press enter. When the password is saved, the next time the configuration menu is called up (<Ctrl>, F12), this password must be entered.
-
Page 40: Selecting A Computer
Selecting a computer through the RS232 port Selecting a computer can be done through the RS232 port if needed. Contact Rose Electronics Technical support for details. Selecting a computer using the Computer select window Press and release the left control <Ctrl> key, then press Esc. The computer select window will display. -
Page 41: Keyboard Commands
KEYBOARD COMMANDS Keyboard commands The following table describes the available keyboard commands. The <Ctrl> key sequence is a press and release of the left control key. Commands following <Ctrl> must be entered within 2 seconds. Command Key sequence Description OSD menu <Ctrl>... - Page 42 Mode value Description CPU keyboard = PC mode 1 (Some IBMs & PS/1’s) CPU keyboard = PC mode 2 (Most PCs) CPU keyboard = PC mode 3 most (RISC) Unix w/stations CPU keyboard/mouse = Apple ADB CPU keyboard/mouse = Sun CPU mouse = PS/2 mouse –...
-
Page 43: Keyboard Command Usage
(minus) switch before the last port is switched to, the defaults will not be restored. The configuration and access passwords are not reset using this procedure. Rackmounting The UltraView Pro can be rack mounted using a Rose Electronics Rackmount kit. See Appendix D and E for instructions. ULTRAVIEW PRO INSTALLATION AND OPERATIONS MANUAL... -
Page 44: Serial Port (Rs232)
KVM station like word or notepad or switching to the command prompt and typing in <Ctrl> and I key. The latest firmware file names on Rose Electronics web site are: UPPxx.hex – main program and UPKxx.hex – kernel program. - Page 45 To update the UltraView Pro’s firmware, first download the latest revision from Rose Electronics web site and save it to a stand-alone computer that is not connected to the UltraView Pro. Connect the serial cable from the UltraView Pro to the serial port of the stand-alone computer as described in steps 1-3.
- Page 46 If any of these errors occur, check the RS232 cable, the connectors, and the adapter. Make sure they are in good working order. Verify the communication program is configured correctly. Enter “Y” to try upgrading the flash again. If programming is unsuccessful, the unit should be serviced.
-
Page 47: Troubleshooting
TROUBLESHOOTING TROUBLESHOOTING Computer does not boot, keyboard or mouse error received. Cable is loose, reseat cable and on PC hit F1 to continue or reboot computer. Wrong cable or keyboard and mouse cables reversed. Cable is defective; try using cable from another computer. ... - Page 48 Mouse does not move Mouse not configured. UltraView Pro turned off after or not connected when computer booted or application using mouse run. Exit and re-enter application using mouse or issue reset command. PS/2 mouse was not connected when UltraView Pro powered up or disconnected and reconnected.
-
Page 49: Service Information
This Unit does not contain any internal user-serviceable parts. In the event a Unit needs repair or maintenance, you must first obtain a Return Authorization (RA) number from Rose Electronics or an authorized repair center. This Return Authorization number must appear on the outside of the shipping container. -
Page 50: Safety
SAFETY Safety This UltraView Pro KVM switch has been tested for conformance to safety regulations and requirements, and has been certified for international use. Like all electronic equipment, the UltraView Pro should be used with care. To protect yourself from possible injury and to minimize the risk of damage to this Unit, read and follow these safety instructions. -
Page 51: Safety And Emc Regulatory Statements
Safety and EMC Regulatory Statements Safety Information Documentation reference symbol. If the product is marked with this symbol, refer to the product documentation to get more information about the product. WARNING A WARNING in the manual denotes a hazard that can cause injury or death. - Page 52 Informations concernant la sécurité Symbole de référence à la documentation. Si le produit est marqué de ce symbole, reportez-vous à la documentation du produit afin d’obtenir des informations plus détaillées. WARNING Dans la documentation, un WARNING indique un danger susceptible d’entraîner des dommages corporels ou la mort.
-
Page 53: Appendices Appendix A. Initial Factory Settings
APPENDICES Appendix A. Initial factory settings Setting Default value KVM keyboard/mouse type PC – PS/2 CPU keyboard/mouse type PC – PS/2 Computer names Computer xxx Scan time interval 5 seconds Power on scan Typematic rate 20 (10.9 chars/sec.) Typematic delay Fast (500 milliseconds) Maximum ports Same as physical number of ports... -
Page 54: Appendix B. Parts And Cables
Appendix B. Parts and cables Part number Description CAB-CX0606Mnnn** Coax VGA-PS/2 Kbd-PS/2 mouse to DB25M CAB-WX0606Mnnn* VGA-PS/2 Kbd-PS/2 mouse to DB25M CAB-CX0509Mnnn** Coax VGA-AT Kbd-Serial mouse to DB25 CAB-VX0509Mnnn* VGA-AT Kbd-Serial mouse to DB25M CAB-CXV0800Mnnn** Coax VGA-Sun Kbd-Sun mouse CAB-SBX0800Mnnn** Coax Sun video-Kbd-mouse to DB25M CAB-C1V0400Mnnn** Coax Apple video-Kbd-mouse to DB25M... -
Page 55: Appendix C. General Specifications
Appendix C. General Specifications The UltraView Pro part number is Uxy-zUB Where x = platform, E = PC, SUN, Apple, Unix (Multi-platform) P = PC and Unix computers (PC) Where y = chassis size, M (mini), B (low), C (high) Where z = number of ports (2, 4, 8, 12, or 16) Size M chassis... -
Page 56: Appendix D. Rack Mount Instructions
Appendix D. Rack mount instructions The UltraView Pro can be mounted in a rack using the Rackmount kits from Rose Electronics. The optional rack mount kit includes the following items: Two black anodized mounting brackets. Four 6-32 x 3/8” flat head mounting screws. -
Page 57: Appendix F. Keyboard Mapping
Appendix F. Keyboard mapping Sun / Apple keyboard emulation (101/102 keyboard) PC key Sun function Apple function Left alt Left meta Left apple / cloverleaf Right alt/alt graph Alt graph Right option Right control Power key Power key Sun / Apple keyboard emulation (104/105 keyboard) PC key Sun function Apple function... -
Page 58: Appendix G. Video Distance Capability
Appendix G. Video distance capability The table below shows the distances, resolution, and quality of video that can be expected with normal or coax cabling. This table applies to the MASTER unit only. There will be some degradation when units are chained together. - Page 60 10707 Stancliff Road Phone: (281) 933-7673 Houston, Texas 77099 WWW.ROSE.COM...
Need help?
Do you have a question about the MultiVideo and is the answer not in the manual?
Questions and answers