Table of Contents
Advertisement
Advertisement
Table of Contents

Related Manuals for Lode ERGOMETERS


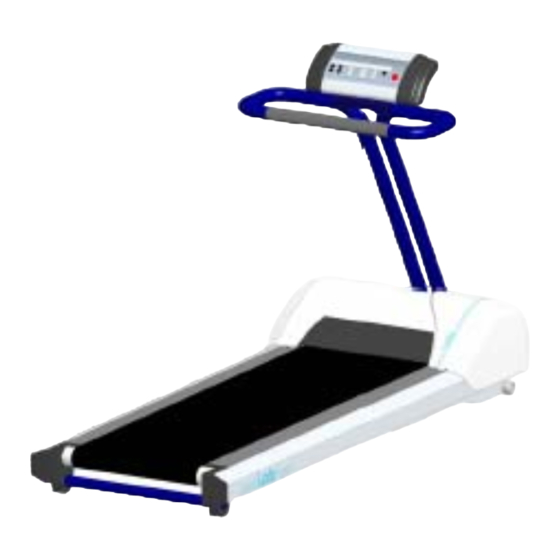
Summary of Contents for Lode ERGOMETERS
-
Page 1: Service Manual
Service manual TREADMILL ERGOMETERS 0344... -
Page 2: Intended Use
Intended Use A Lode treadmill is a diagnostic tool intended to be used as a stress test device in a medical environment. The main goal of the use of a Lode treadmill is to create reproducible stress tests. The following parameters can be measured: •... - Page 3 List of Symbols used On/Off switch External Input External Output Type B Electrical Safety Separate collection of electric and electronic equipment Copyright Lode BV, June 2009, all rights reserved. Manufacturer information: Lode BV Zernikepark 16 NL-9747 AN Groningen, The Netherlands ℡...
- Page 4 Warnings Observe the following precautions when servicing the treadmill: • Do not start the walking belt when someone is on the treadmill. The belt could start moving immediately, and sudden start and subsequent loss of balance could cause serious personal injury. •...
-
Page 5: Table Of Contents
Tabel of contents TECHNICAL SPECIFICATIONS ......................7 932900 & 932910 ..............8 ECHNICAL SPECIFICATIONS ALIANT 932901 & 932911 ............10 ECHNICAL SPECIFICATIONS ALIANT EHAB 932902 & 932912 ............12 ECHNICAL SPECIFICATIONS ALIANT FINAL ASSEMBLIES ..........................14 932900 & V 932901............15 INAL ASSEMBLY ALIANT ALIANT... - Page 6 Service manual Valiant treadmill V1.00...
-
Page 7: Technical Specifications
1 Technical specifications Service manual Valiant treadmill V1.00... -
Page 8: Technical Specifications Valiant 932900 & 932910
1.1 Technical specifications Valiant 932900 & 932910 LODE TREADMILL VALIANT 932900 & 932910 SPEED RANGE - km/h 0,5 – 20 km/h - mph 0.3 – 12 mph HEIGHT ADJUSTMENT FRONT SIDE 0 – 25% WALKING SURFACE 50 x 150 cm... - Page 9 LODE TREADMILL VALIANT 932900 & 932910 ENTRANCE PLATE optional ANTI SLIP STRIPS optional SIDE HANDRAILS FIXED (HEIGHT 850 MM) optional SIDE HANDRAILS ADJUSTABLE optional - height: 791 – 954 mm - width : 440 – 975 mm PEDIATRIC FRONT HANDRAIL...
-
Page 10: Technical Specifications Valiant Rehab 932901 & 932911
1.2 Technical specifications Valiant Rehab 932901 & 932911 LODE TREADMILL VALIANT 932901 & 932911 SPEED RANGE - km/h 0,1 – 12 km/h - mph 0.1 – 7.5 mph HEIGHT ADJUSTMENT FRONT SIDE 0 – 25% WALKING SURFACE 50 x 150 cm... - Page 11 LODE TREADMILL VALIANT 932901 & 932911 ENTRANCE PLATE optional ANTI SLIP STRIPS optional SIDE HANDRAILS FIXED (HEIGHT 850 MM) optional SIDE HANDRAILS ADJUSTABLE optional - height: 791 – 954 mm - width : 440 – 975 mm PEDIATRIC FRONT HANDRAIL...
-
Page 12: Technical Specifications Valiant Plus 932902 & 932912
1.3 Technical specifications Valiant Plus 932902 & 932912 LODE TREADMILL VALIANT PLUS 932902 & 932912 SPEED RANGE - km/h 1 – 25 km/h - mph 0.6 – 15.6 mph HEIGHT ADJUSTMENT FRONT SIDE 0 – 25% WALKING SURFACE 60 x 170 cm... - Page 13 LODE TREADMILL VALIANT PLUS 932902 & 932912 ENTRANCE PLATE optional ANTI SLIP STRIPS optional SIDE HANDRAILS FIXED (HEIGHT 850 MM) optional SIDE HANDRAILS ADJUSTABLE optional - height: 791 – 954 mm - width : 440 – 975 mm PEDIATRIC FRONT HANDRAIL...
-
Page 14: Final Assemblies
2 Final assemblies Service manual Valiant treadmill V1.00... -
Page 15: Final Assembly Valiant 932900 & Valiant Rehab 932901
2.1 Final assembly Valiant 932900 & Valiant Rehab 932901 Part Number Description 932962 CONTROL UNIT 932935 STICKER VALIANT 932950 WALKING BELT 932951 DECK 932960 COVER EXTRUSION PROFILE 932321 ASSY ROLLER REAR 932934 STICKER SIDE BARS 932167 COSMETIC STICKER 932159 FRONT WHEEL VALIANT 932928 COVER VALIANT ON REQUEST... -
Page 16: Final Assembly Valiant Plus 932902
2.2 Final assembly Valiant Plus 932902 Part Number Description 932962 CONTROL UNIT 932935 STICKER VALIANT 932950 WALKING BELT 932951 DECK 932960 COVER EXTRUSION PROFILE 932981 BALL BEARING ROLLER 932934 STICKER SIDE BARS ON REQUEST COSMETIC STICKER 932973 FRONT WHEEL VALIANT 932928 COVER VALIANT ON REQUEST... -
Page 17: Controlunit Assy
2.3 Controlunit assy Partnumber Description 932149 COVER LEFT, CONTROLUNIT 932937 KEYBOARD FOLIE CONTROL UNIT 932148 COVER RIGHT, CONTROLUNIT 932952 MAGNET EMERGENCY SWITCH 932969 DUMMY PLUG EMERGENCY SWITCH 932700 MAINBOARD CONTROL UNIT ( INCL.RS232 CONNECTOR) SCREW M4 X 12 Service manual Valiant treadmill V1.00... -
Page 18: Procedures
3 Procedures Service manual Valiant treadmill V1.00... -
Page 19: Replacement Controller Board
3.1 Replacement controller board 1. Open the control unit by removing the four Allen screws at the back of the control unit (fig 1) 2. Remove the two black side covers. (fig 2 and fig 3) 3. Take the control board out by sliding the board from the clips (fig 4) 4. - Page 20 Fig 1 Fig 2 Fig 3 Fig 4 Fig 5 Fig 6 Service manual Valiant treadmill V1.00...
- Page 21 Fig 7 Fig 8 Fig 9 Fig 10 Fig 11 Fig 12 Service manual Valiant treadmill V1.00...
- Page 22 Fig 13 Fig 14 Fig 15 Fig 16 Fig 17 Fig 18 Service manual Valiant treadmill V1.00...
- Page 23 Fig 19 Fig 20 Fig 21 Fig 22 Service manual Valiant treadmill V1.00...
-
Page 24: Replacement Instruction Grade Potentiometer
3.2 Replacement instruction grade potentiometer You can find the grade potentiometer at the right side of the treadmill under the walking deck. Fig.1: Location Grade potentiometer Fig.2: Bottom side treadmill If, for some reason, the grade potentiometer is broken, the treadmill could be in a specific angle. - Page 25 Resolder the wires onto the potentiometer. Fig. 4: Wiring the potentiometer. Now you have to open the front cover of the treadmill, by removing the white housing. See service manual appendix B. When the white housing of the motor compartment has been removed connect a DC voltmeter to pin 2 ( U-elevation) and 3(GND) of connector 5.
- Page 26 Fig.7 & 8: Potentiometer gear positioning When you switch on the Valiant the treadmill should first go to the lowest position. Now you are able to start and use the treadmill. Service manual Valiant treadmill V1.00...
-
Page 27: Replacement Instruction Grade Motor
3.3 Replacement instruction grade motor Required tools: • Allen Key #4 • Wrench 14 mm ( 2X) Instruction 1. Put the Valiant on its side 2. Remove the 4 Allen screws to take away the black metal plate that prevent to touch the electronics (fig 1&2) 3. - Page 28 Fig 1 Fig 2 Fig 3 Fig 4 Fig 5 Fig 6 Service manual Valiant treadmill V1.00...
-
Page 29: Replacement Instruction Belt & Deck
3.4 Replacement instruction belt & deck Required tools • Allen key #3,#4,#5,#6 • Slotted screw driver #2 • Philips screw driver #2 • Ring spanner #10 Instruction 1. Use the slotted screwdriver to remove the cable from the controller to the Motor compartment of the Valiant (figure 1) 2. - Page 30 Service manual Valiant treadmill V1.00...
- Page 31 Service manual Valiant treadmill V1.00...
- Page 32 Service manual Valiant treadmill V1.00...
- Page 33 Service manual Valiant treadmill V1.00...
-
Page 34: Rs232 Setup
You can change the RS232 by following the procedure below: • Select “Prot id” and select the RS232 that you need to establish communication between your device and the Lode Treadmill.( see for the correct RS232 protocol in the list above) •... -
Page 35: Schematics And Lay-Outs
4 Schematics and lay-outs Service manual Valiant treadmill V1.00... - Page 36 Service manual Valiant treadmill V1.00...
-
Page 37: Trouble Shooting
5 Trouble shooting Service manual Valiant treadmill V1.00... -
Page 38: Error Message "Stop
5.1 Error Message “STOP” When the error message “Stop” is displayed, follow this procedure: See if this connector is connected properly. This connector is mounted on the control board in the control unit. You can take the connector out and make a short in stead of the two red wires. - Page 39 Flat cable J6 DB 25 J3 Signal OUT3 SAFESW1 SAFESW2 15 Volt 15 Volt OUT4 OUT0 OUT1 OUT2 15 Volt 15 Volt 26 NC Service manual Valiant treadmill V1.00...
-
Page 40: Maintenance
Maintenance Service manual Valiant treadmill V1.00... -
Page 41: General Maintenance
6.1 General Maintenance Visual inspection: • Housing • Display • Cables, sockets e.g.line voltage entrance • User Interface, e.g. a keyboard Mechanical check-up • Technical cleaning of mechanical parts • Freewheel assembly • Braking assembly, bearings • Saddle assembly/handle bar assembly Inspection electronics •... -
Page 42: Speed Calibration
6.2 Speed calibration For Calibration of the Speed from the Valiant treadmill you can use a Tachometer which can directly measure the speed at the walking belt. A cheaper and even accurate method for calibration of the speed of the treadmill is counting the revolutions of the belt. - Page 43 Readjusting the speed: 1. Switch off the valiant and remove the front cover, see for instructions in this service manual 2. Switch the Valiant to “standby” 3. Switch the relay on by pushing the switch to “1” (see fig.1) and hold it in this position. Fig 1 4.
- Page 44 Fig 2 FREF Fout IOUT MNTR Frequency reference Output frequency Output current Multi-function Setting/monitoring Monitor Monitor Monitor (GREEN) (GREEN) (GREEN) (GREEN) LO/RE PRGM Operator RUN LOCAL/REMOTE Constant no./data Command FWD/REV Selection (RED) Selection (RED) (GREEN) Fig 3 Service manual Valiant treadmill V1.00...
- Page 45 Factory settings Below you find the default settings of the Valiant Servo Amplifier for the 932900 and 932901. This are the default settings from Valiant serial number 20060086 . Before serial number 20060086 the value for N11 was 50, the value for N13 was 20 and the value for N63 was 1.
-
Page 46: Grade Calibration
6.3 Grade calibration Calibration procedure grade You can follow the procedure for the grade calibration during maintenance. The grade should be within 1%, If the grade of the Valiant is not within specifications, check if the grade motor and grade potentiometer are working properly and make sure there is no obstruction in its way up or down. - Page 47 But it can also be done as follows: You can measure the height at a certain point (o) After that you can measure the length (a) on the floor. The grade can be calculated as follows: Service manual Valiant treadmill V1.00...
-
Page 48: Walking Belt Tension
6.4 Walking belt tension The walking belt can be tightened by means of the two outmost socket screws placed on the feed at the end of the frame: First decrease the tension on the walking belt fully by turning both tightener socket screws anti-clockwise. -
Page 49: Walking Belt Alignment
6.5 Walking belt alignment The alignment of the walking belt is correct when the belt runs in the middle of the supporting plate. The walking belt alignment can be adjusted by means of the socket screw located at the left side of foot at the end from the frame. Set for a speed of approx. -
Page 50: Motor Belt Tension
6.6 Motor belt tension The tension of the motor belt can be checked by pulling the belt up and down in the middle between both pulleys. The full stroke must be about 10 mm. To change the tension of the belt remove the locking nut on the spanner socket screw of the motor belt. -
Page 51: Inclination System
6.7 Inclination system Remove the cover of the motor drive unit. Loosen the socket screw of the mounting bracket of the elevation feedback potentiometer. Turn the gear wheel of the potentiometer away from the driven gear wheel. Switch on the main supply, the inclination system will move to the lowest position and you must switch the main power supply OFF BEFORE the wheels contact the housing.
Need help?
Do you have a question about the ERGOMETERS and is the answer not in the manual?
Questions and answers