Gree GWH09MA-A3DNA3A Owner's Manual
High-wall ductless air conditioning & heating system
Hide thumbs
Also See for GWH09MA-A3DNA3A:
- Installation manual (24 pages) ,
- Quick start manual (2 pages) ,
- Installation, service & troubleshooting (211 pages)
Advertisement
Table of Contents
- 1 Table of Contents
- 2 Safety Precautions
- 3 Part Names
- 4 Operation of Wireless Remote Controller
- 5 System Functions
- 6 Care and Cleaning
- 7 Cleaning and Caring for Your Unit
- 8 Troubleshooting
- 9 System Operation
- 10 System Operations/Energy Saving Tips
- 11 Limited Warranty
- Download this manual
See also:
Installation Manual
Advertisement
Table of Contents

Subscribe to Our Youtube Channel
Related Manuals for Gree GWH09MA-A3DNA3A


Summary of Contents for Gree GWH09MA-A3DNA3A
- Page 1 HIGH-WALL DUCTLESS AIR CONDITIONING & HEATING SYSTEM Models: GWH09MA-A3DNA3A GWH12MB-A3DNA3A GWH09MB-D3DNA3D GWH12MB- D3DNA3D GWH18MC-D3DNA3D GWH24MD-D3DNA3D GWH30LB-D3DNA3E GWH36LB-D3DNA3E...
-
Page 2: Table Of Contents
You can feel confident in your selection because the same pride in craftsmanship and engineering knowledge that goes into millions of other Gree installed products worldwide has gone into your unit. Please read this owner’s manual carefully before operation and retain it for future reference. -
Page 3: Safety Precautions
SAFETY PRECAUTIONS Please read the following before operation. Recognize safety information. This is the safety-alert symbol. When you see this symbol on the unit and in instructions or manuals, be alert to the potential for personal injury. Understand these signal words: DANGER, WARNING, and CAUTION. These words are used with the safety-alert symbol. - Page 4 SAFETY PRECAUTIONS Please read the following before operation. W RNING • Disconnect electrical power to the neo system before performing any maintenance or cleaning. • Do not attempt to repair the neo system yourself. Incorrect repairs may cause electric shock or fire. Contact a qualified service technician for all service requirements. •...
-
Page 5: Part Names
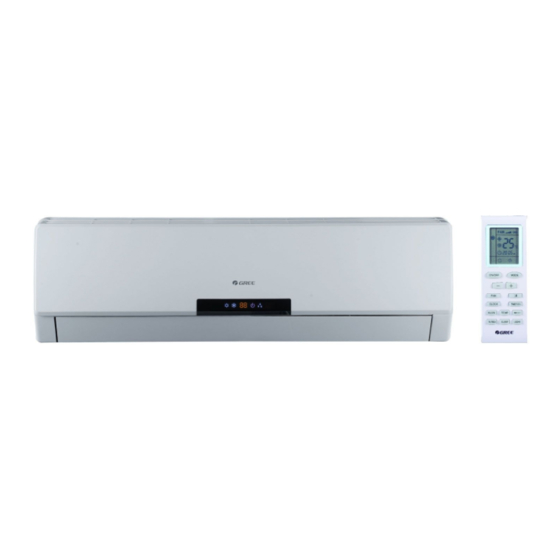
PART NAMES Indoor unit Part Name 1. Remote Controller 2. Front Panel 3. Air Filter 4. Horizontal Louver 5. Wall Hole Sleeve 6. Insulation 7. Refrigerant Pipes 8. Drain Hose Outdoor unit... -
Page 6: Operation Of Wireless Remote Controller
OPERATION OF WIRELESS REMOTE CONTROLLER REMOTE CONTROLLER OPERATIONS The neo universal wireless remote controller is sleek, versatile and allows you to change room temperatures and functions on unit from the palm of your hand. The large LCD display and buttons make it easy-to-understand and easy-to-use. The remote controller may be used for several neo units. - Page 7 OPERATION OF WIRELESS REMOTE CONTROLLER Signal Transmitter ON/OFF Button MODE Button FAN Button...
- Page 8 OPERATION OF WIRELESS REMOTE CONTROLLER REMOTE CONTROLLER FUNCTIONS CLOCK Button • Press the CLOCK button to enter Clock Setup Mode. The clock icon will begin flashing. Set the clock by pressing the + or - buttons. Press once for slow adjustment; press and hold down for fast adjustment.When finished, press the CLOCK button to save your clock settings.
- Page 9 OPERATION OF WIRELESS REMOTE CONTROLLER – Button + Button CLOCK Button X-FAN Button LIGHT Button TURBO Button...
- Page 10 OPERATION OF WIRELESS REMOTE CONTROLLER TIMER ON Button • Press the TIMER ON button to enter TIMER mode. The TIMER ON icon will begin flashing. Set the time period when the unit will turn on by pressing the + or - buttons. Press once for slow adjustment and hold down for fast adjustment.
- Page 11 OPERATION OF WIRELESS REMOTE CONTROLLER VERTICAL SWING TIMER ON Button LOUVER Button TEMP Button TIMER OFF Button SLEEP Button...
- Page 12 OPERATION OF WIRELESS REMOTE CONTROLLER The wireless remote controller is the interface between the user and the neo system. Commands are entered by the user to control the system. Any command that has been entered with the remote controller will remain in memory until it is changed by the user or the batteries are replaced.
- Page 13 OPERATION OF WIRELESS REMOTE CONTROLLER MODE BUTTON : AUTO Use the “MODE” button to select one of the available modes. The selected mode will be displayed on the remote controller : COOL and the appropriate light will illuminate on the display panel. : DRY AUTO –...
- Page 14 OPERATION OF WIRELESS REMOTE CONTROLLER VERTICAL SWING LOUVERS • Press the Vertical Swing Louver button to select five different vertical (up & down) air discharge directions including Continuous Sweep.The Vertical Swing Louver icon will be displayed. Press this button to set swing angle, which circularly changes as below: Swing Louver Display Indicates louver swings back and forth in the five...
- Page 15 OPERATION OF WIRELESS REMOTE CONTROLLER TURBO MODE The desired setpoint, either in heating or cooling, can be achieved faster if TURBO mode is used. After selecting the “HEAT” or “COOL” mode button, push the “TURBO” button. The TURBO icon will be displayed on the remote controller and the unit will run at ultra high speed fan.
- Page 16 OPERATION OF WIRELESS REMOTE CONTROLLER CHANGING BATTERIES AND ADDITIONAL NOTES To change batteries, slide cover off battery compartment on back of remote controller. Remove and safely discard old batteries. Insert two new AAA 1.5V dry batteries, using correct polarity. Reattach back cover. NOTE: •...
-
Page 17: System Functions
SYSTEM FUNCTIONS TIME GUARD The neo System is equipped with many system safeties to provide safe, reliable operation and comfort.The Time Guard function prevents rapid cycling of the compressor.The system has a protective 3-minute time delay to restart the compressor after it has turned off. INTELLIGENT DEFROST The neo Intelligent Defrost function increases room comfort and saves energy by eliminating unnecessary defrost cycles. -
Page 18: Cleaning And Caring For Your Unit
CARE AND CLEANING WARNING CAUTION WARNING C UTION • Turn off power and disconnect unit from power source before cleaning. Failure to do so could cause electric shock. • Never spray water on either indoor or outdoor unit.This could cause damage or unit failure. •... - Page 19 CARE AND CLEANING CLEANING THE PRIMARY AIR FILTER Cleaning is recommended every three months. NOTE: If the indoor unit is exposed to excessive dust, cleaning may be necessary more often. Use caution when removing the filter to avoid sharp metal extensions. 1.
-
Page 20: Troubleshooting
TROUBLESHOOTING WARNING CAUTION WARNING W RNING Do not attempt any repairs on the unit yourself. Incorrect repair can cause shock or fire. Always call a qualified service professional. Using these troubleshooting suggestions can save time when you contact the qualified service professional. PROBLEM CAUSE/SOLUTION System does not restart. - Page 21 TROUBLESHOOTING TROUBLESHOOTING PROBLEM CAUSE/SOLUTION Wireless remote controller Cause: There are a number of possible reasons. lost or does not work. Solution: Check the following: • The batteries might be low. Change the batteries. • The remote controller must be within 25 ft. (7.6 m) with no obstructions of the indoor unit.
-
Page 22: System Operation
SYSTEM OPERATION COOLING OPERATION How it works: In cooling mode, your neo indoor unit will absorb heat from the room, then the neo outdoor unit will discharge the heat to the outdoors. The neo cooling capacity decreases as the outdoor temperature increases. This causes the neo to work harder and longer to hold the selected room temperature. -
Page 23: System Operations/Energy Saving Tips
ENERGY SAVING TIPS 1. Relaxing room temperature at night is OK: During the nighttime hours you don't require the same level of conscious cooling or heating. Try using Sleep Mode to gradually relax room temperature and allow the unit to run less and save energy. 2. -
Page 24: Limited Warranty
LIMITED WARRANTY GREE distributor (hereinafter “Company”) warrants this product against failure due to defect in materials or workmanship under normal use and maintenance as follows.All warranty periods begin on the date of original purchase from wholesaler/supplier . If the date cannot be verified, the warranty period begins one hundred twenty (120) days from date of manufacture.
Need help?
Do you have a question about the GWH09MA-A3DNA3A and is the answer not in the manual?
Questions and answers