Advertisement
Installing the Switch in the Rack
Minimum and Maximum Rack Depth for these switches
Make sure that the Installation kit you have is compatible with your rack.
To use the IS50XX series switch in a rack deeper than 50cm, order the switch with the standard
depth, or order the MIS000083 installation kit. The both of these solutions will allow you to install
the switch in a 19" rack whose vertical supports are between 50cm and 80cm apart.
Table 1 - Switches and Rail Kits for Various Rack Depths
Rack Size
50cm to 80cm
38cm to 50cm
Table 2 - Mellanox Part Numbering Legend
Place
System Type
IS
Model
50
Form factor
FF
InfiniBand Port
C
Config.
Separator
-
# of Power
P
Suplies
Depth of the
M
Unit
Air Flow direc-
Y
tion
RoHS
R
Mellanox Technologies Inc.
350 Oakmead Parkway, Sunnyvale, CA 94085
Document Number
3135
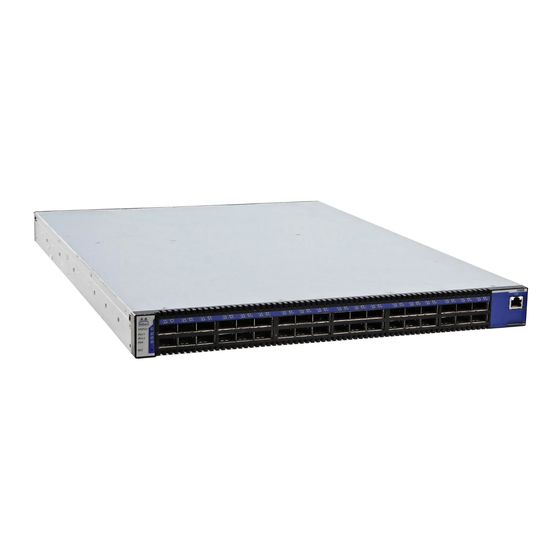
IS5025/5030/5035 Installation Guide
Switch Standard/ Short
Short
Standard
Short
Field
InfiniScale Switch
Family
25 = 36 Ports Unmanaged
30 = 36 Ports and Chassis Management with limited
Fabric Management
35 = 36 ports and Fabric Management
Q= QDR, D= DDR
0=0, 1=1, 2=2....
S = standard depth, B = short depth
R= Connector side to PSU side airflow
F= PSU side to Connector side airflow
C=RoHS5, X=RoHS6
Rail Kit #
MIS000083
MIS000085
MIS000079
Decoder
Tel: 408-970-3400
Fax: 408-970-3403
www.mellanox.com
Rev 1.0
Advertisement
Table of Contents

Related Manuals for Mellanox Technologies IS5025


Summary of Contents for Mellanox Technologies IS5025
-
Page 1: Installing The Switch In The Rack
IS5025/5030/5035 Installation Guide Installing the Switch in the Rack Minimum and Maximum Rack Depth for these switches Make sure that the Installation kit you have is compatible with your rack. To use the IS50XX series switch in a rack deeper than 50cm, order the switch with the standard depth, or order the MIS000083 installation kit. - Page 2 IB connectors can be even with the vertical rack support. The other side of the switch will be further inside of the rack. Things to consider before choosing where to mount the rails and rail slides. Mellanox Technologies...
- Page 3 Note: The side of the switch with these brackets will be the side that is even with the vertical rack support. Step 4. Screw the rails onto the switch. Use the 5 flat head screws to connect each rail to the switch. The 5 screws Mellanox Technologies...
- Page 4 Tighten all of the screws to 9.2 Nm or 81.5 pound inches. Step 13. Plug in the power cables. Note: When the switch is plugged in, the status LED may be RED for up to three minutes until the system completes booting up. Mellanox Technologies...
-
Page 5: Grounding The Switch
Note: Grounding wires, screws, and connectors for the ground are not supplied by Mellanox. Configuring the Switch for the First Time Note: Unmanaged (Externally managed) switches, that is the IS5025 switches, do not get configured. On unmanaged switches, the CONSOLE, Ethernet, and USB connectors are not found. Instead there is an I2C connector. - Page 6 Step 3: Admin password (Enter to leave unchanged)? To avoid illegal access to the <new_password> machine, please type a password Step 4: Confirm admin password? <new_password> and then press <Enter>. Then confirm the password by re- entering it. Note that password characters are not printed. Mellanox Technologies...
- Page 7 3) that you wish to return to. Configuration changes saved. To return to the wizard from the CLI, enter the “configuration Note: jump-start” command from configuration mode. Launching CLI... To run the command "configura- tion jump-start, you must be in bridge-1 > Config mode. Mellanox Technologies...
- Page 8 To change an answer, enter the step number to return to. Otherwise hit <enter> to save changes and exit. Choice: Configuration changes saved. To return to the wizard from the CLI, enter the "configuration jump-start" command from configure mode. Launching CLI... bridge-1 > Mellanox Technologies...
- Page 9 Before attempting a remote (for example, SSH) connection to the gateway, check the eth0 interface configuration. Specifically, verify the existence of an IP address. To check the current eth0 configuration, enter the following commands: bridge-112428> enable // Enter ‘enable’ mode of bridge-112428# show interface eth0 // # indicates ‘enable’ mode Mellanox Technologies...
- Page 10 > enable // Enter ‘enable’ mode of CLI switch-1 # show interface eth0 // # indicates ‘enable’ mode The following is an example of the output: Interface eth0 state Mellanox Technologies...
-
Page 11: Starting An Ssh Connection To The Switch
Note that the IP address used above is the same IP address that was assigned to the Mellanox configura- tion wizard in the “Configuring the Switch for the First Time” section. Step 4. You can enter any supported command now. Note: For a complete reference of commands, please see Mellanox FabricIT Management Software User’s Manual. Mellanox Technologies... -
Page 12: Starting A Webui Connection To The Switch
Use admin for both the login (Account) and the password. The MIS50XXSeries User Manual can be found at: http://www.mellanox.com =>Products=>Switches=>InfiniBand Switch Systems=>IS5025/IS5030/IS5035 Resetting the Switch On the connector side panel under the system LEDs is a reset button. This reset button requires a tool to be pressed, a paper clip will do.
Need help?
Do you have a question about the IS5025 and is the answer not in the manual?
Questions and answers