Palm Centro User Manual
Palm centro
Hide thumbs
Also See for Centro:
- User manual (290 pages) ,
- Quick reference (200 pages) ,
- Quick start manual (41 pages)
Table of Contents
Advertisement
Quick Links
Advertisement
Table of Contents

Related Manuals for Palm Centro


Summary of Contents for Palm Centro
- Page 1 Sprint® Service Palm® Centro™ Smart Device Getting Started Guide sprint.com © Sprint Nextel. All rights reserved. No reproduction in whole or in part without prior written approval. SPRINT and other trademarks are trademarks of Sprint Nextel. PN: 406-11490-00 v. 1.0...
- Page 2 Disclaimer and Limitation of Liability Palm, Inc. and its suppliers assume no responsibility for any damage or loss resulting from the use of this guide. Palm, Inc. and its suppliers assume no responsibility for any loss or claims by third parties that may arise through the use of this software.
- Page 3 Palm products should be sent to a facility that properly recycles electrical and electronic equipment. For information on environmental programs, visit: palm.com/environment. As part of Palm’s corporate commitment to be a good steward of the environment, we strive to use environmentally friendly materials, reduce waste, and develop the highest standards in electronics recycling.
-
Page 5: Table Of Contents
Your New Centro Smart Device ........ - Page 6 Wireless Features ..............89 Getting Started With Sprint Power Vision .
-
Page 7: Introduction
Introduction In This Section About This Guide What You Need Introduction... -
Page 8: About This Guide
Where to Learn More For a Quick Introduction Quick Tour: The Quick Tour introduces you to many of your Centro device’s features. It is already installed on your device, and you can open it anytime. Press Applications and then select Quick Tour... -
Page 9: Contacting Sprint
For information on using your device and desktop software with Windows Vista , visit palm.com/windowsvista. Books: Many books on Palm OS® by ACCESS devices are available in local or online book retailers (look in the computers section), or visit palm.com/us/support/centro/centro_sprint. - Page 10 Reaching Sprint Customer Service You can reach Sprint Customer Service many different ways: On your device, press Phone ; enter *2, and then press Talk Sign on to your account at sprint.com. Call toll-free at 1-800-SPRINT1 (1-800-777-4681) (consumer customers), –or– 1-800-927-2199 (business customers).
-
Page 11: What You Need
USB sync cable. Sprint charger adapter. Software Palm Software Installation CD (includes desktop synchronization software and links to bonus software for your device). You’ll also need the following items to complete the installation and activation: An activated Sprint service plan. - Page 12 Voicemail” on page 34. Sprint Power Vision Password With your Centro device, you may elect to set up a Sprint Power Vision password. This optional password can be used to authorize the purchase of Premium Services content and to protect personal information on multi-phone accounts.
-
Page 13: Device And Phone Basics
Device and Phone Basics In This Section Your New Centro Smart Device Inserting the Battery Charging the Battery Turning Your Device On and Off Moving Around the Device Screen Using the Keyboard Opening Applications Using the Phone Resetting Your Device... -
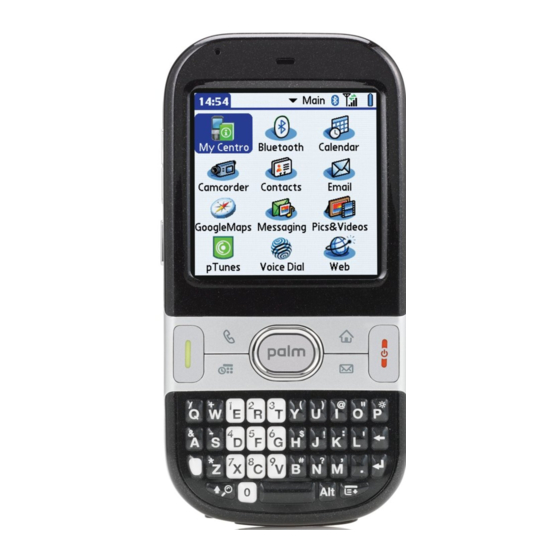
Page 14: Your New Centro Smart Device
Your New Centro Smart Device Your Device’s Features: Front View 3. 5-way 1. Indicator 2. Earpiece Navigator Light 4. Power/End 5. Applications 13. Volume Button 12. Side Button 6. Menu 11. Talk 10. Phone 9. Calendar 7. Messaging 8. Option Indicator Light provides the status of your device’s battery. - Page 15 5-way Navigator gives you one-handed access to moving around the device screen and selecting options. See “Moving Around the Device Screen” on page 18 for instructions. Power/End turns the device’s phone on and off, wakes up and turns off the screen, and hangs up calls.
- Page 16 Your Device’s Features: Back View 14. Self-portrait 15. Speaker Mirror 23. Camera Lens 16. Battery Door 22. Infrared (IR) Port 21. Expansion Card Slot 17. Headset Jack 19. Charger 18. Sync 20. Microphone Jack Connector Self-portrait Mirror enables you to take a picture of yourself. Speaker plays ringtones and alarms, and serves as the speaker for the speakerphone feature and audio playback.
- Page 17 Expansion Card Slot allows you to expand the capabilities of your device using a microSD card. Infrared (IR) Port uses infrared technology to transmit information to and receive information from other infrared-enabled devices that use compatible software. Camera Lens enables you to take pictures using the built-in camera. Note: Your device’s speaker includes a large magnet, so be sure to keep your device away from credit cards or other items that could become...
-
Page 18: Inserting The Battery
Follow the onscreen instructions to set up your device. Tip: Buy an extra battery as a spare for long trips or heavy data use. Visit palm.com/us/support/centro/centro_sprint or sprint.com to purchase batteries that are approved by Sprint and that are compatible with your device. -
Page 19: Charging The Battery
Charging the Battery The battery comes with a sufficient charge to complete the setup process and activate your phone. After activation, we recommend charging your device for three and a half hours to User Guide give it a full charge. See “Maximizing Battery Life” in the for tips on maximizing the life of your device’s battery. - Page 20 The onscreen battery icon displays the power status: Full battery : Battery is not connected to a wall outlet and is fully charged. Partial battery : Battery is not connected to a wall outlet and has some power but is not fully charged.
- Page 21 Using a Sprint Charger Adapter If the connector on your Sprint-approved 1 Amp AC charger or vehicle charger doesn’t fit into the connector on the bottom of your device, use the included Sprint charger adapter. WARNING: Use only with 1 Amp AC chargers distributed by Sprint for your device. Using any unapproved AC charger may destroy the AC charger and cause a fire.
-
Page 22: Turning Your Device On And Off
Turning Your Device On and Off device Note: Throughout this guide the term is used to describe your smart phone device and its physical attributes. The term is used to describe the feature of your smart device that enables you to connect to the Sprint National Network. - Page 23 Turning Your Device’s Phone On and Off When your phone is on, it is connected to the Sprint National Network (provided you are in a coverage area), so that you can make and receive phone calls and use wireless services, such as email, messaging, and the Web browser.
-
Page 24: Moving Around The Device Screen
Moving Around the Device Screen To move around the screen on your Palm Centro™ smart device, you can use the 5-way navigator for one-handed navigation, or you can tap items on the screen with the stylus. With use, you can find your own favorite way to scroll, highlight, and select menu items. - Page 25 Scrolling Through Screens As on a computer, you scroll on the Centro device to move from field to field or page to page, or in some cases to highlight an item or option in a list. The behavior of the 5-way for list screens and entry screens varies by application.
- Page 26 The highlight can take one of two forms, depending on what is highlighted: Border glow: When an onscreen button (OK, Cancel, etc.) or pick list is highlighted, the button acquires a glow around its border. Colored background: When a phone number, text, an email address, or a Web link is highlighted, the item appears as white text against a colored background.
- Page 27 Selecting Menu Items Many applications have menus to provide access to additional features. These menus are usually hidden from view, but they appear when you press Menu . To get the most out of your device, it’s a good idea to familiarize yourself with the additional features available through the various application menus.
- Page 28 Use your stylus to tap the pick list, and then tap the item you want from the list. To exit the pick list without making a selection, tap outside the list. Basics...
-
Page 29: Using The Keyboard
Using the Keyboard When using the keyboard, most people find it easiest to hold the device with two hands and use the tips of both thumbs to press the keys. Backlight Backspace Option Return Menu Shift/Find Space The Backspace, Return, Space, and Shift keys, as well as the letter keys, work in the same way as do those found on any computer keyboard. - Page 30 21 for details. Tip: The Centro smart device includes a keyboard backlight that turns on and off when the screen turns on or off. Press Option + P to adjust screen and keyboard backlight brightness. You can also set the backlight to dim or turn off when an active call lasts longer than a specified period of time.
- Page 31 Entering Numbers, Punctuation, and Symbols Numbers, punctuation, and symbols appear above the letters on Symbol the keys. To enter these characters, do one of the following: Letter Press Option , and then press the key with the desired character shown above the letter. You don’t need to press and hold Option while pressing the second key.
-
Page 32: Opening Applications
Using the Quick Buttons The front of the Centro device has three buttons that you can use to open applications. The fourth button opens Applications view, which allows you to open all the applications on your device (see “Using Applications View”... - Page 33 Button Primary Application Secondary Application Phone Calendar World Clock Messaging Email Using Applications View You can access all available applications through Applications view. Press Applications Use the 5-way to highlight the application you want to open. Press Center to open the selected application. In Applications view, you can also do any of the following: Press Applications repeatedly to cycle through various...
-
Page 34: Using The Phone
Using the Phone Opening the Phone Application Press Phone to open the Main view of the Phone application. Status Icons Dial Pad Favorite Buttons Checking Signal Strength and Phone Status You can monitor the status of your device’s signal strength and several other items, using User Guide the icons in the title bar of the Phone application. - Page 35 Making Calls Your device offers several options for making phone calls. As you become familiar with your device, you’ll discover which method you prefer. Dialing Using the Onscreen Dial Pad Press Phone Enter the phone number by tapping the onscreen Dial Pad with the stylus.
- Page 36 Dialing by Contact Name You need to have names and numbers in your contact list before you can dial a call by using a contact name (see “Adding a Contact” on page 53). You can also import names and numbers by synchronizing (see “Synchronizing Information—The Basics” on page 50). Characters You Enter Press Phone Appear Here...
- Page 37 Dialing With a Speed-Dial Favorite Button For information on speed-dial favorite buttons, see “Defining Favorite Buttons” on page 40. Press Phone Press Down to access your favorite buttons. Use the 5-way to highlight the desired speed-dial favorite button. (Speed-dial favorite buttons are indicated by icon.) Press Center or tap the speed-dial favorite button to dial the number associated...
- Page 38 Adjusting Call Volume While a call is in progress, press the Volume button on the side of your device to adjust the call volume. Volume Button Side Button Receiving Calls To receive calls, your device’s phone must be on. This is different from having only the screen turned on (see “Turning Your Device’s Phone On and Off”...
- Page 39 Sending Calls to Voicemail Press Power/End –or– Using the 5-way , select the onscreen Ignore button. –or– Using the 5-way , select the onscreen Ignore with Text button. This option sends the call to voicemail and opens a text message addressed to the caller. Tip: Do not press Power/End to ignore a call-waiting alert;...
-
Page 40: Using Voicemail
Using Voicemail Setting Up Your Voicemail Make sure your phone is turned on (see “Turning Your Device’s Phone On and Off” on page 17). Press Phone Press and hold 1, or select the Voicemail favorite button, to call the automated voicemail system. Follow the voice prompts to set up your voicemail. - Page 41 What Can I Do When I’m On a Call? When you make or receive a call, Active Call view appears. Use the 5-way to access the onscreen buttons in this view. Current Duration of Call Dial Pad Caller’s Name and Number Mute The onscreen buttons in Active Call view perform the following functions: Ends the call immediately.
- Page 42 Places the current call on hold. Enables you to make another call while the first call is on hold. For User Guide information on making a second call, see the Opens the Dial Pad so you can manually dial additional numbers, such as an extension or a response to a voice prompt.
- Page 43 Tip: When a call lasts longer than two minutes, the screen dims. Press any key except Power/End to restore the screen brightness, and then press Power/End to hang up the call. Be careful not to press Power/End to wake up the screen, because this will accidentally end the call. Saving Phone Numbers After you complete an outgoing call to a number that is not in your Contacts list, you are prompted to add the number to your Contacts list.
- Page 44 Answering a Second Call (Call Waiting) When you are on a call, you can receive a second call. When the second call comes in, you hear a call-waiting tone and the Call Waiting dialog box appears. You can do any of the following to handle the second call: To place the current call on hold and answer the new call, press Talk or use the 5-way...
- Page 45 Using Sprint Voice Command If you subscribe to the Sprint Voice Command service, you can call a number by just saying a name. (There is a monthly charge for this service.) To activate Sprint Voice Command: Make sure your phone is turned on (see “Turning Your Device’s Phone On and Off” on page 17).
-
Page 46: Defining Favorite Buttons
Defining Favorite Buttons Your device provides 70 programmable favorite buttons for quick access to common tasks such as dialing a phone number (speed dial); opening an application; accessing a Web page; addressing a text, email, or Picture Mail message; or accessing voicemail. Sprint may preset favorite buttons on your device that are customized for their services. - Page 47 For a list of compatible hands-free devices, go to palm.com/us/support/centro/centro_sprint. Check the specifications for your headset or car kit to confirm compatibility. Please note that you cannot use stereo headphones with Bluetooth wireless technology to listen to music files on your Centro device. Basics...
- Page 48 Using a Wired Headset Headset Button Microphone Speakers When using the headset, you can press the headset button to answer an incoming call or a call-waiting call, pick up a call that is on hold, switch between an active call and a call on hold (if the second call is incoming), and more.
- Page 49 Other devices provide a screen where you enter a passkey that you make up. In either case, you must use the same passkey on both your Centro device and your hands-free device. We recommend that, where possible, you make up a passkey of 16 alphanumeric characters (letters and numerals only) to improve the security of your Centro device.
- Page 50 Centro device rings and the hands-free device beeps. Even if you answer the call on your Centro device, the call goes to the hands-free device. If you prefer to route calls to the earpiece on your Centro device, you can change the settings on your Centro device to User Guide do this;...
- Page 51 Transfer a call from the earpiece on your Centro device to the hands-free device. Ignore an incoming call. Redial the last number you called from the hands-free device. Selecting Ringtones You can set various tones for various types of incoming phone calls.
-
Page 52: Resetting Your Device
Resetting Your Device Soft Reset Performing a soft reset is similar to restarting a computer. If your Centro device is not responding or you’re having trouble synchronizing with your computer, a soft reset may help. All your information is retained when you perform a soft reset. -
Page 53: Hard Reset
Web browser to access a Web site. A hard reset can tell you if a problem stems from your Centro device or from an application installed on it. If you do not experience the problem after you perform a hard reset, the problem is related to software you installed. - Page 54 Remove the battery from your device. Press and hold Power/End while reinserting the battery. (See “Inserting the Battery” on page 12 for details.) When the second Palm® logo appears, release Power/End When the “Erase all data?” prompt appears, press Up to confirm the hard reset.
-
Page 55: Information Management Tools
Information Management Tools In This Section Synchronizing Information—The Basics Personal Information Management Working With Your Pictures and Videos Listening to Music Working With Your Office Files Installing Applications Using Expansion Cards Customizing Your Device Locking Your Keyboard and Screen Information Management... -
Page 56: Synchronizing Information-The Basics
We strongly recommend that you synchronize your Centro device with your computer or corporate server frequently to keep your information up-to-date (and backed up) in both locations. - Page 57 Connect your device to your computer. See the for instructions. Note: If you’re performing initial setup, your device should already be connected to your computer and you should have already installed the desktop synchronization software from the Palm Software Installation CD. Information Management...
- Page 58 If you’re finishing your initial setup, you now have the option to install bonus software from palm.com/us/support/centro/centro_sprint. If you choose to install some of the bonus software, you need to sync again to install the software on your device. To install bonus software later, see “Installing Applications”...
-
Page 59: Personal Information Management
Personal Information Management Managing Your Contacts Adding a Contact Press Phone Select the Contacts favorite button. Tip: You can also open Contacts from Applications view. Select New Contact. Use the 5-way to move between fields as you enter information. (Optional) Do any of the following: Add a caller ID photo: Select the Picture box, and then do one of the following: Select Camera to take a picture and add it to this... - Page 60 Press Menu Select Select Business Card on the Record menu. After you define your business card, you can beam it to other Palm OS® by ACCESS devices. In Contacts or in any Phone view, press Menu and select Beam Business Card on the Record menu.
-
Page 61: Creating And Viewing Your Calendar
Creating and Viewing Your Calendar Displaying Your Calendar Press Calendar repeatedly to cycle through the various views: Agenda view shows your daily schedule, the number of unread email messages, and any items on your Tasks list that are overdue or due today. If there’s room, Agenda view also shows your schedule for the next dates that have events scheduled. - Page 62 Creating an Event Press Calendar until Day view appears. Press Left or Right to select the desired day. Selected Date Selected Day Select New. Using the keyboard, enter a starting hour and minute for the event. (For example, enter 545 for 5:45.) Select the End Time box, and then select the ending hour and minute for the event.
- Page 63 Scheduling a Repeating Event Create an event, and then select it. Select Details. Select the Repeat pick list, and then select a repeat interval. (If the interval you need doesn’t appear on the list, select Other to define a custom interval.) For weekly events, select the day(s) the event is repeated;...
-
Page 64: Managing Your Tasks
Managing Your Tasks Adding a Task Press Applications and select Tasks Select New to create a new task. Enter a description of the task. (The text can be longer than one line.) (Optional) Select Details to customize this task, or select Note to add a note to this task. -
Page 65: Working With Your Pictures And Videos
If you have an expansion card inserted into your device’s expansion card slot, the Camera application creates a Palm album on the card and stores pictures there. To store the picture in a different location, select the album pick list in the lower-right corner of the screen, and then do one of the following: Select <Album name>... - Page 66 Press Center to take the picture. Select one of the following icons: Saves the picture in the location you selected in step 2. Deletes the picture. Lets you add an audio caption. Opens a list of options for sending the picture: Select Send with PictureMail to send the picture as part of a Picture Mail message (see “Creating and Sending a Sprint Picture...
- Page 67 Press Applications and select Camcorder By default, the Camcorder application stores your videos in the Palm album on your device. If you have an expansion card inserted into your device’s expansion card slot, the Camcorder application creates a Palm album on the card and stores videos there.
- Page 68 Opens a dialog box where you can adjust the volume during playback. Opens a list of options for sending the video: Select Send with PictureMail to send the video as part of a Picture Mail message (see “Creating and Sending a Sprint Picture Mail Message”...
- Page 69 If the picture has a voice caption, select to hear it. Tap the photo or press Center to return to Thumbnail view. Viewing a Video In addition to viewing the videos you capture with the built-in camcorder, you can view videos captured on many popular digital video cameras.
-
Page 70: Listening To Music
Close any applications that are currently running on your computer, including those that are minimized. (Your computer must have all its resources available to install the software.) Insert the Palm Software Installation CD into the CD drive on your computer. Information Management... - Page 71 Double-click the Sprint Music Manager installation option to launch the Sprint Music Manager Installation Wizard. (When the installation wizard opens, follow the onscreen instructions.) Click Finish to complete the process and reboot your computer. (Rebooting your computer completes the installation of the application and phone drivers.) Accessing the Sprint Music Manager Quick Start Guide When you first open the Sprint Music Manager application on your computer, an onscreen Quick Start Guide provides tutorials for the main features.
- Page 72 Use the Sprint Music Manager desktop application to access the Sprint Music Store and download music to your computer. You can then transfer the music from your computer to your Centro device. Open the Sprint Music Manager application and select the Get tab from the main window.
- Page 73 Playing Music With the Sprint Music Manager Select the Manage tab to list all music files found on your PC. By default, the music files are organized by category (including Songs, Artists, Albums, Genre, My Playlists, and Music Store Downloads.) Select a category to display the songs for that category.
- Page 74 Click Rewind to play the previous song in the playlist. Click Forward to play the next song in the playlist. Use the Volume slider to adjust the song’s volume level. Searching for Music Files on Your Computer Launch the Sprint Music Manager application and click the Manage tab. Click Add Music (bottom-right of the window) to launch the Add Music Wizard.
- Page 75 Managing the Files in Your Library Launch the Sprint Music Manager application and click the Manage tab. Note: All music imported into the Music Manager application is analyzed to register its file format and file properties such as size, artist information, genre, album art, and album information.
- Page 76 Transferring Music Files From Your Computer (Windows) To play songs on your Palm Centro™ smart device, you must copy audio files from a computer to your device using the included Pocket Tunes Deluxe application. Make sure the Pocket Tunes Deluxe application is open before you begin. Files can be copied from a variety of desktop music applications, including Windows Media Player, Sprint Music Manager, and others.
- Page 77 If you are using Windows Media Player, you can also select the Windows Media Player option. Open Windows Media Player on your computer. Select the Sync tab, and then select Palm Device from the drop-down list. Select Start Sync. Your device must be connected to your computer using the sync cable.
- Page 78 To transfer music files from your Mac to your Centro device, do the following: Drag and drop the music files onto the Send To Handheld droplet in the Palm folder. Select your device name (username), the file name, and the destination (card).
- Page 79 Transferring Music From a CD to Your Device If your songs are on a CD and you want to listen to them on your device, you need to convert them to a supported file format on your computer before you transfer the files to your device.
- Page 80 Listening to Music on Your Palm Centro™ Smart Device Press Applications and select pTunes Do any of the following: To play the current song, select Play or press Space To play the next song, select Next Song To play the previous song, select Previous Song To play a different song, select Choose Songs and select a song from the list.
- Page 81 Sound On. Tip: For complete instructions for using Pocket Tunes Deluxe with your Centro device, visit pocket-tunes.com. Creating a Playlist If you want to play a group of songs in a particular order, you can create a playlist.
- Page 82 Editing a Playlist Press Applications and select pTunes Press Menu Select Actions, and then select Manage Playlists. Highlight the playlist you want to edit, and then select Edit. Do any of the following: To delete a song from the playlist, select the song and then select Remove. To add a song, select Add Song, select a song, and then select OK.
-
Page 83: Working With Your Office Files
Select the document you want from the list. Tip: If you install the Documents To Go desktop software (from palm.com/us/support/centro/centro_sprint), you can use Documents To Go to transfer files to your device when you synchronize. For complete information on the Documents To Go application, install the Documents To Go desktop software, click the Documents To Go icon on your computer, and then click Help;... -
Page 84: Installing Applications
Installing Bonus Software From My Centro on Your Device My Centro lets you download and install bonus software that you can use on your device. If the bonus software has both a desktop component in addition to a device component, you need to download the software to your computer first. - Page 85 Installing Applications From the Internet You can use the Web browser on your smart device to install Palm OS files (PRC or PDB) directly from the Internet. When you download a PRC or PDB file, it is automatically installed on your smart device. If a file is compressed (ZIP or SIT), you need to download it to your computer and expand the file before installing it on your smart device.
- Page 86 WinZip or Allume StuffIt Expander, before you install the application on your device. On a Windows computer, select Start > Programs > Palm > Install Tool, and then select Add to browse to the application you want to add.
- Page 87 You can install an application to an expansion card rather than to your device. Windows: Select Start > Programs > Palm > Install Tool. Select your device name from the User list. Select Add and browse to the application you want to add.
-
Page 88: Using Expansion Cards
Using Expansion Cards The expansion card slot on your device enables you to insert microSD cards (sold separately) to extend the storage capacity of your device. For example, expansion cards can store pictures, MP3 files, email attachments, games, eBooks, Microsoft Office files, Adobe Acrobat files, applications, databases, and more. - Page 89 Opening Applications on an Expansion Card Insert the expansion card into the expansion card slot. Applications view automatically appears. Select the icon for the application you want to open. Press Center to open the application. Copying Applications Between an Expansion Card and Your Device Make sure the card is not write-protected.
-
Page 90: Customizing Your Device
Customizing Your Device Silencing Sounds You can immediately silence all alerts, ringtones, music that plays through the built-in speaker, and system sounds by sliding the Ringer switch to Sound Off . This does not, however, mute the audio during a phone call. Slide the Ringer switch to Sound Off . - Page 91 Adjusting the Brightness Depending on the lighting conditions when you’re using your device, you may need to adjust the brightness of the screen and keyboard backlight. Press Option , and then press Backlight Backlight Press Left and Right to adjust the brightness. Select Done.
-
Page 92: Locking Your Keyboard And Screen
Locking Your Keyboard and Screen Tip: In addition to locking your keyboard and screen as described here, you can also lock your phone, your device, and individual entries. See the User Guide for details. Locking Your Keyboard (Keyguard) The Keyguard feature locks the keyboard so that buttons aren’t accidentally pressed or items on the screen aren’t activated while your device is in a pocket or bag. - Page 93 You can change how quickly Keyguard turns on, or you can disable the feature altogether. To change the Keyguard settings, do the following: Press Applications and select Prefs Select Keyguard. Select the Auto-Keyguard pick list, and then do one of the following: Select how quickly you want Keyguard to turn on: When power is turned off, 5 seconds after power off, or 30 seconds after power off.
- Page 94 Information Management...
-
Page 95: Wireless Features
Features Wireless In This Section Getting Started With Sprint Power Vision Using Email Sending and Receiving Text and Picture Mail Messages Browsing the Web Watching Sprint TV Connecting to Devices With Bluetooth® Wireless Technology Beaming Information Wireless... -
Page 96: Getting Started With Sprint Power Vision
Sprint Power Vision offers the ultimate in wireless entertainment, real imaging solutions, instant communication, and personalized information at broadband-like speeds. Your Palm Centro™ smart device is equipped with the latest in multimedia, imaging, and processing technology, and offers exclusive services, such as On Demand. - Page 97 Web connections, and a wider variety of online services. Features such as Web access and sending/receiving digital images are available on your Palm Centro™ smart device through the Sprint National Network. Sprint Picture Mail enables you to instantly shoot, share, and print sharp, high-resolution digital pictures, and take and send short video clips with your device.
-
Page 98: Using Email
If you’ve activated Sprint Power Vision, you’re ready to set up an email application on your Palm Centro™ smart device. You can use an email application with your Sprint Mobile Email account, as well as with other email accounts, such as AOL or Earthlink. You can also use an email application with a corporate account. - Page 99 Press Applications , and then select Get Email Follow the onscreen instructions to download and install the Sprint Mobile Email application on your Centro device. (For more information and complete setup instructions, visit sprint.com.) When the installation is complete, press Applications...
- Page 100 Enter the User Name and Password for the email account. Select Register to initialize the service on your Centro device. (When a connection is established, Sprint Mobile Email retrieves your messages from the server and displays the messages in the account Inbox.)
- Page 101 Mail, Other POP, or Other IMAP and select Next. Select PCS Mail to configure your Sprint email account on your Centro device. (For more information and to set up an account, visit sprint.com.) Select Other POP to configure a POP3 email account. (Ask your account administrator or email provider for the required information described in the following steps.)
- Page 102 Review the Account Summary, and then select Next. (Select Back to return to a previous screen and change the configuration.) Select Register to initialize the service on your Centro device. (When a connection is established, Sprint Mobile Email retrieves your messages and displays them in the Inbox.)
- Page 103 Do one of the following: To read the message, select the message entry. To check for new messages, press Menu , and then select Receive from the Message menu. To delete a message, check the box next to one or more messages and select the Delete icon.
- Page 104 Select the Forward icon to forward the message to a new recipient. Tap the onscreen arrows, or , at the bottom of the message to view the previous or next message in the Inbox. Select the Back icon to return to the Inbox. Select Show Details to view additional information in the header of the message.
- Page 105 Check the box next to one or more filenames, and then do one of the following: Select View to view one or more files on your Centro device. Select Attach to attach one or more files to the email message.
- Page 106 User Guide for the VersaMail Application If either of the following is true, see the located on the Palm Software Installation CD for setup steps: You used the VersaMail application on your previous device or smartphone, and you want to transfer your settings and messages to your smart device.
- Page 107 User Guide for the If your email provider’s name is not listed in step 2, see the VersaMail Application located on your Palm Software Installation CD for setup steps. Setting Up VersaMail to Work With Common Providers Press Applications and select Email to open the VersaMail application.
-
Page 108: Sending And Receiving Text And Picture Mail Messages
Both text messages and Sprint Picture Mail messages can also be sent to email addresses. Before you use your Palm Centro™ smart device to send or receive messages, please verify pricing and availability with Sprint. - Page 109 text codes used to send text and multimedia messages for voting, polling, contests, surveys, chat, games, and other applications. For more information on short text codes, visit usshortcodeswhois.com. Tip: If you see numbers when you expect to see letters (or the other way around), you need to turn Option Lock on by pressing Option twice or turn it off by pressing Option once.
- Page 110 Select the To field to address the message: Press Center . If the recipient’s name appears in the list of recent addresses, select it from the list. If the recipient is in your Contacts list, enter the first initial and last name (no spaces), and then select the recipient’s phone number or email address, depending on where you want to send the message.
- Page 111 Your device uploads the pictures or videos to the Sprint Picture Mail Web site (sprint.com/picturemail), creates a private Guest Book for the recipient on the Sprint Picture Mail Web site, and sends your message to the recipient. Receiving Messages When your phone is on and is in an area of wireless coverage, you automatically receive new text messages.
-
Page 112: Browsing The Web
Browsing the Web Viewing a Web Page The Web browser optimizes Web pages for your device, so that you can see most of the content without scrolling left or right. Make sure your phone is turned on (see “Turning Your Device’s Phone On and Off” on page 17). - Page 113 Follow a link to another Web page: In Optimized Mode, highlight the link by pressing Up , Down , Left , or Right , and then press Center to go to the selected page. Tip: In Wide Page Mode, use the stylus to tap a link. Submit a form: Enter the information and then select the onscreen button to submit the form.
- Page 114 Downloading Files From a Web Page The Web browser lets you download files that are recognized by one of the applications on your device. Item Supported File Types Pictures JPEG, BMP, WBMP, GIF, PNG Videos MP4, 3G2, ASF Ringtones MIDI, QCELP, AAC, AAC+ Music Go to the page that contains the link to the file you want to download.
-
Page 115: Watching Sprint Tv
Viewing a Bookmark Select the Bookmarks view icon at the top of a Web page. Select the bookmark or saved page you want to view. Watching Sprint TV The Sprint TV application enables you to view streamed audio and video media from various channels on your device. - Page 116 Viewing Streamed Media Once you connect to the server, playback begins immediately. Use the following controls when viewing or listening to streaming media: Select to return to the channel list. Select or press Center to pause playback of nonlive content such as videos on demand. Select or press Center to stop playback of live content.
-
Page 117: Connecting To Devices With Bluetooth® Wireless Technology
Entering Basic Bluetooth Settings To use your Centro device’s Bluetooth functionality, you need to turn the Bluetooth feature on, and you may need to make your device either temporarily or permanently visible. You can also enter a name for your device. - Page 118 Visibility options. Hidden allows only devices with which you have previously formed a partnership to request a connection with your Centro device. New devices cannot request a connection. Requesting a Connection With Another Bluetooth Device...
- Page 119 (see the device’s documentation), and then select Find More on your Centro device. Enter the same passkey on your Centro device and on the Bluetooth device, and then select OK. Important: Some Bluetooth devices have a predefined passkey.
-
Page 120: Beaming Information
From the Record menu, select Beam to send an individual entry, or select Beam Category to send all entries in the current category. When the Beam Status dialog box appears, point the IR port on your Centro device directly at the IR port of the receiving device. -
Page 121: Receiving Beamed Information
Turn on your screen. Select the beam command on the transmitting device. Point the IR port on your Centro device directly at the IR port of the transmitting device to open the Beam Status dialog box. When the Beam Status dialog box appears, select a category or an expansion card. - Page 122 Wireless...
-
Page 123: Important Safety Information
User’s Guide Proprietary Notice This guide contains important operational and safety information to help you safely use your Palm Centro™ smart device. Failure to read and follow the information provided in this guide may result in serious bodily injury, death, or property damage. -
Page 124: General Precautions
General Precautions There are several simple guidelines to operating your device properly and maintaining safe, satisfactory service. Speak directly into the microphone. Avoid exposing your device and accessories to rain or liquid spills. If your device does get wet, immediately turn the power off and remove the battery. Although your device is quite sturdy, it is a complex piece of equipment and can be broken. -
Page 125: Maintaining Safe Use Of And Access To Your Device
Maintaining Safe Use of and Access to Your Device Do Not Rely on Your Device’s Phone for Emergency Calls Wireless phones such as the one on your Centro device operate using radio signals, which cannot guarantee connection in all conditions. Therefore you should never rely solely upon any wireless phone for essential communication (for example, medical emergencies). - Page 126 RF signals. Also check with the manufacturer regarding any equipment that has been added to your vehicle. Consult the manufacturer of any personal medical devices, such as pacemakers and hearing aids, to determine if they are adequately shielded from external RF signals. Note: Always turn off the phone in health care facilities and request permission before using the phone near medical equipment.
- Page 127 Restricting Children’s Access to Your Device Your Centro device is not a toy. Do not allow children to play with it as they could hurt themselves and others, damage the device and/or its phone, or make calls that increase your monthly bill.
-
Page 128: Using Your Phone With A Hearing Aid Device
Using Your Phone With a Hearing Aid Device Your Palm® Centro™ Smart Device is compliant with the FCC Hearing Aid Compatibility (HAC) requirements. For additional HAC information, including the HAC rating of this product, please refer to palm.com/centroHAC. Your device has been tested for hearing aid device compatibility. When some wireless phones are used near some hearing devices (hearing aids and cochlear implants), users may detect a buzzing, humming, or whining noise. - Page 129 30 days of purchase. With the Palm 30-day Risk-Free Guarantee, you may return the device within 30 days of purchase for a full refund, and you will only be responsible for charges based on your actual usage.
- Page 130 Turning on the HAC Setting When the HAC setting is on, your device sends the audio from your phone calls to the telecoil rather than to the microphone of your hearing aid. You are likely to hear calls much better because volume is increased and background noise and feedback are diminished. The HAC setting improves only the calls you listen to through the earpiece.
-
Page 131: Caring For The Battery
It appears that many, if not all, of these reports involve counterfeit or inexpensive, aftermarket-brand batteries with unknown or questionable manufacturing standards. Sprint is not aware of similar problems with Centro devices resulting from the proper use of batteries and accessories approved by Sprint or the manufacturer of your phone. - Page 132 Disposal of Lithium-Ion (Li-Ion) Batteries Do not handle a damaged or leaking li-ion battery as you can be burned. For safe disposal options of your li-ion batteries, contact your nearest Palm authorized service center. Special Note: Be sure to dispose of your battery properly. In some areas, the disposal of batteries in household or business trash may be prohibited.
-
Page 133: Radiofrequency (Rf) Energy
This power can range from 0.006 watts to 0.2 watts in digital mode. Knowing Radiofrequency Safety The design of your Centro smart device complies with updated NCRP standards described below. In 1991-92, the Institute of Electrical and Electronics Engineers (IEEE) and the American National Standards Institute (ANSI) joined in updating ANSI’s 1982 standard for safety... - Page 134 SAR values at or below the federal standard of 1.6 W/kg are considered safe for use by the public. The highest reported (FCC) SAR values of the Centro smart device are: Maximum SAR Values CDMA Cellular...
-
Page 135: Bluetooth® Qualification Program
Bluetooth® Qualification Program Information about this listing can be found at: https://programs.bluetooth.org/tpg/listings.cfm Bluetooth® QD ID B013348 Safety... -
Page 136: Static Electricity, Esd, And Your Device
Even a small amount of ESD can harm circuitry, so when working with electronic devices, take measures to help protect your electronic devices, including your Palm® device, from ESD harm. While Palm has built protections against ESD into its products, ESD unfortunately exists and, unless neutralized, could build up to levels that could harm your equipment. - Page 137 The recommendation from Palm is that you take this precaution before connecting your device to your computer, placing the device in a cradle, or connecting it to any other device. You can do this in many ways, including the following: Ground yourself when you’re holding your mobile device by simultaneously touching a...
-
Page 138: Owner's Record
The model number, regulatory number, and serial number are located on a nameplate inside the battery compartment. Record the serial number in the space provided below. This will be helpful if you need to contact us about your phone in the future. Model: Palm® Centro™ Smart Device Serial No.: Safety... -
Page 139: User's Guide Proprietary Notice
User’s Guide Proprietary Notice CDMA Technology is licensed by QUALCOMM Incorporated under one or more of the following patents: 4,901,307 5,109,390 5,267,262 5,416,797 5,506,865 5,544,196 5,657,420 5,101,501 5,267,261 5,414,796 5,504,773 5,535,239 5,600,754 5,778,338 5,228,054 5,337,338 5,710,784 5,056,109 5,568,483 5,659,569 5,490,165 5,511,073 User’s Guide template version 5B (October 2005) Safety... - Page 140 Safety...
-
Page 141: Index
43 command buttons 20 passwords 6 Dial Pad 36 songs to playlists 75 favorite buttons 31 speed-dial buttons 40 Palm online support 3 tasks 58 Sprint Customer Service 4 usernames 6 voicemail system 34 address books 39 Web pages 106... - Page 142 applications battery usage guidelines 125 – accessing available 27 battery-charge indicators 13 accessing menus in 21 battery-ready indicators 13 associating with buttons 41 Beam Business Card command 54 closing 26 Beam command 114 copying 83 Beam Status dialog box 114 cycling through 27 beaming information 114 –...
- Page 143 42 transferring music from 70 – card readers 72 updating information on 50 CDs 72 connecting to power sources 13 Centro smart device. smart device connections changing Bluetooth devices and 111 – contact information 54 device to PCs 51...
- Page 144 30 text messages 102 contacts usernames 6 adding 37 Customer Service (Sprint) 4 changing information for 54 customer support (Palm) 3 creating caller IDs for 53 importing 30 daily calendars 55 looking up 30 database files 78 synchronizing 51...
- Page 145 51 files 108 Excel files 77 music 66 expansion card slot 11 Outlook 51 expansion cards Palm OS software 79 inserting 82 Sprint Mobile Email 93 opening applications on 83 User Guide removing 82 downward-pointing arrows on screens 21...
- Page 146 extending battery life 15 extensions (phone) 36 Get Email icon 93 Extra Digits button 34 Global Address Lists 100 green indicator light 13 green lightning bolt 14 Fast Mode 107 Guest Book 105 favorite buttons creating 40 – dialing with 28 HAC setting 124 restrictions for 40 handset.
- Page 147 78 Hold button 36 bonus software 52 home page 107 Documents To Go 77 HotSync operations. synchronizing Palm Desktop software 5 information Sprint Mobile Email 93 Sprint Music Manager 64 sync software 50 Ignore button 33 Instant Messaging 91...
- Page 148 liability ii messages light. indicator light checking for 97 lightning bolts 14 creating 97 links 107 deleting 97 list screens 19 drafting 99 lists 21 opening 33 – lock icon 106 receiving text 105 locking the keyboard 86 retrieving email 94 locking touch-sensitive features 87 retrieving voicemail 34 losing information 47...
- Page 149 Music Manager 64 – applications 16 – Music Store 66 calendar 55 Mute button 36 files 77 My Centro application 78 Quick Tour 2 My Centro icon 78 text messages 33 Web browser 90 naming Word files 77 albums 59...
- Page 150 Palm OS devices 3 See also phone; phone numbers Palm OS software 78 adding a second 36 Palm Software Installation CD 5 adjusting volume 32 paper clip icon 99 ending 35 partial battery icon 14 making 29 –...
- Page 151 viewing 31 Powering off screen 17 Phone Off message 17 PowerPoint files 77 photo albums 59 PRC files 78 photos. pictures Premium Services 6 pick lists 21 – Preparing Vision Services dialog box 90 Pics&Videos application 51 preset buttons 40 Pics&Videos icon 62 preset passkeys 43 picture files 108...
- Page 152 songs from playlists 76 realigning 85 Repeat pick list 57 selecting items on 20 Repeating Event icon 57 turning on or off 9 repeating events 57 waking up 16 replacing battery 12 screens, scrolling through 19 Reply All icon 97 scroll arrows 19 Reply icon 97 scroll bars 19...
- Page 153 Sprint Music Store 66 soft resets 46 Sprint National Network 91 software Sprint Operator Services 4 See also applications; Palm Desktop Sprint Picture Mail 59 software Sprint Power Vision accounts 6 downloading 78 Sprint Power Vision services 3 installing bonus 52...
- Page 154 Sprint Voice Command service 39 text messages 33 – starting Sprint Power Vision sessions 47 See also messages static electricity 130 text messaging services 91 – status information 28 text phrases 103 stereo headphones 41 third-party applications 18 streamed media 109 resetting device and 46 style sheets 107 time zones 56...
- Page 155 Voice Command service 39 voice commands 39 vehicle charger 15 voice memos 9 VersaMail 50 – voicemail 6 vibrate option 45 Voicemail favorite button 34 video albums 61 Voicemail icon 34 video files 108 volume video icons 61 device ringer 33 video recording screen 62 music 68 video recording time 62...
- Page 156 Week view 55 Word documents 77 Welcome screen 17 World Clock 27 Wide Page Mode 106 Windows computers 3 Year view 55 Windows Media Player 64 wired headsets 42 wireless connections 90 ZIP files 79 wireless features 15 zoom setting 59 wireless modems 91 wireless services.
Need help?
Do you have a question about the Centro and is the answer not in the manual?
Questions and answers