Table of Contents
Advertisement
Advertisement
Table of Contents

Related Manuals for Hydropool serenity hot tubs


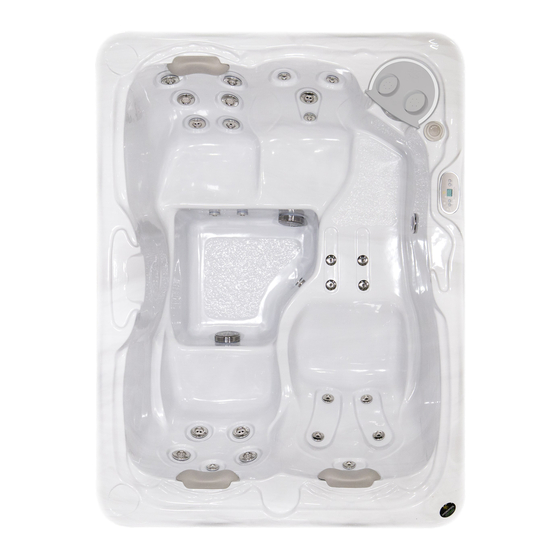
Summary of Contents for Hydropool serenity hot tubs
-
Page 2: Table Of Contents
Topside Control Panel Display Messages 22-23 Optional Variable Air Therapy System Control NOTE: Product specifications, warnings and labels are subject to change without notice. This user’s manual should be used as a guide only. For further information, please contact your independent Hydropool dealer. -
Page 3: Letter Of Introduction
Hydropool hot tubs are not only healthful and relaxing, they can even add value to your home. Please take the time to carefully read and understand all the safety, installation and operating instructions in this manual before electrically connecting your hot tub and adding water. -
Page 4: Important User Safety Instructions
SAVE THESE INSTRUCTIONS IMPORTANT SAVE THESE INSTRUCTIONS Your physiological response to hot water is subjective and depends on your age, health, and medical history. If you don’t know your tolerance to hot water, or if you get a headache, or become dizzy or nauseous when using your hot tub, get out and cool off immediately. -
Page 5: Hyperthermia
SAVE THESE INSTRUCTIONS IMPORTANT SAVE THESE INSTRUCTIONS Your physiological response to hot water is subjective and depends on your age, health, and medical history. If you don’t know your tolerance to hot water, or if you get a headache, or become dizzy or nauseous when using your hot tub, get out and cool off immediately. -
Page 6: Choosing The Right Location
CHOOSING THE RIGHT LOCATION Your Hydropool hot tub can be installed indoors or out, on the ground, in the ground or half-and-half. The following information will assist you in choosing the right location for your individual needs. When making your decision, always remember that hot tubs can be enjoyed year-round, indoors or out, regardless of the climate. -
Page 7: General Installation Considerations
• Ensure that all hot tub support equipment is easily accessible and protected from the elements • The hot tub support equipment is designed for indoor (out of the direct elements) use. When your HYDROPOOL hot tub is equipped with a factory-installed cabinet, and installed as per the guidelines of this manual, the equipment will be adequately protected. -
Page 8: Site Preparation
SITE PREPARATION ABOVE-GROUND INSTALLATIONS • Non-freezing climates – it is sufficient to ensure that the base of the hole or cavity created for the tub has a dry, stable, com- Where the hot tub is a “stand-alone” above-ground installation pacted level base and proper drainage. to be installed in regions where freeze/thaw conditions may •... -
Page 9: Equipment Accessibility & Protection
Most Hydropool models require a clearance width of at least 100 cm. (39 in.) to allow movement of the unit on its side through alley-ways, fence openings, etc. -
Page 10: Important Electrical Safety Instructions
Consult your electrician or local electrical authority for further G.F.C.I./R.C.D. APPLICATION GUIDE FOR details. HYDROPOOL SERENITY SERIES 6 A green colored terminal or a terminal marked “G”, “GR”, “Ground”, or “Grounding” is located inside the supply termi- nal box or compartment. To reduce the risk of electric shock,... -
Page 11: North America G.f.c.i. Installation Diagram
Code, or the Canadian Electrical Code, and all Federal, State/Provincial and local codes and regula- tions in effect at the time of installation. Hydropool highly recommends the use of a new Siemens GFCI breaker for all of its products. Other GFCI’s and older Siemens GFCI’s may have tripping is- sues. -
Page 12: Europe R.c.d. Installation Diagram
EUROPE – R.C.D. INSTALLATION - TYPICAL NOTICE Important Note: Installation of the R.C.D. - Circuit Breaker, including ampere sizing and selection of conductor size and type, must be performed by a qualified electrician in accordance with National, Regional and Local Codes and Regulations in effect at the time of installation. TO HOT TUB SUPPORT EQUIPEMENT... -
Page 13: Accessories
OPTIONAL COVER REMOVER The ASTM approved safety hard cover is designed to Hydropool offers several different devices to assist in the open away from the control area, however, if the hot removal of the safety hard cover. Please refer to the in-... -
Page 14: Steps (Optional)
OPTIONAL STEPS Hydropool’s optional two-tier step makes entering and exiting your hot tub safe and easy. These steps are available in Clear Cedar, or in Everlast Driftwood, Es- presso or Midnight finishes OPTIONAL I-COMMAND SYSTEM The Smart Phone App that is designed as a wireless hot tub control which allows you to pick the water care settings that fit your schedule. -
Page 15: Filling, Checking And Starting Your Hot Tub
See complete details for your spa in section HYDROPOOL CONTROL SYSTEMS Definition: ‘Priming’ a pump is a term used to describe the process in which air trapped in the plumbing and pump wet-end (referred to as an ‘air lock’) is released, allowing... -
Page 16: Pump Priming/Releasing An Air Lock
O– RING / GASKET AT UNION CONNECTIONS • The water should start circulating immediately. If the motor works but you do not notice water circulation within the first 15 seconds, the pump may require priming due to trapped air (referred to as an ‘air lock’). If the pumps have not self- primed after 2 minutes, and water is not flowing from the jets, DO NOT allow the pumps to continue to run. -
Page 17: Hydropool Serenity Control Systems
HYDROPOOL SERENITY SERIES CONTROL SYSTEMS NORTH AMERICA / EUROPE HYDROPOOL SERENITY – ALL SERIES INITIAL START-UP TEMPERATURE CONTROL FUNCTIONALITY AND ADJUSTMENT Before applying voltage to power-up your hot tub, it is very important that you understand the sequence of events that... -
Page 18: Gold Series Controls
HYDROPOOL SERENITY SERIES CONTROL SYSTEMS NORTH AMERICA / EUROPE HYDROPOOL SERENITY – GOLD SERIES KEYPAD FUNCTIONS JET KEY WHICH CONTROLS PUMP 1 TEMP + KEY WHICH CONTROLS THE TEMPERATURE AND SCROLLS THROUGH THE MENUS ILLUM KEY WHICH CONTROLS THE LIGHTING AND ACTIVATES THE LOW... -
Page 19: Platinum Series Controls
HYDROPOOL SERENITY SERIES CONTROL SYSTEMS NORTH AMERICA / EUROPE HYDROPOOL SERENITY – PLATINUM SERIES KEYPAD FUNCTIONS JET 1 KEY WHICH TEMP + KEY WHICH CONTROLS THE CONTROLS PUMP 1 TEMPERATURE AND SCROLLS THROUGH THE MENUS JET 2 KEY WHICH ILLUM KEY WHICH CONTROLS THE... - Page 20 PUMP / JETS FUNCTION Press this pad to activate pump 1 and Press LIGHT to set the Run Hours pump 2 (if equipped) Press TEMP to begin hour change for F1 or F2 1st press – turns on low speed (P1 only) 2nd press –...
- Page 21 LOCK (RESTRICTING PANEL OPERATION) HOLD MODE (STANDBY) Locking the panel prevents the spa from being used; it also The HOLD (standby) feature stops the system from operating prevents unwanted temperature adjustments. All automatic automatically, allowing for convenient filter cartridge removal functions are still active/ Locking the Temperature allows jets and replacement.
-
Page 22: Topside Control Panel Display Messages
TOPSIDE PANEL DISPLAY MESSAGES OHH/HTR TEMP LMT/OH/HL (solid or flashing) Overheat – Spa has shut down. One of the sensors has de- Indicates high-limit or water temperature sensor is non- tected 48°C (119°F) at the heater. functional. DO NOT ENTER WATER! Remove cover and allow water to SnA/SENSOR A SERVICE RQD cool. -
Page 23: Optional Variable Air Therapy System Control
Press any topside panel pad to reset. REST RUN PMPS PURG AIR System is operating in REST mode. See section Hydropool Serenity Control Systems for complete details. Priming mode – occurs when spa is first powered up, or when power has been restored after a power interruption. -
Page 24: Jet And Feature Operation
Rifle Jet JET WATER FLOW ADJUSTMENT INTERCHANGING JET INSERTS Your Hydropool hot tub features adjustable water flow on A great feature for custom tailoring the jets in your Hydro- specific hydrotherapy jets. To reduce the flow: grasp the pool hot tub to suit your personal hydrotherapy needs. -
Page 25: Removal And Replacement
DIVERTER VALVE Your HYDROPOOL hot tub is equipped with a diverter valve. It allows you to direct the flow of the water to different zones in your hot tub. -
Page 26: Audio And Docking Station
OPTIONAL AUDIO AND DOCKING STATION OPTIONAL AUDIO AND DOCKING STATION DOCKING YOUR AUDIO DEVICE The Docking Station is compatible with all alternate audio sources such as IPOD and MP3 players. To install any audio device: 1 Locate and open the Docking Station door by gently pulling upward on the handle. 2 Remove the connector cover prior to plugging in your audio source. -
Page 27: Hot Tub Water Balance
– bather load 4 Add sanitizing tablets (Bromine or Chlorine) to the dispenser: – frequency of use/quantity of bathers Built in dispenser: if your Hydropool hot tub was ordered with – different body chemistry the optional built in bromine/chlorine dispenser, (located under –... -
Page 28: Glossary Of Common Water Maintenance Terms
GLOSSARY OF COMMON WATER MAINTENANCE TERMS 1 CHLORINE – in granular, liquid or puck/tablet form, is an oxidant and biocidal agent. It is very effective and fast acting. Recom- mended chlorine residual level is 3.0 to 5.0 ppm. 2 CHLORAMINES – a compound formed when chlorine combines with nitrogen or ammonia present in the water. When allowed to go unchecked, it causes eye and skin irritation and is indicated by a strong chlorine odor. -
Page 29: Water Balance Troubleshooting
Test total alkalinity levels and if necessary increase with sodium bicarbonate* pH resistant to changing High Total Alkalinity levels Test total alkalinity levels and if necessary decrease with sodium bisulfate* or muriatic acid* * Contact your local Hydropool retailer for specific product recommendation... -
Page 30: Routine Hot Tub Maintenance
Soak your filter cartridge in a filter cartridge cleaning solu- tion. Rinse thoroughly and, if possible, allow to dry before re-installing. Hydropool recommends purchasing a second filter so that while the first is cleaning, the other is clean and ready to install. -
Page 31: Cartridge Filter - Removal, Cleaning, Re-Installation
POOL Hot tub Retailer. Rinse thoroughly and dry before replacing. Hydropool recommends purchasing a spare filter cartridge so that you always have a clean substitute ready to rotate. 10 After the element has dried - if necessary, lightly brush be- tween pleats with a fine paint-brush to remove remaining dirt particles. -
Page 32: Each Time Before Filling The Spa
The acrylic surface can be cleaned and polished using a soft handle clockwise until it stops) cloth and acrylic cleaner, available at your Hydropool Retailer. 2 Safety cap is securely in place. • Important: Do not use detergents - the re-... -
Page 33: Cabinet Wing Locks
PROTECTING YOUR CABINET WOOD FINISH Some HYDROPOOL hot tub cabinets are made from Western red cedar and are factory stained. Once stained, cedar weathers well, and with proper care will maintain its beauty for many years. In order to maintain the translucent finish and to enhance the wood grain beauty staining must be performed on a regular basis. -
Page 34: Winterizing Your Hydropool Hot Tub
HOT TUB safety hard cover. • Remove and clean the cartridge filter element see section - • It is assumed that your HYDROPOOL hot tub has been CARTRIDGE FILTER properly installed on a reinforced concrete pad to elimi- • Using a wet/dry utility vacuum, remove remaining water nate lifting of the hot tub due to hydrostatic ground water from the jet openings, filter cartridge housing, and footwell. -
Page 35: What To Do In The Event Of
If this does not reset the system, Ensure that safe clearance to combusti- contact your local Hydropool retailer or service organiza- ble surfaces is maintained. Do not leave tion. unattended.
Need help?
Do you have a question about the serenity hot tubs and is the answer not in the manual?
Questions and answers