Table of Contents
Advertisement
Advertisement
Table of Contents
Troubleshooting

Related Manuals for Hydropool Self Clean 395 Gold


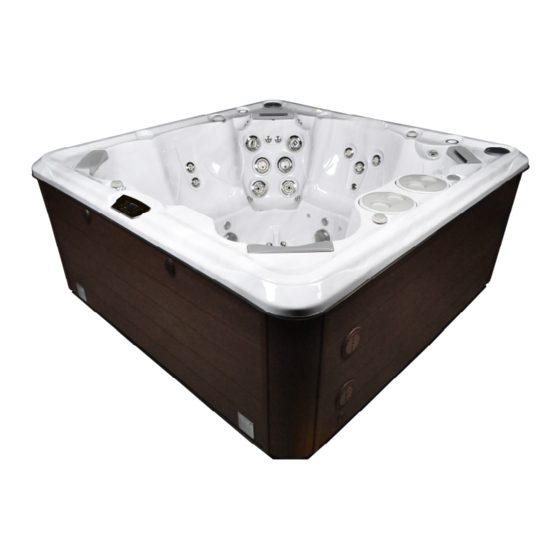
Summary of Contents for Hydropool Self Clean 395 Gold
- Page 1 SELF CLEANING HOT TUBS OWNER’S MANUAL Hydropool Inc. 335 Superior Blvd. Mississauga, ON, Canada L5T 2L6 Tel: 905.565.6810 Toll Free: 1.800.465.2933 Fax: 905.565.6820 Email: info@hydropoolhottubs.com www.hydropoolhottubs.com Contents subject to change without notice BJBB...
- Page 2 Models Covered Domestic Export Model Codes Model Codes Self Clean 395 Gold HSC395G HSCE395G Self Clean 495 Gold HSC495G HSCE495G Self Clean 495 Platinum HSC495P HSCE495P Self Clean 570 Gold HSC570G HSCE570G Self Clean 570 Platinum HSC570P HSCE570P Self Clean 670 Gold...
-
Page 3: Table Of Contents
Topside Panel Display Messages Optional Variable Air Therapy System NOTE: Product specifications, warnings and labels are subject to change without notice. This user’s manual should be used as a guide only. For further information, please contact your independent Hydropool dealer. -
Page 4: Letter Of Introduction
Recognized for quality worldwide, we are confident that your new hot tub will provide you, your family and friends, with years of enjoyment and fulfill all your hydrotherapy needs. Hydropool hot tubs are not only healthful and relaxing, they can even add value to your home. Please take the... -
Page 5: Warnings
SAVE THESE INSTRUCTIONS IMPORTANT SAVE THESE INSTRUCTIONS Your physiological response to hot water is subjec ve and depends on your age, health, and medical history. If you don’t know your tolerance to hot water, or if you get a headache, or become dizzy or nauseous when using your hot tub, get out and cool off... -
Page 6: Hyperthermia
SAVE THESE INSTRUCTIONS IMPORTANT SAVE THESE INSTRUCTIONS Your physiological response to hot water is subjec ve and depends on your age, health, and medical history. If you don’t know your tolerance to hot water, or if you get a headache, or become dizzy or nauseous when using your hot tub, get out and cool off... -
Page 7: Choosing The Right Location
CHOOSING THE RIGHT LOCATION Your Hydropool hot tub can be installed indoors or out, on the ground, in the ground or half-and-half. The following informa on will assist you in choosing the right loca on for your individual needs. When making your decision, always remember that hot tubs can be enjoyed year-round, indoors or out, regardless of the climate. -
Page 8: General Installation Considerations
Please consider the following: Your HYDROPOOL hot tub is self-suppor ng on its base. The cabinet should be decora ve only, not for support. Never suspend the hot tub from the deck or cabinet. Where the hot tub is not equipped with a factory installed cabinet, it is the installer’s responsibility to ensure all electrical equipment is completely weather protected and meets all of the regulatory requirements. -
Page 9: Special Considerations
• Ensure that all hot tub support equipment is easily accessible and protected from the elements • The hot tub support equipment is designed for indoor (out of the direct elements) use. When your HYDROPOOL hot tub is equipped with a factory-installed cabinet, and installed as per the guidelines of this manual, the equipment will be adequately protected. -
Page 10: In-Ground & Partial In-Ground Installations
For units being installed fully or par ally in the ground, the type of support will again vary based on whether or not the tub is being installed in an area with freeze/thaw condi ons. Hydropool does not recommend back-filling full in-ground or par al in-ground installa ons. -
Page 11: Equipment Accessibility & Protection
UNLOADING / HANDLING YOUR HOT TUB All Hydropool hot tubs are shipped with a protec ve combina on layer of foam wrap, cardboard and plas c film. Each hot tub is factory strapped onto a wood skid. If your hot tub is to be delivered by your local dealer, it will generally arrive on a flat bed truck or low profile trailer. -
Page 12: Important Electrical Safety Instructions
IMPORTANT NOTE: • This guide is for standard installa ons where the wire run is 15 m (50 .) or less. For longer wire runs, consult a qualified electrician. G.F.C.I./R.C.D. APPLICATION GUIDE FOR HYDROPOOL SELF CLEAN SERIES NORTH AMERICA Gold Series... -
Page 13: Wire Size
WIRE SIZE NORTH AMERICA • The minimum wire size for systems that require a 40A GFCI is # 8/3 c/w ground (also referred to as # 8 gauge / 4 conductor). • The minimum wire size for systems that require a 50A GFCI is # 8/3 c/w ground (also referred to as # 8 gauge / 4 conductor). EUROPE Standards for amperage breakers may vary from country to country in the CE controlled area. -
Page 14: North America G.f.c.i. Installation Diagram
Na onal Electrical Code, or the Canadian Electrical Code, and all Federal, State/Provincial and local codes and regula ons in effect at the me of installa on. Hydropool highly recommends the use of a new Siemens GFCI breaker for all of its products. Other GFCI’s and older Siemens GFCI’s may have tripping issues. -
Page 15: Europe R.c.d. Installation Diagram
EUROPE – R.C.D. INSTALLATION - TYPICAL NOTICE Important Note: Installa on of the R.C.D. - Circuit Breaker, including ampere sizing and selec on of conductor size and type, must be performed by a qualified electrician in accordance with Na onal, Regional and Local Codes and Regula ons in effect at the me of installa on. -
Page 16: Filling, Checking And Starting Your Hot Tub
See complete details for HOSE BIB your spa in sec on HYDROPOOL CONTROL SYSTEMS When the hot tub pump is located below water level, the water should start circula ng immediately. If the motor works but if you do not no ce water circula on within the first 15... - Page 17 RELEASING AIR TRAPPED IN FILTER... AIR VENT VALVE When the pump starts circula ng, it will be necessary to release trapped air in the filter. Carefully loosen the air vent valve counter-clockwise un l there is the hissing sound of air escaping.
-
Page 18: In.ye / In.yt Spa Pack Series
HYDROPOOL SELF CLEAN SERIES CONTROL SYSTEMS NORTH AMERICA / EUROPE GECKO IN.YE/YT SPA PACK INITIAL START-UP TEMPERATURE CONTROL FUNCTIONALITY AND Before applying voltage to power-up your hot tub, ADJUSTMENT it is very important that you understand the se- quence of events that occur when the system is ac vated in order that the pump(s) can be primed efficiently and damage to the system can be... - Page 19 HYDROPOOL SELF CLEAN SERIES CONTROL SYSTEMS GOLD SERIES CONTROLS KEYPAD FUNCTIONS AND DISPLAY ICONS PUMP 1 INVERT FUNCTION FUNCTION DISPLAY BLOWER SETTINGS FUNCTION NIGHT FUNCTION CONTRAST LIGHT SLEEP FUNCTION MODE TEMP TEMP DOWN...
- Page 20 HYDROPOOL SELF CLEAN SERIES CONTROL SYSTEMS PLATINUM SERIES CONTROLS KEYPAD FUNCTIONS AND DISPLAY ICONS PUMP 1 INVERT FUNCTION DISPLAY FUNCTION PUMP 2 SETTINGS FUNCTION NIGHT FUNCTION CONTRAST BLOWER SLEEP FUNCTION MODE LIGHT FUNCTION TEMP TEMP DOWN...
- Page 21 HYDROPOOL SELF CLEAN SERIES CONTROL SYSTEMS TITANIUM SERIES CONTROLS KEYPAD FUNCTIONS AND DISPLAY ICONS PUMP 1 INVERT FUNCTION DISPLAY FUNCTION PUMP 2 SETTINGS FUNCTION NIGHT FUNCTION CONTRAST PUMP 3 SLEEP FUNCTION MODE BLOWER FUNCTION LIGHT FUNCTION TEMP TEMP DOWN...
- Page 22 PUMP 1 FUNCTION WATER CARE Press this pad to ac vate the pump The Water Care sec on will help you set up your ideal filtra on and hea ng se ngs. Choose from 1st press – low speed (icon rotates slow) Away, Beginner, Energy Savings, Super Energy 2nd press –...
- Page 23 MODIFYING SCHEDULES FILTERING Your spa is equipped with a circula on pump To see and / or modify the Water that filters your water for 24 hours a day. If Care category, use the Se ngs icon the water temperature exceeds the set to open the selected Water Care menu.
- Page 24 MAINTENANCE REMINDERS The in.k1000 keypad will remind you of maintenance required on your spa, like rinsing or cleaning the filter. Each task has its own dura on, based on normal use. The Maintenance Reminders menu allows you to verify the me le before maintenance is required, as well as to reset the me once a task is completed.
- Page 25 KEYPAD SETTINGS ELECTRICAL CONFIGURATION In this sec on you can change the Please do not make changes in this sec on temperature unit and language. Use the unless you are a qualified electrician. arrow keys and move to the se ng that you ABOUT would like to change.
-
Page 26: I-Command 2 System (Optional)
OPTIONAL I-COMMAND 2 SYSTEM The Smart Phone App that is designed as a wireless hot tub control which allows you to pick the water care se ngs that fit your schedule. Adjust filtra on and temperature se ngs and create the ideal hot tub experience from inside your home. This op on is supported by your iPhone®, iPOD touch®, iPAD®... - Page 27 2. Installing the spa transmi er If you purchased a spa with in. touch 2 as a standard feature or as an op on, note that the spa transmi er will be pre-installed. To ensure proper signal transmission, it may be necessary to change the posi on of the transmi er once the spa is installed in the yard.
- Page 28 If you need to replace a transmi er or pair your transmi ers again, power up the home transmi er and press on its pairing bu on with a paper clip. The status light of the transmi er will blink yellow. Then, shut off...
- Page 29 5. Strong and Long Range Communica on Signal Through their proprietary RF technology, in. touch 2 transmi ers emit a strong, stable and long-range signal between your spa and your router (about 3 mes longer than regular signal). No need for repeaters or boosters: your spa will always remain within reach in typical backyard se ngs.
- Page 30 USING THE APP On your home network It is possible to access your spa with the in. touch 2 app through your home network. To be able to see your in. touch 2 in the applica on you need to connect your device to the same router (Wi-Fi network) than the one used to connect your Home Transmi er Go to the Wi-Fi se ngs sec on of your mobile device and choose the same network that your spa is connected to (i.e.
- Page 31 Setup your Wi-Fi on your device Before using your applica on, go to the Wi-Fi sec on of your device’s se ngs. Make sure you are connected to your home network. This needs to be the same Wi-Fi provided by the router to which you connected your Home Transmi er.
- Page 32 Find the icon for the in. touch 2 applica on, then tap on it to open it. The first me you use the applica on a message will ask you: “in. touch 2” Would like to send you no fica ons. If you choose Allow, the applica on will send you no fica ons about the status of your spa.
- Page 33 Login page Before using your applica on, you must create an account first and then, you’ll be able to sign in. Your account will give you the opportunity to have access to your spa from any in. touch 2 applica on.
- Page 34 New account crea on When you choose to create a new account, you agree at the same me the Terms of Service and the Privacy Policy. You can read them at any me through this link: h ps://geckointouch.com/legal...
- Page 35 Choose a spa This page displays all the spas detected by your applica on. To detect your spa, you need to connect your mobile device to the same network to which you connected your Home Transmi er. Once you have done a connec on with the spa its name will be saved on this page to allow you to connect to this spa from anywhere.
- Page 36 Home page The main screen gives you access to your accessories, water temperature, water care and se ngs The app is mirroring the top side control (keypad) over the internet.
-
Page 37: Standby Mode / Drain Mode
STANDBY MODE A press of the SETTINGS key brings you into the menu op ons. Use the UP and DOWN arrow keys to highlight STANDBY. Press the LIGHT key and the following message will appear. “All pumps off! Press Drain to drain spa” This mode allows you to stop all outputs including all automa c func ons such as a filter cycle, hea ng requests and smart winter mode purging for 30 minutes to perform quick spa maintenance. -
Page 38: Topside Panel Display Messages
TOPSIDE PANEL DISPLAY MESSAGES An internal hardware error has been detected The Prr error message indicates a problem with the regula on probe. The system is constantly verifying if the temperature probe reading is within its normal limits. The water temperature at the heater has reached 119 F (48 C). -
Page 39: Hydroclear Purewater System
HYDROCLEAR PUREWATER SYSTEM HOW IT WORKS This system combines the benefits of both Ozone and UV-C sani za on u lizing a patented UV Cham- ber to both inject ozone into the water, mix it and then expose it to powerful UV-C rays, all-in-one. This process not only kills and deac vates microorganisms in the water it passes, but also creates a power- ful hydroxyl radical to burn off... -
Page 40: Hot Tub Water Balance General Overview
– bather load Your Hydropool hot tub comes with a built in bromine/ – frequency of use/quan ty of bathers chlorine dispenser, (located in the lid of the cartridge filter – different body chemistry housing), refer to sec on CARTRIDGE FILTER for details on –... -
Page 41: Glossary Of Common Water Maintenance Terms
GLOSSARY OF COMMON WATER MAINTENANCE TERMS CHLORINE – in granular, liquid or puck/tablet form, is an oxidant and biocidal agent. It is very effec ve and fast ac ng. Recommended chlorine residual level is 3.0 to 5.0 ppm. CHLORAMINES – a compound formed when chlorine combines with nitrogen or ammonia present in the water. When allowed to go unchecked, it causes eye and skin irrita on and is indicated by a strong chlorine odor. -
Page 42: Water Balance Troubleshooting
Test total alkalinity levels and if necessary increase with sodium bicarbonate* pH resistant to changing High Total Alkalinity levels Test total alkalinity levels and if necessary decrease with sodium bisulfate* or muriatic acid* * Contact your local Hydropool retailer for specific product recommendation... -
Page 43: Routine Hot Tub Maintenance
When a hot tub is uncovered, over 90% of heat is lost from the water surface. This evaporation also affects the chemical HYDROPOOL reserves the right to void the warranty of balance and could create humidity problems indoors. HY- your spa if there is any indication of the use of products DROPOOL Safety Hard Covers are engineered for maximum containing Hydrogen Peroxide. -
Page 44: Cartridge Filter, Removal, Cleaning, Re-Installation
The acrylic surface can be cleaned and polished using a soft 11 After the element has dried - if necessary, lightly brush cloth and acrylic cleaner, available at your Hydropool retailer. between pleats with a fine paint-brush to remove remain- ing dirt particles. -
Page 45: Changing Your Hot Tub Water
DRAINING YOUR HOT TUB HYDROPOOL EXCLUSIVE vent/bleeder valve located on the top of the filter housing. QUICK-DRAIN™ & FILL REFER TO DIAGRAM When water begins to escape close the air vent valve. -
Page 46: Hydropool Exclusive Quick-Drain
HYDROPOOL EXCLUSIVE QUICK-DRAIN™ FILTER CARTRIDGE FILL HOSE CHEMICAL FEEDER OZONATOR DRAIN HOSE FILTRATION PUMP SKIMMER/PRE-FILTER HEATER FLOOR VACUUM THE SELF-CLEANING MODE INDICATOR This worry-free indicator is located on the topside control display. The display will indicate “Self Clean Mode” on the screen ensuring that the Self-Clean and Eco Heat Systems are... -
Page 47: Protecting Your Cabinet Everlast Finish
PROTECTING YOUR CABINET EVERLAST FINISH Some HYDROPOOL hot tub cabinets are made from Everlast synthetic plastic material. These cabinets utilize a magnetic latching system to fasten and hold the exterior panels in place. In order to remove a panel for access you need to start at the lower right hand corner of the panel and disengage the first magnetic latch by pulling the panel forward enough to allow your hand to get behind the panel. -
Page 48: Winterizing Your Hydropool Hot Tub
HOT TUB safety hard cover. • Remove and clean the cartridge filter element see section - • It is assumed that your HYDROPOOL hot tub has been CARTRIDGE FILTER properly installed on a reinforced concrete pad to eliminate • Using a wet/dry utility vacuum, remove remaining water lifting of the hot tub due to hydrostatic ground water pres- from the jet openings, filter cartridge housing, and footwell. -
Page 49: General Troubleshooting
Should this occur or if the display shows partial messages, try resetting the system by turning power to the swim spa, waiting a few minutes, then turning power on again. If this does not reset the system, contact your local HYDROPOOL retailer or service organization. POWER FAILURE OR SYSTEM FAULT DURING COLD WEATHER CONDITIONS If your control system will not reset, (i.e.
Need help?
Do you have a question about the Self Clean 395 Gold and is the answer not in the manual?
Questions and answers