
Related Manuals for Alliance Laundry Systems AES17AWF


Summary of Contents for Alliance Laundry Systems AES17AWF
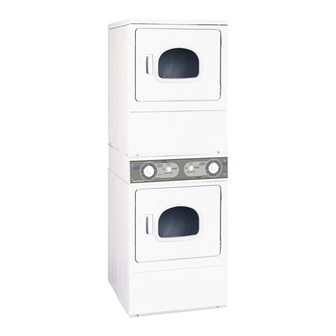
- Page 1 Home Dryers Refer to Page 3 for Model Numbers DRY684C DRY688C D715I Part No. 512176R1 www.comlaundry.com May 2005...
-
Page 3: Table Of Contents
All rights reserved. No part of the contents of this book may be reproduced or transmitted in any form or by any means without the expressed written consent of the publisher. 512176 © Copyright, Alliance Laundry Systems LLC – DO NOT COPY or TRANSMIT... - Page 4 73. Thermal Fuse (Electric Models) ....77 74. Heater Assembly (Electric Models) ....77 75. Cycling or Limit Thermostat ......77 76. Door Switch ...........78 Section 8 – Internal Wiring of Dryer Motor Switch ..............79 © Copyright, Alliance Laundry Systems LLC – DO NOT COPY or TRANSMIT 512176...
-
Page 5: Section 1 - Safety Information
• Whenever ground wires are removed during servicing, these ground wires must be reconnected to ensure that the machine is properly grounded and to reduce the risk of fire, electric shock, serious injury, or death. W284 512176 © Copyright, Alliance Laundry Systems LLC – DO NOT COPY or TRANSMIT... -
Page 6: Locating An Authorized Servicer
Locating an Authorized Servicer Alliance Laundry Systems is not responsible for personal injury or property damage resulting from improper service. Review all service information before beginning repairs. Warranty service must be performed by an authorized technician, using authorized factory parts. If service is required after the warranty expires, Alliance Laundry Systems also recommends contacting an authorized technician and using authorized factory parts. -
Page 7: Section 2 - Introduction
When calling or writing about your product, be sure to Nameplate mention model and serial numbers. Model and serial numbers are located on nameplate(s) as shown. D412PE1A 512176 © Copyright, Alliance Laundry Systems LLC – DO NOT COPY or TRANSMIT... -
Page 8: Model Identification
Model Identification Information in this manual is applicable to these dryers: AES17AWF AES20AWF AES28AWF AES28AWF1500 AES68AWF AES68AWF1500 AGS17AWF AGS20AWF AGS28AWF AGS68AWF CES68AWF CES68AWF1500 CGS68AWF KES18AWF KES18AWF1500 KGS18AWF © Copyright, Alliance Laundry Systems LLC – DO NOT COPY or TRANSMIT 512176... -
Page 9: How Your Dryer Works
The heated air moves through the heater duct and into the cylinder, where it circulates through the wet load. The air then passes through the lint filter, air duct, and exhaust fan, where it is vented to the outdoors. 512176 © Copyright, Alliance Laundry Systems LLC – DO NOT COPY or TRANSMIT... - Page 10 Section 2 Introduction Notes © Copyright, Alliance Laundry Systems LLC – DO NOT COPY or TRANSMIT 512176...
-
Page 11: Section 3 - Troubleshooting
• Firmly press connection block onto motor switch. Broken, loose, or incorrect wiring. • Refer to wiring diagram. Power cord is miswired. • Refer to wiring diagram for the correct wiring. 512176 © Copyright, Alliance Laundry Systems LLC – DO NOT COPY or TRANSMIT... -
Page 12: Dryer Stops In Cycle; Quits After The First Few Loads; Has A Burning Smell; Cycles On Motor Thermal Protector
Motor switch functions inoperative. • Refer to Paragraph 66 to check switch and windings. Short in motor winding. Clothes item caught in fan. • Check fan for obstruction. © Copyright, Alliance Laundry Systems LLC – DO NOT COPY or TRANSMIT 512176... -
Page 13: Dryer Motor Runs But Cylinder Does Not Turn
• Remove dust or lint and spray with a cleaner and lubricant. lint. Inoperative door switch. • Test switch and replace if inoperative. Inoperative timer. • Test timer and replace if inoperative. 512176 © Copyright, Alliance Laundry Systems LLC – DO NOT COPY or TRANSMIT... -
Page 14: Dryer Runs Only When Door Is Open
Inoperative cycling thermostat. • Test thermostat and replace if inoperative. Inoperative timer. • Test timer and replace if inoperative. Broken, loose, or incorrect wiring. • Refer to wiring diagram. © Copyright, Alliance Laundry Systems LLC – DO NOT COPY or TRANSMIT 512176... -
Page 15: Igniter Does Not Glow (Gas Supply Sufficient) - Gas Dryer Models
• Loosen screw and properly position igniter and bracket on tube assembly. burner tube assembly. Sensor installed improperly on burner housing. • Loosen screw and properly position the sensor on the burner housing. 512176 © Copyright, Alliance Laundry Systems LLC – DO NOT COPY or TRANSMIT... -
Page 16: Dryer Heater Assembly Or Burner Shuts Off Prematurely
Air leak at blower seal. • Check and replace seal if necessary. Air leak at cylinder seal(s). • Check and replace seal(s) if necessary. © Copyright, Alliance Laundry Systems LLC – DO NOT COPY or TRANSMIT 512176... -
Page 17: Dryer Heater Assembly Or Burner Does Not Shut Off
5 inch water column, ask Gas Company to correct. Improper belt installation (Low RPM). • Check for proper installation. Refer to Figure 26. 512176 © Copyright, Alliance Laundry Systems LLC – DO NOT COPY or TRANSMIT... -
Page 18: Timer Does Not Advance In Automatic Cycle
2. Seal between front panel and front bulkhead. 3. Seal between blower cover and air duct. 4. Seal between cylinder and front or rear bulkhead. 5. Gap between air duct and filter mounting. © Copyright, Alliance Laundry Systems LLC – DO NOT COPY or TRANSMIT 512176... -
Page 19: Clothes Are Too Hot When Removed From Dryer
• If the abnormal operating noise is loudest at the vent exit, the problem is originating from the blower housing. Replace the current housing and cover. Refer to Figure 28. 512176 © Copyright, Alliance Laundry Systems LLC – DO NOT COPY or TRANSMIT... - Page 20 Section 3 Troubleshooting Notes © Copyright, Alliance Laundry Systems LLC – DO NOT COPY or TRANSMIT 512176...
-
Page 21: Section 4 - Grounding
Check Wall Receptacle Polarity (Gas Dryer Models Only) Refer to Figure 1. Ground Ground Wires 115±12 V.A.C. V.A.C. 115±12 V.A.C. Neutral Side Dryer Power Cord D354SE3A Figure 1 512176 © Copyright, Alliance Laundry Systems LLC – DO NOT COPY or TRANSMIT... -
Page 22: Ground Wire From Terminal Block To Rear Bulkhead And From Rear Bulkhead To Control Cabinet (Electric Dryer Models Only)
19. GROUND WIRE FROM TERMINAL BLOCK TO REAR BULKHEAD AND FROM REAR BULKHEAD TO CONTROL CABINET (Electric Dryer Models Only) Refer to Figure 2. Ground Wires H006GE3A Figure 2 © Copyright, Alliance Laundry Systems LLC – DO NOT COPY or TRANSMIT 512176... -
Page 23: Stacked Dryer Ground Connections
Motor to Base REAR CONTROL GROUND CONNECTIONS Refer to Figure 3. Terminal Block and Rear Bulkhead to Control Panel Motor Terminal Block to Base Motor to Base 512176 © Copyright, Alliance Laundry Systems LLC – DO NOT COPY or TRANSMIT... - Page 24 Section 4 Grounding SWD4G SWD4G Stacked Dryer DRY6G DRY6G Front Control Dryer DRY7G DRY7G Rear Control Dryer Figure 3 © Copyright, Alliance Laundry Systems LLC – DO NOT COPY or TRANSMIT 512176...
-
Page 25: Section 5 - Service Procedures
Slide upper dryer forward, until leveling legs slide into notch on security cabinet. f. Lift upper dryer and place on level surface. Control Panel Service DRY1818S Door Figure 4 512176 © Copyright, Alliance Laundry Systems LLC – DO NOT COPY or TRANSMIT... -
Page 26: Control Hood Assembly (Rear Control Dryers)
Disconnect wiring from timer and carefully remove timer from control hood assembly. NOTE: Refer to wiring diagram when rewiring component parts. e. Remove two screws holding timer to support control panel. © Copyright, Alliance Laundry Systems LLC – DO NOT COPY or TRANSMIT 512176... -
Page 27: Fabric Selector Switch (Rear Control Dryers)
Remove three screws holding control hood assembly to control hood rear panel. c. Rotate assembly forward to access inner wiring. d. Disconnect wires to the signal. 512176 © Copyright, Alliance Laundry Systems LLC – DO NOT COPY or TRANSMIT... - Page 28 Timer Knob Switch Assembly Control Hood Graphic Rear Panel Panel Support Control Panel DRY161P Cabinet Figure 5 GRAPHIC PANEL, CONTROL HOOD AND CONTROLS – REAR CONTROL DRYERS © Copyright, Alliance Laundry Systems LLC – DO NOT COPY or TRANSMIT 512176...
-
Page 29: Control Panel And Controls (Front Control And Stacked Dryers)
Remove wire harness and wires from timer(s). Remove timer(s) from control panel. i. Remove control panel overlay from control panel. j. Remove control panel from unit. 512176 © Copyright, Alliance Laundry Systems LLC – DO NOT COPY or TRANSMIT... - Page 30 Signal Assembly Switch Knob Assembly Extend Tumble Screw Rocker Switch Timer DRY1871P Knob Control Assembly Cabinet Bottom Figure 6 CONTROL PANEL AND CONTROLS – FRONT CONTROL DRYERS © Copyright, Alliance Laundry Systems LLC – DO NOT COPY or TRANSMIT 512176...
- Page 31 Timer Knob Assembly Control Cabinet Bottom Fabric Selector Switch Knob Assembly Expansion Screw Clip Timer DRY1872P Knob Assembly Figure 7 CONTROL PANEL AND CONTROLS – STACKED DRYERS 512176 © Copyright, Alliance Laundry Systems LLC – DO NOT COPY or TRANSMIT...
-
Page 32: Access Panel
Swing bottom of front panel away from dryer to disengage hold-down clips and locators from cabinet top. e. Disconnect wires from door switch. Refer to Figure 16. NOTE: Refer to wiring diagram when rewiring switch. © Copyright, Alliance Laundry Systems LLC – DO NOT COPY or TRANSMIT 512176... - Page 33 • Whenever ground wires are removed during servicing, these ground wires must be reconnected to ensure that the dryer is properly grounded. W001R1 Cabinet Top Cabinet Hold-Down Screws Rear Hold-Down Brackets D339S D394S Figure 11 Figure 10 512176 © Copyright, Alliance Laundry Systems LLC – DO NOT COPY or TRANSMIT...
-
Page 34: Lint Filter
33. LOADING DOOR a. Open loading door. b. Remove screws holding loading door to hinges. Refer to Figure 12. Lint Filter Front Bulkhead D306S Figure 12 © Copyright, Alliance Laundry Systems LLC – DO NOT COPY or TRANSMIT 512176... -
Page 35: Inner And Outer Door Panels And Door Pull
Seal Door Strike Outer Door Panel Screw Wedge Door Pull Screw Inner Door Panel and Seal Assembly Screw Door Hinge Front Panel Screws Screw D343P Figure 13 512176 © Copyright, Alliance Laundry Systems LLC – DO NOT COPY or TRANSMIT... -
Page 36: Reversing Door Procedure (Doors Without Windows Only)
Reinstall four hinge attaching Reinstall nine screws removed in two door plugs, and reinstall on screws removed in Step 1. Step 2. opposite side of door opening. Figure 14 © Copyright, Alliance Laundry Systems LLC – DO NOT COPY or TRANSMIT 512176... -
Page 37: Door Seal
Refer to Figure 15. Door Seal Door Seal Inner Door Panel Slot Bottom Of Door Inner Door Panel D335S Figure 15 512176 © Copyright, Alliance Laundry Systems LLC – DO NOT COPY or TRANSMIT... -
Page 38: Front Panel And Panel Seal
Figure 16. NOTE: Refer to wiring diagram when rewiring switch. H183SE1A e. Depress tabs on top and bottom of catch and push out of front panel. Figure 16 © Copyright, Alliance Laundry Systems LLC – DO NOT COPY or TRANSMIT 512176... - Page 39 Hold-Down Door Clip Front Switch Panel Locator Seal Sticker Door Catch Nameplate Front Panel Hinge Hole Plugs Screw Screw Locator Lower Access Panel Screw SWD648P Figure 17 512176 © Copyright, Alliance Laundry Systems LLC – DO NOT COPY or TRANSMIT...
-
Page 40: Cylinder Light
Figure 16. NOTE: Refer to wiring diagram when rewiring switch. DRY1821S e. Remove screw holding lens to front bulkhead. Figure 18 f. Disconnect wires from light receptacle terminals. © Copyright, Alliance Laundry Systems LLC – DO NOT COPY or TRANSMIT 512176... -
Page 41: Door Hinge
Refer to Figure 17. f. Remove four screws holding four locators to Figure 19 access panel or front panel. Refer to Figure 17. 512176 © Copyright, Alliance Laundry Systems LLC – DO NOT COPY or TRANSMIT... -
Page 42: Burner System Components (Gas Models)
Screw Igniter Wires Disconnect Block Secondary Coil Lead-In Holding Pipe Booster Coil Sensor Valve Sensor Nipple Shut-Off Terminals Union Valve (Shown in closed position) D241SE3G Figure 20 © Copyright, Alliance Laundry Systems LLC – DO NOT COPY or TRANSMIT 512176... - Page 43 (2) Remove screw holding sensor to burner of dryer. housing. Refer to Figure 20. Attaching Screw Igniter and Bracket White Ceramic Portion Burner Tube Burner Tube Shutter D242SE3A Figure 21 512176 © Copyright, Alliance Laundry Systems LLC – DO NOT COPY or TRANSMIT...
-
Page 44: Burner Housing And Heat Shroud (Gas Models)
Gas Valve Handle Burner Tube Limit (Shown in Closed Limit Thermostat Position) Thermostat Burner Tube Screw Base Burner Screw Housing Thermal D244SE3B Fuse Screw D243SE3A Figure 22 © Copyright, Alliance Laundry Systems LLC – DO NOT COPY or TRANSMIT 512176... -
Page 45: Heater Assembly (Electric Models)
Open loading door and remove screw from end Screw of lint filter. Refer to Figure 12. Thermostat d. Lift lint filter out of air duct, paying close D400SE1F attention to orientation. Figure 23 512176 © Copyright, Alliance Laundry Systems LLC – DO NOT COPY or TRANSMIT... -
Page 46: Motor And Exhaust Assembly
Refer to Figures 29 and 30. Screws i. Remove two screws holding motor mounting bracket to dryer base. Refer to Figure 25. Thermostat D400SE1E Figure 25 © Copyright, Alliance Laundry Systems LLC – DO NOT COPY or TRANSMIT 512176... - Page 47 Be sure the belt has been installed slide out through front of dryer. on the correct side of the idler lever. Refer to Figure 26. 512176 © Copyright, Alliance Laundry Systems LLC – DO NOT COPY or TRANSMIT...
- Page 48 (2) Pry two motor clamps off motor mounting bracket with screwdriver, then lift motor out of mounting bracket. Refer to Figure 27. Blower Housing Attaching Screws D249SE3B Figure 28 © Copyright, Alliance Laundry Systems LLC – DO NOT COPY or TRANSMIT 512176...
- Page 49 (with wire securely crimped in place) into back side of connection block. Push terminal into connection block until locking tab on terminal spreads and holds terminal in place. 512176 © Copyright, Alliance Laundry Systems LLC – DO NOT COPY or TRANSMIT...
-
Page 50: Front Bulkhead Assembly
Disengage belt from motor and idler pulley. Screws Cylinder Refer to Figure 26. Glide Bracket D256SE3C f. Models with Cylinder Light – Disconnect Figure 32 wires from light receptacle terminals. © Copyright, Alliance Laundry Systems LLC – DO NOT COPY or TRANSMIT 512176... - Page 51 No. 22506P Sealant. This is accomplished by applying a bead of sealant around the entire flanged area where the felt seal contacts the bulkhead. 512176 © Copyright, Alliance Laundry Systems LLC – DO NOT COPY or TRANSMIT...
-
Page 52: Cylinder Belt
Refer to Figure 35. to Figure 17. After installing belt, manually rotate cylinder counterclockwise to check that belt is properly aligned. © Copyright, Alliance Laundry Systems LLC – DO NOT COPY or TRANSMIT 512176... -
Page 53: Cylinder Assembly
To reduce the risk of serious injury or death by carbon monoxide and other gases in gas dryers, carefully read and follow all instructions given in this section. W005 512176 © Copyright, Alliance Laundry Systems LLC – DO NOT COPY or TRANSMIT... -
Page 54: Rear Seal
Remove four screws holding bulkhead to front flange of cabinet. Then, lift complete bulkhead assembly out of slots in cabinet. Refer to Figure 31. © Copyright, Alliance Laundry Systems LLC – DO NOT COPY or TRANSMIT 512176... - Page 55 Section 5 Service Procedures Rear Outlet Seal Cover Rear Bulkhead Attaching Screws Rear Bulkhead Attaching Screws Cylinder Roller Cylinder Roller Heater Exhaust Duct Screw D405S Figure 36 512176 © Copyright, Alliance Laundry Systems LLC – DO NOT COPY or TRANSMIT...
-
Page 56: Cylinder Rollers
Pull cylinder forward allowing rear of cylinder D260SE3B to drop down exposing rollers. Refer to Figure 37 Figure 37. h. Refer to Figure 37 for removal of roller from bulkhead. © Copyright, Alliance Laundry Systems LLC – DO NOT COPY or TRANSMIT 512176... -
Page 57: Rear Bulkhead And Heater Duct
Refer to Figure 20. W005 512176 © Copyright, Alliance Laundry Systems LLC – DO NOT COPY or TRANSMIT... - Page 58 Remove heater duct from rear bulkhead. Refer rewiring terminal block.) to Figure 38. Rear Bulkhead Heater Duct Attaching Screws Heater Duct Attaching Screws Heater Duct D261SE3B Figure 38 © Copyright, Alliance Laundry Systems LLC – DO NOT COPY or TRANSMIT 512176...
-
Page 59: Terminal Block Or Power Cord
NOTE: Do not let terminal block insulation drop switch. when removing the block. Insulation must be in place when reinstalling block. Cabinet Terminal Block Terminal Block Attaching Screw D406S Figure 39 512176 © Copyright, Alliance Laundry Systems LLC – DO NOT COPY or TRANSMIT... - Page 60 NOTE: Reinstall screw and ground wires into same hole in bulkhead when reinstalling power cord. Ground Ground Wires 115±12 V.A.C. V.A.C. 115±12 V.A.C. Neutral Side Dryer Power Cord D354SE3A Figure 40 © Copyright, Alliance Laundry Systems LLC – DO NOT COPY or TRANSMIT 512176...
-
Page 61: Cabinet
(5) Remove front panel. Remove front bulkhead. (6) Remove two cabinet top hold-down screws. NOTE: Air duct can remain attached to front Refer to Figure 10. bulkhead. 512176 © Copyright, Alliance Laundry Systems LLC – DO NOT COPY or TRANSMIT... - Page 62 Once bulkhead is in place, NOTE: The igniter is very fragile. Be careful not to damage it during removal. © Copyright, Alliance Laundry Systems LLC – DO NOT COPY or TRANSMIT 512176...
- Page 63 Refer to Figures 10 and 11. (e) Remove screw holding terminal block access plate to rear of dryer cabinet and remove plate. (f) Remove wire harness clips. 512176 © Copyright, Alliance Laundry Systems LLC – DO NOT COPY or TRANSMIT...
- Page 64 Section 5 Service Procedures Screw Screw Screws DRY1820S Screws Figure 41 © Copyright, Alliance Laundry Systems LLC – DO NOT COPY or TRANSMIT 512176...
-
Page 65: Base
(6) Gently move burner tube toward rear of pulleys. Refer to Figure 26. dryer to disengage tab from slot on left side of burner housing. Refer to Figure 20. 512176 © Copyright, Alliance Laundry Systems LLC – DO NOT COPY or TRANSMIT... - Page 66 Refer to Figure 26. o. Remove cabinet per Paragraph 60. p. Remove leveling legs from base and reinstall on new base. Refer to Figure 42. © Copyright, Alliance Laundry Systems LLC – DO NOT COPY or TRANSMIT 512176...
-
Page 67: Section 6 - Adjustments
To reduce the risk of serious injury or death by carbon monoxide and other gases in gas dryers, carefully read and follow all instructions given in this section. W005 Dryer Base Leveling D351S Figure 42 512176 © Copyright, Alliance Laundry Systems LLC – DO NOT COPY or TRANSMIT... -
Page 68: Burner Flame (Gas Models)
Air Shutter Shut-Off Valve Lockscrew Handle (Shown in open position) Shutter 1/8 Inch Pipe Plug (For checking manifold pressure) D265SE3A Figure 43 © Copyright, Alliance Laundry Systems LLC – DO NOT COPY or TRANSMIT 512176... -
Page 69: Section 7 - Test Procedures
NOTE: Timer motor power is supplied through M Ohms (closed) (electric models) or N (gas models) terminal. (2) Heat circuit test – L2 and H = “zero” Ohms (closed) 512176 © Copyright, Alliance Laundry Systems LLC – DO NOT COPY or TRANSMIT... -
Page 70: Fabric Selector Switch
X indicates closed when reconnecting wires. – FABRIC SELECTOR SWITCH 3 Position L1-2 L1-3 L1-1 No Heat – – Delicate – Perm. Press/Regular – – X indicates closed © Copyright, Alliance Laundry Systems LLC – DO NOT COPY or TRANSMIT 512176... -
Page 71: Drive Motor
Disconnect motor wire harness at motor 240 Volt 10,000 - 13,000 Ohms disconnect block. Motor Motor Switch Disconnect Block Motor and Exhaust Assembly Drive Motor D326SE3A Figure 45 512176 © Copyright, Alliance Laundry Systems LLC – DO NOT COPY or TRANSMIT... - Page 72 Inoperative start F. Manually depress actuator. switch. Replace switch. Continuity exists between switch Refer to Section 5. terminal 1 and switch terminal 2. Motor switch checks O.K. © Copyright, Alliance Laundry Systems LLC – DO NOT COPY or TRANSMIT 512176...
- Page 73 Replace motor. of switch and brown or blue Paragraph 51 Refer to wire in terminal 4. All motor windings check O.K. 512176 © Copyright, Alliance Laundry Systems LLC – DO NOT COPY or TRANSMIT...
-
Page 74: Motor Switch
Refer to Figure 46. Mounting Thermal Overload Protector Motor Switch D029KE3A Figure 46 © Copyright, Alliance Laundry Systems LLC – DO NOT COPY or TRANSMIT 512176... - Page 75 Step “b”. Refer to Figure 51. Thermal Overload Protector Plastic Clip Top Of Motor Switch Motor Switch D359SE3A Figure 47 512176 © Copyright, Alliance Laundry Systems LLC – DO NOT COPY or TRANSMIT...
-
Page 76: Burner System Operation
The is turned off. heat from the burner flame causes the sensor contacts (located on burner housing beside the © Copyright, Alliance Laundry Systems LLC – DO NOT COPY or TRANSMIT 512176... -
Page 77: Electrical Circuit To Ignition System (Gas Models)
Secondary Coil – Terminals 4 & 5 1325 ± 230 Ohms NOTE: If meter registers any other readings than those listed above, the respective coil(s) should be replaced. Holding D270SE3A And Booster Coil Figure 49 512176 © Copyright, Alliance Laundry Systems LLC – DO NOT COPY or TRANSMIT... -
Page 78: Sensor Check (Gas Models)
NOTE: If meter does not read appropriate Ohms, then replace the igniter. IMPORTANT: Always examine all wires, terminals and connectors to be sure wiring is correct before replacing any components. © Copyright, Alliance Laundry Systems LLC – DO NOT COPY or TRANSMIT 512176... -
Page 79: Thermal Fuse (Electric Models)
Set meter to read Ohms. Apply meter probes to the heater assembly terminals. Refer to Figure 22. Meter should read as follows: (Cold Ohms). 512176 © Copyright, Alliance Laundry Systems LLC – DO NOT COPY or TRANSMIT... -
Page 80: Door Switch
Apply probes to terminals 1 and 2 with door closed. The meter should read “infinite”. g. Open door. Meter should read “infinite” between 1 and 3 and “zero” between 1 and 2. © Copyright, Alliance Laundry Systems LLC – DO NOT COPY or TRANSMIT 512176... -
Page 81: Section 8 - Internal Wiring Of Dryer Motor Switch
W001R1 MAIN START ORANGE/COPPER CUSTOMER CIRCUIT PUSH TO START LINE Motor Switch Attaching Screws SWITCH SHOWN IN START POSITION R.S.P.C. D329SE3D Figure 51 512176 © Copyright, Alliance Laundry Systems LLC – DO NOT COPY or TRANSMIT... - Page 82 Section 8 Internal Wiring of Dryer Motor Switch Notes © Copyright, Alliance Laundry Systems LLC – DO NOT COPY or TRANSMIT 512176...
Need help?
Do you have a question about the AES17AWF and is the answer not in the manual?
Questions and answers