GreatCall Jitterbug Manual
Hide thumbs
Also See for Jitterbug:
- How-to manual (211 pages) ,
- User manual (277 pages) ,
- Quick start manual (16 pages)
Table of Contents
Advertisement
Quick Links
Welcome to the GreatCall
Thank you for choosing the Jitterbug
stay connected to friends and family with the simplicity of the Jitterbug, our 24-hour
service professionals, and our innovative Apps designed to keep you connected,
safe and healthy. This helpful guide contains all the information you need to start
using your new cell phone. And if you have any questions or need assistance, you
can count on us to be here for you day and night.
Best Regards,
Your friends at GreatCall
For additional information about GreatCall, visit www.greatcall.com.
Family.
®
. At GreatCall, we've made it easy for you to
®
Advertisement
Table of Contents

Related Manuals for GreatCall Jitterbug


Summary of Contents for GreatCall Jitterbug
- Page 1 . At GreatCall, we’ve made it easy for you to ® stay connected to friends and family with the simplicity of the Jitterbug, our 24-hour service professionals, and our innovative Apps designed to keep you connected, safe and healthy. This helpful guide contains all the information you need to start using your new cell phone.
- Page 2 2 Table of Contents...
-
Page 3: Table Of Contents
Activate Your Jitterbug ................1 Section 1: Getting Started ............... 9 How To Use This Guide ..................10 Key Items In The Jitterbug Box ................11 Using The Battery .....................12 Installing And Removing The Battery ..............12 • To Install The Battery The First Time: ............12 • To Install The Battery Cover: ..............13... - Page 4 • Turning Your Jitterbug On: .................26 • Your Main Screen: ..................27 • Making Your First Call: ................32 • To Turn Your Jitterbug Off: .................33 Personalize Your Jitterbug .................34 Operator Assistance ..................36 • To Call An Operator: ..................37 Getting More Information .................38 GreatCall Customer Service ................39...
- Page 5 • Receiving A Call When Your Jitterbug Is Open: ...........52 Ending A Call ....................52 Ignoring A Call ....................52 • To Ignore A Call When Your Jitterbug Is Closed: ..........52 • To Ignore A Call When Your Jitterbug Is Open: ..........53 Vibrate Mode ....................54 Adjusting The Ringer Volume ................54...
- Page 6 – Deleting A Contact Directly On Your Jitterbug : ..........70 Section 4: Call History ................73 Using Call History To See Recent Calls ..............74 • To Review Call History: ................74 Returning Missed Calls And Redialing ..............76 Section 5: Settings ................79 Using Your Settings ..................80...
- Page 7 Letting You Know That You Have Voice Mail Messages ........96 Listening To Voice Mail Messages ..............97 Listening To Saved Voice Mail Messages ............98 Section 8: Jitterbug SimpleText ............101 Using Jitterbug SimpleText Service ..............102 Receive A New Text Message ................103 Read A New Text Message ................104 Reply To A Text Message .................105...
- Page 8 © About Bluetooth ....................130 Using Your Jitterbug With Your Bluetooth Headset ..........131 Turning The Bluetooth Feature On Your Jitterbug On And Off ......131 • Turning The Bluetooth Feature On: ............131 • Turning The Bluetooth Feature Off: ............131 Setting Your Bluetooth Headset To Pairing Mode ..........134 Setting Your Jitterbug To Pairing Mode ............136...
- Page 9 • To End A Call When Your Jitterbug Is Open: ..........140 • To End A Call When Your Jitterbug Is Closed: ..........140 Health and Safety Information .............143 The Fine Print ..................191 Your Customer Agreement ..............217 Table of Contents VII...
-
Page 11: Activate Your Jitterbug
Activate Your Jitterbug This guide will give you all the information you need to operate your Jitterbug. Before you get started, please make sure you activate your new phone using the instructions on the next pages. Once activated, this helpful guide will provide more information about the features and benefits available on your Jitterbug. - Page 12 Step 1: Locate your serial number as you will need it to set up the phone. You can find it either on the side of your Jitterbug box, or on the Activation Card you received in the Jitterbug box. It will look like this, featuring an 18-digit number: MEID-DEC: 123456789012345678 Step 2: You can activate your phone in one of two ways: 1.
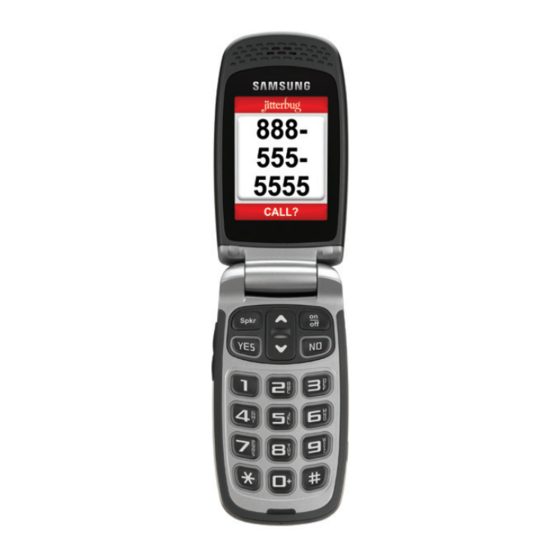
- Page 13 The website or an operator will guide you through the activation process. At some point, you will be instructed to insert the battery and turn on your Jitterbug. To turn on your Jitterbug, simply press the button. Once powered on, you will see screen 1:...
- Page 14 Screen 2 Your phone will now show screen 2, indicating your phone is ready to begin the activation process. The website or operator will instruct you to press the button. Activation could take several minutes or in rare cases up to several hours.
- Page 15 Step 4: After you press the button the second time, the phone will continue the activation process. You will see several screens until your phone is activated and ready to use. Screen 3 Screen 4 If for some reason you encounter any issues during activation, just give us a call at...
- Page 16 Step 5: Hit the button one last time to begin using your Jitterbug Plus! Now that your Jitterbug is ready to go, we encourage you to set up a mygreatcall.com account. On mygreatcall.com, you can pay your bill online, view your minute usage, add helpful apps and services, and even add phone numbers into your Jitterbug Phone Book.
- Page 17 Activation 7...
- Page 18 8 Getting Started...
-
Page 19: Section 1: Getting Started
Section 1 Getting Started This section explains how to start using your Jitterbug phone. Topics • How To Use This Guide • The Inside Of Your Jitterbug • How To Read The Inside Display • Key Items In The Jitterbug Box • Using The Battery • Using Your Jitterbug For The First Time • Personalize Your Jitterbug • Installing And Removing The Battery • Charging The Battery • Operator Assistance • Battery Level Indicator • Getting More Information • GreatCall Customer Service • The Front Of Your Jitterbug • Emergency 911 Service • The Back Of Your Jitterbug For additional support, visit us online at www.greatcall.com/support. Getting Started 9... -
Page 20: How To Use This Guide
This “How-To Guide” is divided into 10 sections that describe the features of your Jitterbug and how to use them in a few simple steps. We recommend that you read the entire guide and keep it handy for easy reference. -
Page 21: Key Items In The Jitterbug Box
Key Items In The Jitterbug Box The Jitterbug box you received includes everything you need to get started: 1. Jitterbug cell phone. 2. Rechargeable Battery – snaps into the back of your Jitterbug. 3. Battery Charger – to charge your battery. -
Page 22: Using The Battery
Using The Battery The Jitterbug Rechargeable Battery is designed to deliver an efficient charge to your Jitterbug for up to 25 days of standby time or 5 hours of talk time. Installing And Removing The Battery To Install The Battery The First Time: 1. With the Samsung logo facing up, slide the battery into the back of your Jitterbug so the gold contacts on the side of thebattery connect with the gold pins inside the phone. -
Page 23: To Install The Battery Cover
3. Press down on the cover around all sides ensuring the cover snaps into place. To Remove The Battery: 1. If the phone is on, turn it off by opening your Jitterbug and holding down the button until the GreatCall logo appears. The phone will then turn off. Getting Started 13... - Page 24 The Jitterbug Rechargeable Battery must be fully charged before using the phone for the first time. We recommend an initial charge of up to 12 hours. Failure to do so may damage your battery. If you use your Jitterbug without charging the battery, and it is critically low, it will turn itself off. 14 Getting Started...
-
Page 25: Charging The Battery
Charging The Battery Your Jitterbug can be charged with the included Battery Charger or with the Car Charger that can be purchased by visiting www.greatcall.com/jitterbug/ accessories. Using The Battery Charger: 1. A Battery Charger is included in the box with your Jitterbug. -
Page 26: Battery Level Indicator
Battery Level Indicator Jitterbug phones remind you to charge your battery. Reminders appear on the Inside Display with the following messages: – a low battery alert and a message will tell you that your battery • Battery Low is beginning to get low. - Page 27 Please reference Section 1, page 28 for more information on Phone Info. The Jitterbug features a standby time of up to 25 days. Talk time is approximately 5 hours. Common factors that affect battery performance include text messaging, taking or sending pictures, usage of 5Star Urgent Response service and making calls.
-
Page 28: The Front Of Your Jitterbug
The Front Of Your Jitterbug 4. Camera 5. 3.5mm Headset Jack 1. Indicator Light 2. Volume Button 6. Outside Display 7. Power Connector and Accessory Connector 3. Internal Antenna 18 Getting Started... - Page 29 3. Internal Antenna – connects with the cellular network so you can use your Jitterbug. 4. Camera – allows you to take a picture with your Jitterbug. 5. Headset Jack – connect to a headset to listen to calls Outside Display – indicates when you have an incoming call or message.
-
Page 30: The Back Of Your Jitterbug
The Back Of Your Jitterbug 3. Lanyard Connector 1. External Speaker 2. Battery Cover 20 Getting Started... - Page 31 1. External Speaker – delivers loud and clear sound. 2. Battery Cover – protects the battery and the back of your Jitterbug. 3. Lanyard Connector – makes it easy to attach a lanyard or wrist strap to carry your Jitterbug.
-
Page 32: The Inside Of Your Jitterbug
The Inside Of Your Jitterbug 1. Earpiece Speaker 2. Inside Display 3. Up/Down Button 4. Speakerphone Button 6. On/Off Button 5. “Yes” Button 7. “No” Button 22 Getting Started... - Page 33 1. Earpiece Speaker – lets you hear the caller loud and clear. 2. Inside Display – shows all the information you need to operate your Jitterbug. Up/Down Button – for navigating between screens on the Inside Display. Speakerphone Button – for sharing conversations with others nearby, or Spkr hands-free calling.
-
Page 34: How To Read The Inside Display
How To Read The Inside Display Throughout this guide, the screen on the inside of your Jitterbug is referred to as the Inside Display. The following diagram explains the areas of the Inside Display and how to use them, using the Phone Book as an example. - Page 35 1. Feature Area – the top of the Inside Display is the Feature Area. It identifies the feature you are using. For example, when you are in the Phone Book, you will see “PHONE BOOK” in the Feature Area. 2. Detail Area – the middle of the Inside Display provides the details of each feature.
-
Page 36: Using Your Jitterbug For The First Time
GreatCall logo appears on the Inside Display. 3. When you hear a dial tone, your Jitterbug has service and is ready to use. If a connection is not possible, a “No Service” message will appear on the Outside Display and a dial tone will not be heard. -
Page 37: Your Main Screen
Your Main Screen: For your convenience, each time you turn your Jitterbug on, you will see the Main Screen as shown in the following diagram: The Main Screen will display your Jitterbug phone number at the top of the screen as shown in the following screen as, “My # 800-733-6632.”... - Page 38 2. Call History – an easy way to review your last ten incoming, outgoing and missed calls, listed with the most recent first. Please reference Section 4, page 73 for more information. 3. Phone Info – gives you the following important points of information about your Jitterbug. • My phone number • Battery life • Signal strength • Approximate minutes used per month...
- Page 39 5. Camera– this is where you will take photos that will be automatically stored in My Photos. See section 9, page 121 for more information. 6. My Photos – an easy way to view, delete or send photos. See section 9, page 125 for more information.
- Page 40 You can easily access all of your features within the Main Screen using three Spkr simple buttons located at the top of the keypad. 1. Use the “Up/Down” button to scroll through the features of the Main Screen. 2. When the feature you want to select is highlighted in gray in the middle of the Inside Display, press the button to select that feature.
- Page 41 2. Phone Book – please see page 61 to learn more about your Phone Book. To change your start-up screen, please give us a call anytime, 24 hours a day, seven days a week by dialing “0” on your Jitterbug to reach an Operator.
-
Page 42: Making Your First Call
3. When your call is finished, press the button or close your Jitterbug to end the call. 4. You can also make a call directly from your Phone Book. Starting from the Main Screen, use the “Up/Down” button to scroll to the “Phone Book” and press button. When you find the desired name and number, press the... -
Page 43: To Turn Your Jitterbug Off
GreatCall logo appears on the Inside Display. 2. Your Jitterbug will then turn off. We recommend keeping your Jitterbug on at all times and charging it overnight so you can always stay connected. Getting Started 33... -
Page 44: Personalize Your Jitterbug
Personalize Your Jitterbug In addition to these six features that come with your new Jitterbug, the following additional services and features are available to make the most of your Jitterbug experience: Voice Mail – callers can leave messages for you when you are unavailable to answer your Jitterbug. - Page 45 5Star Agent anytime, anywhere. Please visit www.mygreatcall.com for details. You can personalize your Jitterbug with only the features and additional services that you want. Please call us at 1-800-733-6632. We’ll be glad to assist you. We offer a variety of helpful services and applications that will further enhance your Jitterbug experience and even keep you safe and healthy.
-
Page 46: Operator Assistance
Operator Assistance Live Operators are available 24 hours a day, seven days a week, and can help you: 1. Update and manage your Phone Book. 2. Look up a residential, business or government phone number. 3. Connect you to any number in the U.S. or Canada. 4. -
Page 47: To Call An Operator
To Call An Operator: 1. Open your Jitterbug. 2. Press the button on the keypad. 3. Press the button to place the call. Minutes are used while speaking with the Operator and for the length of any call they connect for you. If the Operator performs one of the convenient items listed above, an additional five minutes will be deducted from your account for the service. -
Page 48: Getting More Information
The main GreatCall website – greatcall.com – is the place to learn more about the company, read about new services available, shop for Jitterbug accessories or get answers to frequently asked questions. As a GreatCall customer, you have exclusive access to www.mygreatcall.com... -
Page 49: Greatcall Customer Service
GreatCall Customer Service Use any of these ways to contact us: • S end us an email at customerservice@greatcall.com • Call us toll–free at 1-800-733-6632 • W rite to us at: GreatCall Customer Service P.O. Box 4428 Carlsbad, CA 92018 Getting Started 39... -
Page 50: Emergency 911 Service
Emergency 911 Service To Make An Emergency Call: 1. Open your Jitterbug and make sure it’s on. 2. Dial 9–1–1 using the keypad. 3. Press the button when you see “CALL?” at the bottom of the Inside Display. 40 Getting Started... - Page 51 If you expect to make calls beyond the U.S. or Canada, consider our convenient International Calling option. Add the International Calling option to your account and you’ll be ready to call internationally in no time! To dial internationally, you may need to access the + symbol before entering in the country code and phone number.
- Page 52 42 Placing And Receiving Calls...
-
Page 53: Section 2: Placing And Receiving Calls
Section 2 Placing And Receiving Calls This section explains how to use the calling and answering features on your Jitterbug. Topics • Placing A Call • Speakerphone • Answering A Call • Ending A Call • Ignoring A Call • Vibrate Mode • Adjusting The Ringer Volume • Adjusting The Earpiece Speaker Volume • Call Waiting For additional support, visit us online at www.greatcall.com/support. Placing And Receiving Calls 43... -
Page 54: Placing A Call
You can dial a phone number directly from almost every screen on your Jitterbug. 1. When you open your Jitterbug, you will hear a dial tone to indicate that service is available. If service is not available, there will be no dial tone and you will see “No Service”... -
Page 55: Using An Operator To Make A Call
There are three screens where you cannot dial a phone number: (1) when typing a Text Message, (2) when entering a new name and number into your Phone Book using your keypad and (3) when using Voice Dial. Using An Operator To Make A Call: A live Operator can connect you to anyone in your Phone Book or to any number in the U.S. -
Page 56: Using Your Phone Book To Make A Call
4. Tell the Operator the name of the person in your Phone Book you want to call or tell them the ten digit number you want to call. 5. W hen the call is finished, press the button or simply close your Jitterbug to end the call. Using Your Phone Book To Make A Call: To place a call to a number in your Phone Book: 1. - Page 57 6. You will see “Calling...” on the Inside Display followed by “Connected” to confirm you are connected, as shown. 7. W hen you’re finished with the call, press the button or close your Jitterbug to end the call. While in the Phone Book, you can dial any phone number you need by using the keypad. Simply dial the number you wish to call and press the button to connect.
-
Page 58: Speakerphone
Phone Book and other features. 4. With the Speakerphone you do not need to hold the phone to your ear. Depending on your surroundings, you can enjoy a conversation using your Speakerphone up to two feet from your Jitterbug. 48 Placing And Receiving Calls... - Page 59 The audio will be transferred to the earpiece speaker that you hold to your ear. If you close your Jitterbug during a conversation while using the Speakerphone, the call will end and the Speakerphone will be turned off.
-
Page 60: Answering A Call
Answering A Call Your Jitterbug rings or vibrates (depending on how you set the ringer volume level) to indicate an incoming call. Additionally, there are other indications of incoming calls: • The Light Indicator on the front of your Jitterbug flashes. • T he name or phone number of the person calling will appear on the Outside Display. • I f the caller’s number is stored in your Phone Book then the name and number will appear on the Inside Display, as shown. -
Page 61: Answering A Call When Your Jitterbug Is Closed
We recommend keeping your Jitterbug on at all times and charging it overnight so you can always be connected. Answering A Call When Your Jitterbug Is Closed: 1. If the caller’s name and number are stored in your Phone Book or the caller ID is recognized, either the name or the phone number appears on the Outside Display, as shown. -
Page 62: Receiving A Call When Your Jitterbug Is Open
Jitterbug. Ignoring A Call To Ignore A Call When Your Jitterbug Is Closed: When the phone is ringing you can press the volume button to mute the ringer. If Voice Mail is active, the caller will be directed to your Voice Mail. If Voice Mail is not active, callers will get a message that you are not available. -
Page 63: To Ignore A Call When Your Jitterbug Is Open
To Ignore A Call When Your Jitterbug Is Open: You can send a caller directly to your Voice Mail by pressing the button when you see “ANSWER?” at the bottom of the Inside Display. This will give an unavailable message if you do not have Voice Mail. -
Page 64: Vibrate Mode
Vibrate Mode Turn the ringer off by opening your Jitterbug and pressing the volume button on the outside of the phone until “Vibrate” appears on the Inside Display. Your Jitterbug will be set to vibrate to alert you of incoming calls. - Page 65 The selected volume level will appear on the Inside Display. The ringer can be silenced by pressing the volume button down until “Vibrate” appears on the Inside Display. Your Jitterbug will now only vibrate to alert you of incoming calls. This can come in handy at a movie, a library or any other location where a ringer may be a distraction.
-
Page 66: Adjusting The Earpiece Speaker Volume
When you’re on a call, press the volume button up or down until the sound reaches a comfortable level. Your Jitterbug has three volume options for your earpiece speaker that you can adjust while on a call as shown below: • High... - Page 67 1. When a second person calls your Jitterbug while you are already on a call with someone else, you will hear an audible beep and a message will appear on the Inside Display to notify you of a second incoming call.
- Page 68 58 Placing And Receiving Calls...
- Page 69 This section only applies if you have enabled Call Waiting. The feature is not automatically enabled, but is available for free if you are interested in using it. To enable Call Waiting, please call us at 1-800-733-6632. Placing And Receiving Calls 59...
- Page 70 60 Phone Book...
-
Page 71: Section 3: Phone Book
Section 3 Phone Book This section explains how to use your Phone Book to save and find the names and numbers of people you call frequently. Topics • Adding, Changing and Deleting Numbers For additional support, visit us online at www.greatcall.com/support. Phone Book 61... -
Page 72: Adding, Changing And Deleting Numbers
Adding, Changing and Deleting Numbers Your Jitterbug allows you to store up to 50 names and numbers of the people you call on a regular basis. You can manage your Phone Book by adding, changing or deleting names and numbers. -
Page 73: Option 1: Use The Operator
Display, followed by the message “Connected to Operator.” 3. When the Operator answers, let the Operator know the name and number you want to add, change or delete. 4. To end the call, press the button or close your Jitterbug. Phone Book 63... -
Page 74: Option 2: Using Mygreatcall.com
Simply follow the on-screen instructions to set up your account. After setting up your account, you will be able to enter phone numbers online. All phone numbers you enter will automatically appear on your Jitterbug within four hours. mygreatcall.com is a helpful tool that makes it easy to manage your account online, at your convenience. - Page 75 3. Add new services to your account 4. Edit your services 5. Update your Phone Book and calendar entries You can visit mygreatcall.com anytime to learn about new offerings for your Jitterbug phone and keep your account updated. Phone Book 65...
-
Page 76: Option 3: On Your Jitterbug
OPTION 3: On Your Jitterbug Adding A Contact Directly On Your Jitterbug: 1. Starting from the Main Screen, use the “Up/Down” button and scroll to the “Phone Book” until it appears highlighted in gray in the middle of the Inside Display. - Page 77 6. Using the keypad, enter the name of the contact you would like to create. If you accidentally press a wrong button, just press the button to back up and delete the incorrect entry. 7. Press the button when you are done. 8.
-
Page 78: Modifying A Contact Directly On Your Jitterbug
Modifying A Contact Directly On Your Jitterbug: 1. Starting from the Main Screen, use the “Up/Down” button and scroll to the “Phone Book” until it appears highlighted in gray in the middle of the Inside Display. 2. Press the button to select “Phone Book.”... - Page 79 8. To change the contact’s name, use the button to delete the necessary letters. Use the keypad to re–enter the name. 9. Press the button when you are done. 10. To change the contact’s number, use the button to delete the necessary numbers.
-
Page 80: Deleting A Contact Directly On Your Jitterbug
Deleting A Contact Directly On Your Jitterbug : 1. Starting from the Main Screen, use the “Up/Down” button and scroll to the “Phone Book” until it appears highlighted in gray in the middle of the Inside Display. 2. Press the button to select the “Phone Book”... - Page 81 8. Press the button to confirm deleting the contact. 9. “Successfully Deleted” will appear, letting you know the contact has been removed. 10. Press the button two times to return to the Main Screen. Phone Book 71...
- Page 82 72 Call History...
-
Page 83: Section 4: Call History
Section 4 Call History This section explains how to review and return your missed calls. Topics • Using Call History To See Recent Calls • Returning Missed Calls And Redialing For additional support, visit us online at www.greatcall.com/support. Call History 73... -
Page 84: Using Call History To See Recent Calls
Using Call History To See Recent Calls Your Jitterbug keeps a list of your ten most recent outgoing, incoming and missed calls. To Review Call History: 1. Starting from the Main Screen, use the “Up/Down” button and scroll to “Call History”... - Page 85 5. As you scroll through your Call History you will see the following information on the Inside Display: • Feature Area – you will see “CALL HISTORY” indicating that you are in your Call History. • D etail Area – you will see the following messages: • “...
-
Page 86: Returning Missed Calls And Redialing
Returning Missed Calls And Redialing You can use Call History to directly return missed calls and redial both incoming and outgoing calls. 1. Starting from the Main Screen, use the “Up/Down” button and scroll to “Call History” until it appears highlighted in gray in the middle of the Inside Display. 2. - Page 87 5. Press the button to return the call. 6. Press the button or close your Jitterbug to end the call. 7. “Call Ended” will appear, letting you know the call has concluded. Call History 77...
- Page 88 78 Settings...
-
Page 89: Section 5: Settings
Section 5 Settings This section explains how to change the Settings on your Jitterbug. Topics • Using Your Settings • Selecting The Color Of The Inside Display • Changing Ring Tones • Turning The Start-Up GreatCall Jingle On And Off For additional support, visit us online at www.greatcall.com/support. Settings 79... -
Page 90: Using Your Settings
“Settings” until it appears highlighted in gray in the middle of the Inside Display. 2. Press the button to select “Settings.” The following items can be changed using the Settings feature: • Colors: Change the color of the Inside Display • Jingle: Turn the GreatCall start-up Jingle on or off • Ring Tones: Change the ring tone on your Jitterbug • Bluetooth: Turn the Bluetooth feature on or off 80 Settings... -
Page 91: Selecting The Color Of The Inside Display
Selecting The Color Of The Inside Display Your Jitterbug has five color options for the Inside Display: 1. Red – your new Jitterbug will come set to the color Red. 2. Black 3. Gray 4. Green 5. Blue Follow these steps to change the color of your Inside Display: 1. - Page 92 3. Use the “Up/Down” button to scroll through all of the “Color” options. 4. Press the button once the desired color you would like appears highlighted in gray in the middle of the Inside Display. 5. A checkmark will appear to the left of that color selection indicating that your color setting has been changed and you will be returned to the Settings menu.
-
Page 93: Changing Ring Tones
Ring Tones are the sounds your Jitterbug makes when you are receiving an incoming call. Your Jitterbug has seven Ring Tone options for you to choose from: 1. Alert – your new Jitterbug will come set to the “Alert” Ring Tone. - Page 94 1. Starting from within the Settings feature, use the “Up/Down” button to scroll through all of the available options. 2. Press the button once the “Ring Tones” option is highlighted in gray in the middle of the Inside Display. 3. You will notice that the “Alert” Ring Tone has a checkmark next to it indicating that this is your current default Ring Tone.
-
Page 95: Turning The Start-Up Greatcall Jingle On And Off
Turning The Start-Up GreatCall Jingle On And Off Your new Jitterbug will come with the GreatCall Jingle set to “ON.” Each time you turn on your phone the GreatCall Jingle will play. Turning The Jingle Off: 1. Starting from Main Screen, use the “Up/Down”... -
Page 96: Turning The Jingle On
Turning The Jingle On: 1. Starting from Main Screen, use the “Up/Down” button to scroll to “Settings” and press the button. 2. Use the “Up/Down” button to scroll through Settings and press the button once “Jingle OFF” is highlighted in gray in the middle of the Inside Display. - Page 97 Settings 87...
- Page 98 88 Voice Dial...
-
Page 99: Section 6: Voice Dial
Section 6 Voice Dial This section explains how to use Voice Dial on your Jitterbug to call a contact in your Phone Book. Topics • Using Voice Dial For additional support, visit us online at www.greatcall.com/support. Voice Dial 89... -
Page 100: Using Voice Dial
Using Voice Dial 1. Starting from the Main Screen, use the “Up/Down” button and scroll to “Voice Dial” until it appears highlighted in gray in the middle of the Inside Display. 2. Press the button to select “Voice Dial.” 3. You will hear an audible prompt to “Say the name” and then a short beep. After the beep, say the name exactly as it appears in your Phone Book. - Page 101 7. Press the button or close your Jitterbug to end the call. 8. “Call Ended” will appear, letting you know the call has concluded. 9. Press the button to return to the Main Screen. If Voice Dial is unable to find the name, press the button to retry, or button to exit to the Main Screen.
- Page 102 92 Voice Mail...
-
Page 103: Section 7: Voice Mail
Section 7 Voice Mail This section explains how to use and manage Voice Mail on your Jitterbug. Topics • Setting Up Voice Mail • Changing Your Voice Mail Greeting • Letting You Know That You Have Voice Mail Messages • Listening To Voice Mail Messages • Listening To Saved Voice Mail Messages For additional support, visit us online at www.greatcall.com/support. Voice Mail 93... -
Page 104: Setting Up Voice Mail
Setting Up Voice Mail This section only applies if you have purchased Voice Mail with your GreatCall service. To purchase Voice Mail service for your Jitterbug, please call us at 1-800-733-6632. Follow these steps to set up Voice Mail: 1. Starting from the Main Screen, use the “Up/Down”... -
Page 105: Changing Your Voice Mail Greeting
The system will ask you if you would like to review your greeting – press the button. 3. Follow the instructions, pressing the buttons as prompted. 4. To exit your Voice Mail, simply close your Jitterbug at any time. Voice Mail 95... -
Page 106: Letting You Know That You Have Voice Mail Messages
Letting You Know That You Have Voice Mail Messages If you miss a call and the caller leaves you a message, your Jitterbug will notify you by: 1. Displaying “New Voice Mail” on the Outside Display. 2. Displaying “You have a new voice message” on the Inside Display, as shown. -
Page 107: Listening To Voice Mail Messages
Listening To Voice Mail Messages • If you have a new Voice Mail message, your Jitterbug will notify you by displaying “You have a new voice message” on the Inside Display and “LISTEN?” in the Action Line. • P ress the button to listen to your message. -
Page 108: Listening To Saved Voice Mail Messages
2. Press the button to select “Voice Mail” and listen to the prompts to play your saved messages. 3. To exit your Voice Mail, simply close your Jitterbug at any time. To quickly manage multiple messages, press the button at any time while listening to a message. - Page 109 Voice Mail 99...
- Page 110 100 Jitterbug SimpleText...
-
Page 111: Section 8: Jitterbug Simpletext
Section 8 Jitterbug SimpleText This section explains how to use the Jitterbug SimpleText service. Topics • Using The Jitterbug SimpleText Service • Receive A New Text Message • Read A New Text Message • Reply To A Text Message • Saving And Deleting A Text Message • Sending A New Text Message For additional support, visit us online at www.greatcall.com/support. Jitterbug SimpleText 101... -
Page 112: Using Jitterbug Simpletext Service
Using Jitterbug SimpleText Service This section applies if you have asked for SimpleText with your GreatCall service. To get SimpleText on your Jitterbug, please call us at 1-800-733-6632. We’ve created an easy to use Text Messaging service that allows you to do the following: • Receive a new Text Message... -
Page 113: Receive A New Text Message
Jitterbug is opened. 2. The words “New Text Message” will appear on the Outside Display. This message will stay on your Outside Display until your Jitterbug is opened. 3. A n audible alert will play every five minutes until 30 minutes has elapsed. To turn off the audible alert, open your Jitterbug and read the Text Message. -
Page 114: Read A New Text Message
Read A New Text Message After receiving notification of a new Text Message, follow these three steps to read the message: 1. To read the Text Message, open your Jitterbug. You will see the words “You have a new text message.” on the Inside Display and the word “VIEW?” on the Action Line, as shown. -
Page 115: Reply To A Text Message
1. When reading a Text Message you’ve received, you will see the word “REPLY?” on the Action Line. Press the button to reply. 2. To use the Jitterbug Library of pre-written Text Messages, use the “Up/Down” button to scroll to “Library.” Press the button and again, use the “Up/ Down”... - Page 116 5. When the message has been sent, you will see the words “Message Successfully Sent” on the Inside Display. 106 Jitterbug SimpleText...
-
Page 117: Saving And Deleting A Text Message
Display. 2. Press the button to select “Text Messages.” 3. Using the “Up/Down” button, scroll to “Read” until it appears highlighted in gray in the middle of the Inside Display. 4. Press the button to select “Read.” Jitterbug SimpleText 107... - Page 118 6. Press the button to read the entire Text Message. Jitterbug SimpleText automatically saves the messages you’ve received from others as well as the messages you’ve sent to others. When viewing your saved messages, “From” and “To” are clearly labeled at the top of the Inside Display.
-
Page 119: Deleting A Text Message
Deleting A Text Message: Your Jitterbug allows you to delete Text Messages in two ways: • Delete a new text immediately after reading • Delete an old text from your saved messages Deleting A New Text Immediately After Reading: 1. After you’ve read a Text Message, you will be asked to reply to it. 2. If you want to delete the message without replying, press the button when asked to reply. - Page 120 4. Y ou will then be asked to confirm that you want to delete the message. Press button again to confirm deletion. 5. “Message Successfully Deleted” will appear on the Inside Display and you will be returned to your saved messages. 110 Jitterbug SimpleText...
- Page 121 Jitterbug SimpleText 111...
-
Page 122: Deleting An Old Text From Your Saved Messages
Inside Display. 4. Press the button to select “Delete.” 5. Using the “Up/Down” button, scroll to the Text Message you want to delete. 6. Press the button to delete the Text Message you’ve selected. 7. Y ou will then be asked to confirm that you want to delete the message. Press button again to confirm deletion. 112 Jitterbug SimpleText... -
Page 123: Sending A New Text Message
Messages” until it appears highlighted in gray in the middle of the Inside Display. 2. Press the button to select “Text Messages. ” 3. Using the “Up/Down” button, scroll to “Send” until it appears highlighted in gray in the middle of the Inside Display. 4. Press the button to “Send”. Jitterbug SimpleText 113... - Page 124 “Customize.” Press the button and use the keypad to type your Text Message. To use the Jitterbug Library of pre-written Text Messages, use the “Up/Down” button to scroll to “Library.” Press the button and again, use the “Up/Down”...
- Page 125 8. When the message has been sent, you will see the words “Message Successfully Sent” on the Inside Display. Jitterbug SimpleText 115...
- Page 126 Press repeatedly to cycle through the 123, ABC, Abc-S, Abc-W and abc Modes Move back a space and delete a character Press repeatedly to enter characters: . , – ’ @ : ! ? / 1 cycle through the characters 116 Jitterbug SimpleText...
-
Page 127: Modes For Creating Your Own Text Message
In 123 Mode your keypad allows you to type numeric characters only. To enter 123 Mode, press the button until you see “123” appear in the top right corner of the Inside Display. Then press the desired number or numbers. Jitterbug SimpleText 117... -
Page 128: Abc Mode
“ABC” appear in the top right corner of the Inside Display. Abc-S Mode In Abc-S Mode the first letter of each sentence is capitalized. To enter Abc-S Mode, press the button until you see “Abc-S” appear in the top right corner of the Inside Display. 118 Jitterbug SimpleText... -
Page 129: Abc-W Mode
Inside Display. abc Mode In abc Mode every letter will be lower case. To enter abc Mode, press the button until you see “abc” appear in the top right corner of the Inside Display. Jitterbug SimpleText 119... - Page 130 120 Jitterbug Camera...
-
Page 131: Section 9: Jitterbug Camera
Section 9 Jitterbug Camera This section explains how to take, view, delete and share photos on your Jitterbug. Topics • Taking A Photo With Your Jitterbug • Viewing A Photo On Your Jittterbug • Deleting A Photo On Your Jitterbug • Sending A Photo From Your Jitterbug • Receiving A Photo On Your Jitterbug For additional support, visit us online at www.greatcall.com/support. Jitterbug Camera 121... -
Page 132: Taking A Photo With Your Jitterbug
5. Press “Yes” to store your photo. “Photo Successfully Saved” will appear on the Inside Display. 6. Press “No” to delete your photo and return to the camera. Any photo saved on your Jitterbug will be stored in a photo gallery called “My Photos.”... -
Page 133: Viewing A Photo On Your Jitterbug
Viewing A Photo On Your Jitterbug 1. Starting from the main screen use the “Up/Down” button and scroll to “My Photos” until it appears highlighted in gray in the middle of the Inside Display. 2. Press the button to open “My Photos.”... -
Page 134: Deleting A Photo On Your Jitterbug
Deleting A Photo On Your Jitterbug 1. Starting from the main screen use the “Up/Down” button and scroll to “My Photos” until it appears highlighted in gray in the middle of the Inside Display. 2. Press the button to open “My Photos.”... -
Page 135: Sending A Photo From Your Jitterbug
Once a photo has been deleted, there is no way to retrieve it. Sending A Photo From Your Jitterbug 1. Starting from the main screen use the “Up/Down” button and scroll to “My Photos” until it appears highlighted in gray in the middle of the Inside Display. - Page 136 If you have not registered to use mygreatcall.com, simply visit www.mygreatcall.com and follow the online instructions. 126 Jitterbug Camera...
-
Page 137: Receiving A Photo On Your Jitterbug
Receiving A Photo On Your Jitterbug 1. If you receive a photo on your Jitterbug, the words “New Photo” will appear on the Outside Display. This message will stay on your Outside Display until your Jitterbug is opened. 2. To view the photo,open your Jitterbug and press “Yes”. - Page 138 128 Bluetooth...
-
Page 139: Section 10: Bluetooth
Section 10 Bluetooth ® This section explains how to use the Bluetooth functionality on your Jitterbug phone. Topics • About Bluetooth • Using Your Jitterbug With Your Bluetooth Headset • Turning The Bluetooth Feature On Your Jitterbug On And Off • Setting Your Bluetooth Headset To Pairing Mode • Setting Your Jitterbug To Pairing Mode • Answering A Call When Paired With Your Bluetooth Headset • Ending A Call When Paired With Your Bluetooth Headset For additional support, visit us online at www.greatcall.com/support. Bluetooth 129... -
Page 140: About Bluetooth
Bluetooth is a technology that allows you to talk on your cell phone without using your hands. In order to use it, you simply must “pair” your Jitterbug so that it is connected, without wires, to a Bluetooth device, as described on the following pages. -
Page 141: Using Your Jitterbug With Your Bluetooth Headset
Using Your Jitterbug With Your Bluetooth Headset There are three steps to set up your Jitterbug with a Bluetooth headset: 1. Turning on the Bluetooth feature on your Jitterbug. 2. Setting your Bluetooth headset to Pairing Mode. 3. Setting your Jitterbug to Pairing Mode. - Page 142 1. Starting from the Main Screen of your Jitterbug, scroll through the options using the “Up/Down” button until “Settings” is highlighted in gray in the middle of the Inside Display. 2. Press the button on your Jitterbug to select the “Settings.”...
- Page 143 Bluetooth setting is turned on. Turning The Bluetooth Feature Off: 1. Starting from the Main Screen of your Jitterbug, scroll through the options using the “Up/Down” button until “Settings” is highlighted in gray in the middle of the Inside Display.
-
Page 144: Setting Your Bluetooth Headset To Pairing Mode
Setting Your Bluetooth Headset To Pairing Mode The first step in setting up any Bluetooth device is called “Pairing.” This step is required because there are no wires to link your Jitterbug to your Bluetooth device. “Pairing” happens when your Jitterbug and your Bluetooth device agree to communicate with one another. By “Pairing,” your Jitterbug recognizes your Bluetooth device and the two devices automatically accept communication from each other. - Page 145 Please ensure you turn off your Bluetooth if you wish to receive calls from your Jitterbug handset and not your Bluetooth headset. You are unable to turn off your Bluetooth while on a call. When your Bluetooth is on and available for...
-
Page 146: Setting Your Jitterbug To Pairing Mode
Setting Your Jitterbug To Pairing Mode 1. Starting from the Main Screen of your Jitterbug, use the “Up/Down” button and scroll to “Settings” until it appears highlighted in gray in the middle of the Inside Display. 2. Press the button on your Jitterbug to select “Settings. ”... - Page 147 Inside Display of your Jitterbug. 8. Press the button on your Jitterbug to begin searching for the Bluetooth headset. Please wait while your Jitterbug searches for the Bluetooth headset. During this time, “Searching” will appear on the Inside Display. 9. Using the “Up/Down”...
- Page 148 “(your device name) Connected.” You will also hear a chime sound notifying you that your Jitterbug is now connected with your Bluetooth headset. 13. Your Jitterbug is now “Paired” with your Bluetooth headset and ready to make and receive calls. 138 Bluetooth...
- Page 149 You will notice different Bluetooth icons on your Jitterbug Main Screen that indicate when your Bluetooth is available to use: • G ray – Bluetooth is on, but • W hite – Bluetooth is on, not paired with your Jitterbug. paired with your Jitterbug and available for you to use.
-
Page 150: Answering A Call When Paired With Your Bluetooth Headset
Press the “Talk” button on the Bluetooth headset. Ending A Call When Paired With Your Bluetooth Headset To End A Call When Your Jitterbug Is Open: There are two ways to end a call while using a Bluetooth headset: • P ress the “Talk” button on the Bluetooth headset or • P ress the... - Page 151 Bluetooth 141...
- Page 152 142 Health and Safety...
-
Page 153: Health And Safety Information
Read this information before using your mobile device. Topics • Exposure to Radio Frequency (RF) Signals • Care and Maintenance • S pecific Absorption Rate (SAR) • Responsible Listening Certification Information • Operating Environment • Smart Practices While Driving • F CC Hearing Aid Compatibility (HAC) • B attery Use and Safety Regulations for Wireless Devices • Samsung Mobile Products and Recycling • R estricting Children’s Access to Your • UL Certified Travel Charger Mobile Device • Display / Touch-Screen • FCC Notice and Cautions • G PS & AGPS • Other Important Safety Information • Emergency Calls Health and Safety 143... - Page 154 Exposure To Radio Frequency (RF) Signals The U.S. Food and Drug Administration (FDA) has published information for consumers relating to Radio Frequency (RF) exposure from wireless phones. The FDA publication includes the following information: Do cell phones pose a health hazard? Many people are concerned that cell phone radiation will cause cancer or other serious health hazards. The weight of scientific evidence has not linked cell phones with any health problems.
- Page 155 The low levels of RF cell phones emit while in use are in the microwave frequency range. They also emit RF at substantially reduced time intervals when in the stand-by mode. Whereas high levels of RF can produce health effects (by heating tissue), exposure to low level RF that does not produce heating effects causes no known adverse health effects.
- Page 156 forms of electromagnetic radiation with relatively low frequencies. While RF energy does not ionize particles, large amounts can increase body temperatures and cause tissue damage. Two areas of the body, the eyes and the testes, are particularly vulnerable to RF heating because there is relatively little blood flow in them to carry away excess heat.
- Page 157 phones increase the risk of head and neck cancer. A report published in the International Journal of Epidemiology (June, 2010) compared cell phone usage for more than 5,000 people with brain tumors (glioma and meningioma) and a similar number of healthy controls. Results of this study did NOT show that cell phones caused brain cancer.
- Page 158 International Cohort Study on Mobile Phone Users (COSMOS) The COSMOS study aims to conduct long-term health monitoring of a large group of people to determine if there are any health issues linked to long-term exposure to radio frequency energy from cell phone use. The COSMOS study will follow approximately 300,000 adult cell phone users in Europe for 20 to 30 years.
- Page 159 Surveillance, Epidemiology, and End Results (SEER) Program of the National Cancer Institute The National Cancer Institute (NCI) actively follows cancer statistics in the United States to detect any change in rates of new cases for brain cancer. If cell phones play a role in risk for brain cancer, rates should go up, because heavy cell phone use has been common for quite some time in the U.S.
- Page 160 Institute of Electrical and Electronics Engineers (IEEE), the International Commission on Non-Ionizing Radiation Protection (ICNIRP), and others to assure that safety standards continue to adequately protect the public. Reducing Exposure: Hands-Free Kits and Other Accessories Steps to Reduce Exposure to Radio Frequency Energy If there is a risk from being exposed to radio frequency energy (RF) from cell phones - and at this point we do not know that there is - it is probably very small.
- Page 161 from the head in the user’s hand or in approved body worn accessories. Cell phones marketed in the U.S. are required to meet RF exposure compliance requirements when used against the head and against the body. Because there are no known risks from exposure to RF emissions from cell phones, there is no reason to believe that hands-free kits reduce risks.
- Page 162 Children and Cell Phones The scientific evidence does not show a danger to any users of cell phones from RF exposure, including children and teenagers. The steps adults can take to reduce RF exposure apply to children and teenagers as well. • Reduce the amount of time spent on the cell phone; • Use speaker mode or a headset to place more distance between the head and the cell phone. Some groups sponsored by other national governments have advised that children be discouraged from using cell phones at all.
- Page 163 • Environmental Protection Agency (EPA): http://www.epa.gov/radtown/wireless-tech.html. • Occupational Safety and Health Administration (OSHA): http://www.osha.gov/SLTC/radiofrequencyradiation/. (Note: This web address is case sensitive.) • National Institute for Occupational Safety and Health (NIOSH): http://www.cdc.gov/niosh/. • World Health Organization (WHO): http://www.who.int/peh-emf/en/. • International Commission on Non-Ionizing Radiation Protection: http://www.icnirp.de. • Health Protection Agency: http://www.hpa.org.uk/Topics/Radiation/. • Health Protection Agency: http://www.hpa.org.uk/Topics/Radiation/. • US Food and Drug Administration: http://www.fda.gov/Radiation- EmittingProducts/RadiationEmittingProductsandProcedures/ HomeBusinessandEntertainment/CellPhones/default.htm. Health and Safety 153...
- Page 164 Specific Absorption Rate (SAR) Certification Information Your wireless phone is a radio transmitter and receiver. It is designed and manufactured not to exceed the exposure limits for Radio Frequency (RF) energy set by the Federal Communications Commission (FCC) of the U.S. Government. These FCC RF exposure limits are derived from the recommendations of two expert organizations: the National Council on Radiation Protection and Measurement (NCRP) and the Institute of Electrical and Electronics Engineers...
- Page 165 The FCC SAR limit incorporates a substantial margin of safety to give additional protection to the public and to account for any variations in measurements. SAR tests are conducted using standard operating positions accepted by the FCC with the phone transmitting at its highest certified power level in all tested frequency bands. Although the SAR is determined at the highest certified power level, the actual SAR level of the phone while operating can be well below the maximum reported value.
- Page 166 Use of other accessories may not ensure compliance with FCC RF exposure guidelines. The FCC has granted an Equipment Authorization for this mobile phone with all reported SAR levels evaluated as in compliance with the FCC RF exposure guidelines. The maximum SAR values for this model phone as reported to the FCC are: Head: 0.40 W/Kg.
- Page 167 FCC Part 15 Information to User: Pursuant to part 15.21 of the FCC Rules, you are cautioned that changes or modifications not expressly approved by Samsung could void your authority to operate the device. This device complies with part 15 of the FCC Rules. Operation is subject to the following two conditions: (1) This device may not cause harmful interference, and (2) this device must accept any interference received, including interference that may cause undesired operation.
- Page 168 which can be determined by turning the equipment off and on, the user is encouraged to try to correct the interference by one or more of the following measures: • Reorient or relocate the receiving antenna • Increase the separation between the equipment and receiver • Connect the equipment into an outlet on a circuit different from that to which the receiver is connected • Consult the dealer or an experienced radio/TV technician for help...
- Page 169 Samsung is committed to promoting responsible driving and giving drivers the tools they need to understand and address distractions.
- Page 170 • P lace calls when you are not moving • Plan calls when your car will be stationary • D o not engage in stressful or emotional conversations • L et the person with whom you are speaking know that you are driving and will suspend the call if necessary • Do not take notes or look up phone numbers while driving Notice regarding legal restrictions on mounting this device in an automobile: Laws in some states may prohibit mounting this device on or near the windshield of an automobile.
- Page 171 Never use wireless data services such as text messaging, Web browsing, or e-mail while operating a vehicle. Never watch videos, such as a movie or clip, or play video games while operating a vehicle. For more information, go to http://www.ctia.org. Battery Use and Safety Important: Handle and store batteries properly to avoid injury or damage.
- Page 172 If the phone and/or battery get wet, have them checked by your service provider or contact Samsung, even if they appear to be working properly. Do not place your battery in or near a heat source. Excessiveheating can damage the phone or the battery and could cause the phone or the battery to explode.
- Page 173 Important!: Use only Samsung-approved batteries, and recharge your battery only with Samsung-approved chargers which are specifically designed for your phone. Warning!:Use of a non-Samsung-approved battery or charger may present a risk of fire, explosion, leakage, or other hazard. Samsung’s warranty does not cover damage to the phone caused by non-Samsung-approved batteries and/or chargers.
- Page 174 Samsung Mobile Products and Recycling Samsung cares for the environment and encourages it customers to recycle Samsung mobile devices and genuine Samsung accessories. Proper disposal of your mobile device and its battery is not only important for safety, it benefits the environment. Batteries must be recycled or disposed of...
- Page 175 Recycling programs for your mobile device, batteries, and accessories may not be available in your area. We’ve made it easy for you to recycle your old Samsung mobile device by working with respected take-back companies in every state in the country.
- Page 176 Mail It In The Samsung Mobile Take-Back Program will provide Samsung customers with a free recycling mailing label. Just go to http://www.samsung.com/us/ aboutsamsung/citizenship/usactivities_environment_samsungrecyclingdirect. html?INT=STA_recyle_your_phone_page and follow the instructions to print out a free pre-paid postage label and then send your old mobile device or battery to the address listed, via U.S.
- Page 177 be prohibited. Help us protect the environment - recycle! Warning: Never dispose of batteries in a fire because they may explode. UL Certified Travel Charger The Travel Charger for this phone has met applicable UL safety requirements. Please adhere to the following safety instructions per UL guidelines: FAILURE TO FOLLOW THE INSTRUCTIONS OUTLINED MAY LEAD TO SERIOUS PERSONAL INJURY AND POSSIBLE PROPERTY DAMAGE.
- Page 178 “Standard Limited Warranty” on page 196. GPS & AGPS Certain Samsung mobile devices can use a Global Positioning System (GPS) signal for location-based applications. A GPS uses satellites controlled by the 168 Health and Safety...
- Page 179 (FRP). Changes may affect the performance of location-based technology on your mobile device. Certain Samsung mobile devices can also use an Assisted Global Positioning System (AGPS), which obtains information from the cellular network to improve GPS performance. AGPS uses your wireless service provider’s network and therefore airtime, data charges, and/or additional charges may apply in accordance with your service plan.
- Page 180 The location-based information may be shared with third-parties, including your wireless service provider, applications providers, Samsung, and other third- parties providing services. Use of AGPS in Emergency Calls When you make an emergency call, the cellular network may activate AGPS technology in your mobile device to tell the emergency responders your approximate location.
- Page 181 current location, may contain inaccurate or incomplete data, and circumstances can and do change over time. In some areas, complete information may not be available. Therefore, you should always visually confirm that the navigational instructions are consistent with what you see before following them. All users should pay attention to road conditions, closures, traffic, and all other factors that may impact safe driving or walking.
- Page 182 Emergency calls may not be possible on all wireless mobile device networks or when certain network services and/or mobile device features are in use. Check with local service providers. To make an emergency call: 1. If the mobile device is not on, switch it on. 2.
- Page 183 Keep your Samsung Mobile Device away from: • Liquids of any kind. Keep the mobile device dry. Precipitation, humidity, and liquids contain minerals that will corrode electronic circuits. If the mobile...
-
Page 184: Responsible Listening
Doing so may cause a fire or explosion. • Dust and dirt. Do not expose your mobile device to dust, dirt, or sand. • C leaning solutions. Do not use harsh chemicals, cleaning solvents, or strong detergents to clean the mobile device. Wipe it with a soft cloth slightly dampened in a mild soap-and-water solution. - Page 185 phones, at high volume settings for long durations may lead to permanent noise- induced hearing loss. This includes the use of headphones (including headsets, earbuds, and Bluetooth or other wireless devices). Exposure to very loud sound ® has also been associated in some studies with tinnitus (a ringing in the ear), hypersensitivity to sound, and distorted hearing.
- Page 186 realizing that the higher volume may be harmful to your hearing. • W hen using headphones, turn the volume down if you cannot hear the people speaking near you or if the person sitting next to you can hear what you are listening to. •Do not turn the volume up to block out noisy surroundings. If you choose to listen to your portable device in a noisy environment, use noise-cancelling headphones to block out background environmental noise.
- Page 187 You can obtain additional information on this subject from the following sources: American Academy of Audiology 11730 Plaza American Drive, Suite 300 Reston, VA 20190 Voice: 1–800–222–2336 Email: info@audiology.org Internet: http://www.audiology.org/Pages/default.aspx National Institute on Deafness and Other Communication Disorders National Institutes of Health 31 Center Drive, MSC 2320 Bethesda, MD 20892–2320 Email:...
- Page 188 Patriots Plaza Building Washington, DC 20201 Voice: 1-800-35-NIOSH (1-800-356-4674) 1-800-CDC-INFO (1-800-232-4636) Outside the U.S: 513-533-8328 Email: cdcinfo@cdc.gov Internet: http://www.cdc.gov/niosh/topics/noise/default.html TTY: 1-888-232-6348 Operating Environment Remember to follow any special regulations in force in any area, and always switch your mobile device off whenever it is forbidden to use it, or when it may cause interference or danger.
- Page 189 signals. However, certain electronic equipment may not be shielded against the RF signals from your wireless mobile device. Consult the manufacturer to discuss alternatives. Implantable Medical Devices A minimum separation of six (6) inches should be maintained between a handheld wireless mobile device and an implantable medical device, such as a pacemaker or implantable cardioverter defibrillator, to avoid potential interference with the device.
- Page 190 • S hould read and follow the directions from the manufacturer of your implantable medical device. If you have any questions about using your wireless mobile device with an implantable medical device, consult your health care provider. For more information see: http://www.fcc.gov/oet/rfsafety/rf-faqs.html#. Other Medical Devices If you use any other personal medical devices, consult the manufacturer of your device to determine if it is adequately shielded from external RF energy.
- Page 191 Vehicles RF signals may affect improperly installed or inadequately shielded electronic systems in motor vehicles. Check with the manufacturer or its representative regarding your vehicle before using your mobile device in a motor vehicle. You should also consult the manufacturer of any equipment that has been added to your vehicle.
- Page 192 station). Users are reminded of the need to observe restrictions on the use of radio equipment in fuel depots (fuel storage and distribution areas), chemical plants, or where blasting operations are in progress. Areas with a potentially explosive atmosphere are often, but not always, clearly marked. They include below deck on boats, chemical transfer or storage facilities, vehicles using liquefied petroleum gas (such as propane or butane), areas where the air contains chemicals or particles, such as grain, dust, or metal powders, and any...
- Page 193 FCC Hearing Aid Compatibility (HAC) Regulations for Wireless Devices The U.S. Federal Communications Commission (FCC) has established requirements for digital wireless mobile devices to be compatible with hearing aids and other assistive hearing devices. When individuals employing some assistive hearing devices (hearing aids and cochlear implants) use wireless mobile devices, they may detect a buzzing, humming, or whining noise.
- Page 194 device and hearing loss. If your hearing device happens to be vulnerable to interference, you may not be able to use a rated mobile device successfully. Trying out the mobile device with your hearing device is the best way to evaluate it for your personal needs.
- Page 195 Under the current industry standard, American National Standards Institute (ANSI) C63.19, the hearing aid and wireless mobile device rating values are added together to indicate how usable they are together. For example, if a hearing aid meets the M2 level rating and the wireless mobile device meets the M3 level rating, the sum of the two values equals M5.
- Page 196 Keep the mobile device and all its parts and accessories out of the reach of small children. FCC Notice and Cautions FCC Notice The mobile device may cause TV or radio interference if used in close proximity to receiving equipment. The FCC can require you to stop using the mobile device if such interference cannot be eliminated. Vehicles using liquefied petroleum gas (such as propane or butane) must comply with the National Fire Protection Standard (NFPA-58).
-
Page 197: Other Important Safety Information
device. Although your mobile device is quite sturdy, it is a complex piece of equip- ment and can be broken. Avoid dropping, hitting, bending, or sitting on it. Other Important Safety Information • O nly qualified personnel should service the mobile device or install the mobile device in a vehicle. Faulty installation or service may be dangerous and may invalidate any warranty applicable to the device. - Page 198 • F or vehicles equipped with an air bag, remember that an air bag inflates with great force. Do not place objects, including installed or portable wireless equipment near or in the area over the air bag or in the air bag deployment area. If wireless equipment is improperly installed and the air bag inflates, serious injury could result. • S witch your mobile device off before boarding an aircraft. The use of wireless mobile devices in aircraft is illegal and may be dangerous to the aircraft’s operation.
- Page 199 your hands, neck, shoulders, or other parts of your body. When using your device for extended periods, hold the device with a relaxed grip, press the keys lightly, and take frequent breaks. If you continue to have discomfort during or after such use, stop use and see a physician. • I f your device has a camera flash or light, do not use the flash or light close to the eyes of people or pets.
- Page 200 190 The Fine Print...
-
Page 201: The Fine Print
The Fine Print Topics • Intellectual Property • Disclaimer Of Warranties (Exclusion of Liability) • Standard Limited Warranty • End User License Agreement for Software For more information about GreatCall, visit us online at www.greatcall.com. The Fine Print 191... -
Page 202: Intellectual Property
Intellectual Property All Intellectual Property, as defined below, owned by or which is otherwise the property of SAMSUNG and GreatCall, or their respective suppliers relating to the Cellular Phone, including but not limited to, accessories, parts, or software relating thereto (the “Phone System”), is proprietary to SAMSUNG and GreatCall and their respective suppliers and is protected under federal laws, state laws and international treaty provisions. - Page 203 12680 High Bluff Drive Suite 310 San Diego, CA 92130 Tel: 1–858–720–7500 Customer Service Center: P.O. Box 4428 Carlsbad, CA 92018 Tel: 1–800–733–6632 Internet Address: www.greatcall.com Copyright ©2012 GreatCall, Inc. Jitterbug and GreatCall are registered trademarks of GreatCall, Inc. The Fine Print 193...
- Page 204 1301 East Lookout Drive Richardson, Texas 75082 Tel: 1–858–SAMSUNG Internet Address: www.samsungmobileusa.com Copyright ©2012 SAMSUNG Telecommunications America, LLC. Samsung is a registered trademark of Samsung Electronics Co., Ltd. is a registered Trademark RSA Security, Inc. ® 194 The Fine Print...
- Page 205 EXCEPT AS SET FORTH IN THE EXPRESS WARRANTY CONTAINED ON THE WARRANTY PAGE ENCLOSED WITH THE PRODUCT, THE PURCHASER TAKES THE PRODUCT “AS IS, ” AND NEITHER SAMSUNG® NOR GREATCALL MAKES ANY EXPRESS OR IMPLIED WARRANTY OF ANY KIND WHATSOEVER WITH RESPECT TO THE PRODUCT, INCLUDING BUT NOT LIMITED TO THE MERCHANTABILITY OF THE PRODUCT OR ITS FITNESS FOR ANY PARTICULAR PURPOSE OR USE;...
-
Page 206: Standard Limited Warranty
Standard Limited Warranty What is covered and for how long? SAMSUNG TELECOMMUNICATIONS AMERICA, LLC (“SAMSUNG”) warrants that SAMSUNG’s handsets and accessories (“Products”) are free from defects in material and workmanship under normal use and service for the period commencing upon the date of purchase by the first consumer purchaser and continuing for the following specified period of time after that date:... - Page 207 (b) scratches, dents and cosmetic damage, unless caused by SAMSUNG; (c) defects or damage resulting from excessive force or use of a metallic object when pressing on a touch screen; (d) equipment that has the serial number or the enhancement data code removed, defaced, damaged, altered or made illegible;...
- Page 208 What are SAMSUNG’s obligations? During the applicable warranty period, provided the Product is returned in accordance with the terms of this Limited Warranty, SAMSUNG will repair or replace the Product, at SAMSUNG’s sole option, without charge. SAMSUNG may, at SAMSUNG’s sole option, use rebuilt, reconditioned, or new parts or components when repairing any Product, or may replace the Product with a rebuilt, reconditioned or new Product.
- Page 209 To obtain assistance on where to deliver the Product, please call SAMSUNG Customer Care at 1 888 987 4357. If SAMSUNG determines that any Product is not covered by this Limited Warranty, you must pay all parts, shipping, and labor charges for the repair or return of such Product.
- Page 210 ALL IMPLIED WARRANTIES, INCLUDING WITHOUT LIMITATION, IMPLIED WARRANTIES OF MERCHANTABILITY AND FITNESS FOR A PARTICULAR PURPOSE, ARE LIMITED TO THE DURATION OF THIS LIMITED WARRANTY. IN NO EVENT SHALL SAMSUNG BE LIABLE FOR DAMAGES IN EXCESS OF THE PURCHASE PRICE OF THE PRODUCT OR FOR, WITHOUT LIMITATION, COMMERCIAL LOSS OF ANY SORT;...
- Page 211 Limited Warranty or to make binding representations or claims, whether in advertising, presentations or otherwise, on behalf of SAMSUNG regarding the Products or this Limited Warranty. This Limited Warranty gives you specific legal rights, and you may also have other rights that vary from state to state.
- Page 212 SAMSUNG its attorney fees, expert witness fees or costs unless it is determined that the claim was brought in bad faith. In a Small Claim case, you shall be required to pay no more than half of the total administrative, facility and arbitrator fees, or $50.00 of such fees, whichever is less, and SAMSUNG shall pay the...
- Page 213 You may opt out of this dispute resolution procedure by providing notice to SAMSUNG no later than 30 calendar days from the date of the first consumer purchaser’s purchase of the Product. To opt out, you must send notice by e mail to optout@sta.
- Page 214 removable). Alternatively, you may opt out by calling 1 888 987 4357 no later than 30 calendar days from the date of the first consumer purchaser’s purchase of the Product and providing the same information. These are the only two forms of notice that will be effective to opt out of this dispute resolution procedure.
- Page 215 To avoid unintended information leaks and other problems of this sort, it is recommended that the device be returned to Samsung’s Customer Care Center for an Extended File System (EFS) Clear which will eliminate all user memory and return all settings to default settings. Please contact the Samsung Customer Care Center for details.
-
Page 216: End User License Agreement For Software
THIS EULA. IF YOU DO NOT ACCEPT THE TERMS IN THIS EULA, YOU MUST CLICK THE “DECLINE” BUTTON, AND DISCONTINUE USE OF THE SOFTWARE. 1. GRANT OF LICENSE. Samsung grants you the following rights provided that you comply with all terms and conditions of this EULA: You may install, use,... - Page 217 2. RESERVATION OF RIGHTS AND OWNERSHIP. Samsung reserves all rights not expressly granted to you in this EULA. The Software is protected by copyright and other intellectual property laws and treaties. Samsung or its suppliers own the title, copyright and other intellectual property rights in the Software. The Software is licensed, not sold.
- Page 218 5. UPGRADES. This EULA applies to updates, supplements and add-on components (if any) of the Software that Samsung may provide to you or make available to you after the date you obtain your initial copy of the Software, unless we provide other terms along with such upgrade. To use Software identified as...
- Page 219 U.S. and other governments. 8. TERMINATION. This EULA is effective until terminated. Your rights under this License will terminate automatically without notice from Samsung if you fail to comply with any of the terms and conditions of this EULA. Upon termination of this EULA, you must cease all use of the Software and destroy all copies, full or partial, of the Software.
- Page 220 Purchaser, and do not constitute or imply an endorsement, sponsorship, or recommendation of, or affiliation with the third-party or its products and services. Purchaser agrees that SAMSUNG shall not be responsible or liable, directly or indirectly, for any damage or loss caused or alleged to caused by, or in connection with, use of or reliance on any such third-party content, products, or services available on or through any such application.
- Page 221 APPLICATIONS PROVIDED WITH THIS MOBILE DEVICE ARE PROVIDED “AS IS” AND ON AN “AS AVAILABLE” BASIS, WITHOUT WARRANTIES OF ANY KIND FROM SAMSUNG, EITHER EXPRESS OR IMPLIED. TO THE FULLEST EXTENT POSSIBLE PURSUANT TO APPLICABLE LAW, SAMSUNG DISCLAIMS ALL WARRANTIES...
- Page 222 DISCLAIMER OF WARRANTY REGARDING THIRD-PARTY APPLICATIONS, OR TO CREATE ANY WARRANTY. 11. Limitation of Liability. SAMSUNG WILL NOT BE LIABLE FOR ANY DAMAGES OF ANY KIND ARISING OUT OF OR RELATING TO THE USE OR THE INABILITY TO USE ANY THIRD-PARTY APPLICATION, ITS CONTENT OR FUNCTIONALITY,...
- Page 223 COMPUTER VIRUS, FAILURE TO CONNECT, NETWORK CHARGES, AND ALL OTHER DIRECT, INDIRECT, SPECIAL, INCIDENTAL, EXEMPLARY, OR CONSEQUENTIAL DAMAGES EVEN IF SAMSUNG HAS BEEN ADVISED OF THE POSSIBILITY OF SUCH DAMAGES. SOME JURISDICTIONS DO NOT ALLOW THE EXCLUSION OR LIMITATION OF INCIDENTAL OR CONSEQUENTIAL DAMAGES, SO THE ABOVE LIMITATION OR EXCLUSION MAY NOT APPLY TO YOU.
- Page 224 Arbitration Rules of the Korean Commercial Arbitration Board. The award of arbitration shall be final and binding upon the parties. 14. ENTIRE AGREEMENT; SEVERABILITY. This EULA is the entire agreement between you and Samsung relating to the Software and supersedes all prior or contemporaneous oral or written communications, proposals and 214 The Fine Print...
- Page 225 representations with respect to the Software or any other subject matter covered by this EULA. If any provision of this EULA is held to be void, invalid, unenforceable or illegal, the other provisions shall continue in full force and effect. The Fine Print 215...
- Page 226 216 Customer Agreement...
-
Page 227: Your Customer Agreement
Your Customer Agreement 1. Welcome To The GreatCall Family. ® Please read this agreement regarding your phone and service. When you accept this agreement, you’re bound by its conditions. It applies to all of your services from GreatCall and covers important topics such as: • How long this agreement lasts • Your rights to refuse or cancel this agreement... - Page 228 2. Your Monthly Rate Plan The monthly rate plan you select is part of this agreement. To the extent any condition in your plan expressly conflicts with this agreement, the condition in your plan will apply. 3. Your Rights To Refuse Or Cancel This Agreement After you’ve had an opportunity to review this agreement, it will begin when you do any of the following to indicate your acceptance: • Activate your service • G ive us a written or electronic signature indicating your acceptance...
- Page 229 If you have used more than 30 minutes within 30 days from the date of purchase, and did not exceed your plan minutes then we will: • Retain your monthly service charge; or • $0.35 per minute for each additional minute over 30 minutes; whichever is less. If you have used more than 30 minutes within 30 days from the date of purchase, and did exceed your plan minutes then we will retain your monthly service charge plus $0.35 per minute for each additional minute over your plan minutes.
- Page 230 3.2 Service Cancellation If for any reason you are not completely satisfied with your service and you wish to cancel, you’ll be able to do so as described below. However, if you have purchased any Add-On Minutes, they are not refundable and these minutes will expire after your last bill. You will receive a final bill that will detail all the charges and credits on your account. If you wish to cancel your service before the end of a given month, you’ll be responsible for any account charges and overages through the date of your final bill. If you have purchased any Add-On Minutes, they are not refundable and these minutes will expire after your final bill.
- Page 231 4. Charges And Fees There is a fee associated with beginning your service and there may be a fee associated with reactivating your service. Usage charges vary depending on where, when and how you call, including toll-free and Operator-assisted calls. Additional features and services, such as Operator assistance, may have extra charges.
- Page 232 4.3 Taxes, Fees And Assessments We are required by law to charge you certain taxes, surcharges and assessments that will be included on your bill. You are responsible for paying all taxes, surcharges and assessments associated with your GreatCall products and services. These may change from time to time, and we may not be able to give you advance notice about how these changes may affect you.
- Page 233 related charges may sometimes be delayed. Delayed usage charges may be applied in the month they appear on your bill against minutes included in your service plan for that month, rather than against the included minutes for the month when you actually made or received the call. This may result in charges higher than you’d expect in the later month.
- Page 234 5. Service Subject To Change Your service is dependent upon our business requirements, including policies, practices and procedures, which we can change without notice. Unless otherwise prohibited by law, we can also change prices and any other conditions in this agreement at any time by sending you written notice prior to the billing period in which the changes would go into effect.
-
Page 235: Availability Of Service
of cancellation described in Section 3 of this agreement. We may not be able to provide you with some services, such as 9-1-1 location services, while we implement the transfer. 8. Availability Of Service Wireless phones use radio transmissions to access service. Therefore, we can’t provide service when your wireless phone is out of range of our provider’s transmission site or if sufficient network capacity is not available. - Page 236 by this agreement or by your User Guide. WE CAN, WITHOUT NOTICE, LIMIT, SUSPEND OR END YOUR SERVICE OR ANY AGREEMENT WITH YOU FOR VIOLATING THIS AGREEMENT OR FOR ANY OTHER GOOD CAUSE, INCLUDING, BUT NOT LIMITED TO: a. Two or more late payments in a 12-month period. b.
-
Page 237: Your Privacy
We can also temporarily limit your service for any operational or governmental reason. 11. Your Privacy You agree to the terms of our Privacy Policy, available on our website at www.GreatCall.com/privacypolicy, when you use our services. It may change from time to time, so please review this policy with regularity and care. - Page 238 13. Indemnification You agree to indemnify, defend and hold GreatCall harmless from any claims arising out of use of the phone or service, breach of this agreement or violation of any laws or regulations or the rights of any third party by you or any person on your account or that you allow to use your phone or service. 14.
- Page 239 THE AGREEMENT, OR THE PROVISION OF SERVICES OR PRODUCTS TO YOU, INCLUDING ANY BILLING DISPUTES (CLAIM), SHALL BE SUBMITTED TO FINAL, BINDING ARBITRATION BEFORE THE AMERICAN ARBITRATION ASSOCIATION (“AAA”). THIS AGREEMENT TO ARBITRATE ALSO REQUIRES YOU TO ARBITRATE CLAIMS AGAINST OTHER PARTIES RELATING TO SERVICES OR PRODUCTS PROVIDED OR BILLED TO YOU, INCLUDING SUPPLIERS OF SERVICES AND PRODUCTS AND OUR RETAIL DEALERS, IF YOU ALSO ASSERT CLAIMS AGAINST US IN THE SAME PROCEEDING.
- Page 240 (A) FOR CLAIMS LESS THAN $25, WE WILL PAY ALL FEES AND EXPENSES; AND (B) FOR CLAIMS BETWEEN $25 AND $1,000, YOU WILL PAY ONLY $25 IN FEES AND EXPENSES, OR ANY LESSER AMOUNT AS PROVIDED UNDER AAA’S SUPPLEMENTAL PROCEDURES FOR CONSUMER- RELATED DISPUTES.YOU AND WE AGREE TO PAY OUR OWN OTHER FEES, COSTS, AND EXPENSES, INCLUDING THOSE FOR ANY ATTORNEYS, EXPERTS, AND WITNESSES.
-
Page 241: About This Agreement
US THAT YOUR WAIVER OF ANY ABILITY TO PARTICIPATE IN CLASS OR REPRESENTATIVE ACTIONS IS UNENFORCEABLE UNDER APPLICABLE LAW, THE ARBITRATION AGREEMENT WILL NOT APPLY, AND YOU AND WE AGREE THAT SUCH CLAIMS WILL BE RESOLVED BY A COURT OF APPROPRIATE JURISDICTION, OTHER THAN A SMALL CLAIMS COURT. - Page 242 on your most recent bill. If any part of this agreement, including any part of its arbitration provisions, is held invalid, that part may be severed from this agreement. This agreement and the documents to which it refers form the entire agreement between us on their subjects. You can’t rely on any other documents or statements on those subjects by any sales or service representatives, and you have no other rights with respect to service or this agreement, except as specifically provided by law. This agreement isn’t for the benefit of any third party except our parents, affiliates, subsidiaries, agents and predecessors/successors...
- Page 243 Customer Agreement 233...
- Page 244 234 Index...
- Page 245 Ending A Call When Paired With Your Bluetooth Headset ......140 Setting Your Jitterbug To Pairing Mode ............136 Turning The Bluetooth Feature On Your Jitterbug On And Off ..... 131 Turning The Bluetooth Feature Off ............133 Turning The Bluetooth Feature On ............131 Call History ....................
- Page 246 Viewing A Photo On Your Jitterbug ............123 Create A New Member Account............... 64 Customer Service ................... 39 Deleting A Contact Directly On Your Jitterbug ..........70 Dialing Manually .................... 44 Earpiece Speaker Volume ................56 Emergency 911 Service .................. 40 To Make An Emergency Call ................
- Page 247 To Install The Battery The First Time ............12 To Remove The Battery ................13 To Turn Your Jitterbug Off ................33 Using The Battery ..................12 Using Your Jitterbug For The First Time ............26 Your Main Screen ..................27 Index 237...
- Page 248 Health And Safety Information ..............143 Ignoring A Call ....................52 Modifying A Contact Directly On Your Jitterbug ..........68 Operator Assistance ..................36 To Call An Operator ..................37 Using An Operator To Make A Call .............. 45 Personalize Your Jitterbug ................34 Phone Book ....................
- Page 249 – OPTION 3: On Your Jitterbug ................66 Deleting A Contact Directly On Your Jitterbug ..........70 Modifying A Contact Directly On Your Jitterbug ........... 68 Placing And Receiving Calls ................43 Placing A Call ..................... 44 Ringer Volume ....................54 Settings ......................
- Page 250 Saving And Deleting A Text Message ............107 Deleting An Old Text From Your Saved Messages ........112 Deleting A Text Message ................109 Saving A Text Message ................107 Using Jitterbug SimpleText Service ............102 Speakerphone ....................48 Vibrate Mode ....................54 Voice Dial ...................... 89 Using Voice Dial ..................
- Page 251 Websites ......................38 www.greatcall.com ..................38 www.mygreatcall.com ................38 Index 241...
- Page 252 Other charges and restrictions may apply. Coverage and service is not available everywhere. Jitterbug and GreatCall are registered trademarks of GreatCall, Inc. Samsung Telecommunications America, LLC (“Samsung”). Samsung is a registered trademark of Samsung Electronics Co., Ltd. Copyright © 2012 Samsung Telecommunications America, LLC. Copyright ©2012 GreatCall, Inc.