Table of Contents

Related Manuals for Jensen JMC-1000


Summary of Contents for Jensen JMC-1000
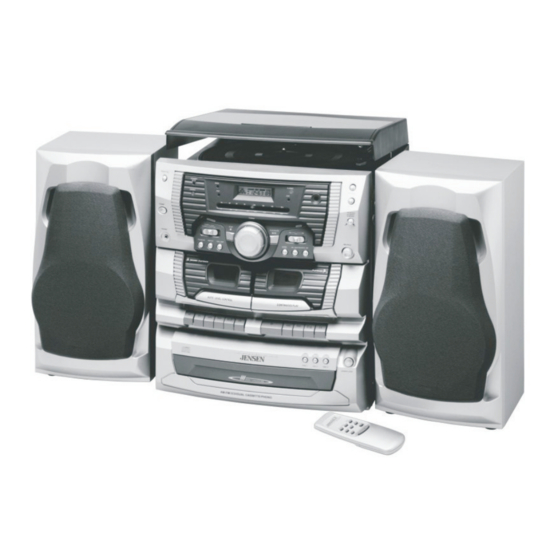
- Page 1 HOME AUDIO SYSTEM WITH 3 CD CHANGER, BELT-DRIVE TURNTABLE, DUAL CASSETTE DECK AND REMOTE CONTROL OWNER'S MANUAL JMC-1000 PLEASE READ THIS OPERATING MANUAL COMPLETELY BEFORE OPERATING THIS UNIT AND RETAIN THIS BOOKLET FOR FUTURE REFERENCE.
- Page 2 The serial number of this product is found on its back cover. You should note the serial number of this unit in the space provided as a permanent record of your purchase to aid in identification in the event of theft of loss. Model Number: JMC-1000 CUSTOMER Serial Number: _______________...
-
Page 3: Important Safety Instructions
IMPORTANT SAFETY INSTRUCTIONS The lightning flash with arrow- head symbol, within an equi- lateral triangle is intended to alert the user to the presence of uninsulated dangerous voltage within the product s enclosure that may be of sufficient magnitude to constitute a risk of electric shock to persons. - Page 4 Unplug this apparatus during lightning storms or when unused for a long periods of time. 14. Power Sources - The appliance should be connected to a power supply only of the type described in the operating instructions or as marked on the appliance. Do not overload wall outlet.
- Page 5 COMPLANCE WITH FCC REGULATIONS This device complies with Part 15 of the FCC Rules. Operation is subject to the following two conditions: this device may not cause harmful interference, and this device must accept any interference received, including interference that may cause undesired operation.
-
Page 6: Preparation For Use
PREPARATION FOR USE SPEAKER CONNECTION Connect each speaker to the corresponding speaker terminals on the back panel of the main unit. Make sure that the left speaker is connected to the left (L) speaker jack and the right speaker to the right (R) speaker jack. Right Speaker Left Speaker SPEAKER... -
Page 7: Protect Your Furniture
PROTECT YOUR FURNITURE !! This model is equipped with non-skid rubber 'feet' to prevent the product from moving when you operate the controls. These 'feet' are made from non-migrating rubber material specially formulated to avoid leaving any marks or stains on your furniture. However certain types of oil based furniture polishes, wood preservatives, or cleaning sprays may cause the rubber 'feet' to soften, and leave marks or a rubber residue on the furniture. -
Page 8: Front View
LOCATION OF CONTROLS AND INDICATORS FRONT VIEW CONTROL PANEL 5 6 7 8 9 10... - Page 9 1.) POWER On/Off Button. 2.) PRESET EQ Button. 3.) FM STEREO Indicator. 4.) STANDBY/MUTE Indicator. 5.) ROCK Equalizer Indicator. 6.) POP Equalizer Indicator. 7.) Dial Scale. 8.) LCD Display. 9.) JAZZ Equalizer Indicator. 10.) CLASSIC Equalizer Indicator. 11.) Remote SENSOR. 12.) VOLUME UP Button.
-
Page 10: Back View
BACK VIEW 1.) FM Wire Antenna. 2.) Speaker L / R Jacks. 3.) AC Power Cord. -
Page 11: Remote Control
REMOTE CONTROL 1.) STANDBY/ON Button. 2.) STOP Button. 3.) PROGRAM Button. PLAY/PAUSE SKIP/SEARCH SKIP/SEARCH 7.) DISC Select Button. 8.) MUTE Button. 9.) VOLUME - Button. 10.) VOLUME + Button. 11.) Battery Compartment (Back Cabinet). B AT T E R Y I N S T AL L AT I O N 1.) Open the battery compartment cover. -
Page 12: General Controls
OPERATING INSTRUCTIONS GENERAL CONTROLS Preset Electronic Equalizer When the unit is switched "On" for the first time, the Equalizer will be in the "Flat" setting. Press the PRESET EQ button repeatly to select "ROCK", "POP", "CLASSIC" or "JAZZ" sound effect to suit your taste. The appropriate EQ Indicator lights to confirm your selection. -
Page 13: Listening To The Radio
LISTENING TO THE RADIO 1.) Slide the FUNCTION selector to the TUNER position. 2.) Slide the BAND selector to the desired band, FM or AM. 3.) Tune to your desired station with the TUNING control. If you have tuned to a FM Stereo station the FM STEREO LED Indicator will light. -
Page 14: Playing Compact Discs
PLAYING COMPACT DISCS IMPORTANT: This CD player can play normal CDs plus CD-R and CD-RW discs. However the playability of CD-R/RW discs may be affected by the type of software that was used in 'ripping' the tracks from the original discs and 'burning' the tracks onto the blank media. - Page 15 TO BEGIN CD PLAYBACK After you have loaded up the 3 CDs in the changer: 1.) Press the PLAY/PAUSE for the first available disc in the tray and will begin playback from Track 1 on the first disc.T he number of the disc being played flashes on the display.
- Page 16 IMPORTANT!! If the disc is smudged or scratched it may skip or stop completely. This does not indicate a problem with the player. If this occurs, try playing another disc. If that disc plays properly, you may assume that the first disc is damaged and unplayable.
-
Page 17: Programmed Cd Playback
PROGRAMMED CD PLAYBACK You can program the CD changer to play up to a total of 32 tracks on all 3 discs in any desired order. NOTE: You can not program the CD changer during playback. If a disc is playing press the STOP 1.) Press the PROGRAM button once. - Page 18 5.) Use the DISC SKIP button or one of the three DISC buttons to select the disc containing the next track you wish to program. Example: Disc 3. 6.) Press the Example: Track 18. 7.) Press the PROGRAM button again to store the desired disc and track into memory location Number "02".
- Page 19 REPEAT Playback On Front Panel Only This system has a four-way repeat function which allows you to continuously repeat one track, one disc, all discs, or all of the tracks which you have programmed. One Track Repeat 1.) Press the REPEAT button until the "REPEAT 1" Indicator appears in the CD display.
- Page 20 All Discs Repeat 1.) Press the REPEAT button until the "REPEAT ALL DISC" Indicator appears in the Display. 2.) Press the PLAY/PAUSE track of the disc which is in the play position. It will continue until it has played all tracks on all discs in the changer. When it has played the last track on the last disc it will begin playing again with the first track on the first disc.
- Page 21 INTRO Scan On Front Panel Only The Intro Scan feature lets you hear a 10 second introduction of each track on each disc. This feature is useful if you are trying to find a particular song but you do not know the title. 1.) Press the INTRO button once.
- Page 22 TURNTA BLE 1.) 45 rpm LP Record Adapter. 2.) Platter. 3.) Transit Screw. 4.) Tone Arm Clamp. 5.) Tone Arm Lever (Cue Control). 6.) 33/45/78 rpm Speed Slide Switch. 7.) Tone Arm. 8.) Stylus and Protective Cover. IMPOR TANT!! TO PROTECT THE TURN TA BLE FROM DAMAGE DURING TRANSPORTATION, A SILVER TRANSIT SCREW IS LOCATED AT THE UPPER HAND CORNER OF THE TURNTABLE PLATFORM.
- Page 23 STEREO PHONOGRAPH OPERATION 1.) Raise the turntable dust cover. 2.) Release the Tone Arm Clamp, and remove the stylus protector. 3.) Slide FUNCTION selector to PHONO position. 4.) Place a record on the turntable, over the central spindle. 5.) Place the 45 rpm adapter over the central spindle when playing 45 rpm records. Set the Speed Selector Switch to 33, 45 or 78 rpm according to the record you are playing.
-
Page 24: Cassette Operation
CASSETTE OPERATION PLAYING CASSETTE TAPES 1.) Press the POWER 2.) Slide the FUNCTION selector to TAPE position to select the Tape mode. 3.) Press the Stop/Eject open the cassette door. 4.) Insert a prerecorded cassette into the slots on the door with the exposed tape facing down and the full reel on the left side. - Page 25 Pause Control Press the key to stop the tape temporarily. The tape movement stops but the tape motors continue to run. Press the resume normal playback. CONTINUOUS PLAYBACK OF TWO CASSETTES 1.) Insert prerecorded tapes into both cassette compartments with the tape you want to play first in DECK B.
- Page 26 MAKING A TAPE RECORDING This cassette recorder features an Automatic Recording Volume Level Control System that prevents overloaded or distorted recordings. You can change the volume level as often as you like during the recording process. It will not have any effect on the volume level of the recording itself.
-
Page 27: Care And Maintenance
CARE AND MAINTENANCE 1. Do not subject the unit to excessive force, shock, dust or extreme temperature. 2. Do not tamper the internal components of the unit. 3. Clean your unit with a dry cloth. Solvent or detergent should never be used. 4. -
Page 28: Head Cleaning
Check that there are no loose layers of tape visible through the cassette center window (see Fig. 1). Take up anyloose layers, using a pencil or hexagonal barrelled ballpoint pen, before inserting the cassette into the machine (see Fig. 2). If the cassette feels tight while performing operation shown see Fig. -
Page 29: Compact Disc Care
COMPACT DISC CARE To remove a disc from its storage case, press down on the center of the case and lift the disc out, holding it carefully by the edges. Fingerprints and dust should be carefully wiped off the disc s recorded surface with a soft cloth. -
Page 30: Troubleshooting Guide
TROUBLESHOOTING GUIDE Symptom Possible Problem The unit does not AC cord is not plugged respond (no power) into a wall outlet Wall outlet is not functioning. AM band is too noisy The reception at the set location is poor. Radio paused about 1 This is normal. -
Page 31: Specifications
Power Requirement Main unit: Remote Control Frequency Range Radio Receiving Power Consumption Main Unit: Please refer to the instructions on the enclosed warranty card for returning your unit for service. When returning the unit, please remove the battery to prevent damage to the unit in transit and/or from possible battery leakage.
Need help?
Do you have a question about the JMC-1000 and is the answer not in the manual?
Questions and answers