Table of Contents
Advertisement
Advertisement
Table of Contents

Subscribe to Our Youtube Channel
Related Manuals for Jensen JWM90A


Summary of Contents for Jensen JWM90A
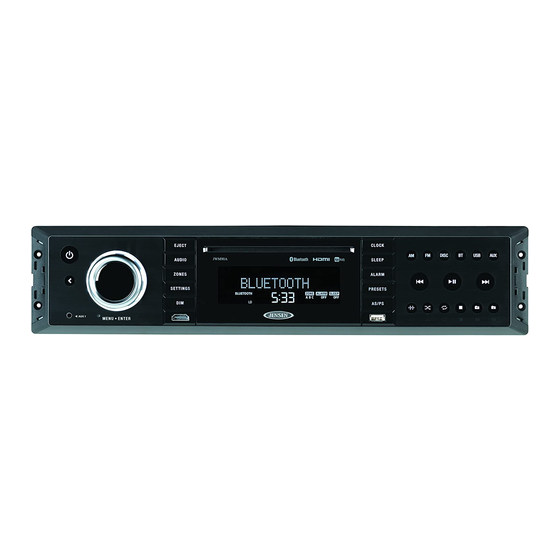
- Page 1 JWM90A MOBILE AUDIO SYSTEM Installation and Owner's Manual AUX 1 HDMI...
-
Page 2: Table Of Contents
JWM90A Introduction..........................3 Disc Notes..........................4 Installation..........................5 Wiring............................6 Basic Operation........................7 Tuner Operation........................12 Disc Operation........................13 MP3/USB Operation........................16 Bluetooth Operation........................18 App Operation........................19 Remote Control Operation.......................20 DVD Setup Menu........................22 Care and Maintenance......................24 Troubleshooting........................24 Specifications.........................25 Fcc Notes ..........................25... -
Page 3: Introduction
The front of this unit should only be cleaned with a slightly damp cloth. Do not in this owner's manual clear and easy to follow. If you take a few minutes to look use cleansers. through it, you'll learn how to use all the features of your new Jensen receiver for Ÿ Use Recommended Accessories. -
Page 4: Disc Notes
JWM90A DISC NOTES Depending on the recording status, conditions of the disc, and the equipment used for recording, some CD-Rs/CD-RWs may not play on this unit. For more reliable playback, please adhere to the following recommendations: Use CD-RWs with speed 1x to 4x and write with speed 1x to 2x. -
Page 5: Installation
To prevent a short circuit, be sure to turn off the ignition and remove the negative (-) battery cable prior to installation. NOTE: If the JWM90A is to be installed in a vehicle equipped with an on- board drive or navigation computer, do not disconnect the battery cable. If the cable is disconnected, the computer memory may be lost. -
Page 6: Wiring
JWM90A WIRING WARNING: Wiring harness comes with stripped and tinned leads to aid in the installation process. Any unused speaker wires must have their exposed ends cut The wiring diagram depicts all the wiring connections required for proper off or insulated individually. -
Page 7: Basic Operation
JWM90A BASIC OPERATION During RADIO / FRONT AUX / REAR AUX / COAXIAL / OPTICAL / HDMI ARC / HDMI IN mode, press the ▶|| button (18) to mute the audio output for active zones. Press again to restore the previous volume level. - Page 8 You can connect a USB device directly to USB interface (11) on the front of the cable output from your portable CD / MP3 or other media player into the Coaxial JWM90A for playback of compatible files. Press the USB button (22) to switch to USB Jack on the left of the unit.
-
Page 9: Clock Setup
(selected brightness level) and press again to turn the dimmer Off (maximum brightness level). Connect HDMI cable to JENSEN TV with ARC function and JWM90A radio head Ÿ 2. Press & Hold the DIM button (6) to access DIMMER LEVEL menu. - Page 10 JWM90A Device Status User Operation Operation Results Remarks Head Unit Head Unit Power ON (HDMI Power ON Power OFF Power OFF TV Power OFF ARC) Power ON Power OFF Power OFF Power ON TV Power OFF Power OFF(Last Power OFF...
- Page 11 JWM90A Multi-source Mode Setup Multi-source Zone Table 1.Press the ZONES button (31) to enter the zone menu. 2.While in the zone menu, press ZONES button (34), or the |<< or >>| buttons Zone A Zone B Zone C (20, 19) repeatedly to navigate through the zones menu settings (ZONE A mode, ZONE A volume adjustment, ZONE B mode, ZONE B volume adjustment, ZONE C mode and ZONE C volume adjustment).
-
Page 12: Tuner Operation
JWM90A TUNER OPERATION Recall preset stations 1.Press the PRESETS button (9) to access the preset menu. 2.Press I<< or >>I buttons (19, 20) or rotate the VOL/ENTER knob to navigate the 12 and 18 preset stations for AM or FM respectively. -
Page 13: Disc Operation
JWM90A DISC OPERATION Track Select Press the >>| or |<< button (19, 20) to advance to the previous or next track on the CD. The selected track number will appear on the display. Press and hold the >>| or |<< button for more than three seconds to fast forward or fast reverse through the disc. -
Page 14: Stop Playback
JWM90A Remote Control Direct Track Entry Stop Playback To select a track directly, use the number pad on the remote control (10). ■ Press the button (15) to suspend disc play, and “PRE STOP” will appear in the For single digit entries, press the corresponding number for two digit display. - Page 15 JWM90A 2. Use the ◄►or ▲▼cursor buttons (15) on the remote control to access 00:02:18 –total elapsed playing time of the current track; the fields on the "PROG" screen. C –00:34:37 –remaining playing time of the current track; 3. Use the number buttons on the remote control to enter a track number in T 00:02:18 –total elapsed playing time for disc;...
-
Page 16: Mp3/Usb Operation
JWM90A MP3/USB OPERATION Ÿ ID3 Tag version 1.0: 32 ID3 Tag version 2.x: 32 Ÿ Mp3 Monitor Display After loading an MP3 disc or USB device, the following screen will appear on your output monitor AUX 1 HDMI 9 10 11 12... - Page 17 JWM90A Repeat (RPT) GOTO Direct Track/Chapter Access Press the RPT button (14) on the control panel or the RPT button (20) on the Use the GOTO function to access a track (chapter) directly. remote control multiple times during playback to select from the following repeat 1.Press the GOTO button (25) on the remote control.
-
Page 18: Bluetooth Operation
5 devices are used, the standby current draw of the JWM90A. Press the SETTINGS button (7) to you must lock the device. To Lock/Unlock a device, press the ENTER knob enter menu adjustment mode. -
Page 19: App Operation
JENSEN stereo system. Store away your old remotes and enjoy the convenience of all the primary functions of your JENSEN stereo right from your phone or tablet by Pausing Playback transforming your mobile device into a functional stereo remote control! During playback, press the ▶II button (18) to pause the Bluetooth audio... -
Page 20: Remote Control Operation
JWM90A REMOTE CONTROL OPERATION DESCRIPTION TUNER BLUETOOTH CD/MP3/USB LOUD Turn radio on/standby Turn radio on/standby Turn radio on/standby Turn radio on/standby Power mode. mode. mode. mode. ALARM Adjust volume up/down. Adjust volume up/down. Adjust volume up/down. Adjust volume up/down. VOL +/-... - Page 21 JWM90A Press to view title TITLE menu. Use directional arrows and play button to play selected title. May not be supported by all discs. Repeat track Repeat chapter Select source for Select source for Select source for Select source for...
-
Page 22: Dvd Setup Menu
JWM90A DVD SETUP MENU Lanuage Setup Press the (setup) button (10) on the remote control to access the SETUP The Language Setup menu controls the following features: menu and adjust system settings for the following categories: System Setup Language Setup... -
Page 23: Video Setup
JWM90A Video Setup The Video Setup menu controls the following features: – Brightness Contrast – – Saturation – Sharpness – Digital Setup The Speaker Setup menu controls the following features: OP Mode: Select LINE OUT or RF REMOD. – Dynamic Range: Select FULL, 6/8, 4/8, 2/8 or OFF. -
Page 24: Care And Maintenance
JWM90A CARE AND MAINTENANCE TROUBLESHOOTING – Keep the product dry. If it does get wet, wipe it dry immediately. Liquids might contain minerals that can corrode the electronic circuits. Symptom Solution Keep the product away from dust and dirt, which can cause premature wear –... -
Page 25: Specifications
JWM90A SPECIFICATIONS FCC Notes FM Tuner Frequency Coverage (USA) ......87.5 to 107.9 MHz Frequency Coverage (Europe) .
Need help?
Do you have a question about the JWM90A and is the answer not in the manual?
Questions and answers
I can get sound from a DVD but no picture. I have checked the TV remote input and it is proper
The Jensen JWM90A may not display a picture when playing a DVD due to incorrect video settings. Ensure the correct picture format (4:3PS, 4:3 LB, or 16:9) is selected in the Video Setup menu. Additionally, check the video connections and ensure the display device is properly connected and set to the correct input source.
This answer is automatically generated