Table of Contents
Advertisement
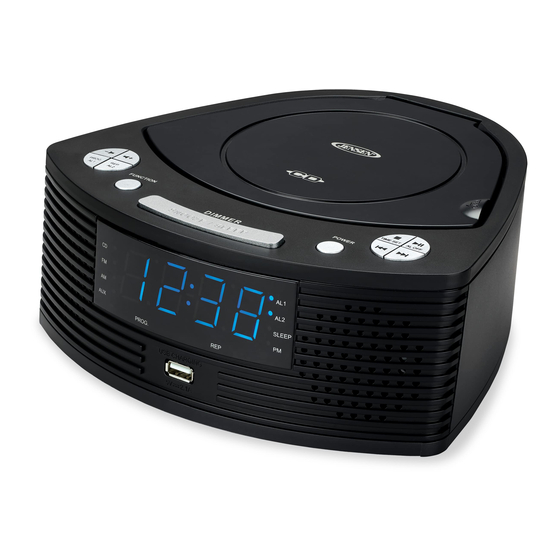
STEREO COMPACT DISC PLAYER WITH AM/FM DIGITAL DUAL
ALARM CLOCK RADIO
MODEL: JCR-390
USER MANUAL
PLEASE READ THIS USER MANUAL COMPLETELY BEFORE OPERATING THIS UNIT
AND RETAIN THIS BOOKLET FOR FUTURE REFERENCE
Please contact Spectra Customer Service at 1-800-777-5331 if you have any questions
about operating this product
Advertisement
Table of Contents

Related Manuals for Jensen JCR-390


Summary of Contents for Jensen JCR-390
- Page 1 STEREO COMPACT DISC PLAYER WITH AM/FM DIGITAL DUAL ALARM CLOCK RADIO MODEL: JCR-390 USER MANUAL PLEASE READ THIS USER MANUAL COMPLETELY BEFORE OPERATING THIS UNIT AND RETAIN THIS BOOKLET FOR FUTURE REFERENCE Please contact Spectra Customer Service at 1-800-777-5331 if you have any questions...
-
Page 2: Important Safety Instructions
WARNING TO PREVENT FIRE OF SHOCK HAZARD, DO NOT USE THIS PLUG WITH AN EXTENSION CORD, RECEPTACLE OR OTHER OUTLET UNLESS THE BLADES CAN BE FULLY INSERTED TO PREVENT BLADE EXPOSURE. TO PREVENT FIRE OR SHOCK HAZARD, DO NOT EXPOSE THIS APPLIANCE TO RAIN OR MOISTURE. -
Page 3: Compliance With Fcc Regulations
Power Sources - This product should be operated only from the type of power source indicated on the marking label. If you are not sure of the type of power supply to your home, consult your product dealer or local power company. For products intended to operate from battery power, or other sources, refer to the operating instruction. -
Page 4: Protect Your Furniture
CAUTION Follow the advice below for safe operations. ON PROTECTION AGAINST LASER ENERGY EXPOSURE As the laser beam used in this compact disc player is harmful to the eyes, do not attempt to disassemble the casing. Stop operation immediately if any liquid or solid object should fall into the cabinet. Do not touch the lens or poke at it. -
Page 5: Dear Jensen Customer
The serial number of this product is found on its bottom. You should note the serial number of this unit in the space provided as a permanent record of your purchase to aid in identification in the event of theft of loss. Model Number: JCR-390 Serial Number:... -
Page 6: Location Of Controls
LOCATION OF CONTROLS... - Page 7 LED DISPLAY PROGRAM / ALARM 1 BUTTON SPEAKERS REPEAT / ALARM 2 BUTTON CD INDICATOR FUNCTION BUTTON FM INDICATOR DIMMER / SNOOZE / SLEEP BUTTON AM INDICATOR POWER BUTTON AUX-IN INDICATOR SKIP BUTTON PROGRAM INDICATOR SKIP BUTTON REPEAT INDICATOR ALARM OFF/ PLAY/PAUSE BUTTON PM INDICATOR TIME SET/ CD STOP...
-
Page 8: Standby Mode
POWER SOURCE (AC ADAPTOR ONLY) The unit is powered by an external 120V AC adaptor with an output of 5V / 3A. The unit is also equipped with a battery back-up system for the clock that is powered by 2 x ‘AA’ (UM-3) batteries (Not included). POWER CONNECTION 1. -
Page 9: Setting The Clock
SETTING THE CLOCK The LED DISPLAY (#1) will flash when the unit is plugged in for the first time. The unit is now standby mode. Setting the Time: In standby mode, press and hold the TIME SET BUTTON (#25) until the hour digits of the clock display begin to flash. 2. - Page 10 8. Setting the ALARM 2 time uses the same steps above, but using the ALARM 2 BUTTON (#18) in place of the ALARM 1 BUTTON (#17). Note: The unit will automatically save the settings and return to Standby mode if you do not tap any button within 10 seconds.
-
Page 11: Snooze Function
Setting the alarms ON/OFF: 1. In Standby mode, tap the ALARM 1 BUTTON (#17) to turn on Alarm 1. The ALARM 1 INDICATOR (#12) on the LED DISPLAY (#1) will turn on. 2. Tap the ALARM 1 BUTTON (#17) again to turn off the Alarm 1. The ALARM 1 INDICATOR (#12) will be turned off. - Page 12 To set / recall the radio presets: The unit allows you to store up to 10 stations and 10 AM stations for easy recall at any time. 1. Set to FM or AM mode 2. Turn to the desired radio station by “MANUAL” or “AUTO” tuning method. 3.
- Page 13 REPEAT MODE Repeat 1: Tap the REPEAT BUTTON (#18), the REPEAT INDICATOR (#8) will light up and flash. The current track will be repeated until it is interrupted. Repeat All: Tap the REPEAT BUTTON (#18) again; the REPEAT INDICATOR (#8) will stay lit. The whole disc will be played repeatedly.
-
Page 14: Auxiliary Input
AUXILIARY INPUT This unit provides an AUX IN JACK (#30) for connecting external audio devices like MP3 players, CD players, smart phones and iPods (except iPod shuffle 3rd generation) to listen to your external source through the speakers of this system. 1. -
Page 15: Care And Maintenance
USB CHARGING (CHARGING CORD NOT INCLUDED) THE UNIT FEATURES A FRONT MOUNTED USB CHARGING PORT (DC 5V 2.1 A) FOR CHARGING YOUR CELL PHONE. 1. Plug the standard end of a USB charging cable (not included) into the USB CHARGING PORT (#13) located on the front of the unit. -
Page 16: Troubleshooting Guide
TROUBLE SHOOTING GUIDE If you experience difficulties in the use of this clock radio, please check the following or call 1- 800-777-5331 for Customer Service and support Symptom Possible Cause Solution Noise or sound - Station not tuned properly for AM - Retune the AM or FM broadcast distorted on AM or FM or FM. - Page 17 90 DAY LIMITED WARRANTY AND SERVICE VALID IN THE U.S.A. ONLY SPECTRA MERCHANDISING INTERNATIONAL, INC. warrants this unit to be free from defective materials or factory workmanship for a period of 90 days from the date of original customer purchase and provided the product is utilized within the U.S.A. This warranty is not assignable or transferable.
Need help?
Do you have a question about the JCR-390 and is the answer not in the manual?
Questions and answers
How do I change the time on the jcr 390
To change the time on the Jensen JCR-390:
1. Repeatedly tap the SKIP BUTTON (#22) or SKIP BUTTON (#23) to set the hour. Press and hold the buttons for fast reverse/advance. Ensure the correct AM or PM time is selected by checking the PM INDICATOR (#9) on the LED DISPLAY (#1).
2. Press the TIME SET BUTTON (#25) to confirm the hour. The minute digits will start flashing.
3. Repeatedly tap the SKIP BUTTON (#22) or SKIP BUTTON (#23) to set the minutes. Press and hold for fast reverse/advance.
4. Tap the TIME SET BUTTON (#25) to confirm and complete the setting. The display will stop flashing.
To check the time, press and hold the TIME SET BUTTON (#25) for 2 seconds when in CD, FM, or AM mode. The current time will display for 5 seconds.
This answer is automatically generated
Can I preset radio stations so tuning is not necessary?
Yes, you can preset radio stations on the Jensen JCR-390. The unit allows you to store up to 10 FM stations and 10 AM stations for easy recall. To do this, set the unit to FM or AM mode, tune to the desired station manually or automatically, press the program button to enable program mode, select the desired station memory, and press the program button again to store it.
This answer is automatically generated
How is display returned to time after cd is completed?
How do I turn off the alarm? Alarm indicator/#12 stays on. Alarm sound every morning whether I want it or not
Press and hold the ALARM OFF button (#24) or the POWER button (#21) for two seconds to turn off the alarm.
This answer is automatically generated