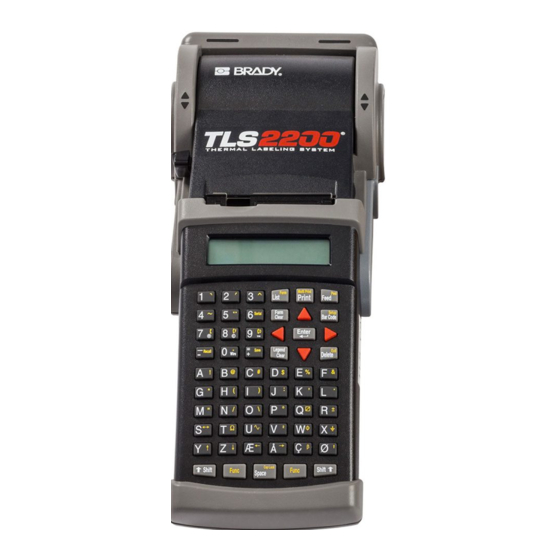
Brady TLS2200 User Manual
Transfer printer
Hide thumbs
Also See for TLS2200:
- User manual (594 pages) ,
- User manual (84 pages) ,
- User manual (37 pages)
Table of Contents
Advertisement
Advertisement
Table of Contents

Related Manuals for Brady TLS2200


Summary of Contents for Brady TLS2200
- Page 2 Trademarks ™ ™ TLS2200 and LabelMark/WIN are trademarks of BRADY Worldwide, Inc. Microsoft and Windows are registered trademarks of Microsoft Corporation. BRADY reserves the right to make changes without further notice to any product or system described herein to improve reliability, function, or design.
-
Page 3: Weee Directive
In accordance with the European WEEE Directive, this device needs to be recycled in the European Union country in which it was purchased. Canada This Class A digital apparatus meets all requirements of the Canadian Interference-Causing Equipment Regulations. ™ TLS2200 Thermal Transfer Printer User Manual... - Page 4 THE USE, OR INABILITY TO USE, BRADY’S PRODUCTS. YOU SHOULD CAREFULLY READ THE FOLLOWING TERMS & CONDITIONS OF THIS LICENSE AGREEMENT. IF YOU DO NOT AGREE WITH THESE TERMS & CONDITIONS, PLEASE PROMPTLY RETURN THIS PACKAGE FOR A FULL REFUND. ™ TLS2200 Thermal Transfer Printer User Manual...
-
Page 5: License Agreement
DOCUMENTATION, HOWEVER CAUSED AND ON ANY THEORY OF LIABILITY. THIS LIMITATION WILL APPLY EVEN IF BRADY HAS BEEN ADVISED OF THE POSSIBILITY OF SUCH DAMAGE. YOU ACKNOWLEDGE THAT THE LICENSE FEE REFLECTS THIS ALLOCATION OF RISK. ™ TLS2200 Thermal Transfer Printer User Manual... - Page 6 If any provision of the Agreement is held invalid, the remainder of this Agreement shall continue in full force and effect. ™ TLS2200 Thermal Transfer Printer User Manual...
-
Page 7: Technical Support
Phone: (800) 643-8766, Monday - Friday 7:00 a.m. - 6:00 p.m. (CST). Fax: (414) 358-6767. E-Mail: tech_support@bradycorp.com. Assistance is available 24 hours per day / 7 days per week. Go to: www.bradyid.com, and then select Knowledge Base from the left-hand panel. ™ TLS2200 Thermal Transfer Printer User Manual... -
Page 8: Table Of Contents
Table of Contents Introduction..........................1 Unpacking Your TLS2200™ Thermal Labeling System ............1 Saving Your Packaging......................1 ™ TLS2200 Thermal Labeling System Specifications ............2 Physical and Environmental Characteristics ................2 Certification ...........................2 Knowing Your Software Version Number................3 Quick Start Guide........................4 Summary of Steps ........................4 Working with Screens and Menus....................13... - Page 9 Accessory Parts List......................63 Appendix 1: Troubleshooting and Error Message Guide ............64 Troubleshooting Guide......................64 Error Messages........................65 Appendix 2: Glossary of Terms ....................70 ™ Appendix 3: Using the TLS2200 Device Loader..............71 System Requirements......................71 ™ Downloading the TLS2200 Device Loader from the Internet..........71 ™...
-
Page 10: Introduction
Never before has there been a printer quite like the TLS2200 printer. It is so easy—simply ™ choose the type of labels you want to print and load them in. The TLS2200 printer takes care ™ of the rest. Thanks to its innovative smart-cell technology, the TLS2200... -
Page 11: Tls2200 ™ Thermal Labeling System Specifications
4º to 40º C (40º to 105º F) -18º to 60º C (0º to 140º F) 20% to 95% (non-condensing) 10% to 80% Relative Humidity (non-condensing) ™ *Exposing the TLS2200 printer to direct sunlight is not recommended. Certification ™ The TLS2200 printer has the following certifications: •... -
Page 12: Knowing Your Software Version Number
Brady Device ™ Loader. To determine the version number of the software currently loaded in your TLS2200 printer, watch the LCD screen as you turn the unit on. You will see one of the following... -
Page 13: Quick Start Guide
Note: It is suggested that you read Appendix 2: Glossary of Terms before you read this guide. This appendix acquaints you with the terms found in this manual that are used ™ within the specific context of the TLS2200 printer. Summary of Steps Following is a summary of the steps needed to create a label. - Page 14 Drop the battery in as shown and slide forward. Battery Slide the battery release lever to the lock position (slide to right). Step 3. Turn the Power On Battery Release Lever Turn battery power switch to the on (I) position. ™ TLS2200 Thermal Transfer Printer User Manual...
- Page 15 This material is UL recognized with its respective ribbon. This material is CSA approved with its respective ribbon. UL/CSA This material is UL & CSA approved with its respective ribbon. R6210 ribbon included with printer. ™ TLS2200 Thermal Transfer Printer User Manual...
- Page 16 (Locking lever must be in unlock position – see below.) Push the locking lever towards the back of the printer to close the print head and lock the ribbon cartridge in place. Locking Lever ™ TLS2200 Thermal Transfer Printer User Manual...
- Page 17 To place an accent mark over a vowel, type the mark first followed by the letter itself. (Note: The tilde (~) is to be used Characters with the letters A, a, or N, n, only.) ™ TLS2200 Thermal Transfer Printer User Manual...
- Page 18 ◄ ►◄ ◄► ►◄ ► LABELING SYSTE ™ TLS2200 THERMAL_ The status bar indicates the As you continue to enter text, the cursor is located at the 16 screen scrolls to allow the entry of the remaining text (underlined character position M is at cursor position 31).
-
Page 19: Cursor And Editing Keys
Legend Clear Clears all characters on the current legend line. Shift + Legend Clears all characters on the legend. Clear ™ TLS2200 Thermal Transfer Printer User Manual... - Page 20 Toggles between uppercase and lowercase characters. Note: Current Cap Lock status is retained when unit is turned off. Space Bar Moves the cursor one position to the right. Inserts a space at the current cursor position. ™ TLS2200 Thermal Transfer Printer User Manual...
- Page 21 When a label has printed out use the built-in cutter to remove it. Use the external lever to cut between labels. perforation. WARNING: Never use the cutter with BRADYSleeve label rolls! The printer always advances the last printed sleeve to the appropriate position to allow tear-off at the perforation. ™ TLS2200 Thermal Transfer Printer User Manual...
-
Page 22: Working With Screens And Menus
This screen is the home base of ™ any processing you perform with the TLS2200 printer. To change any of the parameters previously defined, you must access the software features of the printer by calling up the Setup Menu from the Text Editor screen. -
Page 23: Setup Menu Options
Toggles between on and off. Font size ranges from 2 (5 point) to 9 (14 point). Default = off. Bar Code Type Determine type of bar codes: • Code_39 • Code_128 • ITF_25 • Codabar ™ TLS2200 Thermal Transfer Printer User Manual... - Page 24 Right. The marker roll loaded in the unit determines the default setting. V Justify Sets the vertical justification of the legend. Options are: Top, Center, and Bottom. The marker roll loaded in the unit determines the default setting. ™ TLS2200 Thermal Transfer Printer User Manual...
- Page 25 ™ TLS2200 Setup Menu, or you can use the <Func> + <Exit> key combination from the text ™ entry screen. This option allows you to use the TLS2200 printer along with BRADY’s ™ LabelMark/WIN V1.2 or greater software to print labels that are created and stored on your PC.
- Page 26 Can be set to Off, or to 30 seconds, one minute, three minutes, or Timer five minutes (time before automatic turnoff). Version Mode for downloading firmware. Requires PC connection. Download Waiting Message displayed before firmware begins downloading, Download indicating printer ready to receive update. Firmware ™ TLS2200 Thermal Transfer Printer User Manual...
-
Page 27: Setup Menu Tree
> keys to increase/decrease values ▲ ▼ within the range by larger steps. • Press <Enter> to select and save menu option choices. • Press <Exit/Delete> to exit a menu without saving changes. ™ TLS2200 Thermal Transfer Printer User Manual... -
Page 28: Creating Legends
LCD. ™ When a marker roll is loaded and the unit is turned on, the TLS2200 printer reads the marker size information stored in the smart-cell on the marker roll core. This information is used to automatically set an initial font size for your label. -
Page 29: Changing The Font Size
To add more lines, press <Shift> + < > to decrease the font size of the existing lines. ▼ ™ TLS2200 Printer Fonts ™ The following fonts are available on the TLS2200 printer: FONT POINT PRINT SAMPLE NUMBER SIZE BRADY 12345 BRADY 12345... - Page 30 FONT POINT PRINT SAMPLE NUMBER SIZE BRADY 12345 BRADY 12345 BRADY 12345 BRADY 12345 BRADY 123 BRADY 1 BRADY 1 BRADY BRADY ™ TLS2200 Thermal Transfer Printer User Manual...
-
Page 31: Clearing The Legend
This rule holds true only if the part number of the ™ marker roll loaded in the unit is not changed while the unit is turned off. If the TLS2200 printer detects a marker size change when turned on, or if a different marker size is loaded while the unit is on, text on the display is cleared and the default font size is set. -
Page 32: Function Keys
Saves the currently displayed legend to a legend list. Recall Recalls the previously saved legend to a legend list. List Displays List Menu. Form RESERVED FOR FUTURE USE. Form Clear RESERVED FOR FUTURE USE. ™ TLS2200 Thermal Transfer Printer User Manual... -
Page 33: Printing Your Labels
The burn temperature setting can be adjusted to darken or lighten your printed legend. Cases ™ where adjustments are needed should be rare as the TLS2200 printer automatically optimizes the burn temperature based on the material loaded in the unit. -
Page 34: Reloading Marker Rolls And Ribbons
Reloading Marker Rolls and Ribbons ™ If the marker roll runs out of labels while printing, the TLS2200 printer stops printing and the following message appears: “Error Out of Label” When the marker roll runs out, the print job is permanently cancelled. Any legends remaining to be printed are aborted. -
Page 35: Advanced Features
Features outlined in this section pertain to advanced user options. You will find instructions for generating serialized, legend list, terminal block, and barcode labels. Serialized Labels ™ This section discusses making serialized labels with the TLS2200 printer. Serialization ™ Legends you create with the TLS2200 printer can be serialized both numerically and alphabetically. - Page 36 • After printing a series of serial characters, the editor displays the next logical character in the serial pattern (example: Print 1 to 5. After print job is completed, editor displays 6). ™ TLS2200 Thermal Transfer Printer User Manual...
-
Page 37: Legend Lists
Legend Lists ™ This section discusses making legend lists with the TLS2200 printer. What Is A Legend List? A legend list consists of one or more legends stored under a list name. The storage capability ™ of the TLS2200 allows you to create, select, print, and edit legend lists. -
Page 38: The List Menu
Refer to Deleting a List later in this section for instructions. To delete a legend from a list, press <Func> + <Shift> + <Delete>. Press <Shift> + <Legend Clear> to clear the text from the Text Editor screen. ™ TLS2200 Thermal Transfer Printer User Manual... - Page 39 List” or “From Current”. Select “From Current” if you want to print only the part of the list from the legend currently displayed forward. If you run out of ribbon or markers during a list print, press <Enter> to return to the legend where the printer stopped. ™ TLS2200 Thermal Transfer Printer User Manual...
- Page 40 This message will also display if you are trying to save a legend to an active list, and the wrong part (a part other than the part the list was created for), or no part, is loaded in the printer. ™ TLS2200 Thermal Transfer Printer User Manual...
- Page 41 You will be prompted with all list names stored in the printer (up to 10). Use the < > ▲ and < > keys to select the list you want to edit, then press <Enter>. ▼ ™ TLS2200 Thermal Transfer Printer User Manual...
-
Page 42: Appending A List
> and < > keys to select the name of the list you want to delete, then press ▲ ▼ <Enter>. After deleting a list, the display returns to the Text Editor screen. ™ TLS2200 Thermal Transfer Printer User Manual... -
Page 43: Continuous Printing-Terminal Block Labels
Creating Terminal Block Labels ™ Terminal block labels can be created and printed using the TLS2200 printer. Simply choose the appropriate center-to-center spacing repeat (pitch) for the block, enter your text, and print as needed. The number of lines of text available at each termination is dependent on repeat value spacing and the font size chosen. -
Page 44: Continuous Printing-Banners
Continuous Printing—Banners ™ You can create banners using the TLS2200 printer. Banners have a variety of industrial uses, including labeling larger conduit. New continuous label parts designed for banner printing such as PTL-8, PTL-42, and PTL-43 can only be used with version 2 software or higher. If you are using version 1 software, you will not be able to enter text on the editor screen. -
Page 45: Fixed Length Banners
Fixed length allows you to use the H Justify to specify at which point on the banner you want the text to appear. The H Justify option allows Left, Center, and Right justification. Barcode Labels ™ This section discusses making barcode labels with the TLS2200 printer. Creating Barcode Labels ™... -
Page 46: Barcode Symbology Specifications
Capital letters: A, B, C, and D Numbers: 0 to 9 Symbols: - . $ / + : ™ TLS2200 Printer Barcode Parameters Narrow Bar Width: 2 dots (.25mm) Wide-to-Narrow Ratio: 2 to 1 Quiet Zone: 10 dots (1.25mm) Density: 7.82 CPI... -
Page 47: Multiple Barcodes
(if text) or bar height (if a barcode), and print again. Note: You cannot switch the legend mode from Text to Barcode if a line contains any invalid barcode characters. ™ TLS2200 Thermal Transfer Printer User Manual... -
Page 48: Tutorial Guide
The part number of the marker roll used is noted at the beginning of each tutorial. Many of the tutorials use part number PTL-19-423. A sample roll of this 1" x 1" marker is provided in your ™ TLS2200 Thermal Labeling System package. T1: Creating a One-Line Legend, Component Marker Note: This example assumes you have marker roll PTL-19-423 loaded in your printer. -
Page 49: T2: Creating A Component Label Utilizing Multiple Font Sizes
▲ Enter FONT on line two, then press <Enter>. Press <Shift> + < > eight times to decrease the font size from 12 to 4. ▼ Enter SIZES on line three. Press <Print>. ™ TLS2200 Thermal Transfer Printer User Manual... -
Page 50: T3: Creating A Wiremarker
9. Press <Shift> + <Wire> to change format mode from Component to Wire (note the change from C to W on the LCD Status Bar). Enter 1001 on line one. Press <Print>. ™ TLS2200 Thermal Transfer Printer User Manual... -
Page 51: T4: Creating Serialized Wiremarkers
When “No. to Serial?” prompt appears, enter 5, then press <Enter>. When “No. of Copies?” prompt appears, enter 2. Press <Enter> or <Print>. The printer begins printing two each of the five wiremarkers listed above. ™ TLS2200 Thermal Transfer Printer User Manual... -
Page 52: T5: Creating A Label With Rotated Text, Printing Multiple Copies
11. Enter TEXT on line two. 12. Press <Func> + <Multi Print>. 13. When “No. of Copies?” prompt appears, enter 3. 14. Press <Enter>. The printer prints three copies of the legend created above. ™ TLS2200 Thermal Transfer Printer User Manual... -
Page 53: T6: Creating A Barcode Label
> keys to select the desired rotation, then press <Enter>. ▲ ▼ 15. Press <Func> + <Exit> to exit back to the Text Editor screen. 16. Enter barcode text as needed and print your label. ™ TLS2200 Thermal Transfer Printer User Manual... -
Page 54: T7: Creating A Serialized Barcode Label
When “No. to Serial? “ prompt appears, enter 5, then press <Enter>. When “No. of Copies?” prompt appears, enter 1. Press <Enter> or <Print>. The printer begins printing one each of the five serialized barcode labels from A101 to A105. ™ TLS2200 Thermal Transfer Printer User Manual... -
Page 55: T8: Creating A Terminal Block Label
Press <Func> + <Exit> to exit back to the Text Editor screen. With the cursor highlighted on line one, press <Shift> + < > once to increase the font ▲ size from 6 to 7. 10. Enter 101 on line one. ™ TLS2200 Thermal Transfer Printer User Manual... - Page 56 14. When “No. of Copies?” prompt appears, enter 1. 15. Press <Enter> or <Print>. The printer should print ten times along the terminal block marker (101 through 110). 16. Press <Feed> to advance printed terminal strip label to the cut position. ™ TLS2200 Thermal Transfer Printer User Manual...
-
Page 57: T9: Creating A Patch Panel Label
15. When “No. of Copies?” prompt appears, enter 1. 16. Press <Enter> or <Print>. The printer should print twelve times along the patch panel label (01D through 12D). 17. Press <Feed> to advance printed patch panel label to the cut position. ™ TLS2200 Thermal Transfer Printer User Manual... -
Page 58: T10: Creating A Continuous Label
<Enter>. 10. Press <Func> + <Exit> to exit back to the Text Editor screen. 11. Enter BX1.10H2CC 10 Base T HUB TO 2ND FLOOR CALL CENTER on line one. 12. Press <Print>. ™ TLS2200 Thermal Transfer Printer User Manual... -
Page 59: T11: Creating A Banner Label Of Fixed Length
<Enter>. Press <Func> + <Exit> to exit back to the Text Editor screen. Enter 220 VOLTS on line one. 10. Press <Print>. 11. Press <Feed> to advance the banner to the cut position. ™ TLS2200 Thermal Transfer Printer User Manual... -
Page 60: T12: Creating A Legend List, Component Markers
Press <Shift> + <Form Clear> to delete all lines of text and reset the font to the default value of 9. Enter PANEL1 on line one. Press <Func> + <Save>. Press <Shift> + <Legend Clear>. Enter PANEL1A on line one. 10. Press <Func> + <Save>. ™ TLS2200 Thermal Transfer Printer User Manual... - Page 61 13. Press <Func> + <Save>. 14. Press <List>. 15. Press the < > key twice to select Print, then press <Enter>. ▼ 16. When the “No. of Copies?” prompt appears, enter 1, then press <Enter>. ™ TLS2200 Thermal Transfer Printer User Manual...
-
Page 62: T13: Creating A Legend List Utilizing Multiple Font Sizes And Rotations
Press <Shift> + <Form Clear> to delete all lines of text and reset the font to the default value of 9. Enter 100A on line one. Press <Func> + <Save>. Press <Shift> + <Legend Clear>. Press <Shift> + < > twice to reduce the font size ▼ to 7. ™ TLS2200 Thermal Transfer Printer User Manual... - Page 63 18. Press <Func> + <Save>. 19. Press <List>. 20. Press the < > key twice to select Print, then press <Enter>. ▼ 21. When the “No. of Copies?” prompt appears, enter 1, then press <Enter>. ™ TLS2200 Thermal Transfer Printer User Manual...
-
Page 64: T14: Creating A Legend List, Wiremarkers, Printing Multiple Copies
With the cursor on Rotation, press <Enter>. Press the < > or < > keys to toggle to 0 Degrees, then press <Enter>. ▲ ▼ 10. Press <Func> + <Exit> to return to the Text Editor screen. ™ TLS2200 Thermal Transfer Printer User Manual... - Page 65 19. Press <Func> + <Save>. 20. Press <List>. 21. Press the < > key twice to select Print, then press <Enter>. ▼ 22. When the “No. of Copies?” prompt appears, enter 2, then press <Enter>. ™ TLS2200 Thermal Transfer Printer User Manual...
-
Page 66: T15: Creating And Recalling A Legend List, Barcode Labels
> keys as needed to set the height of your barcode to 8mm (0.31496 ▲ ▼ in.), then press <Enter>. 10. Press the < > key once to select Human Readable, then press <Enter>. ▼ ™ TLS2200 Thermal Transfer Printer User Manual... - Page 67 Text Editor screen. List4 is now the active list. Press <List>. Press the < > key twice to select Print, then press <Enter>. ▼ When the “No. of Copies?” prompt appears, enter 1, then press <Enter>. ™ TLS2200 Thermal Transfer Printer User Manual...
-
Page 68: T16: Creating A Legend List, Recalling And Editing A Legend
Enter 100A on line one. Press <Func> + <Save>. Press <Shift> + <Legend Clear>. Enter 100B on line one. 10. Press <Func> + <Save>. 11. Turn the battery power switch off to deactivate List5. ™ TLS2200 Thermal Transfer Printer User Manual... - Page 69 Press <Func> + <Shift> + <Delete>. Legend 100C is now deleted from List5. Press <List>. Press the < > key twice to select Print, then press <Enter>. ▼ When the “No. of Copies?” prompt appears, enter 1, then press <Enter>. ™ TLS2200 Thermal Transfer Printer User Manual...
-
Page 70: T17: Creating A Legend List, Banner Legends
12. Enter 120 VOLTS on line one. 13. Press <Func> + <Save>. 14. Press <Shift> + <Legend Clear>. 15. Enter CAUTION on line one. 16. Press <Func> + <Save>. 17. Press <Shift> + <Legend Clear>. ™ TLS2200 Thermal Transfer Printer User Manual... - Page 71 19. Press <Func> + <Save>. 20. Press <List>. 21. Press the < > key twice to select Print, then press <Enter>. ▲ 22. When the “No. of Copies?” prompt appears, enter 1, then press <Enter>. ™ TLS2200 Thermal Transfer Printer User Manual...
-
Page 72: Maintenance
Maintenance ™ Keep the TLS2200 printer in good operating condition by performing the following recommended maintenance procedures. Cleaning the Drive Roller and Cutter Follow the instructions on the cleaning card shipped with the unit. Cleaning the Print Head Remove the cutter mechanism by loosening the screw that holds it in place. Lift the cutter away from the top of the printer mechanism and clean the print head with a cotton swab dipped in isopropyl alcohol. -
Page 73: Appendix 1: Troubleshooting And Error Message Guide
Appendix 1: Troubleshooting and Error Message Guide ™ If your TLS2200 printer is not performing as documented in this user’s guide, use the following troubleshooting and error message guides to determine the corrective action you should take. If the corrective action does not work, contact BRADY’s Technical Support Group. -
Page 74: Error Messages
Corrective Action Error in CheckSum The software was Contact BRADY’s Technical Support improperly installed on Group. ™ your TLS2200 printer. Error Head Open Print head is unlocked. Move the lever on the right side of the ™ TLS2200 printer to the lock position. - Page 75 Manually advance the take-up spool installation or label jam. end towards you until the ribbon has a smooth, flat surface. Reinsert the ribbon in the printer. There is a bad ribbon Contact BRADY’s Technical Support sensor. Group. ™ TLS2200 Thermal Transfer Printer User Manual...
- Page 76 If you receive this Delete one or more lists or legends. message while trying to save a legend to a list, the memory has reached capacity. ™ TLS2200 Thermal Transfer Printer User Manual...
- Page 77 •there is no part loaded in the printer. -or- •you have the wrong part loaded in the printer. The wrong part is a part other than the one the list was created for. ™ TLS2200 Thermal Transfer Printer User Manual...
- Page 78 If you receive this Create or activate a list. message while trying to See Legend Lists on page 28 for save a legend to a list, instructions. you do not have an active list. ™ TLS2200 Thermal Transfer Printer User Manual...
-
Page 79: Appendix 2: Glossary Of Terms
Marker Roll—A marker roll contains the marker and a notched liner that are fed through the ™ printer, and a smart cell located in the spindle. The TLS2200 printer uses the smart cell to automatically identify the marker being used. -
Page 80: Appendix 3: Using The Tls2200 ™ Device Loader
Click <Next> to save the file to C:\Program Files\BradyDeviceLoader (or click <Browse> to choose a different destination). Click <Next>. Click next to save the file as Brady TLS2200 Device Loader in the <Start> menu. Leave the Desktop Icon box checked if you wish to place the program icon on your desktop (it will still be accessible from your Start menu). -
Page 81: Connecting The Tls2200 ™ Printer To A Pc
Complete the following steps to connect the TLS2200 printer to a PC: ™ Locate the communication port on the bottom of your TLS2200 printer. This is the port that looks similar to a modular phone jack. On/Off Switch Battery Pack Communication Port ™... - Page 82 The LCD will display <Waiting Download Firmware>. ™ Downloading new firmware to your TLS2200 printer: Click Start > Programs > Brady TLS2200 Device Loader > Brady TLS2200 Device Loader. ™ The Brady Device Loader will open. Click on the TLS2200 printer image to continue.
-
Page 83: Appendix 4: Direct Printing From Labelmark/Win
™ Appendix 4: Direct Printing from LabelMark/Win ™ ™ Use the LabelMark/WIN software to print labels from a PC through the TLS2200 Thermal ™ Transfer Printer. For more information on LabelMark/WIN software, please visit our website at http://www.bradyid.com/. ™ TLS2200...
Need help?
Do you have a question about the TLS2200 and is the answer not in the manual?
Questions and answers