Table of Contents
Advertisement
Quick Links
Advertisement
Table of Contents

Related Manuals for thomann Millenium DP-2000


Summary of Contents for thomann Millenium DP-2000
- Page 1 DP-2000 percussion pad user manual...
- Page 2 Musikhaus Thomann e.K. Treppendorf 30 96138 Burgebrach Germany Telephone: +49 (0) 9546 9223-0 E-mail: info@thomann.de Internet: www.thomann.de 16.10.2012...
-
Page 3: Table Of Contents
Table of contents Table of contents General notes............................... 4 Safety notes..............................6 Features................................9 Controls................................ 10 Device functions............................16 Technical data............................39 Protecting the environment......................40 Appendix..............................41 8.1 Sound list............................. 41 8.2 Effect list.............................. 63 8.3 Kit list..............................67 8.4 Groove box and accompaniment tracks................. -
Page 4: General Notes
General notes General notes This user manual contains important information on safe operation of the device. Read and follow all safety notes and all instructions. Save this manual for future reference. Make sure that it is available to all persons using this device. If you sell the device, include the manual for the next owner. - Page 5 General notes Signal word Meaning DANGER! This combination of symbol and signal word indicates an immediate dangerous situation that will result in death or serious injury if it is not avoided. CAUTION! This combination of symbol and signal word indicates a possible dangerous situation that can result in minor injury if it is not avoided.
-
Page 6: Safety Notes
Safety notes Safety notes The multi pad converts digital trigger signals from drum pads to different percussion sounds. Use the device only as described in this user manual. Any other use or use under other oper‐ ating conditions is considered to be improper and may result in personal injury or property damage. - Page 7 Safety notes CAUTION! Possible hearing damage With loudspeakers or headphones connected, the device can produce volume levels that may cause temporary or permanent hearing impairment. Do not operate the device permanently at a high volume level. Decrease the volume level immediately if you experience ringing in your ears or hearing impairment.
- Page 8 Safety notes NOTICE! External power supply The device is powered by an external power supply. Before connecting the external power supply, ensure that the input voltage (AC outlet) matches the voltage rating of the device and that the AC outlet is protected by a residual cur‐ rent circuit breaker.
-
Page 9: Features
Features Features Eight velocity-sensitive, freely programmable drum pads 914 pre-programmed sounds 80 pre-programmed drum kits Groove box with 20 pre-programmed loops Memory for 30 user-defined loops Recording function 20 pre-programmed accompaniment tracks Built-in effects processor Programmable 4-band equalizer Metronome function Five trigger inputs Support plate for stand/tabletop mounting DP-2000... -
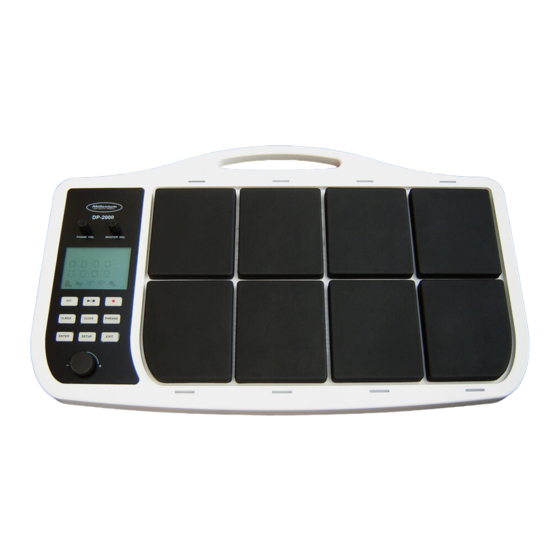
Page 10: Controls
Controls Controls Front panel percussion pad... - Page 11 Controls 1 MASTER VOL Volume control for overall volume level. 2 PHONE VOL Volume control for headphone output. 3 LED display Shows the current value or parameter. 4 [KIT] button Button for opening the kit selection. button Button for starting / stopping playback of pre-programmed and saved sounds, loops and recordings. button Button for starting a recording in recording mode.
- Page 12 Controls 8 [CLICK] button Button for activating and deactivating the metronome. 9 [PHRASE] button Button for activating the PHRASE mode. 10 [ENTER] button Button for confirming inputs and values in the various menus. 11 [SETUP] button Button for activating the SETUP mode. 12 [EXIT] button Button for leaving the current use level or currently open menu.
- Page 13 Controls Rear panel DP-2000...
- Page 14 Controls 15 ON/OFF On/Off switch. 16 DC IN Socket for connecting the 9 V power supply unit included in delivery. 17 LINE IN Input socket for connecting external playback devices such as MP3 or CD players. 18 LINE OUT L (MONO) / R signal output. 19 HEADPHONE Headphone output.
- Page 15 Controls 22 SNARE Socket for connecting a snare pad. 23 RIDE Socket for connecting a ride pad. 24 KICK Socket for connecting a bass drum pedal. 25 FOOT SW Socket for connecting a foot switch. 26 USB interface 27 MIDI IN MIDI input socket.
-
Page 16: Device Functions
Device functions Device functions Switching on/off Connect the power supply unit to the 9 V input on the device, and then insert the power plug into the socket-outlet. To switch the device on and off, use the [ON/OFF] switch. Before starting to play the pads, turn the [PHONE VOL] and the [MASTER VOL] volume to minimum levels and gradually increase the volume while striking a pad. - Page 17 Device functions External triggers You can connect external drum pads to the device via the connections on the rear of the DP-2000. As soon as a kick, snare, ride or hi-hat pad or a hi-hat pedal is connected to one of the sockets, a corresponding marker appears below the icon on the display.
- Page 18 Device functions Press the [KIT] button until ‘CHAIN’ appears in the top left corner of the display. The favorites are shown as ‘C01’ to ‘C10’ with their related kit names. Use the [+ | –] rotary knob to select the desired kit.
- Page 19 Device functions Layer mode In layer mode, the pads can be programmed in such a way that different sounds at different volume levels with different effects are produced by one pad depending on the force of your touch. In KIT mode, press the [SETUP] button. ð...
- Page 20 Device functions To exit the menu, press the [EXIT] button. ð The ‘Save?’ confirmation prompt appears on the display. Confirm with [ENTER] to save the new settings. Parameter Meaning Value range Layer mode Mode of functioning Off, Mix, Switch, Fade, X.Fade Layer Point Volume threshold for switching from layer A to layer B.
- Page 21 Device functions The external trigger pads can be adjusted in the same way. Open the SETUP, KIT EDIT, EXTERNAL menu. The parameters of the external triggers are marked by the letter ‘E’ . Groove box The DP-2000 features 20 on-board loops, which can be opened in “GROOVE BOX” mode (see Ä...
- Page 22 Device functions By connecting external triggers to the device, you can mix further percussion sounds into the loop. During loop playback you can modify the loop variation (A to D) for all four tracks together by means of the [+ | –] rotary knob . Alternatively you can modify the variation of a single track by softly striking the related pad, or mute the track by hardly hitting the pad.
- Page 23 Device functions Effects The DP-2000 is equipped with a digital signal processor which controls three effects (see Ä Chapter 8.2 ‘Effect list’ on page 63). You can assign several effects to each single kit. The effects always affect all pads and external triggers and cannot be assigned to individual pads. Effect Parameter, range of values Reverb...
- Page 24 Device functions Once you are done with your settings, press the ‘EXIT’ button to exit the menu. ð The ‘Save?’ confirmation prompt appears on the display. Confirm with [ENTER] to save your settings and to exit the menu. 4-band equalizer The DP-2000 features a programmable 4-band equalizer with eight presets, allowing you to adjust the sound characteristics of the individual kits (see Ä...
- Page 25 Device functions To adjust the User EQ settings, press the [SETUP] button, select the ‘System’ option by means of the [+ | –] rotary knob and confirm by pressing [ENTER]. Use the [+ | –] rotary knob to select the ‘User EQ’ option and confirm by pressing [ENTER]. Subsequently you can make the desired settings as follows: Confirm the selection of the displayed parameter by pressing [ENTER].
- Page 26 Device functions Recording function The DP-2000’s recording function allows you to record loops of your own: Direct recording with default settings In this recording mode, you can record a four-bar loop in overdub mode without making any further settings. Open the desired kit and press the button to activate the recording mode.
- Page 27 Device functions Recording with presets In this recording mode, you can set different recording parameters. To activate the recording mode, press the button. ð The [PHRASE] button lights up and the button starts flashing to indicate that the device is ready for recording. Press the [SETUP] button to open the setup menu for the recording function.
- Page 28 Device functions Parameter Meaning Value range Over Dub In overdub (On) mode, the newly recorded sounds are On, Off overlaid onto the existing ones. In overwrite (Off) mode, the existing sounds are overwritten by the newly recorded ones. Pad Kit Sound kit selection.
- Page 29 Device functions Parameter Meaning Value range Reverb Reverb effect On, Off Rev. Type Reverb type (only with Reverb On) 0…27 Rev. Level Reverb level (only with Reverb On) 0…127 Chorus Chorus effect On, Off Chr. Type Chorus type (only with Chorus On) 01…23 Chr.
- Page 30 Device functions Recording with accompaniment track In this recording mode, you can record a loop with an accompaniment track. To activate the recording mode, press the button. ð The [PHRASE] button lights up and the button starts flashing to indicate that the device is ready for recording.
- Page 31 Device functions Overwriting loops Existing loops may be overwritten at any time. In the PHRASE menu, select the desired loop and overwrite it with a new recording as described above. Replaying loops Press the [PHRASE] button to open the selection of user-created loops. Use the [+ | –] rotary knob to select the desired loop and start/stop playback by pressing the button.
- Page 32 Device functions Advanced settings This menu allows you to set different pad parameters. In KIT mode, press the [SETUP] button. Use the [+ | –] rotary knob to select the ‘Advanced’ option and confirm by pressing [ENTER]. Use the [+ | –] rotary knob to select either the ‘Pad Kit’ (device pads) or the ‘External’ (external triggers) option and confirm by pressing [ENTER].
- Page 33 Device functions Parameter, display Meaning Value range Xtalk Gate Threshold for touch sensitivity 0…127 X-Talk Crosstalk 0…127 Always press the [ENTER] button after making a setting to save the new value and to move to the next parameter, or press the [EXIT] button once you are done with your settings. The ‘Save?’...
- Page 34 Device functions To change the hi-hat settings, proceed as follows: In KIT mode, press the [SETUP] button. Use the [+ | –] rotary knob to select the ‘Advanced’ option and confirm by pressing [ENTER]. Use the [+ | –] rotary knob to select the ‘External’ option and confirm by pressing [ENTER].
- Page 35 Device functions Parameter, display Meaning Value range Pedal THR Pedal response threshold 0…127 Trigger Trigger characteristic (force of touch/volume rela‐ Linear, Log, Exp tion) Always press the [ENTER] button after making a setting to save the new value and to move to the next parameter, or press the [EXIT] button once you are done with your settings.
- Page 36 Device functions The table below lists the available parameters. Parameter, display Meaning Value range Equalizer Ä ‘4-band equalizer’ on page 24 Master Vol Volume level of device 0…127 Master Tune Tuning function, based on the A standard concert +/–50 pitch. This function allows you to globally tune up or down all sounds.
- Page 37 Device functions Parameter, display Meaning Value range Channel MIDI channel selection. 01…16 Pad Note A Ä Chapter 8.5 ‘MIDI Note pitch of layer A (see implementation’ on page 76). Pad Note B Note pitch of layer B (see Ä Chapter 8.5 ‘MIDI imple‐ mentation’...
- Page 38 Device functions Reset function The reset function allows you to restore the factory settings of changed parameters. In KIT mode, press the [SETUP] button. Use the [+ | –] rotary knob to select the ‘Reset’ option and confirm by pressing [ENTER]. Select one of the following options by means of the [+ | –] rotary knob: Reset Kits (reset all sound kits) Reset Adv.
-
Page 39: Technical Data
Technical data Technical data Display LC display Voltage supply Power supply unit (9 V / 1000 mA) Dimensions (D × W × H) 330 × 543 × 90 mm (12.99 × 21.38 × 3.54 inches) Weight 3,66 kg (8.07 lbs) Accessories Power supply unit, drum key, support plate DP-2000... -
Page 40: Protecting The Environment
Protecting the environment Protecting the environment Disposal of the packaging mate‐ rial For the transport and protective packaging, environmentally friendly materials have been chosen that can be supplied to normal recycling. Ensure that plastic bags, packaging, etc. are properly disposed of. Do not just dispose of these materials with your normal household waste, but make sure that they are collected for recycling. -
Page 41: Appendix
Appendix Appendix 8.1 Sound list Category Sound number GM Bank 1 – 61 Kick 62 – 88 Hi-Hat 89 – 110 Cymbal 111 – 117 Snare 118 – 150 Side-Stick 151 – 153 Floor Tom 154 – 163 Low Mid Tom 164 –... - Page 42 Appendix Category Sound number High Mid Tom 169 – 172 High Tom 173 – 175 Category Sound number Percussion Effect 176 – 247 Hand Drum 248 – 270 Banya 271 – 273 Tabla 274 – 286 Timpani 287 – 320 Voice 321 –...
- Page 43 Appendix Category Sound number Marimba 439 – 476 Brass 477 – 488 Bowl 489 – 491 492 – 504 Wood Block 505 – 526 Category Sound number Triangle 527 – 529 Cowbell 530 – 544 Craski 545 – 549 Balalaika 550 –...
- Page 44 Appendix Category Sound number Lute 589 – 611 Chinese Instrument 612 – 651 Hits 652 – 663 Special FX 664 – 669 Scratch 670 – 681 Effect 682 – 751 Other Percussions 752 – 914 Name Name Name Name HighQ SnareDrum1 RideBell LowTimbale...
- Page 45 Appendix Name Name Name Name ScraPull LowFloTom1 Cowbell Cabasa Stick PedalHH CrashCymb2 Maracas SquarClick LowTom VibraSlap ShortWhist MetroClick OpenHi-hat RideCymb2 LongWhist MetroBell Low-midTom HiBongo ShortGuiro KickDrum2 Hi-midTom LowBongo LongGuiro KickDrum1 CrashCymb1 MuteConga Claves SideStick RHighTom HiConga Hi W-Block SnareDrum2 RideCymb1 LowConga Lo W-Block HandClap...
- Page 46 Appendix Name Name Name Name OpenCuica Kick05 Kick18 Hi-hat04 MuteTriang Kick06 Kick19 Hi-hat05 OpenTriang Kick07 Kick20 Hi-hat06 Cabasa Kick08 Kick21 Hi-hat07 Shaker Kick09 Kick22 Hi-hat08 Belltree Kick10 Kick23 Hi-hat09 Castanets Kick11 Kick24 Hi-hat10 MuteSurdo Kick12 Kick25 Hi-hat11 OpenSurdo Kick13 Kick26 Hi-hat12 Kick01 Kick14...
- Page 47 Appendix Name Name Name Name Hi-hat17 Snare01 Snare14 Snare27 Hi-hat18 Snare02 Snare15 Snare28 Hi-hat19 Snare03 Snare16 Snare29 Hi-hat20 Snare04 Snare17 Snare30 Hi-hat21 Snare05 Snare18 Snare31 Hi-hat22 Snare06 Snare19 Snare32 Cymbal01 Snare07 Snare20 Snare33 Cymbal02 Snare08 Snare21 S-Stick01 Cymbal03 Snare09 Snare22 S-Stick02 Cymbal04 Snare10...
- Page 48 Appendix Name Name Name Name Tom-Lo4 Tom-HiMid2 Ckjk5 HMN12 Tom-Lo5 Tom-HiMid3 Ckjk6 HMN13 Tom-Lo6 Tom-HiMid4 HMN01 Mtl1 Tom-Lo6 Tom-Hi1 HMN02 Mtl2 Tom-Lo7 Tom-Hi2 HMN03 Mtl3 Tom-Lo8 Tom-Hi3 HMN04 Mtl4 Tom-Lo9 Bktk1 HMN05 Mtl5 Tom-LoMid1 Bktk2 HMN06 Mtl6 Tom-LoMid2 Bktk3 HMN07 Mtl7 Tom-LoMid3 Ckjk1...
- Page 49 Appendix Name Name Name Name Perc Fx05 Perc Fx18 Perc Fx31 Arabian1 Perc Fx06 Perc Fx19 Perc Fx32 Arabian2 Perc Fx07 Perc Fx20 Perc Fx33 Arabian3 Perc Fx08 Perc Fx21 Perc Fx34 Arabian4 Perc Fx09 Perc Fx22 Perc Fx35 Arabian5 Perc Fx10 Perc Fx23 Perc Fx36...
- Page 50 Appendix Name Name Name Name Atht4 Tabla01 THH01 Tima1 Handpan1 Tabla02 THH02 Tima2 Handpan2 Tabla03 THH03 Timpani01 Handpan3 Tabla04 THH04 Timpani02 Handpan4 Tabla05 THH05 Timpani03 Handpan5 Tabla06 THH06 Timpani04 Indian1 Tabla07 THH07 Timpani05 Indian2 Tabla08 THH08 Timpani06 Indian3 Tabla09 THH09 Timpani07 Indian4 Tabla10...
- Page 51 Appendix Name Name Name Name Timpani12 Dine6 Voice11 Voice24 Timpani13 Dine7 Voice12 Voice25 Timpani14 Dine8 Voice13 Voice26 Timpani15 Voice01 Voice14 Voice27 Timpani16 Voice02 Voice15 Voice28 Timpani17 Voice03 Voice16 Voice29 Timpani18 Voice04 Voice17 Voice30 Timpani19 Voice05 Voice18 Voice31 Dine1 Voice06 Voice19 Voice32 Dine2 Voice07...
- Page 52 Appendix Name Name Name Name Voice37 Bell4 BP08 CR09 Voice38 Bell5 BP09 CR10 Voice39 Bell6 BP10 CR11 Voice40 Bell7 BP11 CR12 Voice41 Bell8 BP12 HEA01 Voice42 Bell9 CR01 HEA02 Animal1 BP01 CR02 HEA03 Animal2 BP02 CR03 HEA04 Animal3 BP03 CR04 HEA05 Animal4 BP04...
- Page 53 Appendix Name Name Name Name HEA10 SPH06 Marimba05 Marimba18 HEA11 SPH07 Marimba06 Marimba19 HEA12 SPH08 Marimba07 Marimba20 HEA13 SPH09 Marimba08 Marimba21 HEA14 SPH10 Marimba09 Marimba22 HEA15 SPH11 Marimba10 Marimba23 HEA16 SPH12 Marimba11 Marimba24 HEA17 SPH13 Marimba12 Marimba25 SPH01 SPH14 Marimba13 Marimba26 SPH02 Marimba01...
- Page 54 Appendix Name Name Name Name Marimba31 Brass06 Pot04 W-Block04 Marimba32 Brass07 Pot05 W-Block05 Marimba33 Brass08 Pot06 W-Block06 Marimba34 Brass09 Pot07 W-Block07 Marimba35 Brass10 Pot08 W-Block08 Marimba36 Brass11 Pot09 W-Block09 Marimba37 Brass12 Pot10 W-Block10 Marimba38 Bowl1 Pot11 W-Block11 Brass01 Bowl2 Pot12 W-Block12 Brass02 Bowl3...
- Page 55 Appendix Name Name Name Name W-Block17 Cowbell05 Craski3 Balalaik11 W-Block18 Cowbell06 Craski4 Balalaik12 W-Block19 Cowbell07 Craski5 Balalaik13 W-Block20 Cowbell08 Balalaik01 Balalaik14 W-Block21 Cowbell09 Balalaik02 Balalaik15 W-Block22 Cowbell10 Balalaik03 Balalaik16 Triangle1 Cowbell11 Balalaik04 Balalaik17 Triangle2 Cowbell12 Balalaik05 Balalaik18 Triangle3 Cowbell13 Balalaik06 Balalaik19 Cowbell01 Cowbell14...
- Page 56 Appendix Name Name Name Name Balalaik24 Gus12 Lute11 Chinese01 Balalaik25 Gus13 Lute12 Chinese02 Gus01 Gus14 Lute13 Chinese03 Gus02 Lute01 Lute14 Chinese04 Gus03 Lute02 Lute15 Chinese05 Gus04 Lute03 Lute16 Chinese06 Gus05 Lute04 Lute17 Chinese07 Gus06 Lute05 Lute18 Chinese08 Gus07 Lute06 Lute19 Chinese09 Gus08 Lute07...
- Page 57 Appendix Name Name Name Name Chinese14 Chinese27 Chinese40 Spec FX1 Chinese15 Chinese28 Hit01 Spec FX2 Chinese16 Chinese29 Hit02 Spec FX3 Chinese17 Chinese30 Hit03 Spec FX4 Chinese18 Chinese31 Hit04 Spec FX5 Chinese19 Chinese32 Hit05 Spec FX6 Chinese20 Chinese33 Hit06 Scratch01 Chinese21 Chinese34 Hit07 Scratch02...
- Page 58 Appendix Name Name Name Name Scratch08 Effects09 Effects22 Effects35 Scratch09 Effects10 Effects23 Effects36 Scratch10 Effects11 Effects24 Effects37 Scratch11 Effects12 Effects25 Effects38 Scratch12 Effects13 Effects26 Effects39 Effects01 Effects14 Effects27 Effects40 Effects02 Effects15 Effects28 Effects41 Effects03 Effects16 Effects29 Effects42 Effects04 Effects17 Effects30 Effects43 Effects05 Effects18...
- Page 59 Appendix Name Name Name Name Effects48 Effects61 Perc004 Perc017 Effects49 Effects62 Perc005 Perc018 Effects50 Effects63 Perc006 Perc019 Effects51 Effects64 Perc007 Perc020 Effects52 Effects65 Perc008 Perc021 Effects53 Effects66 Perc009 Perc022 Effects54 Gtr1 Perc010 Perc023 Effects55 Gtr2 Perc011 Perc024 Effects56 Gtr3 Perc012 Perc025 Effects57 Gtr4...
- Page 60 Appendix Name Name Name Name Perc030 Perc043 Perc056 Perc069 Perc031 Perc044 Perc057 Perc070 Perc032 Perc045 Perc058 Perc071 Perc033 Perc046 Perc059 Perc072 Perc034 Perc047 Perc060 Perc073 Perc035 Perc048 Perc061 Perc074 Perc036 Perc049 Perc062 Perc075 Perc037 Perc050 Perc063 Perc076 Perc038 Perc051 Perc064 Perc077 Perc039 Perc052...
- Page 61 Appendix Name Name Name Name Perc082 Perc095 Perc108 Perc121 Perc083 Perc096 Perc109 Perc122 Perc084 Perc097 Perc110 Perc123 Perc085 Perc098 Perc111 Perc124 Perc086 Perc099 Perc112 Perc125 Perc087 Perc100 Perc113 Perc126 Perc088 Perc101 Perc114 Perc127 Perc089 Perc102 Perc115 Perc128 Perc090 Perc103 Perc116 Perc129 Perc091 Perc104...
- Page 62 Appendix Name Name Name Name Perc134 Perc142 Perc150 Perc157 Perc135 Perc143 Perc151 Perc158 Perc136 Perc144 Perc152 Perc159 Perc137 Perc145 Perc153 Perc160 Perc138 Perc146 Perc154 Perc161 Perc139 Perc147 Perc155 Perc162 Perc140 Perc148 Perc156 Perc163 Perc141 Perc149 percussion pad...
-
Page 63: Effect List
Appendix 8.2 Effect list Reverb Name Display Name Display Short Room A ShortRoomA Vocal Plate VocalPlate Short Room B ShortRoomB Church A Church A Short Room C ShortRoomC Church B Church B Room A Room A Cathedral Cathedral Room B Room B Gated Reverb A Gated RevA... - Page 64 Appendix Name Display Name Display Mono 3/4 Echo M.Echo 3/4 Mono Triplet Echo M.Echo Tri Stereo 3/4 Echo S.Echo 3/4 Stereo Triplet Echo S.Echo Tri Mono 4/4 Echo M.Echo 4/4 User Reverb UserReverb Stereo 4/4 Echo S.Echo 4/4 percussion pad...
- Page 65 Appendix Chorus Name Display Name Display Chorus Light 1 Lt.Chorus1 Flange Slow Deep Slw Flange Chorus Light 2 Lt.Chorus2 Flange Deep Dp.Flange Chorus Medium 1 Md.Chorus1 Phaser Light Lt.Phaser Chorus Medium 2 Md.Chorus2 Phaser Medium Md.Phaser Chorus Deep 1 Dp.Chorus1 Phaser Slow Deep Slw Phaser Chorus Deep 2...
- Page 66 Appendix Delay Name Display Name Display Delay 1 Delay 1 Delay 4 Delay 4 Delay 2 Delay 2 User Delay User Delay Delay 3 Delay 3 Equalizer Equalizer type Equalizer type Normal 1 Bright Mid Normal 2 Bright Bass Boost Bright High Bass Mid User EQ...
-
Page 67: Kit List
Appendix 8.3 Kit list Name Default assignment Pad 1 Pad 2 Pad 3 Pad 4 Pad 5 Pad 6 Pad 7 Pad 8 Standard – – – – – – – switch Latin – – – – – – – –... - Page 68 Appendix Name Default assignment Pad 1 Pad 2 Pad 3 Pad 4 Pad 5 Pad 6 Pad 7 Pad 8 DJ Blues – – – – – – – – SEV Drum switch – – – – switch – switch Timpani –...
- Page 69 Appendix Name Default assignment Pad 1 Pad 2 Pad 3 Pad 4 Pad 5 Pad 6 Pad 7 Pad 8 War Crysis – – – – – – – – SwingSwing – – – – – – – – Pots switch switch switch...
- Page 70 Appendix Name Default assignment Pad 1 Pad 2 Pad 3 Pad 4 Pad 5 Pad 6 Pad 7 Pad 8 Voice2 – – – – – – – – Voice3 – – – – – – – – Sci-Voice1 – –...
- Page 71 Appendix Name Default assignment Pad 1 Pad 2 Pad 3 Pad 4 Pad 5 Pad 6 Pad 7 Pad 8 Bell – – – – – – – – Ring1 – – – – – – – – Ring2 – –...
- Page 72 Appendix Name Default assignment Pad 1 Pad 2 Pad 3 Pad 4 Pad 5 Pad 6 Pad 7 Pad 8 Funny – – – – – – – – Kraski – – – – – switch switch – Ceremony – –...
- Page 73 Appendix Name Default assignment Pad 1 Pad 2 Pad 3 Pad 4 Pad 5 Pad 6 Pad 7 Pad 8 Mixed Kit2 switch switch switch switch switch switch switch switch Mixed Kit3 switch switch switch switch switch switch switch switch Sci-Fic –...
-
Page 74: Groove Box And Accompaniment Tracks
Appendix 8.4 Groove box and accompaniment tracks Groove box list Groove box Groove box U got it Synth Hoy ti Brothers Smooth Bossa Waltz Cici Find Stay Carbon The way California That’s it Let’s rock Games Pop ballad Step Slapin Mixer percussion pad... - Page 75 Appendix Accompaniment tracks Accompaniment tracks Accompaniment tracks Bottle Month Bowdown Sunshine Freemind Vida Remcele Mayday Smile Being Soft Case Wish Marie Binary Myeyes Carryout Challenge Spud DP-2000...
-
Page 76: Midi Implementation
Appendix 8.5 MIDI implementation Function Transmitted Recognized Remarks Basic channel 1-16 Note number 0-127 0-127 Velocity Note ON 1-127 0-127 Note OFF 0-127 Major Controls B9h 04h xxh Hi-Hat pedal control Bxh 79h 00h Reset All Controller Bxh 7Bh 00h All Notes OFF Programme Change System Exclusive... - Page 77 Appendix Channel 10 supports only Bank 0. For more information regarding “System Exclusive”, “RPN” and “NRPN”, please con‐ tact your specialized dealer. Layer A Note Layer B Note Layer A Note Layer B Note Pad 1 Pad 5 Pad 2 Pad 6 Pad 3 Pad 7...
- Page 78 Appendix Instrument Note Instrument Layer B Note Snare Rim2 Hi-Hat Pedal Ride Head Kick Ride Edge Ride Mute Ride Bell percussion pad...
- Page 80 Musikhaus Thomann e.K. · Treppendorf 30 · 96138 Burgebrach · Germany · www.thomann.de...
Need help?
Do you have a question about the Millenium DP-2000 and is the answer not in the manual?
Questions and answers