Advertisement
Quick Links
Advertisement

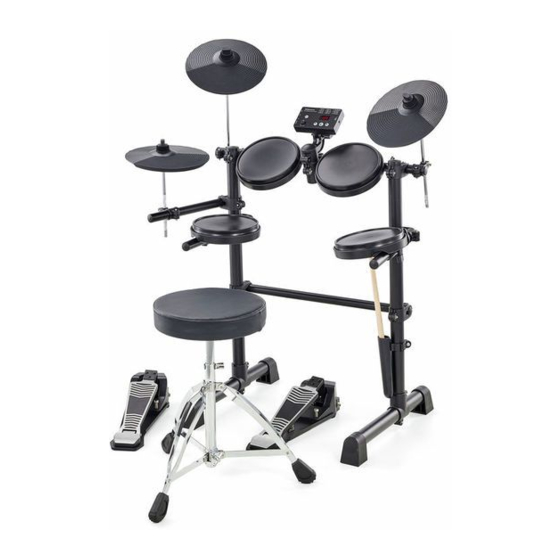
Summary of Contents for thomann Millenium HD-120
- Page 1 HD-120 e-drum set assembly instructions...
- Page 2 Musikhaus Thomann Thomann GmbH Hans-Thomann-Straße 1 96138 Burgebrach Germany Telephone: +49 (0) 9546 9223-0 E-mail: info@thomann.de Internet: www.thomann.de 09.04.2019, ID: 461227...
- Page 3 Table of contents Table of contents Safety instructions.......................................... 4 Scope of delivery..........................................5 Assembly.............................................. 7 Protecting the environment....................................14 HD-120...
-
Page 4: Safety Instructions
Safety instructions Safety instructions DANGER! Danger for children Ensure that plastic bags, packaging, etc. are disposed of properly and are not within reach of babies and young children. Choking hazard! Ensure that children do not detach any small parts (e.g. knobs or the like) from the unit. They could swallow the pieces and choke! Never let children unattended use electrical devices. -
Page 5: Scope Of Delivery
Snare pad (7 inch) Crash (9 inch), Ride (9 inch), Hi-hat (9 inch) Hi-hat pedal Bass drum pedal e-drum module Millenium HD-120 Multi-cable for connecting the pads, cymbals, and pedals to the e-Drum module Drum stick holder Set of drum sticks... - Page 6 Scope of delivery Item Qty. Seat 3.5 mm stereo jack cable Headphone adapter from 3.5 mm stereo jack to 6.3 mm stereo jack e-drum set...
-
Page 7: Assembly
Tom pad 1 (7 inch), Tom pad 2 (7 inch), Tom pad 3 (7 inch) Snare pad (7 inch) Crash (9 inch), Ride (9 inch), Hi-hat (9 inch) Hi-hat pedal Bass drum pedal e-drum module Millenium HD-120 Drum stick holder Seat HD-120... - Page 8 Assembly Assembling the rack CAUTION! Danger of cuts on hands and fingers When connecting the parts, take care for sharp edges on the metal tubes, screws etc. Attach the lateral support tubes (2, 3) to the rack foots (1). Then tighten the fixing screws (22) with the drum key (21). Attach the horizontal connection tube (4) to the fixing clamps provided on the lateral support tubes (2, 3).
- Page 9 Assembly Attach the side arms (5) in the provided mounting clamps on the rack. Then tighten the fixing screws (22) with the drum key (21). Attach the hi-hat hinge (9) to the side arm. Slide the hinge for the Hi-hat (9) in the desired position and then tighten the fixing screws (22) with the drum key (21). Loosen the fixing screws (22) of the mounting clamps on the lateral support tubes with the drum key (21).
- Page 10 Assembly Attach the Tom pads (12), the multi-cable fixings (11), the horizontal connecting tube clamps (10), and the cymbal joints (9) in the order shown to the horizontal connecting tube (6). Then tighten the fixing screws (22) of the individual components with the drum key (21). Attach the horizontal connecting tube (5) to the lateral support tubes (2, 3).
- Page 11 Assembly Attach the holders for the cymbals (7) and the Hi-hat (8) to the joints for the cymbal and the Hi-hat (9). Then tighten the fixing screws (22) with the drum key (21). Unscrew the wing nuts from the holders for the cymbals (7) and the Hi-hat (8) and take the felt washers off the holders. Place the cymbals (14) as shown in the figure on the holders.
- Page 12 Assembly Hang the drumstick holder (19) in the provided rail on the side support tube (3) and store the drumsticks (20) in the drum‐ stick holder. Set up the Hi-hat pedal (15) and the Bass drum pedal (16). Put the e-drum module (17) up to the stop into the free bracket of the horizontal connection tube (6). Align the e-drum module and then tighten the fixing screws (22) with the drum key (21).
- Page 13 Assembly Set up the rack, the pads and the cymbals according to your needs. Finally, position the Hi-hat and bass drum pedals in front of the rack and connect all trigger cables to the e-drum module. Position the bass drum pedal centred under the rack. Position the Hi-hat pedal to the left of the rack.
-
Page 14: Protecting The Environment
Protecting the environment Protecting the environment Disposal of the packaging material For the transport and protective packaging, environmentally friendly materials have been chosen that can be supplied to normal recycling. Ensure that plastic bags, packaging, etc. are properly disposed of. Do not just dispose of these materials with your normal household waste, but make sure that they are collected for recycling. - Page 16 Musikhaus Thomann · Hans-Thomann-Straße 1 · 96138 Burgebrach · Germany · www.thomann.de...


Need help?
Do you have a question about the Millenium HD-120 and is the answer not in the manual?
Questions and answers