Advertisement
Quick Links
Safe Operation Practices • Set-Up • Operation • Maintenance • Service • Troubleshooting • Warranty
O
'
M
peratOr
s
anual
33-Inch Wide Cut Grass Bag Kit — 19A20001100
WARNING
READ AND FOLLOW ALL SAFETY RULES AND INSTRUCTIONS IN THIS MANUAL
BEFORE ATTEMPTING TO OPERATE THIS MACHINE.
FAILURE TO COMPLY WITH THESE INSTRUCTIONS MAY RESULT IN PERSONAL INJURY.
CUB CADET LLC, P.O. BOX 361131 CLEVELAND, OHIO 44136-0019
Printed In USA
Form No. 769-03121B
(February 20, 2009)
Advertisement

Related Manuals for Cub Cadet 19A20001100


Summary of Contents for Cub Cadet 19A20001100
- Page 1 Safe Operation Practices • Set-Up • Operation • Maintenance • Service • Troubleshooting • Warranty ’ peratOr anual 33-Inch Wide Cut Grass Bag Kit — 19A20001100 WARNING READ AND FOLLOW ALL SAFETY RULES AND INSTRUCTIONS IN THIS MANUAL BEFORE ATTEMPTING TO OPERATE THIS MACHINE.
-
Page 2: Assembly And Setup
Locate your nearest Cub Cadet Dealer at (877) 282-8684 ◊ Write us at Cub Cadet LLC • P.O. Box 361131 • Cleveland, OH • 44136-0019 Contents of Carton Before installing this accessory, remove all parts from the carton. Carton contents, including items included within the hardware pack, are shown in Figures 1 and 2. - Page 3 Installing the Right Side Bracket Installing the Right Bracket Position the rod assembly [C] between the metal panel and Shut off engine and disconnect the spark plug wire. the plastic panel cover while aligning holes in rod assembly Loosen the four star knobs by turning the knobs with holes in the panels and securing with the following counterclockwise five full rotations.
- Page 4 Installing the Left Side Bracket Installing the Left Bracket Position the rod assembly [C] between the metal panel and Remove the Left Side Hardware the plastic panel cover while aligning holes in rod assembly with holes in the panels and securing with the following Remove the following from the left side of the upper handle.
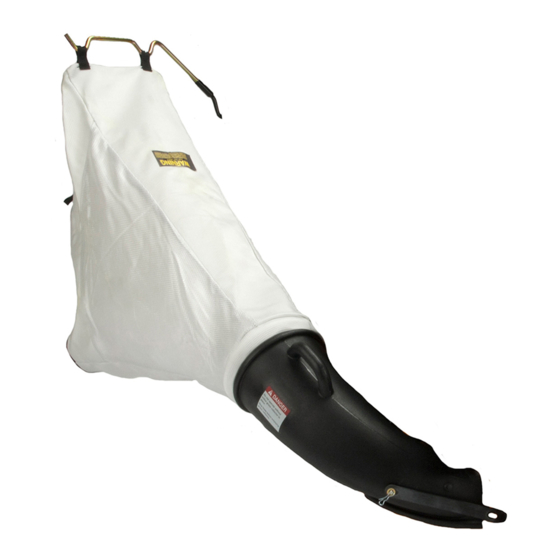
- Page 5 Assembling the Grass Bag Attaching the Grass Bag Assembly (newer Style Deck) Place grass bag [A] over chute assembly [B]. See Fig. 8. Use the cable tie [I] to secure bag to chute assembly by Lift the chute deflector on the deck back towards engine. inserting the cable tie into hole in bag and pulling through.
- Page 6 Attaching the Grass Bag Assembly Install the Chute Latch (Older Style Deck) Pull the rivet’s plunger upward to unlock it and remove the rivet from the hole in the chute. See Fig. 12. Remove the Chute Strap Remove and discard the clevis pin, washer, hairpin clip and chute strap.
- Page 7 Attaching the Chute Shut the engine off and disconnect spark plug. Pivot the chute deflector upward. See Fig. 14. Secure the latch [J] to the side of the chute/grass bag assembly using the hardware provided. Place the bottom lip of the chute/grass bag assembly into the lip on the deck.
- Page 8 Service completed by someone other than an authorized service The limited warranty set forth below is given by Cub Cadet LLC with respect to new merchandise purchased or leased and used in the United dealer.
Need help?
Do you have a question about the 19A20001100 and is the answer not in the manual?
Questions and answers