Jøtul F50 TL Rangeley Installation And Operating Instructions Manual
Hide thumbs
Also See for F50 TL Rangeley:
- Installation and operating instructions manual (28 pages) ,
- Installation and operating instructions manual (28 pages)

Related Manuals for Jøtul F50 TL Rangeley


Summary of Contents for Jøtul F50 TL Rangeley
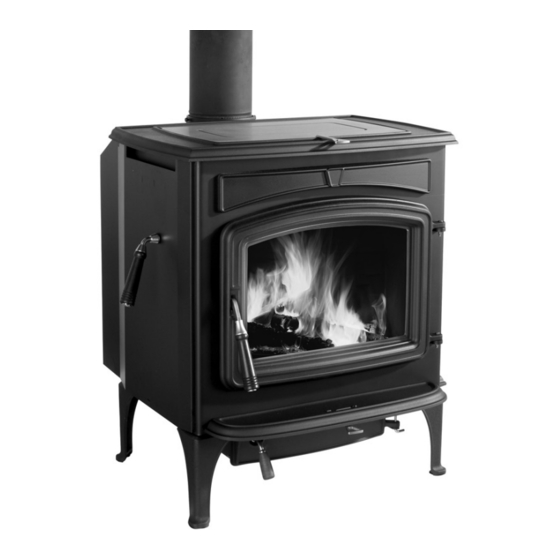
- Page 1 Jøtul F 50 TL Rangeley for USA and Canada Installation and Operating Instructions Keep these instructions for future reference.
-
Page 2: Table Of Contents
139262 Rev_A 11/1/2010 Table of Contents Installation and Operation Accessories Instructions for USA/Canada ................... 2 Standards and Safety Notices Installation et Standards / Codes ................3 ..Safety Notices .................. 4 fonctionnement pour Canada 1.0 Installation 1.1. Assembly Before Installation ..........5 1.2 Flue Collar Installation ............6 Safety notice: If this solid fuel room heater is not 1.3 Flue Collar Heat Shield . - Page 3 139262 Rev_A 11/1/2010 Standards Check Building Codes The Jøtul F 50 TL wood stove has been tested and listed When installing, operating and maintaining your to: U.S: ANSI/UL 1482 and ANSI/UL 737 Jøtul F 50 TL woodstove, follow the guidelines Canada: CAN/ULC-S627-M93 presented in these instructions, and make them available to anyone using or servicing the stove. Tests performed by: ITS, Intertek Testing Services Your city, town, county or province may require Middleton, WI a building permit to install a solid fuel burning appliance. Manufactured by: Jøtul North America 55 Hutcherson Drive In the U.S., the National Fire Protection Association’s Gorham, Maine 04038-2644 Code, NFPA 211, Standards for Chimneys, Fireplaces, Vents and Solid Fuel Burning Appliances, or similar regulations, may apply to the installation of a solid The Jøtul F 50 TL Rangeley wood fuel burning appliance in your area.
-
Page 4: Safety Notices
139262 Rev_A 11/1/2010 Safety Notices • We recommend that this stove be installed • Burn solid wood fuel only by a professional solid fuel technician or that you consult one if you do the work • Do not use chemicals or fluids to start the fire. yourself. Also, consult your insurance Do not burn garbage or flammable fluids. company regarding any other specific • Read this entire manual before you install requirements. -
Page 5: Installation
139262 Rev_A 11/1/2010 1.0 Installation 27 1/4” (692 mm) If this solid fuel room heater is not properly installed, a house fire may result. For your safety, follow the installation directions. Contact the local building or fire officials about restrictions and installation inspection requirements in your area. 15 1/2”... -
Page 6: Flue Collar Installation
139262 Rev_A 11/1/2010 1.2 Flue Collar Orientation Figure 2. Flue Collar heat shield attachment. The Flue Collar is oriented in the Top Exit position. To change orientation to Rear Exit: 1. Twist and remove the perforated cut-out section from the top edge of the rear shroud. 2. Use a 10 mm open end wrench or socket wrench to remove the two M6 x 12 bolts that attach the flue collar to the stove. Orient the flue collar to the rear and use the same bolts to re-attach it to the stove. 1.3 Flue Collar Heat Shield Not applicable for rear exit configuration. 1. Unfold the heat shield as shown in fig.2. Secure it to the rear stove shroud using the four #8 x 12 sheet metal screws from the Miscellaneous Hardware Kit. 1.4 Bottom Heat Shield Installation Back of Stove The bottom heat shield must be installed unless the stove hearth is composed of poured concrete on earth or unless an Outside Air Kit is installed. -
Page 7: Chimney Requirements
139262 Rev_A 11/1/2010 A short exterior masonry chimney will give the poorest Figure 5. performance because it will be difficult to warm the flue Chimney connector and sustain the temperatures necessary to maintain draft orientation. strength. In extremely cold climates, it may be necessary to reline the chimney or extend the height to help establish draft. Flue Gas Toward A tall, interior masonry chimney is easier to keep warm Stove Direction and will perform the best under a variety of weather and environmental conditions. The following guidelines give the necessary chimney requirements based on the national code (ANSI-NFPA • The maximum horizontal run should not exceed 3 ft. 211 for the US. And CSA CAN-B365 for Canada). However, (92 cm) with a 1/4” rise per foot. Under no circumstance many local codes differ from the national code to take should horizontal pipe be allowed to slant down toward into account climate, altitude, or other factors. Your local... -
Page 8: Prefabricated Chimneys
139262 Rev_A 11/1/2010 2.2 Prefabricated Chimneys Figure 7. 2’ A prefabricated metal chimney must be tested and Chimney Height 61 cm 3’ listed for use with solid fuel burning appliances. High Requirement. 10’ 91.5 cm Temperature (HT) Chimney Standard UL 103 for the U.S. and 305 cm High Temperature Standard ULC S-629 for Canada. The manufacturer’s installation instructions must be followed precisely. Always maintain the proper clearance to combustibles as established by the pipe manufacturer. This clearance is usually a minimum of 2”, although it may vary by manufacturer or for certain chimney components. 2” clearance between wall 2.3 Chimney Height stud and chimney Flue Liner The chimney must be at least 3 feet (92 cm) higher than Header the highest point where it passes through the roof and at least 2 feet (61 cm) higher than the highest part of the roof or structure that is within 10 feet (3.05 m) of the chimney, measured horizontally. 12” 30,5 cm Pass-through Chimneys shorter than 14 feet (4.27 m) may not provide construction:... -
Page 9: Connecting To The Chimney
139262 Rev_A 11/1/2010 Refractory mortar must be used at the junction of the 3.2 Hearthmount into a Masonry chimney and the pass-through liner. The pass-through Fireplace liner must not penetrate the chimney liner beyond the inner surface of the chimney liner. Use extreme care when The Jøtul F 50 TL may be installed into a masonry fireplace constructing the hole in the chimney liner as the tiles can with a minimum opening height of 30 1/2” (77.5 c m). shatter easily. NOTE: There is no short leg option. DO NOT ALTER OR REMOVE THE LEGS. In Canada Building code requires that the fireplace damper plate be The installation must conform to CAN/CSA-B365, removed or securely fixed in the open position. Installation Code for Solid Fuel Burning Appliances and A connector pipe must then extend from the stove’s flue Equipment. Before proceeding be sure to consult your local exit through the damper area of the fireplace and into the building inspector. chimney tile liner. See fig. 10. In any case, we recommend Common Method: that a full liner be installed through any masonry chimney to ensure good performance. This method requires the removal of all combustible materials from at least 18” (45.7 cm) around the chimney The cross-sectional area of the flue of a chimney with no connector’s proposed location. A 6” round liner requires a walls exposed to the outside below the roofline may be no minimum opening 43” x 43” (109.2 x 109.2) square. more than three times the cross-sectional area of the stove flue collar. -
Page 10: Prefabricated Chimneys
139262 Rev_A 11/1/2010 3.4 Mobile Home Installation The cross-sectional area of the flue of a chimney with one or more walls exposed to the outside below the roofline The Jøtul F 50 TL is approved for installation in may be no more than two times the cross-sectional area of manufactured mobile homes provided the following the stove flue collar. requirements are met: If the chimney liner is too large to accommodate the stove, 1. All chimney components, including chimney sections, an approved relining system must be installed to resize the supports, spark arrestor, etc., shall comply with the Standard flue. for Factory-built Chimneys for Residential Type and Building A new sheet metal damper block-off plate must be Heating Appliances, UL 103 and/or CAN/ULC-S629 Standard installed around the connector pipe at the damper frame for 650°C Factory-built Chimneys. and sealed with the proper sealant (usually High-Temp 2. The chimney shall be attached directly to the stove and Silicone). extend at least 3 ft. (0.9m) above the roof. Termination must be at least 2 ft. (0.6m) above the hightest elevation of any 3.3 Prefabricated Chimneys part of the mobile home within 10 ft. (3m). When connecting the Jøtul F 50 TL to a prefabricated 3. In order to allow for transportation of the mobile home, metal chimney always follow the pipe manufacturer’s the chimney termination shall be readily removed at or instructions and be sure to use the all components that are below an elevation of 13.5 ft. (4.1 m) above ground level and required. This usually includes a “smoke pipe adapter” that reinstalled without use of special tools or instructions. -
Page 11: Clearances To Combustibles
139262 Rev_A 11/1/2010 4.0 Clearance to Combustibles 4.1 Floor Protection The Jøtul F 50 TL includes a bottom heat shield which must be installed unless the stove is on a concrete floor poured 2” on earth. 2” The Jøtul F 50 TL requires one of the following forms of hearth protection if not installed directly on concrete poured on earth: 40 1/2” 1) Any UL, ULC, or Warnock Hersey Listed Type 1 hearth board. 2) Any noncombustible material. 16” DOOR In the U.S. floor protection must extend forward from the OPENING door opening at least 16 in. and 8 in. from the sides of the door opening. Protection must also extend 2 in. under the 8” chimney connector. This will result in a minimum floor 33” protector 33” wide x 40 1/2” deep. See fig 12. Figure 12. Floor Protection minimum dimensions, U.S. In Canada, floor protection must extend 18” from the front of the stove and 8 in. (460mm) from the sides and rear. It must also extend 2 in. (51 mm) under the chimney... -
Page 12: Alcove Installation
139262 Rev_A 11/1/2010 19” 8” (203 mm) (483 mm) Maximum Maximum 48” 48” (1219 mm) (1219 mm) 6” 6” 16” 16” (152 mm) (152 mm) (406 mm) (406 mm) 39 1/2” (1003 mm) 59 1/2” (1511 mm) Figure 13. Alcove with Unprotected Walls. Figure 14. -
Page 13: Clearance Diagrams
139262 Rev_A 11/1/2010 4.6 Jøtul F 50 TL Clearance Specifications PROTECTED WALLS UNPROTECTED WALLS PER NFPA211 OR CAN/CSA -B365-M93 SIDE REAR CORNER SIDE REAR CORNER Single Wall Connector 14” / 356 mm 18” / 457 mm 13” / 330 mm 12” / 305 mm 8” / 203 mm 8.5” / 216 mm Single Wall Connector 6” / 153 mm w/ Flue Collar Heat Shield 16” / 406 mm 10” / 254 mm 11” / 280 mm... -
Page 14: Operation
139262 Rev_A 11/1/2010 5.0 Operation WARNING ALWAYS WEAR STOVE GLOVES WHILE TENDING THE FIRE. NEVER ALLOW THE FIRE TO REST DIRECTLY ON THE GLASS. KEEP THE LOGS SPACED AT LEAST ONE INCH FROM Please read the following section before building the first THE GLASS TO ALLOW FOR PROPER AIR FLOW WITHIN THE fire in your new Jøtul F 50 TL. -
Page 15: Air Control Settings
139262 Rev_A 11/1/2010 5.4 Air Control / Blower Settings 5.6 Break-In Procedure Although your Jøtul F 50 TL is constructed of welded, 1/4” Use the following guide for best performance. steel plate, it also incorporates cast iron components. This Burn Rate Air Control Setting Blower Speed material requires the stove to be“broken-in” gradually so Min. Low Min. Open Low / On at 30 min. that heat expansion does not occur too quickly and cause Med. Low 3/8” Open Low / On at 30 min. damage. The following steps describe the proper break- Med. High 3/4” Open Low / On at 30 min. in procedure for your stove. Use a magnetic stove-top High Max. Open High / On thermometer to monitor stove temperature, placed directly on the cook plate. -
Page 16: Starting And Maintaining A Fire
139262 Rev_A 11/1/2010 5.7 Starting and Maintaining a Fire 5.8 Adding Fuel Burn only solid wood directly on the bottom grate of the Follow this procedure when reloading the stove while it is stove. Do not elevate the fire in any way. still hot and a bed of hot embers remains: WARNING: DO NOT OPERATE THIS STOVE WITH THE ASH • Always wear gloves when tending to the stove. DOOR OPEN. DOING SO MAY CAUSE DAMAGE AND WILL VOID YOUR WARRANTY. • Adjust the Primary Air Shutter Lever to the fully open position and open the baffle plate. Wait a few seconds to We recommend use of a magnetic stovetop thermometer re-establish strong draft before opening the load door. This to monitor the surface temperature of the stove. Locate... -
Page 17: Creosote And The Need For Removal
139262 Rev_A 11/1/2010 5.10 Creosote Formation and the Need for Removal When wood is burned slowly, it produces tar and other vapors that combine with moisture to form creosote. Creosote vapors condense in the relatively cool chimney flue, and creosote residue accumulates on the flue lining. When ignited, this creosote fuels an extremely hot fire. The chimney connector and chimney flue should be inspected at least twice monthly during the heating season to determine if creosote buildup has occurred. If creosote has accumulated, it should be removed to reduce the chance of a chimney fire. In the event that creosote ignites in the flue, the resulting fire is often accompanied by a roaring noise and crackling sound as flakes of burning creosote break loose. If you suspect you are having a chimney fire, immediately close the air controls and make sure the door is closed securely. Call the fire department and have everyone leave the house. Do not attempt to extinguish the fire. Opening the door will only supply additional oxygen and intensify the fire. When the fire in the flue has subsided, resist the temptation to open the door to check on the fire. The fire may have suffocated, but could re-ignite with a supply of fresh air. After a chimney fire, do not use the stove until the chimney connector and flue have been cleaned and inspected to ensure no damage has been sustained. See Section 6.6 of this manual regarding chimney cleaning. 5.11 Ash Removal Ashes will drop through the bottom grate into the inter- nal ash pan during normal operation. Empty the ash pan periodically, depending on how frequently the stove is... -
Page 18: Maintenance
139262 Rev_A 11/1/2010 6.0 Maintenance 6.1 Glass Care 6.3 Glass Removal or Replacement See fig. 19. Cleaning 1. Place the door face down on a protected surface. On occasion it will be necessary to clean the carbon deposits 2. First just loosen each glass clip screw and then remove and fly ash off of the glass. If these deposits are allowed the clips. to remain on the glass for an extended period of time, the 3. Lift the glass panel out of the door. Use pliers and a surface may become etched and cloudy. Any creosote that putty knife to remove the old glass gasket. Replace with might develop on the glass will burn off during the next hot PN 200024, .025 dia. LD2 gasket. Apply a small bead of fire. cement in the channel and gently press the gasket into place. Follow this glass cleaning procedure: 4. Replace the glass and glass clips. Tighten the clips gradually, avoiding placing uneven pressure on the glass. 1. Glass must be completely cool. 2. Only use a cleaner that is specifically designed for this purpose. The use of abrasives will damage the glass and 6.4 Gaskets... -
Page 19: Gaskets
139262 Rev_A 11/1/2010 6.5 Gasket Replacement 1. Use pliers and a putty knife to remove the old gasket and adhesive from the door. 2. Thoroughly clean the channel with a wire brush. 3. Apply a small bead of cement to the channel. 4. Gently press the new gasket into the cement to seat it in the channel. Wrap the two ends around and secure with the gasket clamp as shown in fig. 19. Close and latch the door and then reopen. Wipe away any excess cement that may have squeezed out from around the gasket. 6.6 Chimney System The Jøtul F 50 TL is designed to burn cleanly and efficiently when used according to the guidelines in this manual. In order to maintain proper performance, you should inspect the chimney and chimney connector at the beginning of each heating season and then twice per month during the heating season. Clean the chimney whenever creosote and fly ash accumulation exceeds 1/4 inch in any part of the system. Chimney brushes are available from your local Jøtul dealer or hardware supply store. Your dealer can also refer you to a reputable, professional chimney sweep who will have all the equipment to ensure a complete and proper job. WARNING: FAILURE TO KEEP THE CHIMNEY CONNECTOR AND FLUE FREE OF CREOSOTE BUILD-UP CAN RESULT IN A CHIMNEY FIRE. -
Page 20: Appendix
139262 Rev_A 11/1/2010 7.0 Appendix 7.1 Optional Blower 156431 2. Attach the Air Deflector: Bend the deflector tabs at the perforation lines as shown in Tools Required fig. 20. Attach the deflector to the interior side of the rear • 10 mm wrench or socket driver shroud using two #8 X 12 sheet metal screws. • 1/4” socket driver or flat head screwdriver • 4 mm hex key 3. Attach the Blower Mounting Bracket to the two center studs • work gloves on the back of the stove, oriented as shown in fig. 20, using two M6 hex nuts. CAUTION: Avoid injury- always wear work gloves when handling sheet 4. - Page 21 139262 Rev_A 11/1/2010 Figure 20. Blower Parts Identification. Lower Air Deflector Blower Assembly 6. Snapstat Blower Mounting Bracket Snapstat Bracket Air Deflector 8. M6 Flange Hex Nut (3) 4. Control Box Assembly 9. M6 Wingnut (2) Control Box Bracket 10. #8 x 1/2” sheet metal screws (9) Operation BLOWER The blower is controlled by the heat-activated snapstat that will only function when the control switch is set in AUTO. After the fire is established, the snapstat will react to the heat and activate the blower. Fan speed may be manually adjusted with the rheostat knob. The blower will shut off automatically as the stove cools down. If automatic blower circulation is not desired, place the blower control switch in RHEOSTAT POWER SNAPSTAT the MANUAL position. SUPPLY Maintenance Disconnect power. Use a vacuum to clean the blower at...
-
Page 22: Outside Air Kit Installation
139262 Rev_A 11/1/2010 Front Manifold Main Manifold M6 Hex Nuts, #8 x 12 mm Sheet Metal Screws Outside Air Bottom Heat Shield 4” Duct Collar Figure 22. Outside Air Kit parts identification and orientation. 7.2 Outside Air Kit 157320 Contents: •... -
Page 23: Mobile Home Floor Bracket
139262 Rev_A 11/1/2010 Lag Screw Screw Figure 25. Floor Bracket Detail 7.3 Mobile Home Floor Bracket 157321 Contents: Floor Bracket, (1) 1. Determine the final location of the stove and use the leveling bolts to make the stove level and plumb. 2. Mount the floor bracket over one of the rear leveling bolts and secure it to the floor using an appropriate length lag screw. -
Page 24: Illustrated Part List
139262 Rev_A 11/1/2010 Figure 26. F 50 TL Illustrated Parts... -
Page 25: Parts List
139262 Rev_A 11/1/2010 8.0 Jøtul 50 TL Rangeley Parts List No. Description Par. No. Description Part Number No. Description Part Number 61. 61. Glass, Ceramic, Door, 50 TL 224158 Air Baffle Manifold Assembly 157345 62. Glass Clip w/Gasket, Top, Steel Stoves 157352 Gasket, LD2, .500 Ø Fiberglass Rope, SS Jacket 223828 63. Gasket, MD, .625 Ø Fiberglass Rope 223858 Nut, M8, Serrated Flange 117881 64. Exhaust Deflector 224325 Upper Union Plate, 104609 65. -
Page 26: Warranty Statement
139262 Rev_A 11/1/2010 9.0 Jøtul Wood-burning Product Limited Warranty Effective February 1, 2010 T h i s w a r r a n t y p o l i c y a p p l i e s t o w o o d - b u r n i n g p r o d u c t s 8. Damage incurred while the Jøtul or Scan Stove or Fireplace is in transit. - Page 27 139262 Rev_A 11/1/2010 This page is intentionally blank.
- Page 28 139262 Rev_A 11/1/2010 Jøtul pursues a policy of constant product development. Products supplied may therefore differ in specification, colour and type of accessories from those illustrated and described in the brochure. Quality Jøtul AS utilizes quality controls conforming to NS-EN ISO 9001 for product development, manufacturing, and distribution of stoves and fireplaces. This policy is intended to provide you with the peace of mind that the Jøtul product you purchase meets or exceeds current uniform standards for quality and safety - a continuation of the standards instituted at the company’s inception in 1853. We appreciate your trust in welcoming our product into your home and invite your comment and appraisal of our efforts to provide you with the finest in home hearth products. Jøtul AS P.O. Box 1411 N-1602 Fredrikstad, Norway Jøtul North America Inc. P.O. Box 1157 55 Hutcherson Drive Gorham, Maine 04038...
Need help?
Do you have a question about the F50 TL Rangeley and is the answer not in the manual?
Questions and answers