Table of Contents
Advertisement
Advertisement
Table of Contents

Related Manuals for Panduit COUGAR LS9Q


Summary of Contents for Panduit COUGAR LS9Q
- Page 1 ™ LS9Q OUGAR HERMAL RANSFER RINTER Operator’s Manual Panduit Corp. Identification Products Division 1819 Atlanta Highway Cumming, GA 30040 Technical Support: 1-866-871-4571 Customer Service: 1-800-777-3300 www.panduit.com LS9Q-MAN-A REV. 0 – 5/5/09...
-
Page 2: Table Of Contents
Section 1: Getting Started ............3 Introduction and Safe Operation ..........4-6 General Description ..............7-8 Loading Batteries and Label Cassette ..........9 Keyboard Functions ..............10-11 Section 2: Working with the C ™ LS9Q ......12 OUGAR Using the C ™... -
Page 3: Section 1: Getting Started
SECTION 1 GETTING STARTED... -
Page 4: Introduction And Safe Operation
INTRODUCTION & SAFE OPERATION ™ LS9Q Hand-Held Thermal Congratulations on your purchase of the C OUGAR ™ LS9Q is designed to meet the Transfer Printer. The versatile C OUGAR demanding printing requirements of electrical and network users. The LS9Q prints high quality industrial labels on a wide variety of materials for electrical and network applications, such as wire/cable, components, safety, and facility identification. - Page 5 INTRODUCTION & SAFE OPERATION Do Not Substitute Parts Or Modify Equipment Because of the danger of introducing additional hazards, do not install substitute parts or perform an unauthorized modification to the printer or its accessories. The proper components for service and repair may be obtained from Panduit Corp. WARNING: When the printer has been in use for an extended period of time, the printer motor may become hot.
-
Page 6: Introduction And Safe Operation
INTRODUCTION & SAFE OPERATION Printer Power Supply ™ LS9Q is supplied with 6 AA alkaline batteries. These batteries are The C OUGAR not re-chargeable. After the batteries have surpassed their useful life, they must be disposed of properly and replaced. ™... -
Page 7: General Description
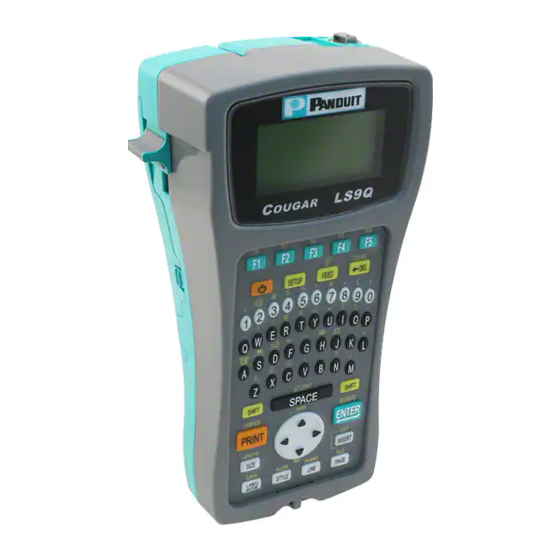
GENERAL DESCRIPTION ™ LS9Q Hand-Held Thermal Transfer Printer OUGAR Cutter button with partial cut adjustment Large, graphic display Print head latch QWERTY keypad P1™ Label Cassette System Ribbon included Integrated memory device Durable plastic housing Continuous labels... -
Page 8: General Description
GENERAL DESCRIPTION Print Technology ™ LS9Q prints labels using thermal transfer printing technology. The The C OUGAR print head melts ink contained on a thin web of ribbon material allowing the ink to transfer to the label material. The print head operates at a resolution of 203 dots per inch (dpi). -
Page 9: Loading Batteries And Label Cassette
KEYBOARD FUNCTIONS Loading the Batteries ™ LS9Q printer. If the Remove the battery door from the back of the C OUGAR impact bumper is installed on the printer, you will have to move it away from the battery door first. Install the 6 AA batteries according to the molded indicators within the battery compartment. -
Page 10: Keyboard Functions
KEYBOARD FUNCTIONS Special Function Keys (F1-F10) Feed Setup Power Delete/Clear Numbers and Letters Space/Accented Characters Shift Enter/Rotate Print Directional Arrows Size/Length Insert or Edit Tools Label Mode/ Style/ Lines/ Page/ Caps Lock Align Frames File Manager... - Page 11 KEYBOARD FUNCTIONS Basic Keyboard Functions • POWER Turn printer on or off • SETUP Access the Set Up menu • FEED Feed labels • Turn display backlight on or off. Available on LS8E printer. Not available on LS9Q printer • DELETE Erase characters and tools •...
-
Page 12: Section 2: Working With The Cougar ™ Ls9Q
SECTION 2 WORKING WITH THE OUGAR ™ LS9Q... -
Page 13: Using The Cougar ™ Ls9Q
USING THE C ™ LS9Q OUGAR The Home Screen The home screen is where you enter and edit text or place label items known as tools. The home screen is also where you print labels. The home screen has several different indicators, including: INDICATOR ICON DESCRIPTION... -
Page 14: Creating Text
CREATING TEXT Creating Text ™ LS9Q, the home screen will appear. The home After turning on the C OUGAR screen is also the text editor. To create text on the home screen, simply begin pressing the alphabetic or numeric keys on the keypad. Text will be entered at the position of the cursor. The cursor is indicated by a vertical line. -
Page 15: Creating Text
CREATING TEXT Text Style ™ LS9Q has two different text styles: Bold and Bold + Underline. The C OUGAR To change the text style, press the STYLE key. The new text style can be applied to all characters on a label or just to characters inserted after the change. Text style can be different for each individual text character on a line. -
Page 16: Creating Serializations
CREATING SERIALIZATIONS The Serialization Tool The serialization tool is used to automatically number labels in a sequence. The sequence can be either numeric (1 to 999) or alphabetic (A to ZZZ). serialization is defined by a start value, an end value, and an increment value. To correctly define a serialization, the end value must be larger than the start value and the start and end values must be both numeric or both alphabetic. - Page 17 CREATING SERIALIZATIONS More Serialization Parameters The serialization tool includes more parameters on a second screen following the first screen. The second screen includes Copies and Collate. To access the second screen press the down directional arrow twice after Increment. The Copies parameter determines the number of copies to print for the serialization.
-
Page 18: Creating Serializations
CREATING SERIALIZATIONS Press the key to accept the changes and to return to the home screen. Advanced Serialization Options The serialization tool includes several advanced options for customizing labels. The advanced serialization options are Print As and Place On. The Print As option determines whether the serialization will print as text or as a bar code on the labels. -
Page 19: Creating Symbols
CREATING SYMBOLS The Symbol Tool The Symbol Tool is used for creating electrical, network, and safety or facility identification labels. Creating a Symbol The symbol tool should be accessed from the home screen. To access the symbol tool: Press the INSERT key to enter the tools menu. Press the directional arrows to highlight the symbol tool. -
Page 20: Creating Symbols
CREATING SYMBOLS Currently available symbols and their assigned library numbers are listed below. Additional symbols may be added to the C ™ LS9Q firmware in the future. OUGAR... -
Page 21: Creating Bar Codes
CREATING BAR CODES The Bar Code Tool The bar code tool can be used for bin labeling, component identification, or asset management and can be used in combination with other tools. The bar code tool can be printed with or without a checksum digit or human readable text. The bar code symbologies available in the C ™... - Page 22 CREATING BAR CODES Press the key to accept all of the changes and to return to the home screen. Otherwise, press the DEL key to return to the home screen without accepting changes. Bar Code Settings The default bar code settings can be changed in the setup menu. To change the default settings, access the printer settings in the setup menu.
-
Page 23: Creating Lines
CREATING LINES Lines Using lines allows custom placement of vertical and horizontal lines on a label. Lines are especially useful for creating patch panel, faceplate, or terminal block labels. There are seven unique line settings available: Center Horizontal, Center Vertical, Top, Bottom, Left, Right, and @ Pages. Each of these settings may be turned on or off independently. - Page 24 CREATING LINES The Right setting places a line at the far right side of the label. The @ Pages setting places lines between each page of a continuous label that has multiple pages defined. The @ Pages setting is used for patch panel, outlet, and terminal block labeling.
-
Page 25: Creating Frames
CREATING FRAMES Frames Frames are useful for customizing a label. There are three unique frame settings available: Box, Reverse, and Box Off. The Box setting places a box outline around the perimeter of the entire label area. WARNING The Reverse setting places a dark background with light text characters on a label. -
Page 26: Using Pages
USING PAGES The Page Function The C ™ LS9Q provides 9 separate pages for each label. Label items, OUGAR including text and tools may be placed on each of the 9 pages. The pages function is particularly useful for creating non-standard serializations that do not follow a common increment. -
Page 27: Using Special Functions
USING SPECIAL FUNCTIONS Special Functions The C ™ LS9Q has several special functions that may be accessed by OUGAR pressing the F keys at the top of the keypad. The special functions are listed in a menu that appears when pressing F1. The entire list of special functions includes: •... -
Page 28: Setting Up The Cougar Ls9Q And Using File Manager
SETTING UP THE COUGAR LS9Q AND USING FILE MANAGER The Setup Menu The setup menu is used to modify the default printer settings. The setup menu should be accessed from the home screen. To access the setup menu press the SETUP key. - Page 29 SETTING UP THE COUGAR LS9Q AND USING FILE MANAGER Label Modes To edit the label mode, press the LABEL MODE key. Use the up or down directional arrows to select the desired mode and then press Available Modes include: MODE...
-
Page 30: Setting Up The C Ougar ™ Ls9Q And Using File Manager
SETTING UP THE COUGAR LS9Q AND USING FILE MANAGER The C ™ LS9Q has the ability to store and recall label files. Label files are OUGAR stored and recalled within File Manager. Label files are designated with a .LS8 ending. The file type is shared with the P ™... -
Page 31: Labeling Exercises
LABELING EXERCISES Exercise 1 Create a wire marker on continuous cloth tape • Step 1: Insert a continuous cloth tape cassette, such as T100X000C1C- • Step 2: When prompted, select New Blank File. Save previous label if necessary. • Step 3: Step 4: Set length as 1.50 inches •... - Page 32 LABELING EXERCISES Exercise 3 Create basic text on continuous tape • Step 1: Insert a continuous tape label cassette such as T100X000VUC- • Step 2: When prompted, select New Blank File. Save previous label if necessary. • Step 3: Type 220 VOLTS •...
- Page 33 LABELING EXERCISES Exercise 4 Create serialized wire markers with heat shrink tubing • Step 1: Insert a heat shrink tubing label cassette such as H000X044F1C • Step 2: When prompted, select New Blank File. Save previous label if necessary. • Step 3: Type WIRE •...
- Page 34 LABELING EXERCISES Exercise 5 Create a symbol label on continuous tape • Step 1: Insert a continuous tape label cassette, such as T100X000VXC- • Step 2: When prompted, select New Blank File. Save previous label if necessary. • Step 3: Press SHIFT key and let go •...
- Page 35 LABELING EXERCISES Select Place On… Labels (this allows more than 9 terminals in a serialization • Step 5: Press Print If you see the Tools too big error, then reduce the font size, increase terminal space, or check the label rotation. Hint: You can separate the terminal legends with lines across the label.
- Page 36 LABELING EXERCISES Create a face plate or patch panel label • Step 1: Insert a continuous tape label cassette, such as T100X000VXC- • Step 2: When prompted, select New Blank File. Save previous label if necessary. • Step 3: Type “A” •...
-
Page 37: Printer Cleaning Instructions
PRINTER CLEANING INSTRUCTIONS Cleaning the Print head and Drive Roller The LS9Q printer is cleaned using the LS9-CLN, cleaning kit. The print head should be cleaned regularly, and more often in harsh environments. The print head should be cleaned whenever any irregular printing results occur. -
Page 38: Printer Cleaning Instructions
PRINTER CLEANING INSTRUCTIONS Cleaning the Cutter Blade The cutter blade should be cleaned when the quality of the cut indicates that the blade may be dirty. Turn OFF power to printer. Remove the cassette door. Unlock the print head latch. Remove the label cassette from the printer. -
Page 39: Printer Troubleshooting
PRINTER TROUBLESHOOTING This section helps identify printer conditions and problems that can often be solved by the user. If you are unable to correct the problem contact Panduit Technical Support at 866-871-4571 or Panduit Customer Service at 800-777- 3300. SYMPTOM ACTION POWER Printer does not... - Page 40 PRINTER TROUBLESHOOTING SYMPTOM ACTION Printed image is full, • Print head heat setting is too high. Reduce heat but grayish or setting. The heat setting is accessible in the Setup “translucent”. menu. Press the SETUP key, scroll down to heat and Press ENTER.
-
Page 41: Frequently Asked Questions
FREQUENTLY ASKED QUESTIONS Question: How do you cut the labels? Answer: Fully press and then release the cutter button. The cutter button is located on the top of the LS9Q printer adjacent to the label exit. Question: What is the partial cut function and how is it adjusted? Answer: Partial cutting enhances productivity and organization by keeping a strand of labels together for pulling apart at a job... -
Page 42: Frequently Asked Questions
FREQUENTLY ASKED QUESTIONS Question: If my cassette runs out during a print job, after I reinstall another cassette, will the print job begin where it left off? Answer: No, the print job will start over. To avoid printing duplicate labels, you can change the printing parameters, such as the serialization start or end, before printing. -
Page 43: Warranty Information
WARRANTY INFORMATION PANDUIT Tool and Printer Warranty: Panduit tools and printers are warranted to be free from defects in material and workmanship at the time of sale but Panduit’s obligation under this warranty is limited to the replacement of any tool or printer proved to be defective within 1 year (for printers) and 90 days (for tools) from the date of purchase. -
Page 44: General Specifications
GENERAL SPECIFICATIONS Print Method: Thermal transfer Effective Print Width: 1.00” (25.4 mm) Print Length: 12.00” (maximum label length) Print Resolution: 203 dpi (horizontally and vertically) Label Width: 0.24” to 1.0” Media Length: Up to 25’ continuous tapes Media Types: Continuous tapes and continuous heat shrink tubing Materials: Heat shrink tubing, vinyl tape, vinyl cloth tape, polyester tape, polyolefin tape... -
Page 45: Global Technical Support Information
GLOBAL TECHNICAL SUPPORT INFORMATION COUNTRY/REGION TECHNICAL SUPPORT PHONE NUMBER Asia Pacific 65-6379-6700 Australia 61-3-9794-9020 Brazil 551136112434 Canada 866-871-4571 Europe 44-208-601-7200 Japan 81-3-376-77011 Latin America 01-800-36086-00 866-871-4571...
Need help?
Do you have a question about the COUGAR LS9Q and is the answer not in the manual?
Questions and answers