Simoco SRP9180 Operating Instructions Manual
Portable radio mpt1327 trunked simoco
Hide thumbs
Also See for SRP9180:
- User manual (63 pages) ,
- User manual (40 pages) ,
- User manual (50 pages)
Table of Contents
Advertisement
Advertisement
Table of Contents

Related Manuals for Simoco SRP9180


Summary of Contents for Simoco SRP9180
- Page 1 SRP9180 Portable Radio MPT1327 Trunked Operating Instructions Issue 1.3...
-
Page 2: Table Of Contents
Page 19 7.1.2 Group Page 19 7.1.3 Phone Book Edit Page 20 7.1.3.2 Delete an Entry Page 21 7.1.3.3 Edit an Existing Entry Page 21 7.1.3.4 Using The Keypad Page 22 Page 2 SRP9180 - Trunked Portable Radio User Guide... - Page 3 Appendix B - Numbering Conventions Page 27 Appendix C - Glossary Page 28 BEFORE USE Page 29 Switching On The radio Page 29 Problems And Hints Page 29 Care of your Radio Page 29 Page 3 SRP9180 - Trunked Portable Radio User Guide...
-
Page 4: General Safety
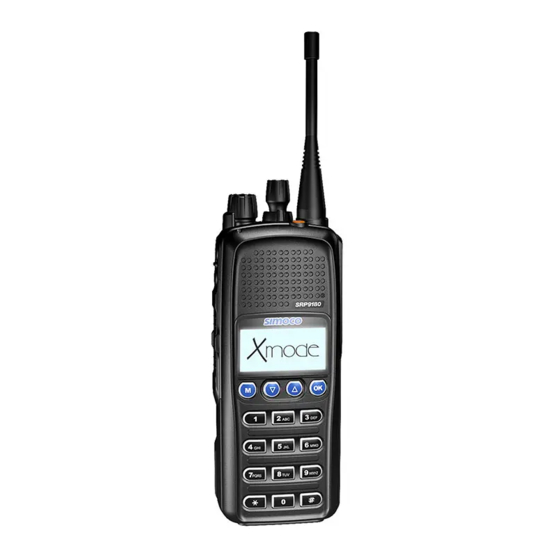
The SRP9180 Series Radio is a versatile Digital Signal Processor (DSP) controlled, twoway portable radio. The SRP9180 Series Radio is available in a number of frequency bands for specific applications. The radio is software programmable and can be customised to the operational requirements of your particular fleet. Your Simoco representative can help in programming your radio facilities to meet your present and future requirements. -
Page 5: Front Panel Controls
Confirm key. Special Function F5 Programmable function key. Special Function F6 Programmable function key. Special Function F7 Programmable function key. It is typically programmed as the Alarm /Emergency key. Page 5 SRP9180 - Trunked Portable Radio User Guide... -
Page 6: Menu System
3. MENU SYSTEM The SRP9180 radio software uses a programmed menu structure to enable the operator to access the radio options. The structure of the menu can be configured to meet the customer’s specific needs using the FPP . Figure 2 (overleaf) illustrates the menu structure of the radio. Note that the order and presence of each menu is determined by the configuration of the radio programmed by the FPP . -
Page 7: Menu System
‘M’ ‘M’ ‘M’ Scroll through Phone Group Phonebook Group Book menu Entries Default Screen ‘M’ User options ENTRY POINT SubMenu Selection Page 7 SRP9180 - Trunked Portable Radio User Guide ebMeybMe bMeBbMeebMeebMepbMesSelec0 c 0 - 3 8 8 . 9... -
Page 8: Phonebook Screen
The asterisk symbol indicates Call Pending, i.e. there is an outgoing call waiting for the radio to be In Service. The key icon indicates that the keypad lock function is activated. Page 8 SRP9180 - Trunked Portable Radio User Guide... -
Page 9: Stored Calls Screen
To return to the Phonebook Screen without making a call, either press M (back) twice or press OK for the pop-up menu and select Exit. Pressing the function key assigned as Clear will also exit to the Phonebook Screen. Page 9 SRP9180 - Trunked Portable Radio User Guide... - Page 10 Press OK key to bring up a popup menu with functions: More Delete: Delete the message and go to stored calls Screen Exit: Go to idle Screen Press M to remove the popup Page 10 SRP9180 - Trunked Portable Radio User Guide...
-
Page 11: Recall Screen
Use this Screen to view and send Status Messages from the programmed list. The Screen will always open at the last viewed message. • Press the keys to scroll through the Status list. • Press the nominated Clear * key to return to the Phonebook Screen without making a call. • Press OK to go to the Phonebook Screen with the Status Message Dialstring ready for editing (the keypad is enabled for this step). Status Screen * A function key (usually F6) can be programmed as a Clear key using the FPP . Page 11 SRP9180 - Trunked Portable Radio User Guide... -
Page 12: Call Types Screen
• When the message is complete, press OK to go to the Phonebook Screen. • Select the destination address using the keys and press OK to send. Alternatively, the address can be manually entered from this Screen. 4.7 SETUP SCREEN Use this Screen to access the other Setup submenus. • Press OK and the keys to show the sub-menus. See Section 7 for further information. Page 12 SRP9180 - Trunked Portable Radio User Guide... -
Page 13: Common Functions And Facilities
The top On/Off/Volume knob adjusts the speech level at the loudspeaker or remote speaker microphone. Rotating clockwise increases the volume and anti-clockwise decreases the volume. Note: The radio can be programmed so that the volume cannot be turned off completely. Page 13 SRP9180 - Trunked Portable Radio User Guide... -
Page 14: Call Types
Status Calls. Allow a status number to be sent between users. The SRP9180 allows text messages to be associated with up to 30 status numbers and can display these text messages when such a status is to be sent or is received. -
Page 15: Making A Voice Cal
A conversation can now take place with each operator taking turns to press their Press-To- Talk (PTT) keys and speaking. When the call is finished, either operator can end the call by pressing the nominated Clear * key or press * #. Note: If the called radio cannot be contacted (radio off or out of range) a Radio Busy or Unavailable message is displayed and call-fail tones are emitted. * Note that F6 is usually assigned as the Clear key. Page 15 SRP9180 - Trunked Portable Radio User Guide... -
Page 16: Making A Status Call
If the Status Number and the destination ID Number are known, use the keypad to enter the numbers in the following format: * n * x # where n is the Status Message Number (01 – 20), and x is and the destination ID Number. eg * 0 2 * 3 5 # where Status Message Number 02 = ‘At Lunch’, and destination ID Number 35 = ‘Andrew Jones’ means A Status Call was sent to ‘Andrew Jones’ indicating the sender was ‘At Lunch’. Note: You cannot send a Status Message during a Voice Call. Page 16 SRP9180 - Trunked Portable Radio User Guide... -
Page 17: Receiving A Call
6.2 RECEIVING A CALL The SRP9180 will respond to incoming calls according to the type of call being received. There are three types of call: • Individual Voice Call. • Group Voice Call. • Status Message or Data Message. 6.2.1 Receiving an Individual Voice Call When a call is received both radios will be connected and will display the audio enabled icon. -
Page 18: Receiving A Group Voice Call
If not already displayed, the icon appears on the Main Phonebook Screen and a short ‘bip’ is emitted every 5 seconds to alert the user that a new message has been received. Page 18 SRP9180 - Trunked Portable Radio User Guide... -
Page 19: Setup
• Groups 1 to 8 have been set up by the programmer and cannot be changed by the user.. • Groups 9 to 16 are dynamically assigned by the Trunk Network and cannot be changed by the user. • Groups 17 to 24 are editable by the user. These groups are defined via the * 50 *… to * 57 *… dialstrings • Use the OK key to return to the idle Phonebook Screen. Page 19 SRP9180 - Trunked Portable Radio User Guide... -
Page 20: Phone Book Edit
Enter the New Entry number using the keypad. Press OK. Next, enter New Entry text using the ABC keypad (see 7.1.3.4 below). Press OK again to exit back to the Idle Screen. Page 20 SRP9180 - Trunked Portable Radio User Guide... -
Page 21: Delete An Entry
Next, edit the number using the F6 key (destructive backspace) and keypad and press OK. Next, edit the text using the keys to move along the text and the “0” key to erase characters. Press OK when finished. (See 7.1.3.4 below). Page 21 SRP9180 - Trunked Portable Radio User Guide... -
Page 22: Using The Keypad
Volume setting. The level can be set in 63 steps over the range -31 to +31. • Use the keys to change the relative alert level. • Press OK or Back to accept the setting and return to the Idle Screen. Note: A minimum Alert Level may be set to ensure Alerts can always be heard from the speaker. Page 22 SRP9180 - Trunked Portable Radio User Guide... -
Page 23: Radio Information
7.1.6 Radio Information This Screen displays information that identifies the: • Programmer File description, • Software Version • Selcall ID; and, • Radio Serial Number and ESN. Press OK to return to the Idle Screen. Press Back to return to the Menu Select Screen. Page 23 SRP9180 - Trunked Portable Radio User Guide... -
Page 24: Troubleshooting
Number Unobtainable Transmit Confirmed Call Clear Item Duration Warning Go to Traffic Channel No Transmittal Allowed Wrong Key Press Call Diversion Call Fail System Busy Call Fail Unavailable Call Fail Radio Busy Page 24 SRP9180 - Trunked Portable Radio User Guide... -
Page 25: Appendix B - Dial Strings
Appendix B - Dial Strings The following conventions and dial strings apply on the SRP9180 radio. Dial Strings DESCRIPTION CALL MODIFIER Abbreviated PSTN Codes **nn nn = 1 to 45 Call Set up Abandon/Call Complete *# or Red Handset Button Accept Incoming Call # or PTT or Green Handset Status Call *0n*...# , n = 1 to 30... -
Page 26: Appendix A - Call Progress
Page 26 SRP9180 - Trunked Portable Radio User Guide... -
Page 27: Appendix B - Numbering Conventions
Unit/Group NN in small fleet FFFF, in prefix PPP , PPP = 200-329, FFFF = 2001-6050, NN = 20-99 PPPFFFFNNN Unit/Group NNN in large fleet FFFF, in prefix PPP , PPP = 200-329, FFFF = 2001-6050, NN = 200-998 0NNN... PSTN Call to number NNN..., NNN... can be up to 30 digits in length Page 27 SRP9180 - Trunked Portable Radio User Guide... -
Page 28: Appendix C - Glossary
Service. The radio has established communications with the trunking structure. Status Number The code that transmits the status of the mobile to the controller automatically Page 28 SRP9180 - Trunked Portable Radio User Guide... -
Page 29: Before Use
PROBLEMS AND HINTS The SRP9180 Radio is a high quality reliable product. In the unlikely event of a problem, please check the following points before contacting your supplier: If the Radio fails to work, check that the battery is charged and correctly fitted and that the radio is switched on. - Page 30 Tel: 01224 471335 www.scot-tel-gould.co.uk...
Need help?
Do you have a question about the SRP9180 and is the answer not in the manual?
Questions and answers