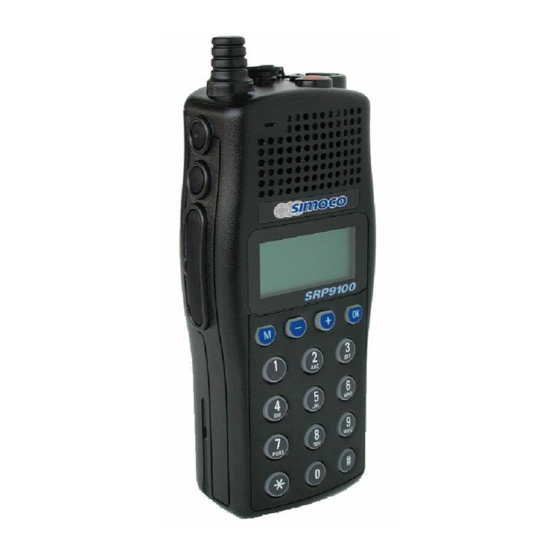
Simoco SRP9100 Operating Instructions Manual
Conventional – pmr
Hide thumbs
Also See for SRP9100:
- Operating instructions manual (51 pages) ,
- Alignment procedure (13 pages)

Related Manuals for Simoco SRP9100


Summary of Contents for Simoco SRP9100
-
Page 1: Operating Instructions
SRP9100 Portable Radio Conventional – PMR Operating Instructions TNM-U-E-0047 Issue 1.2a, January 2010 Comgroup Australia Pty. Ltd. 1270 Ferntree Gully Road Scoresby Victoria, 3179 Australia www.comgroup.net.au... -
Page 3: Associated Documentation
To order copies of any of the above publications, or any other Simoco product, contact SImoco on +61 3 9730 3800 or send a Fax on +61 3 9730 3968. The Simoco web site also has a comprehensive list of documentation available for download. -
Page 4: Safety
Do NOT dispose of batteries in a fire. EMR SAFETY The SRP9100 portable radio transceiver complies with the RF exposure guidelines as defined in the ARPANSA* standard "Radiation Exposure Levels to Radiofrequency fields – 3kHz to 300GHz", Schedule 5 when: (1) the radio is operated by an "aware"... -
Page 5: Table Of Contents
SRP9100 ~ PMR Portable Radio User Guide CONTENTS ASSOCIATED DOCUMENTATION ............I ABOUT THIS DOCUMENT ............... I SAFETY ....................II EMR SAFETY ..................II HINTS FOR USING THE RADIO ............. II CONTENTS..................... III 1. INTRODUCTION ................1 1.1 Overview..................1 1.2 Configuration ................1 2. - Page 6 SRP9100 ~ PMR Portable Radio User Guide 5.4 SELCALL Functions..............15 5.4.1 Receiving a Selcall............15 5.4.2 Sending a Selcall ............. 15 5.4.3 Other Selcall Functions ............ 15 5.5 Scan Functions ................ 17 5.5.1 Scan Screen..............17 5.5.2 Scan-Edit Screen [keypad version only]......18 5.6 MUTE Level Setting..............
- Page 7 SRP9100 ~ PMR Portable Radio User Guide 7.12 Repeater Defeat ................25 7.13 Low Power ................25 7.14 Channel Up and Down .............25 7.15 Send Channel Encode..............25 7.16 Send DTMF 1 and 2 ..............25 7.17 User CTCSS ................25 7.18 Scramber On/Off ...............25 8.
-
Page 9: Introduction
PMR mode of the SRP9100. ONFIGURATION Before you can use the SRP9100, it must be configured using the Field Personality Programmer (FPP). The configuration process loads the customised radio channels, signalling and user options so that the radio will operate with your system. -
Page 10: Front Panel Controls
SRP9100 ~ PMR Portable Radio User Guide 2. FRONT PANEL CONTROLS Indicator LED Accessory Socket Function Button # 7 Often used as Alarm On-Off Volume Function Button # 5 Microphone Function Button # 6 Function Button # 3 Press To Talk Switch... - Page 11 SRP9100 ~ PMR Portable Radio User Guide Function Button F3 + This button’s function may be configured by the programmer, it is typically programmed as the channel up key Function Button F4 OK This button’s function may be configured by the programmer, it is typically programmed as the Send Channel Encode key.
-
Page 12: Menu System
SRP9100 ~ PMR Portable Radio User Guide 3. MENU SYSTEM The SRP9100 radio software uses a programmed Menu structure to enable the operator to access all of the radio options. The structure of the menu (comprising up to thirteen screens) can be programmed to meet the specific needs of individual customers. -
Page 13: Default Settings
SRP9100 ~ PMR Portable Radio User Guide EFAULT ETTINGS Pressing the “M” key steps through the Once in the Set-up sub menu, pressing the menus on the left. The Set-up sub menu “M” key steps through the sub menus. Exit on the right can be entered by pressing by reset key or wait for timeout. -
Page 14: Main Menu Screens
SRP9100 ~ PMR Portable Radio User Guide 4. MAIN MENU SCREENS HANNELS CREEN Channel Number Battery Level Mt Buller Channel Name Signal Strength (RSSI) The Channels Screen shows the current channel and allows it to be changed. The Channel Name shows the text associated with the radio channel. -
Page 15: Phonebook Screen
SRP9100 ~ PMR Portable Radio User Guide The Keypad may be used to enter numbers directly, which temporarily appear on the Message-Line, e.g. Changing channels from the keypad can be done by entering the channel number and pressing the ‘#’ button. [only available on... -
Page 16: Status Screen
SRP9100 ~ PMR Portable Radio User Guide TATUS CREEN This Screen need only be accessed if Selcall is used. Selcall Status is stored here and can be sent from this Screen. Status Number Battery Level On Route Status Text Signal Strength (RSSI) The -/+ buttons scroll through the Status List entries. -
Page 17: Stored Calls Screen
SRP9100 ~ PMR Portable Radio User Guide TORED ALLS CREEN This screen allows the ten most recent missed Selcalls (ones not answered before the Alert-tone stops) and received Status Selcalls to be reviewed. icon will show in the Main Channel Screen when there is an entry in this Screen. - Page 18 SRP9100 ~ PMR Portable Radio User Guide ESSAGE CREEN This Screen allows the user to send a free form text message to another radio user in a similar manner to a cell phone SMS. Memory Entry Number (defined by FPP)
-
Page 19: Setup Screen
SRP9100 ~ PMR Portable Radio User Guide ETUP CREEN Use this Screen to access the other Set-up submenus. Memory Entry Number (defined by FPP) User Options Press (OK) button to show the first of the submenus, and then the -/+ buttons to scroll through these screens. -
Page 20: Common Functions And Facilities
SRP9100 ~ PMR Portable Radio User Guide 5. COMMON FUNCTIONS AND FACILITIES WITCH WITCH Turn the On/Off/Volume Knob clockwise to switch the portable radio ON. The display will illuminate and show a ‘Welcome Message’ and the Selcall Identity of the portable radio. -
Page 21: Receiving
SRP9100 ~ PMR Portable Radio User Guide ECEIVING Channel Number Received Signal Strength Mt Buller (Scan / Vote) Channel Name Signal Received The portable radio will listen on the displayed Channel. The Speaker Icon will show when a valid signal is being received and audio will be heard at the Loudspeaker. -
Page 22: Transmitting
SRP9100 ~ PMR Portable Radio User Guide RANSMITTING To avoid interfering with other users of the channel, listen first to ensure no transmissions are occurring. Make sure that the Speaker Icon is not shown. Hold the portable a few centimeters from the mouth, press the “Press to talk”... -
Page 23: Selcall Functions
Refer to sections on Phonebook Screen (page 7) and Status Screen (page 8) for methods of sending a Selcall. 5.4.3 Other Selcall Functions The SRP9100 series has several other functions that affect how the radio operates with received signals or selcalls. These are described later in this booklet under the headings: Monitor/Reset (refer to Section 7.1) - Page 24 SRP9100 ~ PMR Portable Radio User Guide Transpond Enable (refer to Section 7.6) Send-1, Send-2 (refer to Section 7.5) Special Encode1...8 (refer to Section 7.10) TNM-U-E-0047 Issue 1.2a Page 16 © Comgroup Australia 2010...
-
Page 25: Scan Functions
SRP9100 ~ PMR Portable Radio User Guide UNCTIONS Scanning consists of sequentially searching up to 16 channels for a valid signal (RF, CTCSS or DCS tone). When found, the radio will stop on that channel until the signal disappears again. -
Page 26: Scan-Edit Screen [Keypad Version Only]
SRP9100 ~ PMR Portable Radio User Guide selected or if the Scan Channel is re-selected. The Priority Channel cannot be skipped. Scan groups may be assigned as user scan groups using the field programmer. There may be up to 4 user scan groups. -
Page 27: Mute Level Setting
SRP9100 ~ PMR Portable Radio User Guide To add a channel to the scan group, press the 1 key followed by the channel to add, and then the # key. To add channel 34, press 134#. To change the priority channel, press the 2 key followed by the new priority channel group, and then the # key. -
Page 28: Setup
SRP9100 ~ PMR Portable Radio User Guide 6. SETUP The Set-up sub-menus allow the operator to edit/modify the operation of some of the general functions of the radio. The programmer can restructure or restrict access to any or all of these menus and may restructure them according to specific requirements. -
Page 29: User Options
SRP9100 ~ PMR Portable Radio User Guide 6.1.1 User Options The User Options Screen allows the Keybeeps, Backlight, Dual Watch and DTMF facilities to be set On or Off. Use the -/+ buttons to scroll between the different facilities. Key Beeps The OK button toggles the selection On/Off. - Page 30 SRP9100 ~ PMR Portable Radio User Guide 6.1.3.2 DELETE AN ENTRY Bring up phone book edit on the screen as for add entry and press the -/+ keys to select the entry to delete. When the chosen entry is displayed, press the OK key. The number will be now displayed.
-
Page 31: Contrast
SRP9100 ~ PMR Portable Radio User Guide 6.1.4 Contrast The Contrast Screen allows you to set the contrast level of the Display in the range from 0 to 15. Use the -/+ to select the required level. Contrast Press OK to accept the setting and go to the Channel Screen. -
Page 32: Special Function Buttons
7. SPECIAL FUNCTION BUTTONS This section lists Functions that may be programmed to the F1, F2, F3, F4, F5 F6 or F7 buttons. Consult your Simoco Dealer for which functions have been programmed in to your radio. ONITOR Opens/Closes the audio (signaling) mute. -
Page 33: Alarm
SRP9100 ~ PMR Portable Radio User Guide 7.11 LARM Put the mobile into Alarm mode. 7.12 EPEATER EFEAT Allows the radio to transmit on the reverse frequency on a Repeater Channel. When the button is pressed again (or the Channel is changed) the transmit frequency reverts to the original setting. -
Page 34: Options
SRP9100 ~ PMR Portable Radio User Guide 8. OPTIONS The following options are available, contact your dealer for further information. APACITY ATTERY This battery can be used where there are more demands on the time that the radio must be operational, or where transmissions are more frequent. -
Page 35: Troubleshooting
If, after reading this guide, you are unable to switch the radio on, check that the battery is charged and correctly attached. If these checks are OK, contact your dealer or SImoco representative for further advice. © Comgroup Australia 2010... -
Page 36: Appendix A - Alert Tones And Messages
Appendix A - Alert Tones and Messages 0.05 Key Beep 440 Hz 880 Hz 0.05 Error Tone 1480 Hz Duration Indicated in seconds 0.10 Beep Alert 0.10 Bip Alert 0.10 2 x Bip Alert Ring Alert Telephone Ring Tone 0.19 Urgent Alert Continuous Continuous Alert... -
Page 37: Appendix C - Glossary
SRP9100 ~ PMR Portable Radio User Guide Appendix C - Glossary A summary of common radio terms and some other terms used in this document, and their meanings, are given below. The transceiver emits these tones to indicate an Alert tones invalid operator or error.
Need help?
Do you have a question about the SRP9100 and is the answer not in the manual?
Questions and answers