Stanley CS11 Service Manual
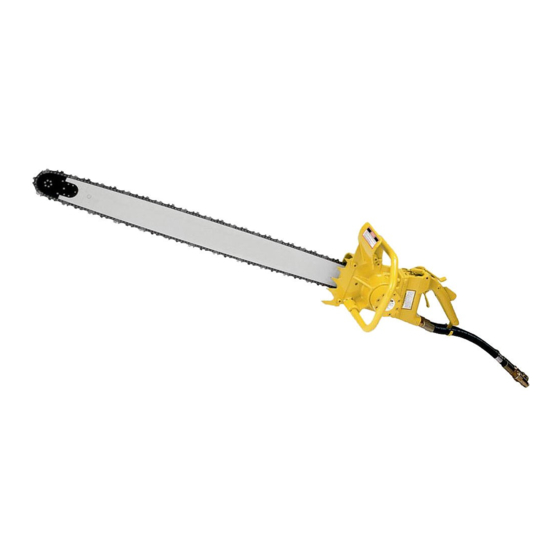
Hydraulic chain saw
Hide thumbs
Also See for CS11:
- Service manual (32 pages) ,
- User manual (25 pages) ,
- User manual (24 pages)
Table of Contents
Advertisement
Quick Links
Download this manual
See also:
User Manual
Advertisement
Table of Contents

Related Manuals for Stanley CS11


Summary of Contents for Stanley CS11
- Page 1 CS11 HYDRAULIC CHAIN SAW afety peratiOn and aintenance SerVice ManUaL © 2010 Stanley Black & Decker, Inc. New Britain, CT 06053 U.S.A. 05427 5/2012 Ver. 6...
-
Page 2: Declaration Of Conformity
Provisiones especiales: Disposizioni speciali: Representative in the Union: Patrick Vervier, Stanley Dubuis 17-19, rue Jules Berthonneau-BP 3406 41034 Blois Cedex, France. Vertreter in der Union/Représentant dans l’union/Representante en la Union/Rappresentante presso l’Unione Done at/Ort/Fait à/Dado en/Fatto a Stanley Hydraulic Tools, Milwaukie, Oregon USA... -
Page 3: Table Of Contents
REPAIRS AND / OR SERVICE TO THIS TOOL MUST ONLY BE DONE BY AN AUTHORIZED AND CERTIFIED DEALER. For the nearest authorized and certified dealer, call Stanley Hydraulic Tools at the number listed on the back of this manual and ask for a Customer Service Representative. -
Page 4: Safety Symbols
Always observe safety symbols. They are included for your safety and for the protection of the tool. LOCAL SAFETY REGULATIONS Enter any local safety regulations here. Keep these instructions in an area accessible to the operator and mainte- nance personnel. 4 ► CS11 Service Manual... -
Page 5: Safety Precautions
Keep all parts of your body away from the chain saw the space provided in this manual. and maintain proper footing and balance at all times. The model CS11 Hydraulic Chain Saw will provide safe • Do not rely exclusively upon the safety devices built and dependable service if operated in accordance with into the saw. - Page 6 Only use replacement bars and chains specified by • When using tools near energized transmission lines, Stanley Hydraulic Tools. Chains must meet the re- be sure to use only hoses labeled and certified non- quirements of ANSI B175.1 for low kickback perfor- conductive.
-
Page 7: Electrical Hazards
345.0 to 362.0 13–02 4.02 15–00 4.58 16–03 4.96 500.0 to 550.0 19–00 5.80 21–09 6.63 23–06 7.17 765.0 to 800.0 27–04 8.34 31–03 9.53 33–10 10.32 1. Exceeds phase-to-ground; elevation factor per 29 CFR 1910.269. CS11 Service Manual ◄ 7... - Page 8 Electrical system own- While climbing, the arborist should climb on the side of ers/operators shall be notified immediately. the tree that is away from energized electrical conduc- tors as required in Tables 1 and 2. 8 ► CS11 Service Manual...
-
Page 9: Tool Stickers & Tags
TOOL OPERATOR. before removal. We suggest you retain this tag and SEE OTHER SIDE SEE OTHER SIDE attach it to the tool when not in use. SAFETY TAG P/N 15875 (shown smaller then actual size) CS11 Service Manual ◄ 9... -
Page 10: Hose Types
HOSE SAFETY TAGS To help ensure your safety, the following DANGER tags are attached to all hose purchased from Stanley Hydraulic Tools. DO NOT REMOVE THESE TAGS. -
Page 11: Hose Recommendations
HOSE RECOMMENDATIONS CS11 Service Manual ◄ 11... -
Page 12: Htma Requirements
2000 psi 2000 psi 2000 psi (at the power supply outlet) (172 bar) (138 bar) (138 bar) (138 bar) (138 bar) NOTE: These are general hydraulic system requirements. See tool specification page for tool specific requirements 12 ► CS11 Service Manual... -
Page 13: Operation
Stanley representative or your county agent. They can often provide infor mation that will make your work The hydraulic system should have a minimum of 25 mi- safer and more productive. -
Page 14: Figure 2. Felling A Tree
Look out for stresses in the log and cut through the log in such a manner that the guide bar will not get pinched. 14 ► CS11 Service Manual... -
Page 15: Figure 3. Crosscutting Logs With Pressure On Top
4. Cut from the bottom. Make a boring cut if the log is close to the ground. 5. Finish with a bottom cut. Figure 4. Crosscutting Logs Larger than Bar Length With Pressure on Top CS11 Service Manual ◄ 15... -
Page 16: Figure 5. Crosscutting Logs/Limbs With Pressure On Bottom
3. Be alert for kickback. Do not allow the tip of the bar to touch anything while the chain is in motion. 4. Do not cut overhead. Keep the saw below chest lev- el. The chain is too close to your face in this position. 16 ► CS11 Service Manual... -
Page 17: Cold Weather Operation
Never force a dull chain to cut. 4. Clean out the bar groove and keep the oil hole open. Turn the bar over to equalize wear on the rails. 5. Always install a new sprocket with a new chain. CS11 Service Manual ◄ 17... -
Page 18: Tool Protection & Care
This can cause damage to internal seals. • Always replace hoses, couplings and other parts with replacement parts recommended by Stanley Hydraulic Tools. Supply hoses must have a mini- mum working pressure rating of 2500 psi/172 bar. 18 ► CS11 Service Manual... -
Page 19: Troubleshooting
Oil leakage between rear gear Motor face seal failure. Replace as required. housing and valve handle assembly. Chain continues to move after Chain is too loose. Tighten chain. valve is shut off. Input flow too high. Decrease flow. CS11 Service Manual ◄ 19... -
Page 20: Specifications
42-inch Saw Chain ............................72954 42-inch Cut Sprocket Nose Bar .........................72950 Stud Kit To Convert old CS11’s To New Bar (Includes 2-Stud’s, 2 Nuts, 2 Washers & Inst Sheet) ....72960 This new bar change started end of May 2012 SERVICE TOOLS Motor Seal Kit, 3 Pc (for P/N 03272 Motor) .......................03327... -
Page 21: Cs11 Parts Illustration
CS11 PARTS ILLUSTRATION NOTE: If you have a CS11 built in 2011 or earlier and you are replacing either the Spool (item 36) or the Plug (item 54) you must replace 3 items. The spool and plug have changed along with the addition of a Poppet (item 92). -
Page 22: Cs11 Parts List
SEAL KIT (CS11)............10569 • 02921 AUTO OILER ADJUSTMENT PLUG REPAIR KIT (Includes Seal Kit 10569)......10570 12535 CIRCUIT TYPE “E” DECAL (* Denotes Part in Seal Kit) (• Denotes Part in Repair Kit) 12536 CIRCUIT TYPE “F” DECAL 22 ► CS11 Service Manual... -
Page 23: Service
3/16 inch/5 mm diameter punch. ery cloth. 6. Install the 3/16 × 1-3/8 inch roll pin. Thoroughly clean all parts before assembly. CS11 Service Manual ◄ 23... - Page 24 Push on the small end of the motor shaft until the shaft and bearing(s) slide free. Be careful REMOVAL not to bend the motor shaft. 1. Remove the two bar clamping nuts and washers, chain guard, saw bar, and chain. 24 ► CS11 Service Manual...
- Page 25 In- The graphite seal liner must not be forced, pried spect motor shaft for corre sponding wear and replace or pushed on directly because it can be easily as required. damaged. CS11 Service Manual ◄ 25...
- Page 26 2. Align the motor mounting holes and secure the mo- assembly. tor using the two 5/16-18 × 3/4 inch oval head ma- chine screws. 26 ► CS11 Service Manual...
-
Page 27: Figure 7. Rail Wear
NOTE: Authorized chain saw dealers have equipment to close the rails. Oil output will vary proportionally to load and oper- ating pressure. It should be adequate for most op- erations as adjusted at the factory. CS11 Service Manual ◄ 27... - Page 28 5. Pull the chain around the bar by hand to be sure it fits the sprocket and bar properly. The chain should move easily. 6. Tighten the two 3/8-16 bar stud nuts. 28 ► CS11 Service Manual...
-
Page 29: Figure 8. Chain Sharpening
If the depth gauge extends above the slot, file them level with a flat file. Depth gauge setting is .025 inch. 3. After lowering, round off the front edge to its original shape. CS11 Service Manual ◄ 29... - Page 30 Stanley Hydraulic Tools 3810 SE Naef Road Milwaukie, Oregon 97267-5698 USA (503) 659-5660 / Fax (503) 652-1780 www.stanleyhydraulic.com IMPORTANT To fill out a Product Warranty Recording form, and for information on your warranty, visit Stanleyhydraulic.com and select the Warranty tab.
Need help?
Do you have a question about the CS11 and is the answer not in the manual?
Questions and answers