Table of Contents
Advertisement
Quick Links
Advertisement
Table of Contents

Related Manuals for Stanley DS06


Summary of Contents for Stanley DS06
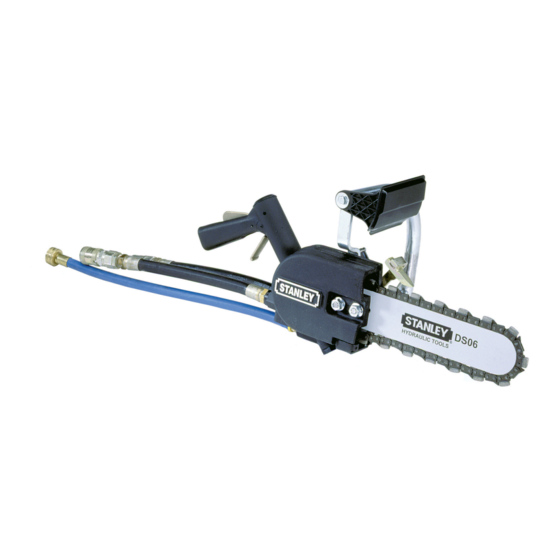
- Page 1 DS06 HYDRAULIC DIAMOND SAW WARNING AFETY PERATION AND AINTENANCE SERVICE MANUAL Stanley Hydraulic Tools 3810 SE Naef Road Milwaukie OR 97267-5698 Copyright © 2005, The Stanley Works 503-659-5660 OPS/MAINT USA FAX 503-652-1780 34567 8/2005 Ver 3 www.stanley-hydraulic-tools.com...
-
Page 3: Table Of Contents
REPAIRS AND / OR SERVICE TO THIS TOOL MUST ONLY BE DONE BY AN AUTHORIZED AND CERTIFIED DEALER. For the nearest authorized and certifi ed dealer, call Stanley Hydraulic Tools at the number listed on the back of this manual and ask for a Customer Service Representative. -
Page 4: Certificate Of Conformity
Self 3744 1994 Self 10726 1992 Self Special Provisions: None Spezielle Bestimmungen: Dispositions particulières: Provisiones especiales: Disposizioni speciali: Done at/Ort/Fait à/Dado en/Fatto a Stanley Hydraulic Tools, Milwaukie, Oregon USA Date/Datum/le/Fecha/Data 3/98 Signature/Unterschrift/Signature/Firma/Firma____________________________________________________________________________ Position/Position/Fonction/Puesto/Posizione Engineering Manager P/N 62310 rev 03 3/05... -
Page 5: Safety Symbols
SAFETY SYMBOLS Safety symbols and signal words, as shown below, are used to emphasize all operator, maintenance and repair actions which, if not strictly followed, could result in a life-threatening situation, bodily injury or damage to equip- ment. This is the safety alert symbol. It is used to alert you to potential personal injury hazards. -
Page 6: Safety Precautions
4. Cut at rated operating speeds (gpm). 5. Do not overreach or cut above shoulder height. 6. Only use replacement bars and chains specifi ed by Stanley or the equivalent. • Make sure the chain guard is in place before operating the chain saw. - Page 7 SAFETY PRECAUTIONS • Remove or control the water slurry to prevent yourself or others from slipping while cutting. • Provide adequate ventilation in closed areas when operating a gas or diesel hydraulic power source. • Always be well rested and mentally alert before operating the chain saw. •...
-
Page 8: Tool Stickers & Tags
USE ONLY PARTS AND REPAIR USE ONLY PARTS AND REPAIR suggest you retain this tag PROCEDURES APPROVED BY PROCEDURES APPROVED BY STANLEY AND DESCRIBED IN THE OPERA- STANLEY AND DESCRIBED IN THE OPERA- and attach it to the tool TION MANUAL. TION MANUAL. -
Page 9: Hydraulic Hose Requirements
HOSE SAFETY TAGS To help ensure your safety, the following DANGER tags are attached to all hose purchased from Stanley Hydrau- lic Tools. DO NOT REMOVE THESE TAGS. -
Page 10: Htma Requirements
HTMA REQUIREMENTS TOOL CATEGORY HYDRAULIC SYSTEM REQUIREMENTS TYPE 1 TYPEII TYPEIII TYPE RR FLOW RATE 4-6 gpm 7-9 gpm 11-13 gpm 9-10.5 gpm (15-23 lpm) (26-34 lpm) (42-49 lpm) (34-40 lpm) TOOL OPERATING PRESSURE 2000 psi 2000 psi 2000 psi 2000 psi (at the power supply outlet) (138 bar) -
Page 11: Operation
OPERATION CONNECT HYDRAULIC HOSES PREOPERTION PROCEDURES 1. Wipe all hose couplers with a clean lint-free cloth before CHECK THE POWER SOURCE making connections. If necessary, use a light-weight pen- etrating oil in a spray can to clean the hose couplers before 1. -
Page 12: Check Chain Segment Wear
For advice on specifi c cutting problems or techniques, consult your local OPERATING PROCEDURES Stanley Representative. He/she can often provide information that will make your work safter and more productive. 1. Observe all safety precautions. -
Page 13: Types Of Cuts
OPERATION COLD WEATHER OPERATION TYPES OF CUTS If the saw is to be used during cold weather, preheat the The DS06 can be operated using the types of cuts shown hydraulic fl uid at low power source speed. When using the in Figure 5. -
Page 14: Maintenance & Adjustments
MAINTENANCE & ADJUSTMENTS GENERAL MAINTENANCE TIPS CHAIN TENSION ADJUSTMENT Correct chain tension is very important throughout the life Several simple maintenance tasks which, if performed, can of the chain. Check the chain tension often during use keep a chain saw operating at a high level of effi ciency. Routine maintenance also keeps replacement costs down (when the chain saw is stopped and the saw bar and chain have cooled off). -
Page 15: Servicing The Chain
Figure 11. Chain Breaker Mounting Note: The Stanley chain breaker is only designed to remove rivet heads from the connecting links, not from a chain segment. The rivet heads shown in the shaded areas of Figure 12 are the only ones that can be removed. -
Page 16: Maintenance & Adjustments
SPINNING RIVETS Figure 19. Securing the Chain The following procedures explain how to spin rivets using Stanley’s bench-mounted rivet spinner (part number 20857) to assembly the chain. 1. Mount the rivet spinner fl ush with the side or front of a... -
Page 17: Nose Sprocket Disassembly And Assembly
MAINTENANCE & ADJUSTMENTS 4. turn the rivet spinner crank a few times to center the rivet hub in the spinner anvil (Figure 20). Take-up Handle Rivet Spinner Crank Figure 23. Spinner Oiling Chambers Figure 20. Centering the Rivet Hub 5. Apply a few drops of oil to the rivet hub (Figure 21). NOTE: the rivet spinner is equipped with oiling chambers and should be maintained periodically with a light-weight... - Page 18 MAINTENANCE & ADJUSTMENTS 5. Insert 6 nose rivets into the holes and then hold them with your thumb. Remove the screwdriver and slide out the insertion card. Note: On used bars the nose rails might tend to spread apart. Use a small clamp if necessary to hold the rails together.
-
Page 19: Tool Equipment & Care
fl ow. This can cause damage to internal seals. • Always replace hoses, couplings and other parts with replacement parts recommended by Stanley Hydraulic Tools. Supply hoses must have a minimum working pressure rating of 2500 psi/172 bar. -
Page 20: Troubleshooting
TROUBLESHOOTING correct hydraulic fl ow and pressure to the tool as listed If symptoms of poor performance develop, the following in the table. Use a fl owmeter known to be accurate. chart can be used as a guide to correct the problem. Check the fl... - Page 21 TROUBLESHOOTING SYMPTOM CAUSE REMEDY Leakage around drive sprocket. Motor shaft seal failure. Have unit serviced. No water discharge at bar. Blocked port(s) in bar. Turn off hydraulic supply. Remove bar and chain and clean bar thoroughly. Blow ports with compressed air. Blocked inlet or outlet.
-
Page 22: Specifications
SPECIFICATIONS Cutting Depths ............................13 inches / 33 cm Bar Lengths ..............................13 inch / 33 cm Chain Type ......................3/8 inch pitch with 21 diamond segments Maximum Back Pressure ..........................250 psi/17 bar Input Flow Range 5 gpm model .......................... 4-6 gpm / 15-23 lpm 8 gpm model .......................... -
Page 23: Service
SERVICE INSTRUCTIONS a reduced diameter indicate fl uid contamination. If PRIOR TO DISASSEMBLY abnormal wear is present (more than normal polishing), replace both the spool and the handle. Clean exterior of the tool. 2. Apply grease and install a new o-ring (15) onto the ON/ Obtain a seal kit so that all seals exposed during disas- OFF valve (14). -
Page 24: Motor Inspection And Cleaning
SERVICE INSTRUCTIONS MOTOR SERVICING 11. To remove the bearing from the shaft, press on the out- side end (sprocket end) of the motor shaft while supporting 1. Remove the 2 nuts (51) and then lift off the chain guard the outer race of the bearing. Discard the old bearing. (50). - Page 25 SERVICE INSTRUCTIONS groove should be smooth as should the rest of the fl at Serial Number 357 and Above. surface. The bore for the shaft seal should be smooth or oil leakage may occur. GEAR HOUSING Shake the gear housing and the two seal check balls (not shown) should rattle.
-
Page 26: Bar & Chain And Chain Guard Assembly
SERVICE INSTRUCTIONS 4. Place the bar (with chain) over the studs making sure For Diamond Saws with Serial Number 357 and above follow steps a thru e. the chain is looped around the sprocket and the bar adjust- ment nut is seated in the hole on the bar. While holding For Diamond Saws with Serial Number 356 and below, the bar and chain in place, turn the adjustment screw (68) follow steps 10 thru 13. -
Page 27: Ds06 Parts Illustration
DS06 PARTS ILLUSTRATION For Serial Numbers 357 and Above. -
Page 28: Ds06 Parts List
For Serial Numbers DS06 PARTS LIST 357 and Above. Item Item Part No. Qty Description Part No. Qty Description 00753 HSHCS 10-24 UNC x 1-1/4 60804 O-Ring 33445 Name Tag 19215 Seal Back-Up Washer 11207 Circuit “D” Decal (8 gpm Model) 43689 Sprocket Adapter 11206... -
Page 29: Ds06 Parts Illustration
DS06 PARTS ILLUSTRATION For Serial Numbers 356 and Below. -
Page 30: Ds06 Parts List
DS06 PARTS LIST For Serial Numbers 356 and Below. Item Qty Part Description Item Qty Part Description • 00753 HSHCS 10-24UNCx1-1/4 60804 O-RING • 33445 NAME TAG 19215 SEAL LINER 11207 CIRCUIT "D" STICKER (8 gpm model) ----- NO ITEM 11206 CIRCUIT "C"... -
Page 31: Diamond Chain Applications
DIAMOND CHAIN APPLICATIONS Model Bar Length Correct Applications Very hard aggregate concretes (fl int, chert, granite, etc). Heavy steel 13 inch Pinnacle- reinforcing, 5/8 inch/16 mm diameter and larger. Medium/hard aggre- Pinnacle- gate concretes (granite, quartz, river rock, etc). Moderate steel rein- forcing (wire mesh 3/8-1/2 inch/10-12 mm diameter). -
Page 32: Warranty
SEALS & DIAPHRAGMS: Seals and diaphragms installed in new tools are warranted to be free of defects in material and/or workmanship for a period of 6 months after the date of fi rst usage, or for a period of 2 years from the shipping date from Stanley, whichever period expires fi rst. - Page 33 Stanley Hydraulic Tools 3810 SE Naef Road Milwaukie OR 97267-5698 503-659-5660 FAX 503-652-1780 www.stanley-hydraulic-tools.com...
Need help?
Do you have a question about the DS06 and is the answer not in the manual?
Questions and answers