
Subscribe to Our Youtube Channel
Related Manuals for Intelligent Weighing Technology Intell-Lab IL-0.0001 g


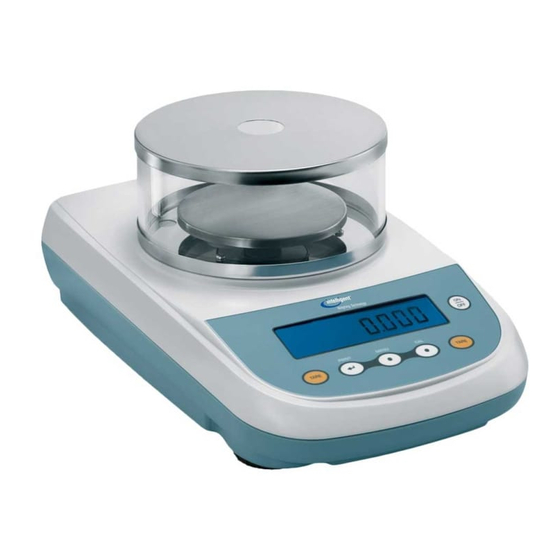
Summary of Contents for Intelligent Weighing Technology Intell-Lab IL-0.0001 g
- Page 1 A Higher Level of Precision… A Higher Level of Performance Intell-Lab™ IL 0.0001 g PB 0.001 g PB 0.01 g Service Manual...
- Page 3 Problem and solution for balances model IL-0.0001, PB-0.001 and PB-0.01g F a u l t P o s s i b l e c a u s e S e r v i c e T a b l e Balance not stable.
- Page 4 Mechanical group service IL-0.0001, PB-0.001, PB-0.01g F o r M o d e l I L 0 . 0 0 0 1 REMOVE THE BALANCE TOP COVER WITH DRAFTSHIELD (REMOVE ONE SCREW Fig.1 AND FOUR SCREWS UNDER THE BALANCE Fig2 Fig.2 Fig.1 REMOVE THE COVER SHIELD OF MECHANICAL GROUP,...
- Page 5 For Model PB-0.01 REMOVE THE BALANCE TOP COVER (REMOVE ONE SCREW Fig.1 AND FOUR SCREWS UNDER THE BALANCE Fig2) Fig.1 Fig.2 REMOVE THE COVER SHIELD OF MECHANICAL GROUP (REMOVE FOUR SCREWS Fig.3) Fig.3 For all Model PB-0.01, PB-0.001, IL-0.0001 REMOVE THE DISPLAY BOARD (REMOVE FOUR SCREWS Fig.1) AND COVER SHIELD OF MAINBOARD (REMOVE FIVE SCREWS Fig2) REMOVE THE CABLE OF OPTICAL GROUP (Fig.3) AND THEN REMOVE THE MECHANICAL GROUP (REMOVE THREE SCREWS UNDER THE BALANCE Fig.4)
- Page 6 Disassembly group for all Model PB-0.01, PB-0.001, IL-0.0001 The mechanical group is the same for all model except for: dimension of springs dimension of spacers cone 1. Take jigs for the moving pillar (two screws M5x20mm and two spacers) 2.
- Page 7 9. Turn the group up again 10. Remove the two ’ cone support screws 11. Remove the cone support 12. Take tool n°7 13. Remove the four screws of top parallelogram guide 15. Remove the top parallelogram guide, handle it carefully 17.
- Page 8 19. Position the jig on the moving pillar 20. Insert two screws in the holes of moving pillar and fix them. 21. Insert the clamping plate. 23. Insert screw and fix clamping plate with tool n °3. 24. Remove top screws of vertical spring, with tool n°3 26.
- Page 9 28. Remove the screws and spacer fixed jigs of moving pillar. 29. Remove moving pillar 30. Remove screws of fixed vertical spring with tool n°3 S p a c e r o f m o v i n g p i l l a r f o r : 0.0001g = n°1x0.5mm 0.001g = n°1x4mm...
- Page 10 35. Unsolder the gold wires. 36. Remove n°4 screws that fix the fulcrum flexures using tool n°7. 38. Remove the fulcrum flexures F u l c r u m f l e x u r e s : 0.0001g = Fulcrum flexures 0.5/0.09mm 0.001g = Fulcrum flexures 0.5/0.09mm 0.01g = Fulcrum flexures 0.51/0.10mm 38.
- Page 11 42. Remove magnet from below the monobloc Now if you need to remove the lever to change the coil or lever then follow points from A to E, otherwise go to point 43. A. Remove jigs for lever (Remove n screws).
- Page 12 Now you can start assemble the mechanical group 47. Take jigs for level (n°4 screws M4x19mm, n°1 tool for fixing the lever). 48. Insert two screws in to monobloc and two in to lever. 49. Insert magnet from below into monobloc 50.
- Page 13 S p a c e r m o v i n p i l l a r f o r : 0.0001g = n°1x0.5mm 0.001g = n°1x4mm 0.01g = n°1x7mm, n°1x0.5mm V e r t i c a l s p r i n g : 0.0001g = Vertical spring 0.5/0.10mm 0.001g = Vertical spring 0.5/0.10mm...
- Page 14 66. Center the hole of the vertical spring with the hole of the lever. 68. Fix the two screws of bottom vertical spring 70. Insert spacer of lever for: 0.0001 g=n °1 x7mm,n °1 x0.5mm 0. 001g = n° 1x4m m . 0.
- Page 15 76. Put cone support on the moving pillar ’ 78. Insert two cone support Screws and fix them 80. Solder the wire of temperature sensor. do not invert ( I m p o r t a n t : the wires) 79.
- Page 16 84. Turn on the balance and center the lever. (when the balance is turned on, the lever must exactly be centered in the window). 85. Fix the screws 86. Fix the mechanical group in the bottom case. 87. Check the main board signals. 88.
- Page 17 Corner load regulation for model EMC IL-0.0001, PB-0.001, PB- 0.01g F o r M o d e l I L - 0 . 0 0 0 1 REMOVE THE COVER WITH DRAFTSHIELD (REMOVE ONE SCREW Fig.1 AND FOUR SCREWS UNDER THE BALANCE Fig2) REMOVE LABELS ON THE HOLES (Fig 3) Fig.3 CONNECT KEYBOARD, PUT THE PLATE WIHT WINDSHIELD AND TURN ON THE...
- Page 18 For Model PM-0.001 REMOVE THE CAPS (Fig.5) PUT THE PLATE AND TURN ON THE BALANCE. (KEEP WARM UP FOR 20 MINUTES.) Fig.5 For Model M0.01 REMOVE DISK UNDER THE PLATE.(REMOVE FOUR SCREWS Fig.6) PUT THE PLATE AND TURN ON THE BALANCE. (KEEP WARM UP FOR 20 MINUTES.) Fig.6 For all Model PB-0.01, PB-0.001, IL-0.0001 TOOL NUMBER 8...
- Page 19 1. PUT THE WEIGHT (1/3 OF MAX RANGE) TO CHECK IN THE CENTER OF THE PLATE, AND PRESS TARE. 2. MOVE THE WEIGHT IN THE POINT 2A, READ AND WRITE DOWN THE VALUE. 3. MOVE THE WEIGHT IN THE CENTER AND PRESS TARE. 4.
- Page 20 PROCEDURE TO LINEARIZE EMC BALANCES IL-0.0001, PB- 0.001, PB-0.01g RELEASE R2.xx For model with four point of linearity Switch on balance. After 30 min press ON/OFF button. Press sequentially buttons ON/OFF - CAL – CAL. You will see "Lin" on display, press ENTER to confirm.. The display shows on the left number “1”...
- Page 21 Clear the linearit y and calibration value: 1. Switch on balance. 2. Press sequentially buttons ON/OFF - CAL – CAL. 3. You will see "Lin" on display, press ENTER to confirm.. 4. The display show on the left number “1 ” press MENU and keep it pressed until the display shows CLEAR.
- Page 24 MARK " M " 0.0110.l g ODOIO MORELLO PORTATA( RISOLUZ.4gti L.inearita fpBsi lassB FL LCCC v . v v . ' v v v V ^ y C - ' v . v v . ' C - ' K C g - 3 C C c - E L C C c / 2 C 2 D E 2 C C B _ "...
-
Page 25: Internal Calibration
Internal calibration In these balance models there are 4 calibration modes: From display zero condition, press and keep pressed the MENU button until the acoustic alarm is over, then release the button. The message “unitS” will be visualized on display, press then MENU button until you visualize “Calib”... - Page 26 the display will show “TEC-MEM”. 5. After having stored the value of internal calibration weight, balance returns to normal weighing conditions. 6. Return to calibration menu as described at paragraph 6.2 and set the desired calibration mode: internal, automatic or external.. ATTENTION : this procedure must be effected only using E2-class reference masses.
- Page 27 Change main board EMC series IL-0.0001, PB-0.001, PB-0.01g 1. REMOVE THE COVER OF BALANCE.(REMOVE THE SCREW ON THE TOP, AND FOUR SCREWS ON THE BOTTOM. 2. REMOVE THE DISPLAY AND THE BOARD SHIELD. 3. DISCONNECT POWER SUPPLY, OPTICAL SENSOR CONNECTOR, RS232 CONNECTOR, KEYBOARD CONNECTOR, DISPLAY CONNECTOR, GEAR CONNECTOR, AND UNSOLDER SIGNAL RESISTOR.
- Page 28 NOW YOU CAN ASSEMBLE THE NEW MAIN BOARD. 5. CONNECT, POWER SUPPLY, OPTICAL SENSOR, RS232, KEYBOARD, DISPLAY, GEAR CONNECTOR AND SOLD SIGNAL RESISTOR. 6. FIX THE DISPLAY AND THE BOARD SHIELD. 7. FIX THE COVER OF BALANCE. 8. CHECK AND REGULATE CALIBRATION LINEARITY AND INTERNAL CALIBRATION(TECH CAL).
- Page 29 Check of main board signals EMC series IL-0.0001, PB-0.001, PB-0.01g. Display RS232 Connector Signal Resistor Keyboard Connector T p 8 From –2,4V (with unload plate) Gear To +2,4V connector (with maximum range on plate) T p 6 + 3.3 V Power 24 v AC T p 3...
- Page 30 Spare parts for balance EMC model IL-0.0001, PB-0.001,PB- 0.01g...
- Page 31 M 0.0001 g/M 0.000 1ig I M A G E C O D E D E S C R I P T I O N A7 13 ALLUMINIUM INTERNAL CASE A7 12 MECHANICAL GROUP SHIELD A7 11 MAIN BOARD SHIELD A7 19 ADJUSTABLE FEET PLASTIC CASE A538...
- Page 35 O N L Y M 0 . 0 0 0 1 i g C O D E D E S C R I P T I O N I M A G E M642 INTERNAL WEIGTH 200g...
- Page 36 PB-0.001 g / PB-0.001 g...
- Page 37 PB-0.001 g / PB-0.001 g A712 MECHANICAL GROUP SHIELD C O D E D E S C R I P T I O N I M A G E A7 11 MAIN BOARD SHIELD ALLUMINIUM INTERNAL CASE A7 13 A503 LEVEL BUBBLE MAIN BOARD MSP430_427_REV2.1 6K S3 13...
- Page 38 M 0 . 0 0 1 g / M 0 . 0 0 1 i g A720 KEYBOARD BEL ADT7 124 C O D E D E S C R I P T I O N I M A G E E493 CABLE WITH DC PLUG E748...
- Page 43 M0.01g/M0.01ig A713 ALLUMINIUM INTERNAL CASE A503 LEVEL BUBBLE MAIN BOARD MSP430_427_REV2.1 S3 13 OPTICAL SENSOR S284 S304 DISPLAY BOARD DISP_LCD_ADT7 1 24_REV 1.1 LCD ADT7 124 E3 18 S310 CABLE 14 PIN FOR KEY CONNECTING S3 11 CABLE 26 PIN FOR DISPLAY CONNECTING KEYBOARD BEL ADT7 124 A720...
- Page 44 E496 CABLE WITH SENSOR TEMPERATURE M620 MONOBLOC M109 LEVER WITH FLAG M9 12 COIL M20 1 MOVING PILLAR M053 MAGNETIC GROUP M054 COVER MAGNET...
- Page 47 O N L Y M 0 . 0 1 i g C O D E D E S C R I P T I O N I M A G E M641 INTERNAL WEIGHT 400g M642 INTERNAL WEIGTH 200g...
Need help?
Do you have a question about the Intell-Lab IL-0.0001 g and is the answer not in the manual?
Questions and answers