JVC RX-8010VBK Service Manual
Audio/video control receiver
Hide thumbs
Also See for RX-8010VBK:
- Instructions manual (71 pages) ,
- Service manual (136 pages) ,
- Instructions manual (63 pages)
Table of Contents
Advertisement
SERVICE MANUAL
AUDIO/VIDEO CONTROL RECEIVER
CATV/DBS VCR 1
TV
AUDIO
POWER
POWER
POWER
POWER
DVD
DVD MUILTI
CD
FM/AM
TV/DBS
VIDEO
CDR
PHONO
VCR 1
VCR 2
TAPE/MD
USB
SURROUND
DSP
ANALOG/DIGITAL SLEEP
ON/OFF
MODE
INPUT
BASS
ROOM
LINE DIF .ECT BOOST
EFFECT
SIZE
1
2
3
MIDNIGHT
MENU
MODE
TEST
CTR TONE LIVENESS
4
5
6
ENTER
STANDBY
∗
∗
∗
SOUND
SUBWFR
L/R BAL
CENTER
7/P
8
9
POWER
∗
∗
∗
MUTING
DIGITAL EQ
REAR L
REAR R
0
10
+10
RETURN
FM MODE
100 +
SPEAKERS ON/OFF
CATV/DBS
∗
CONTROL
+
BAL L
+
+
1
∗
SURROUND ON/OFF
CH/
LEVEL TV VOL
VOLUME
−
−
−
TV/VIDEO
2
∗
BAL R
PLAY
SUBWOOFER OUT ON/OFF
EXIT
MENU
TEXT
/REW
PAUSE
FF/
DISPLAY
SET
REC
DOWN - TUNING - UP
PAUSE
STOP
CONTROL
PHONES
RM-SRX8010J
A/V CONTROL RECEIVER
Contents
Safety precautions --------------------------------------------------------1-2
Importance administering point on the safety --------------------- 1-3
Disassembly method -----------------------------------------------------1-4
Adjustment method -------------------------------------------------------1-10
Self-diagnose function ----------------------------------------------------1-11
Description of major ICs -------------------------------------------------1-13
RX-8010VBK
RX-8010V
AUDIO/VIDEO CONTROL RECEIVER
FM/AM TUNING
FM/AM PRESET
FM MODE
MEMORY
D I G I T A L
S U R R O U N D
D I G I T A L
DVD MULTI
DVD
VCR 1
INPUT
DSP MODE
ANALOG/DIGITAL
MIDNIGHT MODE
INPUT ATT
USB AUDIO
VIDEO
S-VIDEO
VIDEO
L-AUDIO-R
PHONO
CD
CDR
TAPE / MD
SOUCE NAME
COPYRIGHT
2001 VICTOR COMPANY OF JAPAN, LTD.
MASTER VOLUME
VCR 2
VIDEO
TV SOUND/DBS
DIGITAL
LEVEL
EQ
ADJUST
SOUCE NAME
EFFECT SETTING
USB AUDIO
FM / AM
CONTROL
DOWN
UP
RX-8010VBK
Area Suffix
J
U.S.A.
LINE DIRECT
BASS BOOST
D I G I T A L
No.20921
Mar. 2001
Advertisement
Chapters
Table of Contents

Related Manuals for JVC RX-8010VBK


Summary of Contents for JVC RX-8010VBK
-
Page 1: Table Of Contents
RX-8010VBK SERVICE MANUAL AUDIO/VIDEO CONTROL RECEIVER RX-8010VBK Area Suffix U.S.A. CATV/DBS VCR 1 AUDIO POWER POWER POWER POWER DVD MUILTI FM/AM TV/DBS VIDEO PHONO VCR 1 VCR 2 TAPE/MD SURROUND ANALOG/DIGITAL SLEEP ON/OFF MODE INPUT RX-8010V AUDIO/VIDEO CONTROL RECEIVER BASS ROOM LINE DIF .ECT BOOST... - Page 2 RX-8010VBK 1. This design of this product contains special hardware and many circuits and components specially for safety purposes. For continued protection, no changes should be made to the original design unless authorized in writing by the manufacturer. Replacement parts must be identical to those used in the original circuits.
-
Page 3: Importance Administering Point On The Safety
RX-8010VBK Importance administering point on the safety LVA10222-A6 B3191 RY63 PW20 PW17 PW26 PW19 PW18 CN55 B3142 6.3A-125V PW30 RY62 CN56 CN811 B3192 LVA10222-A3 2A-125V FC61 FC62 2A-125V FC64 FC63 Caution: For continued protection against risk of fire, replace only with same type 6.3A/125V for F201, 2A/125V for F202 and F203. -
Page 4: Disassembly Method
RX-8010VBK Disassembly method Top cover Removing the top cover (See Fig.1) Remove the four screws A attaching the top cover on both sides of the body. Remove the three screws B on the back of the body. Remove the top cover from behind in the direction of Fig.1... - Page 5 RX-8010VBK Removing each board connected to the rear side of the audio board (See Fig.5 to 11) Prior to performing the following procedure, remove the top cover and the rear panel. Tie band Cut off the tie band fixing the harness.
- Page 6 RX-8010VBK S Video Video audio board Video board board Fig.10 DSP board CN601 Fig.11 Relay board CN814 CN813 Removing the audio board CN71 (See Fig.12 to 13) power supply Prior to performing the following procedure, remove board the top cover and the rear panel.
- Page 7 RX-8010VBK Removing the main board (See Fig.14) Prior to performing the following procedure, remove the top cover, the rear panel and audio board. Cut off the tie band fixing the harness. CN811 Disconnect the harness from connector CN811 on the power supply board respectively.
- Page 8 RX-8010VBK Removing the power transformer (See Fig.17) Prior to performing the following procedures, remove the top cover. Power Power transformer supply board Unsolder the two harnesses connected to the power board transformer. Disconnect the harness from connector CN55 and CN56 on the power transformer board.
- Page 9 RX-8010VBK Removing the system control board / Front panel assembly power switch board (See Fig.20 to 22) Operation switch panel Prior to performing the following procedure, remove the top cover and the front panel assembly. Pull out the volume knob on the front side of the front panel and remove the nut attaching the system control board.
-
Page 10: Adjustment Method
RX-8010VBK Adjustment method Tuner section 1.Tuner range 87.5MHz~108.0MHz AM(MW) 530kHz~1710kHz Power amplifier section Adjustment of idling current Measurement location B2204-B2205(Lch) , B2213-2214(Rch) Adjustment part VR787(Lch) , VR788(Rch) Attention This adjustment does not obtain a correct adjustment value immediately after the amplifier is used (state that an internal temperature has risen). -
Page 11: Self-Diagnose Function
RX-8010VBK Self-diagnose function 1. Detection of abnormal power supply and voltage When the power is turned ON, if an abnormality is detected during the signal input at the A/D port (IC901, pin 2-5, 7) for one second continuously, the status will become STANDBY mode immediately. - Page 12 RX-8010VBK 4. Self-diagnose To enter the self-diagnose mode, put the power plug in the socket while pressing SETTING key and UP key together simultaneously, then turn the power ON. With the UP/DOWN key operation, DSP microcomputer, ROM No.of system microcomputer as well as working status of DSP can be displayed for five seconds.
-
Page 13: Description Of Major Ics
RX-8010VBK Description of major ICs AK4527 (IC571) : A/D,D/A Converter 1.Pin layout VREFL SDOS RIN+ OCKS RIN- LIN+ BCLK LIN- LRCK ROUT1 SDTI1 LOUT1 SDTI2 ROUT2 SDTI3 LOUT2 SDTO ROUT3 DAUX LOUT3 2.Block diagram Audio LIN+ LIN- RIN+ RIN- LRCK... - Page 14 RX-8010VBK 3. Pin function (1/2) AK4527(1/2) Pin name Function SDTO Source select pin SDOS "L" : Internal ADC output, "H" : DAUX input ORed with serial control register if P/S="L". MCKO Clock frequency select pin OCKS "L" : MCLK, "H" : MCLK/2.
- Page 15 RX-8010VBK 3.Pin function (2/2) AK4527(2/2) Pin Name Function VREFL Negative voltage reference Input pin, AVSS VCOM Common voltage output pin,AVDD/2 Large external capacitor around 2.2uF is used to reduce power-supply noise VREFH Positive voltage reference input pin,AVDD AVDD Analog power supply pin...
- Page 16 RX-8010VBK BA15218F(IC303, IC304, IC372, IC385, IC386) : OP AMP. OUT1 -IN1 OUT2 +IN1 -IN2 +IN2 BA7625 (IC201, IC242) : Video selector MONITOR OUT MONITOR OUT CTL A VOUT 1 logic VOUT1 CTL B CTL E VOUT2 logic VOUT 2 CTL D...
- Page 17 RX-8010VBK BU2092(IC402):PORT EXPANDER 1.Terminal Layout DATA CLOCK CONTROL CIRCUIT 2.Pin Function Symbol Function Pin No. Connect to GND DATA Serial Data input CLOCK Shift Clock of Data Latch Clock of Data 5~16 Q0~Q11 Parallel Data Output Latch Data OUTPUT ON OFF...
- Page 18 RX-8010VBK MB90088 (IC203) : On screen display controller 1.Terminal Layout AVss YOUT VOUT AVcc COUT IOUT SCLK TEST BOUT HSYNC ROUT VSYNC GOUT EXHSYN EXVSYN 2.Block Diagram Serial Input Each Control, Data SCLK Control EXHSYN H/V Separate EXVSYN VOUT Analog SW...
- Page 19 RX-8010VBK 3.Functions Symbol I/O Function Lux signal Input terminal for Superinpause indication Composite video signal input terminal for Superinpause indication Contrast signal input terminal for Superinpause indication Analog power supply terminal AVcc Color (Lux) signal output terminal IOUT Character output terminal...
- Page 20 RX-8010VBK MAX4018ESD (IC390) : OP AMP. OUTC INC- INC+ INA+ INB+ INA- INB- OUTA OUTB N.C. N.C. NJM2285V-W(IC202) : 2-INPUT 3CHANNEL VIDEO SWITCH IN1A GND1 IN2B CTL2 IN2A GND3 IN3B CLAMP TYPE BIAS TYPE CLAMP TYPE IN1B CTL1 OUT1 GND2...
- Page 21 RX-8010VBK NJM4580D (IC301) : LPF, Mic and H.phone Amp. 1.Terminal layout A OUT A -IN B OUT A +IN B -IN B +IN (TOP VIEW) 2.Block diagram INPUT OUTPUT NJU7241F33(IC411) : VOLTAGE REGULATOR PIN FUNCTION 1. GND 2. V 3. V 4.
- Page 22 RX-8010VBK PCM2702E-X (IC410) : DIGITAL / ANALOG CONVERTER 2. Block diagram 1.Pin layout VccP USB packet audio DGNDC data data AGNDP FIFO Low-pass WRCLK VccL VOUTL USB I/F Filter Multi-level Oversampling VBUS DGND AGNDL Delta-Sigma VCOM DGNDU Digital Filter Modulator...
- Page 23 RX-8010VBK TC9162AN (IC380) : ANALOG SWITCH R-S1 L-S1 R-S2 L-S2 R-COM1 L-COM1 R-S3 L-S3 R-S4 L-S4 R-COM2 L-COM2 R-S5 L-S5 R-S6 L-S6 R-COM3 L-COM3 R-S7 L-S7 R-COM4 L-COM4 DATA R-S1 L-S1 R-S2 L-S2 R-COM1 L-COM1 R-S3 L-S3 R-S4 L-S4 R-COM2...
- Page 24 RX-8010VBK TC9163AF-X (IC371) : ANALOG SWITCH R-S1 L-S1 R-S2 L-S2 R-S3 L-S3 R-COM1 L-COM1 R-S4 L-S4 R-S5 L-S5 R-S6 L-S6 R-COM2 L-COM2 R-S7 L-S7 R-S8 L-S8 R-COM3 L-COM3 DATA R-S1 L-S1 R-S2 L-S2 R-S3 L-S3 R-COM1 L-COM1 R-S4 L-S4 R-S5...
- Page 25 RX-8010VBK TC9164AF-X (IC302) : ANALOG SWITCH R-S1 L-S1 R-S2 L-S2 R-S3 L-S3 R-S4 L-S4 R-COM1 L-COM1 R-S5 L-S5 R-S6 L-S6 R-COM2 L-COM2 R-S7 L-S7 R-S8 L-S8 R-COM3 L-COM3 DATA R-S1 L-S1 R-S2 L-S2 R-S3 L-S3 R-S4 L-S4 R-COM1 L-COM1 R-S5...
- Page 26 RX-8010VBK TC9459F (IC381, IC382, IC383) : Electronic volume control 2. Block diagram 1.Terminal layout L-OUT R-OUT L-OUT R-OUT L-IN 915TEP R-IN L-1N R-IN L-ch L-LD1 R-ch R-LD1 Same as L-ch L-LD2 R-LD2 L-LD1 R-LD1 Circuit L-A-GND R-A-GND L-LD2 R-LD2 L-A-GND...
- Page 27 RX-8010VBK PQ3DZ53 (IC583) : Regulator IC DC INPUT(Vin) DC OUTPUT(Vo) CUSTOM IC ON/OFF CONTROL(Vc) TC74HC4053AF (IC388, IC389) : MULTIPLEXER CONTROL INPUTS INHIBIT Y-COM X-COM Z-COM X: Don't Care. W24L010AJ-12 (IC511) : CMOS STATIC RAM 1. Pin layout 2. Block diaglam...
- Page 28 RX-8010VBK UPD784215AGC132(IC581) : UNIT CPU 1.Pin layout 2.Pin function Pin No. Symbol Function Non connect Power supply terminal Connecting the crystal oscillator for system main clock Connecting the crystal oscillator for system main clock Connect to GND Connecting the crystal oscillator for system sub clock...
-
Page 29: Block Diagrams
RX-8010VBK Block diagrams Signal I/O block section Main section LVA10221-1 CN731 CN732 LVA10221-2 Q761 L ch Q763 RY831 SPK1 CN244 CN242 LVA10219-5 Q762 RY832 R ch SPK2 Q764 CN200 CN204 CN206 LVA10219-4 CN587 CN581 RY833 LVA10223 Q1751 Q1752 CN313 CN371... - Page 30 RX-8010VBK Video section Video input section LVA10219-3 LVA10219-4 DVD F TV/DBS DATA TV/DBS IC 203 DATA/CLK MON Y/C OUT VCR1 REC Y/C SEP SOUTCE IC 202 SELECTOR VCR1 IC 201 IC 371 MON Y/C IN VCR1 P.B V SIG V SIG...
- Page 31 RX-8010VBK Tuner section System control & FL section LVA10009 LVA10218-1 TUNER AM/FM DET RF 101 IC102 FL DISPLAY D400 SYSTEM CONTROLLER MW RF & OSC T111 IC102 IC 400 DATA Audio input section VIDEO AUDIO LVA10219-2 PHONO IC 301 DATA/CLK...
- Page 32 RX-8010VBK Standard schematic diagrams Power supply section PW10 PW20 PW11 CN811 PW17 PW12 1SS133 PW13 PW14 PW15 PW16 PW26 PW18 PW28 CN55 CN56 PW19 PW29 sheet 10/11 CN402 PW30 PW40 0.047MY FW51 3.3M 1SR35-400A 0.047MY 10E2-FD 0.0047/100 0.1MY 0.1MY 100K...
- Page 33 RX-8010VBK Main & Speaker terminal section sheet 8/11 sheet 7/11 sheet 6/11 sheet 7/11 sheet 8/11 sheet 6/11 sheet 8/11 R831 R833 C835 0.022 C834 RY831 D831 0.022 CN702 CN705 CN703 CN701 CN721 CN723 CN706 1SS133 C846 220P C847 R832...
- Page 34 RX-8010VBK Audio section R915 R916 R961 R971 R951 R941 R921 R931 R917 Q941 Q921 Q931 Q971 Q951 Q961 2SD2395/EF/ 2SD2395/EF/ 2SD2395/EF/ 2SD2395/EF/ 2SD2395/EF/ KTA1046/Y/ C942 C932 C952 C922 C972 C962 R932 0.0047 0.0047 0.0047 R942 0.0047 0.0047 0.0047 R922 R963 R973 2.2K...
- Page 35 RX-8010VBK Audio / V Audio signal input section R315 C301 R301 C311 2.2k 4.7/50 R305 IC301 C305 0.0018MY C307 0.0068MY 4.7/50 NJM4580DD R307 R309 470k C306 0.0018MY C308 0.0068MY R308 R310 470k R306 C312 C302 R302 IC301 4.7/50 R316 2.2k NJM4580DD 4.7/50...
- Page 36 RX-8010VBK Video / S video signal input section R253 CN200 QGB2510K1-11 R254 R255 CN240 QGB2510K1-12 R225 C241 0.047 R240 J241 R241 C208 47/16 OSDCS C242 OSDDATA 4.7/50 C209 0.01 OSDCLK C244 0.047 C211 Q240 Q244 R231 100/50 sheet 3/11 R207...
- Page 37 RX-8010VBK DVD section C1381 C1382 C1383 R1370 R1379 R1380 R1381 C1352 100/10 J1370 R1371 C1384 C1385 C1386 CN480 R1393 R1396 47/25 4.7/50 4.7/50 R1395 D1391 D1392 100k QJK017-031301 100k 1SS133 1SS133 C1353 0.1u R1392 J1380 Q1391 IC387 R1372 KRA107M C1387...
-
Page 38: Sheet
RX-8010VBK Audio amplifier section (1/2) C751 R761 R705 R707 Q761 R787 D771 Q707 1SS133 KTA1268/GL Q791 R771 KTA1268/GL/ R779 0.22( 7W) C795 R775 0.022 R791 VR787 R789 R795 C713 R783 R777 L791 D701 1SS133 R773 Q781 C715 R793 2SD637( Q.R) - Page 39 RX-8010VBK Audio amplifier section (2/2) R1721 C1713 R1703 2.2/50 C1751 Q1703 R1751 KTA1268/GL/ R1795 C1741 Q1751 47/100 C1711 2SD2390/OPY/-F6 C1712 D1771 0.01MY 1SS133 D1701 R1771 1SS133 Q1791 R1722 KTA1268/GL/ 3.3k R1712 R1773 R1761 R1753 C1791 C1701 R1723 R1701 0.22 0.022...
- Page 40 RX-8010VBK DSP section R2560 C2560 UN560 GP1FA550TZ C2561 TP_RX1 UN561 IC551 R2561 1.1K GP1FA550RZ C2553 C2555 C2556 AK4112AVF 100/4 LC551 C2551 CDTO NQR0322-001 R2571 5.1K CDTI C2562 CCLK TP_RX2 D_CS UN562 X2551 R2562 1.1K R2007 256FS GP1FA550RZ 11.2896MHz LIN- C2013...
- Page 41 RX-8010VBK System control & FL display section RA403 RA400 RA401 RA402 QRB059J-104 QRB169J-104 QRB169J-104 QRB169J-104 C400 C409 4.7/50 4.7/50 C410 4.7/50 DI400 QLF0084-001 Q402 Q404 CN412 D405 Q407 QGF1205F1-08 DTC114YKA DTC114TKA 1SS133 DTC114YKA Q408 DTC114YKA CN410 IC411 M_CLK QGF1205F1-10 NJU7241F33...
- Page 42 RX-8010VBK Tuner section FM/TUNER Signal AM Signal CN101 SHEET 11/11 sheet 3/11 2-14...
- Page 43 RX-8010VBK Printed curcuit boards Main board B521 B522 B523 CN491 B241 B524 B525 CN72 B526 B527 CN82 B528 B529 B530 B531 S831 B117 R860 ST831 ST851 C853 B118 R863 B119 C847 C843 Q832 C886 B116 C890 C844 C848 C842 C846...
- Page 44 RX-8010VBK Micon board FW51 PW28 B3230 B3191 RY63 PW40 B3122 CN55 PW29 B3231 B3234 TH71 B3123 B3430 B3233 B3334 RY62 CN71 PW22 PW25 CN56 B3236 B3235 CN811 PW27 PW23 B3192 B3331 PW24 PW21 B3237 B3130 PW19 PW26 PW18 PW17 PW20...
- Page 45 RX-8010VBK Front board B1114 B1115 R424 B1313 B1118 R417 R423 C431 R472 R419 K452 C441 C442 C465 S431 C461 C462 R415 R477 R418 S424 S419 S415 S417 S423 S418 S420 C454 R425 R420 B1103 C440 B1104 R476 K456 C438 D414...
- Page 46 RX-8010VBK Input board (Reverse side) R390 R389 R388 R385 C253 R387 R1211 R1227 C1231 R345 IC303 C259 CN416 R1243 C257 C1227 CN244 R1225 R1241 C258 C260 R271 IC394 IC395 R1223 C256 C261 R346 D240 R1224 D241 R1226 R1242 C1228 IC393...
- Page 47 RX-8010VBK Input board (Forward side) R385 R1227 R1211 C259 C257 CN416 CN244 C260 R271 C256 C258 D240 C261 D241 IC242 R1228 IC241 C277 J241 J243 J242 C363 C1245 C364 Q1245 C210 IC301 Q1247 C216 Q1248 CN206 Q1249 Q1250 Q207 C215...
- Page 48 RX-8010VBK Power board DSP board Reverse side B2131 R1873 B2501 B2425 R1823 R1831 B2130 C1843 C795 R1805 C1817 C1895 C1805 B2221 L1861 VR787 B2204 D1801 C1809 Q791 B2807 R1813 B2106 C717 R1811 R1861 C1807 D1871 B2206 C719 R1809 R1863 B2319...
-
Page 49: Tuner Board
RX-8010VBK Tuner board AT101 Q112 B105 D124 [DOM] D125 C107 B198 [DOM] B173 B197 Q103 B123 R108 R109 L111 B194 Q111 R119 C117 C118 C158 R105 R107 B180 B192 R129 C157 R146 C105 C168 B195 B189 B193 C138 C133 R103... -
Page 50: Parts List
RX-8010VBK PARTS LIST [ RX-8010VBK ] * All printed circuit boards and its assemblies are not available as service parts. Area suffix J ----------------------------- U.S.A. - Contents - Exploded view of general assembly and parts list 3- 3 Electrical parts list... - Page 51 RX-8010VBK < M E M O >...
- Page 52 RX-8010VBK Exploded view of general assembly and parts list Block No. Power trans board I/O board Power trans board Power/Fuse board Speaker board Relay board Power supply Main Audio board board board power switch board Front key & System control board...
- Page 53 RX-8010VBK Parts list (General assembly) (General assembly) Block No. M1MM Parts list Block No. M1MM Item Parts number Parts name Q'ty Description Area Item Parts number Parts name Q'ty Description Area LV10469-001A FRONT PANEL QYSDSTL4008Z SPECIAL SCREW P.TRANS VJD5429-001SS JVC MARK...
- Page 54 RX-8010VBK Electrical parts list (Main board) Block No. 01 Item Remarks Item Remarks Parts number Parts name Area Parts number Parts name Area C 801 QCE22HP-103 C CAPACITOR .010MF +100:-0% R 851 QRJ146J-120X UNF C RESISTOR 12 5% 1/4W C 802...
- Page 55 RX-8010VBK Electrical parts list (Front board) Block No. 02 Item Remarks Item Remarks Parts number Parts name Area Parts number Parts name Area BK400 LV42092-001A FL HOLDER(R) IC410 PCM2702E-X BK401 LV42093-001A FL HOLDER(L) IC411 NJU7241F33-X C 400 QEKC1HM-475Z E CAPACITOR 4.7MF 20% 50V...
- Page 56 RX-8010VBK Electrical parts list (Front board) Block No. 02 Item Remarks Item Remarks Parts number Parts name Area Parts number Parts name Area R 453 NRSA63J-103X MG RESISTOR S 482 QSW0683-001Z PUSH SWITCH (SPK2) R 454 NRSA63J-103X MG RESISTOR S 483...
- Page 57 RX-8010VBK Electrical parts list (Power board) Block No. 03 Item Remarks Item Remarks Parts number Parts name Area Parts number Parts name Area C 701 QTE1V06-106Z E CAPACITOR C1808 QETN1CM-107Z E CAPACITOR 100MF 20% 16V C 702 QTE1V06-106Z E CAPACITOR...
- Page 58 RX-8010VBK Electrical parts list (Power board) Block No. 03 Item Remarks Item Remarks Parts number Parts name Area Parts number Parts name Area Q 712 KTC3200/GL/-T TRANSISTOR R 726 QRE141J-152Y C RESISTOR 1.5K 5% 1/4W Q 761 2SD2560/OPY/-F6 TRANSISTOR R 727...
- Page 59 RX-8010VBK Electrical parts list (Power board) Block No. 03 Item Remarks Parts number Parts name Area R1793 QRE141J-183Y C RESISTOR 18K 5% 1/4W R1795 QRE141J-473Y C RESISTOR 47K 5% 1/4W R1801 QRE141J-222Y C RESISTOR 2.2K 5% 1/4W R1802 QRE141J-222Y C RESISTOR 2.2K 5% 1/4W...
- Page 60 RX-8010VBK Electrical parts list (Input board) Block No. 04 Item Remarks Item Remarks Parts number Parts name Area Parts number Parts name Area C 201 QETN1HM-475Z E CAPACITOR 4.7MF 20% 50V C 308 QFLC1HJ-682Z M CAPACITOR 6800PF 5% 50V C 202...
- Page 61 RX-8010VBK Electrical parts list (Input board) Block No. 04 Item Remarks Item Remarks Parts number Parts name Area Parts number Parts name Area C1306 QETN1EM-476Z E CAPACITOR 47MF 20% 25V HL203 VYH7653-005 IC HOLDER C1307 QETN1CM-476Z E CAPACITOR 47MF 20% 16V...
- Page 62 RX-8010VBK Electrical parts list (Input board) Block No. 04 Item Remarks Item Remarks Parts number Parts name Area Parts number Parts name Area Q1341 2SC3576-JVC-T TRANSISTOR R 302 NRSA63J-222X MG RESISTOR Q1342 2SC3576-JVC-T TRANSISTOR R 303 NRSA63J-473X MG RESISTOR Q1343...
- Page 63 RX-8010VBK Electrical parts list (Input board) Block No. 04 Item Remarks Item Remarks Parts number Parts name Area Parts number Parts name Area R 397 NRSA63J-104X MG RESISTOR R1368 NRSA63J-104X MG RESISTOR R 398 NRSA63J-104X MG RESISTOR R1370 NRSA63J-471X MG RESISTOR...
- Page 64 RX-8010VBK (DSP board) Electrical parts list Block No. 05 Item Remarks Item Remarks Parts number Parts name Area Parts number Parts name Area C 571 NCB31HK-103X C CAPACITOR C2308 NEA71EM-475X E CAPACITOR C 573 NCF31CZ-104X C CAPACITOR C2347 NCS31HJ-330X C CAPACITOR...
- Page 65 RX-8010VBK Electrical parts list (DSP board) Block No. 05 Item Remarks Item Remarks Parts number Parts name Area Parts number Parts name Area C2601 NCB31CK-104X C CAPACITOR R 574 NRSA63J-432X MG RESISTOR C2605 NCB31CK-104X C CAPACITOR R 575 NRSA63J-432X MG RESISTOR...
- Page 66 RX-8010VBK Electrical parts list (DSP board) Block No. 05 Item Remarks Item Remarks Parts number Parts name Area Parts number Parts name Area R2506 NRSA63J-473X MG RESISTOR R2221 NRSA63J-333X MG RESISTOR R2507 NRSA63J-473X MG RESISTOR R2222 NRSA63J-333X MG RESISTOR R2508...
- Page 67 RX-8010VBK (Micon board) Electrical parts list Block No. 06 Item Remarks Item Remarks Parts number Parts name Area Parts number Parts name Area QCZ9104-472 C CAPACITOR 4700PF D 56 MTZJ6.2B-T2 ZENER DIODE C 51 QFLC2AJ-472Z M CAPA CITOR 4700PF 5% 100V...
- Page 68 RX-8010VBK Electrical parts list (Micon board) Block No. 06 Item Remarks Item Remarks Parts number Parts name Area Parts number Parts name Area Q 907 KRC105M-T D TRANSISTOR R 973 QRJ146J-332X UNF C RESISTOR 3.3K 5% 1/4W Q 908 KRC105M-T...
- Page 69 RX-8010VBK Electrical parts list (Tuner board) Block No. 07 Item Remarks Item Remarks Parts number Parts name Area Parts number Parts name Area AT101 QNB0014-001 ANT TERMINAL R 115 NRSA02J-104X MG RESISTOR BK 1 LV31618-001A SHIELD BKT R 119 NRSA02J-103X...
- Page 70 RX-8010VBK Packing materials and accessories parts list Block No. Block No. A2~A7 Parts list (Packing) Block No. M2MM Item Parts number Parts name Q'ty Description Area QPA02503505P POLY BAG FOR INST LV20989-010A CARTON BOX LV32034-003A SHEET LV20947-001A PACKING PAD LV20948-001A...
- Page 71 RX-8010VBK VICTOR COMPANY OF JAPAN, LIMITED AUDIO & COMMUNICATION BUSINESS DIVISION PERSONAL & MOBILE NETWORK BUSINESS UNIT. 10-1,1chome,Ohwatari-machi,Maebashi-city,371-8543,Japan Printed in Japan (No.20921) 200103(V)
- Page 72 AUDIO/VIDEO CONTROL RECEIVER RX-8010VBK CATV/DBS VCR 1 AUDIO POWER POWER POWER POWER DVD MUILTI FM/AM TV/DBS VIDEO PHONO VCR 1 VCR 2 TAPE/MD SURROUND ANALOG/DIGITAL SLEEP ON/OFF MODE INPUT RX-8010V AUDIO/VIDEO CONTROL RECEIVER BASS ROOM LINE DIF .ECT BOOST EFFECT...
- Page 73 Numéro de modèle: RX-8010VBK triangle is intended to alert the user to the Nom de marque: presence of important operating and Personne responsable: US JVC CORP. maintenance (servicing) instructions in the literature accompanying the appliance. Adresse: 1700 Valley Road Wayne, N.J. 07470 Numéro de téléphone: (973) 315-5000...
- Page 74 In addition, maintain the best possible air circulation as illustrated. Veiller également à ce que l’air circule le mieux possible comme illustré. Spacing 15 cm or more Dégagement de 15 cm ou plus RX-8010VBK Wall or obstructions Mur, ou obstruction Front Avant Stand height 15 cm or more...
- Page 75 Showing the Text Information on the Display ......21 AV COMPU LINK Remote Control System ..47 Basic Setting and Adjustment — Auto Memory ...... 21 Operating JVC’s Audio/Video Components ... 49 Receiving Radio Broadcasts ......22 Operating Audio Components ..........49 Operating Video Components ..........
-
Page 76: Parts Identification
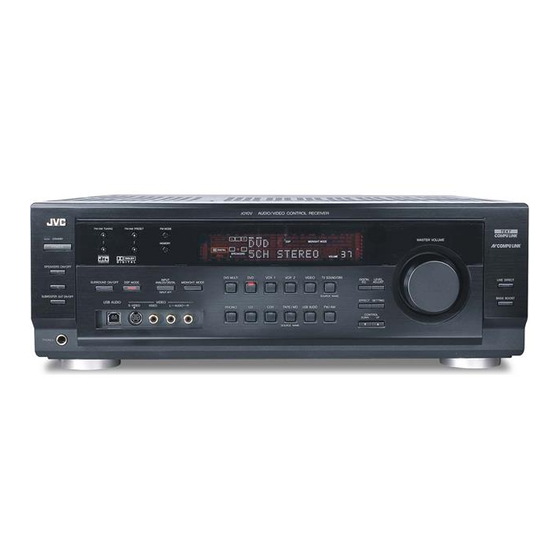
Parts Identification Become familiar with the buttons and controls on the receiver before use. Refer to the pages in parentheses for details. 3 4 5 RX-8010V AUDIO/VIDEO CONTROL RECEIVER FM/AM TUNING FM/AM PRESET FM MODE DGTL AUTO DVD MULTI PRO LOGIC AUTO MUTING TUNED STEREO ANALOG 3D–PHONIC MIDNIGHT MODE... -
Page 77: Getting Started
Getting Started This section explains how to connect audio/video components and speakers to the receiver, and how to connect the power supply. Before Installation Connecting the FM and AM Antennas FM Antenna Connections General • Be sure your hands are dry. •... -
Page 78: Connecting The Speakers
Basic connecting procedure AM Antenna Connections Snap the tabs on the loop into the ANTENNA slots of the base to assemble the FM 75 AM loop. COAXIAL 1 Cut, twist and remove the insulation at the end of AM Loop Antenna LOOP each speaker signal cable (not supplied). -
Page 79: Connecting Audio/Video Components
Connecting the rear and center speakers Analog Connections Connect rear speakers to the REAR SPEAKERS terminals and a Audio component connections center speaker to the CENTER SPEAKER terminals. Use the cables with RCA pin plugs (not supplied). Center speaker Connect the white plug to the audio left jack, and the red plug to the audio right jack. -
Page 80: Sheet
Video component connections Cassette deck or MD recorder Use the cables with RCA pin plugs (not supplied). Cassette deck Connect the white plug to the audio left jack, the red plug to the audio right jack, and the yellow plug to the video jack. To audio output To audio input •... - Page 81 TV and/or DBS tuner Video camera The VIDEO input terminals on the front panel are convenient when When connecting the TV to the AUDIO jacks (TV SOUND/ connecting and disconnecting the equipment frequently. DBS), DO NOT connect the TV’s video output to these video input terminals.
-
Page 82: Digital Connections
Notes: Digital Connections • When shipped from the factory, the DIGITAL IN terminals have This receiver is equipped with four DIGITAL IN terminals — one been set for use with the following components. digital coaxial terminal and three digital optical terminals, and one –... -
Page 83: Usb Connection
5. Check if the drivers are correctly installed. USB Connection 1. Open the Control Panel on your PC: Select [Start] = This receiver is equipped with a USB terminal on the front panel. [Settings] = [Control Panel] You can connect your PC to this terminal and enjoy sound 2. -
Page 84: Connecting The Power Cord
Putting Batteries in the Remote Control Connecting the Power Cord Before using the remote control, put two supplied batteries first. Before plugging the receiver into an AC outlet, make sure that all connections have been made. When using the remote control, aim the remote control directly at the remote sensor on the receiver. -
Page 85: Basic Operations
Basic Operations The following operations are commonly used when you play any sound source. From the remote control: Before using the remote control To turn on the power, press AUDIO POWER. How to confirm the remote control operation mode AUDIO POWER The STANDBY lamp on the front panel goes off. -
Page 86: Adjusting The Volume
On the front panel: Notes: • When connecting an MD recorder (to the TAPE/MD jacks), and a DVD MULTI VCR 1 VCR 2 VIDEO TV SOUND/DBS DBS tuner (to the TV SOUND/DBS jacks), change the source names shown on the display. For details, see page 16. SOURCE NAME •... -
Page 87: Selecting The Front Speakers
Selecting the Front Speakers Muting the Sound IMPORTANT: From the remote control ONLY: You can activate two pairs of the front speakers at the same time only Press MUTING to mute the sound through all MUTING when the SPEAKER LOAD SELECTOR switch on the rear panel is speakers and headphones connected. -
Page 88: Activating The Subwoofer Sound
Attenuating the Input Signal Activating the Subwoofer Sound When the input level of the playing source is too high, the sounds You can cancel the subwoofer sound even though you have connected a subwoofer and have set “SUBWOOFER” to “YES” will be distorted. -
Page 89: Adjusting The Equalization Patterns
Adjusting the Equalization Patterns Using the Sleep Timer You can adjust equalization to your preference. Using the Sleep Timer, you can fall asleep to music and know the • You can do this setting for each source. receiver will turn off by itself rather than play all night. From the remote control ONLY: Before you start, remember.. -
Page 90: Basic Settings
Basic Settings Some of the following settings are required after connecting and positioning your speakers in your listening room, while others will make operations easier. When changing the source name from “TV” to Adjusting the Front Speaker Output “DBS”: Balance •... -
Page 91: Setting The Subwoofer Information
Setting the Speakers for a Surround Setting the Subwoofer Information Field Register whether you have connected a subwoofer or not. To obtain the best possible surround sound of the Surround and DSP Before you start, remember..modes, you have to register the information about the speakers •... - Page 92 Center Delay Time Setting Center Register the delay time of the sound from the center speaker, speaker Right front Left front comparing to that of the sound from the front speakers. speaker speaker If the distance from your listening point to the center speaker is equal to that to the front speakers, select 0 ms.
-
Page 93: Digital Input (Digital In) Terminal Setting
Low Frequency Effect Attenuator Setting To set the DIGITAL 2/3/4 terminals: If the bass sound is distorted while playing back a source using 1. Press SETTING again until T SETTING Dolby Digital or DTS Digital Surround, follow the procedure below. DIGITAL 2/3/4 terminals' setting appears on the display. -
Page 94: Selecting The Analog Or Digital Input Mode
When playing a software encoded with the Dolby Digital or Selecting the Analog or Digital Input DTS Digital Surround, “DGTL AUTO” may not work properly Mode and the following symptoms may occur: • Sound does not come out at the beginning of playback. When you have connected digital source components using the •... -
Page 95: Showing The Text Information On The Display
Showing the Text Information on the Basic Setting and Adjustment — Auto Memory Display Without any setting required, this receiver stores different sound When you have connected an MD recorder or CD player equipped settings for each different playing source automatically whenever with TEXT COMPU LINK remote control system (see page 42), you do the following: you can show the text information, such as disc title or track title,... -
Page 96: Receiving Radio Broadcasts
Receiving Radio Broadcasts You can browse through all the stations or use the preset function to go immediately to a particular station. Tuning in Stations Manually Using Preset Tuning On the front panel: Once a station is assigned to a channel number, the station can be quickly tuned. -
Page 97: Selecting The Fm Reception Mode
To tune in a preset station Selecting the FM Reception Mode On the front panel: When an FM stereo broadcast is hard to 1. Press FM/AM to select the band FM/AM receive or noisy (FM or AM). You can change the FM reception mode while receiving an FM The FM/AM lamp on the front panel button lights broadcast. -
Page 98: Creating A Surround Field In Your Room
Creating a Surround Field in Your Room The built-in Surround Processor provides Surround mode and four types of the DSP (Digital Signal Processor) mode — DAP (Digital Acoustic Processor) mode, 5 CH/4 CH Stereo mode, 3D-PHONIC mode, and HEADPHONE DSP mode. With this receiver, you can use a Surround mode and a DSP mode at the same time. -
Page 99: Reproducing The Sound Field
The 3D-PHONIC mode is the result Direct sounds reach the listener directly without any reflection. On of research on sound localization technology carried out at JVC for the other hand, indirect sounds are delayed by the distances of the many years. -
Page 100: Available Dsp Modes According To The Speaker Arrangement
Available DSP Modes According to the Speaker Arrangement Available DSP modes will vary depending on how many speakers are used with this receiver. Make sure that you have set the speaker information correctly (see page 17). Speaker arrangements Available DSP modes Each time you press DSP MODE, the DSP modes change as follows: \ THEATER 2 \ HALL 1... -
Page 101: Adjusting The Surround Modes
5. Select the speaker you want to adjust. Adjusting the Surround Modes • To select the center speaker level, press CENTER. “CTR” appears on the remote control display window. You can also use a Surround mode with a DAP mode (see page 30). •... -
Page 102: Adjusting The Dap Modes
On the front panel: 2. Press SURROUND ON/OFF to SURROUND ON/OFF activate an appropriate Surround 1. Press DSP MODE repeatedly until DSP MODE mode — PRO LOGIC, DOLBY the DAP mode you want to adjust DIGITAL or DTS SURROUND. — THEATER 1, THEATER 2, The SURROUND ON/OFF lamp on the front panel button lights HALL 1, HALL 2, LIVE CLUB, DANCE CLUB, or PAVILION —... - Page 103 4. Adjust the overall levels of the effect. 3. Select the speaker you want to adjust. EFFECT SETT 1) Press EFFECT repeatedly until • To select the center speaker level, press CENTER. “EFFECT” appears on the display. “CTR” appears on the remote control display window. The display shows the current setting.
-
Page 104: Adjusting The Surround Modes With The Dap Modes
9. Press LIVENESS to adjust the liveness. 5. Press TEST to check the speaker TEST LIVENESS • Each time you press the button, the output balance. MENU display changes to show the following: “TEST TONE L” starts flashing on the display, and a test tone comes out of the LIVENESS 1 LIVENESS 2... - Page 105 11.Press EFFECT to adjust the 3. Press DSP MODE repeatedly until DSP MODE EFFECT overall level of the effect. the DAP mode you want to adjust MENU • Each time you press the button, the effect — THEATER 1, THEATER 2, level changes as follows: HALL 1, HALL 2, LIVE CLUB, DANCE CLUB, or PAVILION —...
-
Page 106: Adjusting The 5 Ch/4 Ch Stereo Mode
7. Adjust the room size (sense of spaciousness). 2. Adjust the speaker output levels. 1) Press EFFECT repeatedly until 1) Press LEVEL ADJUST repeatedly LEVEL EFFECT SETTIN ADJUST “ROOM SIZE” appears on the until one of the following indications display. appears on the display. -
Page 107: Adjusting The 3D-Phonic Modes
∗ BAL L 4. Press LEVEL +/– to adjust the Adjusting the 3D-PHONIC Modes speaker output levels (–10 dB to ∗ LEVEL − +10 dB). Before you start, remember... • Make sure that you have set the speaker information correctly ∗... - Page 108 4. Adjust the overall levels of the effect. 6. Press CTR TONE to select the CTR TONE 1) Press EFFECT repeatedly until center tone level you want. EFFECT SETT ENTER “EFFECT” appears on the display. • Each time you press the button, the display The display shows the current setting.
-
Page 109: Using The Dvd Multi Playback Mode
Using the DVD MULTI Playback Mode This receiver provides the DVD MULTI playback mode for reproducing the analog discrete output mode of the DVD player. Before playing back a DVD, refer also to the manual supplied with the DVD player. From the remote control: Activating the DVD MULTI Playback Mode 1. -
Page 110: Using The On-Screen Menus
Using the On-Screen Menus You can use the Menus on the TV screen to control the receiver. To use this function, you need to connect the TV to the MONITOR OUT jack on the rear panel (see page 7), and set the TV’s input mode to the proper position to which the receiver is connected. -
Page 111: Adjusting The Equalization Pattern
For Surround mode, Surround mode with DAP Adjusting the Equalization Pattern mode: (Also see page 15) “TEST TONE”: Output a test tone. 1. Press MENU. “L/R BALANCE”: Adjust the right and left balance The MENU appears on the TV. of the front speakers. •... -
Page 112: Adjusting The Dvd Multi Playback Mode
7. Press 5 / ∞ to move 5. Press 5 / ∞ to move to the item you want to set or adjust, then press 2 / 3. to “EFFECT ADJUST,” then press 2 / 3. On this adjustment menu, you can do the following: “L/R BALANCE”: Adjust the right and left balance The EFFECT ADJUST menu... -
Page 113: Selecting The Line Direct Function
Selecting the Line Direct Function Operating the Tuner (Also see pages 22 and 23) (Also see page 14) 1. Select FM or AM as the playing source. 1. Press MENU. Press FM/AM. The MENU appears on the TV. • Pressing one of the 5 / ∞ / 2 / 3 buttons also displays the 2. -
Page 114: Setting The Basic Setting Items
SETTING 2 menu Setting the Basic Setting Items “DIGITAL 1/2/3/4”: Set the digital input terminal 1/2/3/4 (Also see pages 16 – 21) (see page 19). 1. Press MENU. “VIDEO DVD”: Set the video input terminal for the The MENU appears on the TV. DVD player (see page 16). -
Page 115: Compu Link Remote Control System
COMPU LINK Remote Control System The COMPU LINK remote control system allows you to operate JVC audio components through the remote sensor on the receiver. To use this remote control system, you need to connect JVC audio Automatic Source Selection... -
Page 116: Text Compu Link Remote Control System
TEXT COMPU LINK Remote Control System The TEXT COMPU LINK remote control system has been developed to deal with the disc information recorded in the CD Text* and MDs. Using these information in the discs, you can operate the CD player or MD recorder equipped with the TEXT COMPU LINK remote control system through the receiver. -
Page 117: Showing The Disc Information On The Tv Screen
1 Source name: CD or MD OPERATIONS: 2 Select , then press SET to change the disc. 3 Track numbers and track titles. To use this remote control system, you need to connect the TV to the • When you move to a track number, you can change the track information by pressing 2 / 3. -
Page 118: Searching For A Disc (Only For The Cd Player)
Search for a disc by its disc title: Searching for a Disc (Only for the CD player) 1. Press TEXT DISPLAY while “CD” is selected as Search for a disc by its performer: the source. 1. Press TEXT DISPLAY while “CD” is selected as The Disc Information screen appears on the TV. -
Page 119: Entering The Disc Information
Search for a disc by its genre: Entering the Disc Information 1. Press TEXT DISPLAY while “CD” is selected as For the CD Player with the disc memory function: the source. You can use the disc memory function through this receiver. The Disc Information screen appears on the TV. - Page 120 For the MD recorder: 4. Repeat step 3 until you finish putting a You can write the disc information (disc title and song titles) into the disc. You can only write the song title for the song currently performer name (up to selected.
-
Page 121: Av Compu Link Remote Control System
This receiver is equipped with the AV COMPU LINK-III, which added a function to operate JVC video components through the video components terminals. To use this remote control system, you need to connect the video components you want to operate, following the diagrams below and the procedure on the next page. - Page 122 One-Touch DVD Play 1. If you have already plugged your VCR 1 (VCR connected to the VCR 1 jacks), DVD player, TV Simply by starting playback on the DVD player, you can enjoy the DVD playback without setting other switches manually. and this receiver into the AC outlets, unplug their •...
-
Page 123: Operating Jvc's Audio/Video Components
Operating JVC’s Audio/Video Components You can operate JVC’s audio and video components with this receiver’s remote control, since control signals for JVC components are preset in the remote control. Tuner Operating Audio Components You can always perform the following operations:... - Page 124 CD changer CD recorder After selecting “CDDSC” by pressing CONTROL repeatedly, you After pressing CDR (or selecting “CDR” by pressing CONTROL can perform the following operations on a CD changer: repeatedly), you can perform the following operations on a CD recorder: 3 PLAY: Starts playing.
-
Page 125: Operating Video Components
VCR 1: using cables with RCA pin plugs (see pages 6 and 7). 1 – 9, 0: • Some JVC VCRs can accept two types of the control signals — Selects the TV channels on the VCR. 3 PLAY: remote code “A”... -
Page 126: Operating Other Manufacturers' Video Equipment
Operating Other Manufacturers’ Video Equipment To change the transmittable signals for This remote control supplied with the receiver can transmit control signals for other manufacturers’ VCRs, TVs, CATV converters, operating another manufacturer’s TV DBS tuners and DVD players. By changing the transmittable signals from preset ones to the other manufacturers’, you can operate the other manufacturer’s components using this remote control. - Page 127 To change the transmittable signals for For CATV converter operating a CATV converter or DBS tuner Manufacturer Codes GENERAL INSTRUMENT 06, 07, 08, 09, 10, 11, 1. Press and hold CATV/DBS POWER. 12, 13, 14, 29 HAMLIN/REGAL 01, 02, 03, 04, 05 2.
- Page 128 Manufacturer Codes After pressing DVD, these buttons ROOM 00, 26, 27, 28, 29, 58 EFFECT can be used for the DVD menu SIZE AIWA 01, 02 operations. MENU BELL & HOWELL TEST CTR TONE LIVENESS BLAUPUNKT 04, 05 Note: 06, 07 ENTER ∗L/R BAL For detailed menu operations, refer to...
-
Page 129: Troubleshooting
Troubleshooting Use this chart to help you solve daily operational problems. If there is any problem you cannot solve, contact your JVC service center. PROBLEM POSSIBLE CAUSE SOLUTION The display does not light up. The power cord is not plugged in. - Page 130 PROBLEM POSSIBLE CAUSE SOLUTION “OVERLOAD” starts flashing on the Speakers are overloaded because of high 1. Press POWER on the front panel to turn off display. volume. the receiver. 2. Stop the playback source. 3. Turn on the receiver again, and adjust the volume.
-
Page 131: Specifications
Specifications Amplifier Output Power: At Stereo operation: 120 W per channel, min. RMS, driven into 8 Ω, 20 Front channels: Hz to 20 kHz with no more than 0.08% total harmonic distortion. At Surround operation: 100 W per channel, min. RMS, driven into 8 Ω at 1 kHz with no Front channels: more than 0.8% total harmonic distortion. - Page 132 FM tuner (IHF) Tuning Range: 87.5 MHz to 108.0 MHz 12.8 dBf (1.2 µV/75 Ω) Usable Sensitivity: Monaural: 21.3 dBf (3.2 µV/75 Ω) 50 dB Quieting Sensitivity: Monaural: 41.3 dBf (31.5 µV/75 Ω) Stereo: Signal-to-Noise Ratio (IHF-A weighted): Monaural: 78 dB at 85 dBf Stereo: 73 dB at 85 dBf Total Harmonic Distortion:...
- Page 133 Sophisticated electronic products may require occasional service. Just as quality is a keyword in the engineering and production of the wide array of JVC products, service is the key to maintaining the high level of performance for which JVC is world famous. The JVC service and engineering organization stands behind our products.
- Page 134 WHAT WE WILL DO: If this product is found to be defective, JVC will repair or replace defective parts at no charge to the original owner. Such repair and replacement services shall be rendered by JVC during normal business hours at JVC authorized service centers.
- Page 135 VICTOR COMPANY OF JAPAN, LIMITED 0101NHMMDWJEIN...
Need help?
Do you have a question about the RX-8010VBK and is the answer not in the manual?
Questions and answers