Advertisement
Advertisement
Table of Contents

Related Manuals for Ironman Fitness Evolution EVO-1


Summary of Contents for Ironman Fitness Evolution EVO-1
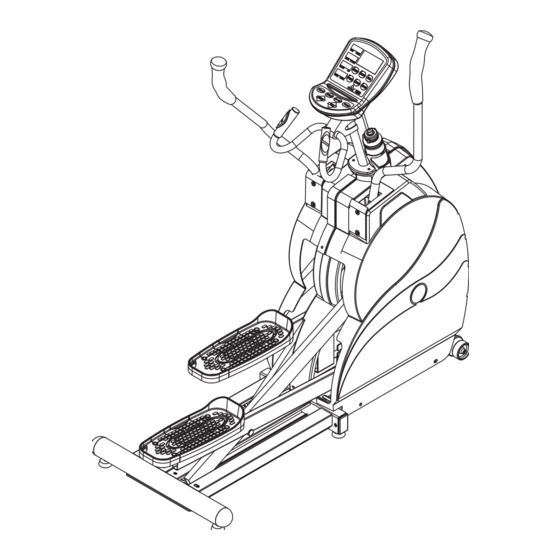
- Page 1 Owner’s Manual EVOLUTION ELLIPTICAL Customer Service 1.800.750.IRON 1.800.750.4766 Ironman Fitness 4009 Distribution Drive Suite 250 Garland, TX 75041 www.ironmanfitness.com Model Name : EVO-1 Manufactured Date: Serial Number : Write down for future reference 315-00040 01-06 Rev B EVOLUTION...
-
Page 2: Table Of Contents
Table of Contents Important Safety Information Before You Start Assembly Console Instructions Moving Instructions Monitoring Your Heart Rate Warm Up Exercises Exploded View Parts List Warranty 10-13 15-16... -
Page 3: Important Safety Information
3. The unit should only be used on a level surface and is intended for indoor use only. The unit should not be placed in a garage, patio, or near water and should never be used while you are wet. Ironman Fitness recom- mends a mat be placed under the unit to protect floor or carpet and for easier cleaning. -
Page 4: Before You Start
Before You Start Thank you for purchasing the EVOLUTION Elliptical! This quality product you have chosen was designed to meet your needs for cardiovascular exercise. Before you start, please read the Owner's Manual and become familiar with the operation of your new unit. Remember to take the time to perform the stretching exercises provided to avoid injury. -
Page 5: Assembly
Assembly INSTRUCTIONS FOR ASSEMBLY: Unpack the box in a clear area. Check to make sure all components are present and in good condition. Do not dispose of the packing material until the assembly is completed. Tools have been provided for you to use when assembling this product. - Page 6 Assembly Step 2 A) Insert Left Handlebar into the opening at the top of the left side on the Main Frame. Secure to the Pivot Arm using a Small Washer and a M8*45mm Hex Bolt. B) Slide two of the Cover Plates over the holes for the Short Screws. C) Attach the Small Cover and secure in place using two Short Screws.
- Page 7 Assembly Step 3 A) Plug the Upper Console Cable, the two Pulse Wires, and the Grounding Wire into the back of the Console. See Figure 3a B) Secure the Console to the Console Tube and secure in place using four M5*12mm Screws and four Small Washers.
- Page 8 Assembly Step 4 A) Plug the Upper Console Wire into the Lower Console Wire and slide the excess cable into the Main Frame as you lower the Console Tube down. B) Secure the Console Tube to the Main Frame using four Small Washers and 4 M8*15mm Button Screws.
- Page 9 Assembly Step 5: A) Locate wheel kit and take out of box. Wheel kit will already include one Bolt (2D1E), two Washers (0J4J), one Wheel (015W) and one Nut (0KMV). Tighten Nut if needed. B) Attach wheel kit to the front of the frame. Tighten Bolt on the wheel kit. Note: You will need a 17 mm wrench in order to complete this step.Wrench is provided.
-
Page 10: Console Instructions
Console Instructions Display Function Data Window - TIME, SPEED, STRIDES, DISTANCE, CALORIES, PULSE, LEVEL, WATTS Profile Window - Workout program profile and message. Program Indicator - Indicate which program you are currently using. Auto Scan Indicator - When this is lit, the DATA WINDOWS will automatically switch which data is currently being displayed. - Page 11 Console Instructions Starting the Console - Plug in the power supply to power on the console. Press START / ENTER key to go to the Quick Start Mode. Press LEVEL UP and LEVEL DOWN for 2 sec. to go to the Service Mode. Press TIME UP and TIME DOWN for 2 sec.
- Page 12 Console Instructions Key Description START / ENTER - Press START / ENTER to start time counting or to confirm your setting while programming the console. SELECT / SCAN - Press SELECT / SCAN to swap the data window displays or press and hold it for 2 seconds to alternate the displays automatically in 4 second intervals.
-
Page 13: Console Instructions
Console Instructions Console Service Mode Display Scroll Testing will show on the PROFILE WINDOW and "0"…"9", "A"…"F" on the DATA WINDOW, press any key to pass the testing. Keypad Testing will show the key button test results in the PROFILE WINDOW. Press and hold STOP / RESET key for 2 seconds to pass all the testing. -
Page 14: Moving Instructions
Moving Instructions CAUTION! TO REDUCE THE POSSIBILITY OF INJURY WHILE LIFTING, BEND YOUR LEGS AND KEEP YOUR BACK STRAIGHT. AS YOU LEAN THE UNIT, LIFT USING YOUR LEGS, NOT YOUR BACK. Reach down and grab the rear Foot Tube assembly with both hands. Next, carefully tilt the unit up until it rolls freely on the transport wheels. -
Page 15: Monitoring Your Heart Rate
Monitoring Your Heart Rate Monitoring Your Heart Rate To obtain the greatest cardiovascular benefits from your exercise workout, it is important to work within your target heart rate zone. The American Heart Association (AHA) defines this target as 60%-75% percent of your maximum heart rate. -
Page 16: Monitoring Your Heart Rate
Monitoring Your Heart Rate TARGET HEART RATE ZONE 100% Serious athletic training range Cardiovascular conditioning range Fat burning range... -
Page 17: Warm Up Exercises
Warm Up Exercises EXERCISE GUIDELINES WARNING! Before beginning this or any exercise program, you should consult your physician. This is espe- cially important for individuals over the age of 35 or individuals with pre-existing health problems. Warming up prepares the body for the exercise by increasing circulation, supplying more oxygen to the mus- cles and raising body temperature. -
Page 18: Exploded View
Exploded View... -
Page 19: Parts List
FOAM GRIPS, EVO-1 2DBE 311-00070 POLY V-BELT PULLET, EVO-1 2DDT 310-00170 WATER BOTTLE CAGE, EVO-1 2DDX 306-00623 END CAP, PEDAL TUBE ASSY, EVO-1 2DDW 306-00624 END CAP, REAR STABILIZER ASSY, EVO-1 2DDV 306-00625 END CAP, FRAME, EVO-1 2DE0 323-00329 PEDAL TUBE, EVO-1... -
Page 20: Warranty
Labor: 1 Year This Limited Warranty applies in the United States and Canada to products manufactured or distributed by Ironman Fitness (“Ironman”) under the Ironman brand name. The warranty period to the original purchaser is listed above in the table. - Page 21 Customer Service 1.800.750.IRON 1.800.750.4766 Ironman Fitness 4009 Distribution Drive Suite 250 Garland, TX 75041 www.ironmanfitness.com Ironman and M-dot are registered trademarks of the World Triathlon Corp., used here by permission.
Need help?
Do you have a question about the Evolution EVO-1 and is the answer not in the manual?
Questions and answers