Table of Contents
Advertisement
Advertisement
Table of Contents

Related Manuals for Ironman Fitness Achiever


Summary of Contents for Ironman Fitness Achiever
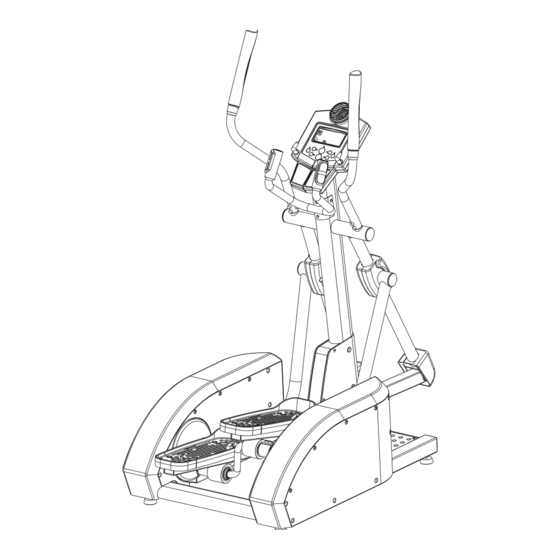
- Page 1 Customer Service 1.800.750.IRON 1.800.750.4766 4009 Distribution Drive Suite 250 Garland, TX 75041 www.ironmanfitness.com 315-00084 10/06 Rev B Owner’s Manual Achiever Elliptical CAUTION! Read all precautions and instructions in this manual before using this equipment.
-
Page 2: Table Of Contents
Table of Contents Important Safety Information Assembly Console Instructions Monitoring Your Heart Rate Warm-Up Exercises Troubleshooting/Cleaning/Maintenance Parts List Exploded Views Warranty Information 5-10 11-16... -
Page 3: Important Safety Information
3. The unit should only be used on a level surface and is intended for indoor use only. The unit should not be placed in a garage, patio, or near water and should never be used while you are wet. Ironman Fitness recommends a mat be placed under the unit to protect floor or carpet and for easier cleaning. -
Page 4: Important Safety Information
Important Safety Information SAFETY PRECAUTIONS AND TIPS FOR CHEST STRAP 1. It is the owner's responsibility to ensure that all users of this unit have read the Owner's Manual and are familiar with warnings and safety precautions. 2. Do not place chest strap near devices that generate large magnetic fields. TV sets, electric motors, radios, and high voltage power lines can affect the transmitter’s performance. -
Page 5: Assembly
Assembly Thank You for purchasing the Ironman Fitness Achiever Elliptical! The quality product you have chosen was designed to meet your needs for cardiovascular exercise. Before you start, please read the Owner’s Manual and become familiar with the operation of your new unit. - Page 6 Assembly Getting Started - The Ironman Fitness Achiever Elliptical will require some assembly. Unpack the box in a clear area. Remove packing material. Do not dispose of packing material until assembly is complete and unit is working properly. Place the unit on a clean level surface for assembly.
- Page 7 Assembly Figure 2 Locate Bag labeled Figure 2. Locate Cover. Secure Cover to Main Frame by using three M5*8 Screws through the left side of unit. Repeat for the right side. Figure 3 Locate Bag labeled Figure 3. Locate Left and Right Handrail Assemblies.
- Page 8 Assembly Figure 4 Locate bag labeled Figure 4. Lift and place left Linkage onto Sleeve and align holes. Secure Linkage to unit using four M8*12 mm Hex Bolts. Repeat for right side. Note: The Linkage is secured to the sleeve with three M8*12 Hex Bolts on the top of the Linkage and one M8*12 Hex Bolt on the bottom of the Linkage.
-
Page 9: Handrail Assembly
Assembly Figure 6 Locate bag labeled Figure 6. Locate Bracket Covers. Attach bracket Cover to the Handrail Assembly by lining up hole, and securing using one Screw, M5X0.8-12. Repeat for other side. Note: Do not overtighten screw, this will damage Bracket Cover. Figure 7 Locate bag labeled Figure 7. -
Page 10: Assembly
Console Tube using six M6*10 Hex Socket Head Bolts. Note: Ensure that all wires are secure inside console tube. Be careful not to pinch wires. You have completed assembly of your Achiever Elliptical. Figure 8 Figure 9 PULSE WIRE PULSE HANDLEBAR ASSY... -
Page 11: Console Instructions
Console Instructions Take a few moments to review the console layout. Below is a overview of the console keys and their different functions. CONSOLE BUTTONS: MODE: To set function value for TIME, DIST, CAL, PULSE. RESET: Return to main function mode in STOP mode and clean all preset function values at zero. START/STOP: To start or stop training RECOVERY:... -
Page 12: Console Functions
Console Instructions FAN: Console is equipped with a fan that has four settings, AUTO/LOW/MED/HIGH/OFF. Press the button to turn the fan to the preferred setting. The AUTO setting will adjust the fan speed based on the RPMs produced, the more RPMs produced the faster the fan speed will be. BODY FAT: Press the button to start body fat measurement. -
Page 13: Getting Started
Console Instructions CALENDAR: Screen will display year/month/day in sleep mode. When the unit is plugged in, the console will prompt user to input correct information. Use the UP and DOWN button until correct year is found. Press Mode to select and move on to the Month. Repeat to input correct month and day. Note: All information will be saved until unit is unplugged. -
Page 14: Preset Programs
Console Instructions Use the UP/DOWN buttons to scroll to this program. Press MODE to select this program. TIME will flash in the display. Use the UP/DOWN keys to set desired TIME. Press MODE to confirm value. Repeat steps for DISTANCE and KCAL. Press START/STOP to begin exercising. Grasp Pulse Grips loosely with both hands to activate PULSE function. -
Page 15: Body Fat Program
Console Instructions In all Heart Rate Control programs, the console only accepts the heart rate signal from the chest strap transmitter. Make sure that the Heart Rate Receiver is plugged into the side of the Console. The chest strap will not function if it is not plugged in. Once the Heart Rate Receiver is plugged in, the pulse grip heart rate function is disabled. - Page 16 Console Instructions Body Fat Body Type Female Male Athlete <17% Lean 17-22% 10-15% Average 22-25% 15-18% Above Avg 25-29% 18-20% Overweight 29-35% 20-25% Obese 35+% FITNESS TEST: (Pulse Recovery Feature) The fitness test compares your pulse rate before and after training. You will notice that your fitness will improve with regular exercise.
-
Page 17: Monitoring Your Heart Rate
Monitoring Your Heart Rate Monitoring Your Heart Rate To obtain the greatest cardiovascular benefits from your exercise workout, it is important to work within your target heart rate zone. The American Heart Association (AHA) defines this tar- get as 60%-75% percent of your maximum heart rate. Your maximum heart rate may be roughly calculated by subtracting your age from 220. -
Page 18: Warm-Up Exercises
Warm Up Exercises EXERCISE GUIDELINES WARNING! Before beginning this or any exercise program, you should consult your physician. This is especially important for individuals over the age of 35 or individuals with pre-existing health problems. Warming up prepares the body for the exercise by increasing circulation, supplying more oxy- gen to the muscles and raising body temperature. -
Page 19: Troubleshooting/Cleaning/Maintenance
CLEANING/MAINTENANCE - Your Achiever Elliptical has been manufactured to withstand many hours of use with minimal maintenance. It may occasionally require silicone to be sprayed on the moving parts (available at most stores). Periodically wipe down your machine with mild, soapy water or a diluted general purpose household cleaner. -
Page 20: Parts List
DRIVEN WHEEL, CENTER-G/ACHIEVER/DCT 2GPX 305-00170 COVER, SIDE RIGHT TOP, ACHIEVER 2GPW 305-00171 COVER, SIDE RIGHT INNER, ACHIEVER 2GPV 305-00172 COVER, SIDE RIGHT OUTER, W/LOGO ACHIEVER 0KRK 302-00144 U-TYPE NUT M5-12MM 2B5V 302-00111 CR. RE. PAN HD. SCREW M5*0.8-16MM 0K94 302-00115 CR. -
Page 21: Exploded Views
Exploded View... -
Page 22: Warranty Information
Labor: 1 Year This Limited Warranty applies in the United States and Canada to products manufactured or distributed by Ironman Fitness (“Ironman”) under the Ironman brand name. The warranty period to the original purchaser is listed above in the table. - Page 23 Customer Service 1.800.750.IRON 1.800.750.4766 Ironman Fitness 4009 Distribution Drive Suite 250 Garland, TX 75041 www.ironmanfitness.com Ironman and M-dot are registered trademarks of the World Triathlon Corp., used here by permission...
Need help?
Do you have a question about the Achiever and is the answer not in the manual?
Questions and answers