Advertisement
Quick Links
1840
1840
A
A
SSEMBLY
SSEMBLY
:
:
:
I I I I
MPORTANT
MPORTANT
MPORTANT
MPORTANT
READ ALL ASSEMBLY INSTRUCTIONS AND SAFETY PRECAUTIONS BEFORE USING THIS PRODUCT. REFERENCE ALL
SAFETY GUIDELINES AND WARNING LABELS. RETAIN PRODUCT LITERATURE FOR FUTURE REFERENCE.
S S S S
: : : :
AFETY
AFETY
AFETY
AFETY
PROPERLY WARM UP AND STRETCH BEFORE EXERCISING. IF YOU FEEL PAIN OR DIZZINESS AT ANY TIME WHILE
EXERCISING , STOP IMMEDIATELY AND CONSULT YOUR PHYSICIAN.
SERIAL NO.
SERIAL NO. _____________________________________________ PURCHASE DATE:____________________
SERIAL NO.
SERIAL NO.
Part No. 06203
Part No. 06203
Part No. 06203
Part No. 06203
E
E
LLIPTICAL
LLIPTICAL
I
I
NSTRUCTIONS
NSTRUCTIONS
T
T
RAINER
RAINER
/ O
/ O
WNERS
WNERS
PURCHASE DATE:____________________
PURCHASE DATE:____________________
PURCHASE DATE:____________________
Revision: B B B B Date: 10/09
M
M
ANUAL
ANUAL
10/09
10/09
10/09
Advertisement

Related Manuals for Ironman Fitness 1840


Summary of Contents for Ironman Fitness 1840
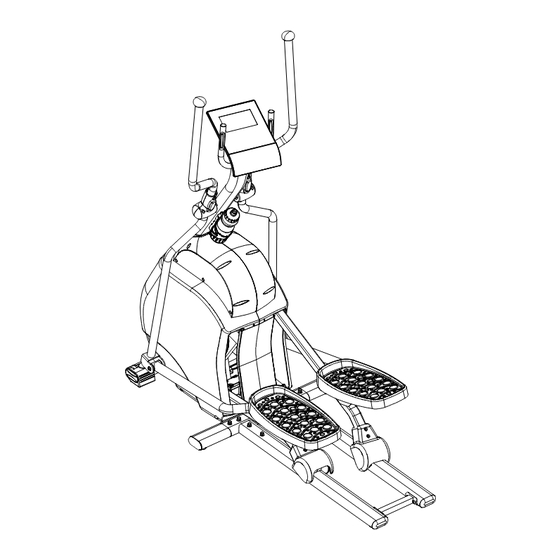
- Page 1 1840 1840 LLIPTICAL RAINER LLIPTICAL RAINER SSEMBLY NSTRUCTIONS WNERS ANUAL SSEMBLY NSTRUCTIONS WNERS ANUAL I I I I MPORTANT MPORTANT MPORTANT MPORTANT READ ALL ASSEMBLY INSTRUCTIONS AND SAFETY PRECAUTIONS BEFORE USING THIS PRODUCT. REFERENCE ALL SAFETY GUIDELINES AND WARNING LABELS. RETAIN PRODUCT LITERATURE FOR FUTURE REFERENCE.
-
Page 2: Parts Listing
ABLE OF ONTENTS 1840 E 1840 E LLIPTICAL RAINER LLIPTICAL RAINER EFERENCE NFORMATION Assembly Prep & Intro Parts Listing Product Exploded View Product Assembly Instruction 7-13 Computer Operation 14-16 Training Chart Lubrication instruction (Important) Troubleshooting Preventative Maintenance Warranty Terms Product Registration Star Trac Health &... - Page 3 & I SSEMBLY NTRO SSEMBLY REPARATION SSEMBLY REPARATION ♦ The product assembly process has been documented in easy to follow stages. Please read all assembly instructions carefully. Take time to review the manual and familiarize yourself with the entire assembly process before proceeding.
- Page 4 ARTS EFERENCE 1840 A SSEMBLY ARTS ISTING...
- Page 5 ARTS EFERENCE 1840 A SSEMBLY ARTS ISTING...
- Page 6 ARTS EFERENCE 1840 H 1840 H ARDWARE ISTING ARDWARE ISTING Socket Head M7 x 22 Multi Tool Lock Washer 7 x 2t Handlebar Clamp Allen Wrench Flat Washer 7 x 1t Self-threading Screw M3 x 14 Allen Bolt M8 x 20...
- Page 7 SSEMBLY ARTS 1840 A 1840 A SSEMBLY ARTS SSEMBLY ARTS 9991 9991 USTOMER ERVICE USTOMER ERVICE...
- Page 8 SSEMBLY NSTRUCTION SSEMBLY TAGE Attach Stabilizers IMPORTANT: Apply Thin Coat of DJUSTMENT EVELER Lubricant to the Top of Each Base Rail Assembly Hardware Required: Allen Bolt M8 x 20mmL Qty. 2 Flat Washer Qty. 10 Hex Bolt M8 x 50mmL Qty.
- Page 9 SSEMBLY NSTRUCTION SSEMBLY STAGE Attach Handlebar Mast Assembly FIGURE #1 Cable Pinch Point: Use Caution During Assembly Assembly Hardware Required: ARDWARE REINSTALLED IN THE SSEMBLY ARTS Flat Washer 8 x 2t* Qty. 2 Allen Bolt M8 x 16mmL* Qty. 6 Curved Washer 8 x 2t* Qty.
- Page 10 SSEMBLY NSTRUCTION SSEMBLY TAGE Mounting Swing Arms FIGURE #1 FIGURE #2 Assembly Hardware Required: ARDWARE REINSTALLED IN THE SSEMBLY ARTS Curved Washer 8 x 2t Qty. 4 Wave Washer Qty. 2 Flat Washer 10 x 2t Qty. 2 Hex Bolt M8 x 20mmL Qty.
- Page 11 SSEMBLY NSTRUCTION SSEMBLY TAGE Mounting Pedal Arms Roller FIGURE #1 Pedal Roller Assembly Hardware Required: Flat Washer 8 x 2t Qty. 2 Nylon Nut M8 Qty. 4 Flat Washer 8 x 1t Qty. 2 Allen Bolt M8 x 70mmL Qty. 2 Shoulder Bolt M8 x 64mmL Qty.
- Page 12 SSEMBLY NSTRUCTION SSEMBLY TAGE Mounting Fixed Hand Grips Assembly Hardware Required: ARDWARE REINSTALLED IN THE SSEMBLY ARTS Truss Screw M5 x 14mmL* Qty. 2 Handlebar Clamp Qty. 1 Flat Washer 7 x 1t Qty. 2 Lock Washer 7 x 2t Qty.
- Page 13 SSEMBLY NSTRUCTION SSEMBLY TAGE Mounting Computer Assembly Hardware Required: ARDWARE REINSTALLED IN THE SSEMBLY ARTS Truss Screw M5 x 14mmL* Qty. 4 Assembly Description: A) Remove the preinstalled mounting hardware from the back of the Computer (#27) . B) Plug the connector of Upper Data Cable (#8) into the corresponding receptacle on the back of the Computer (#27). Note: Avoid pulling on (stretching) the cable assemblies in order to make computer connections.
- Page 14 SSEMBLY NSTRUCTION Assembly Hardware Needed: (None) Assembly Description: Note: This product requires AC voltage. Make sure elliptical is located near a wall outlet. (AC Adapter will have an approximate cord length of 6 feet). Assembly Caution: The Adapter converts AC voltage to a low DC output. The Adapter can be shorted if it is improperly grounded while plugging it into a wall outlet.
- Page 15 OMPUTER PERATION C C C C I I I I OMPUTER OMPUTER NSTRUCTION NSTRUCTION OMPUTER OMPUTER NSTRUCTION NSTRUCTION ACTIVATION THE USER MAY PRESS ANY FUNCTION BUTTON OR START PEDALING TO ACTIVATE DISPLAY. NOTE: BIKE MUST HAVE THE AC ADAPTER PLUGGED INTO A WALL OUTLET IN ORDER TO OPERATE PROPERLY.
- Page 16 OMPUTER PERATION OMPUTER NSTRUCTION OMPUTER NSTRUCTION DISPLAY FUNCTIONS / READINGS TIME COMPUTER DISPLAY WILL ACCUMULATE TOTAL TRAINING TIME IN 00:00 (MINUTES : SECONDS). COMPUTER WILL COUNT UP TO, OR DOWN FROM , A MAXIMUM READING OF 99:59. PRESET TARGET TRAINING TIME: WHEN PROMPTED IN THE PROGRAM MODE USE THE UP / DOWN BUTTONS TO ADJUST THE SETTING.
- Page 17 OMPUTER PERATION ROGRAMMING OMPUTER ROGRAMMING OMPUTER ELECT RAINING ROGRAM AVAILABLE PROGRAM MODES AS LISTED BELOW ANUAL ROGRAM ARGET EART USTOM WILL APPEAR AS SCROLLING TEXT IN THE DISPLAY WINDOW ELECT ONE OF THE TRAINING PROGRAMS LISTED BELOW USING THE DOWN ENTER START / STOP BUTTONS...
- Page 18 RAINING HART TRAINING SCHEDULE RESISTANCE TOTAL TOTAL TOTAL HEART FITNESS AVERAGE DATE LEVEL TIME DISTANCE CALORIE RATE LEVEL SPEED / RPM...
- Page 19 UBRICATION NSTRUCTION Special Instruction-Elliptical Lubrication Reason (Symptom) for Applying Lubricant: Rollers could track off the base rails as the unit is being used. • Squeaking noise from roller as pedals move over base rails. • Application Instruction: Apply a thin coat of lubricant on the top and side surfaces of both base rails. •...
- Page 20 ROUBLESHOOTING BASIC TROUBLESHOOTING TIPS BASIC TROUBLESHOOTING TIPS PROBLEM DESCRIPTION SUGGESTED SOLUTION 1. NO DISPLAY (E-2 ERROR CODE) CHECK CABLE CONNECTIONS: MAKE SURE CONNECTIONS ARE SECURE AND IN THE CORRECT ORIENTATION. CHECK CABLE ASSEMBLIES FOR DAMAGE: PINCH POINTS & POSSIBLE SHORTING OF WIRES. CHECK FOR POSSIBLE COMPUTER DAMAGE: CRACKED DISPLAY WINDOW (BLACK SCREEN).
- Page 21 REVENTATIVE AINTENANCE QUIPMENT AINTENANCE QUIPMENT AINTENANCE ♦ Use a dampened soft-cloth to wipe equipment free of perspiration after each use. Avoid getting excessive moisture on computer or electronic components. Do not use abrasive cleaners or petroleum-based solvents to clean equipment. ♦...
- Page 22 IMITED ARRANTY General Terms & Conditions Exclusive Remedies All Star Trac Health & Fitness, Inc. exercise products are warranted For any product that fails to conform under the terms of applied to be free from defects in materials and workmanship under the warranty, Star Trac Health &...
- Page 23 RODUCT EGISTRATION Thank you for purchasing a Star Trac Health & Fitness, Inc. product. Our products are designed and manufactured to the highest quality standards. We are committed to our customers satisfaction and we will do everything we can under the con- ditions of your product warranty to keep you secure in your product purchase.
- Page 24 STAMP & F & F & F EALTH EALTH ITNESS ITNESS EALTH ITNESS 1844 N 1844 N 1844 N ELSON UITE ELSON ELSON UITE UITE , CO 80501 , CO 80501 , CO 80501 ONGMONT ONGMONT ONGMONT FOLD LINE & T LOSED OR EGISTRATION IN A EPARATE...
Need help?
Do you have a question about the 1840 and is the answer not in the manual?
Questions and answers