Table of Contents
Advertisement
Quick Links
Owner's Operation and Instruction Manual
CAUTION!
Please read this entire manual before you
install or use your new room heater.
to follow instructions may result in property
damage, bodily injury, or even death.
Improper Installation Could Void
Your Warranty!
THIS MANUAL WILL HELP YOU TO OBTAIN EFFICIENT, DEPENDABLE SERVICE FROM THE HEATER, AND ENABLE YOU TO
ORDER REPAIR PARTS CORRECTLY. KEEP IN A SAFE PLACE FOR FUTURE REFERENCE.
S
C
U
S
BRECKWELL
Exceptional Heat, Outstanding Value
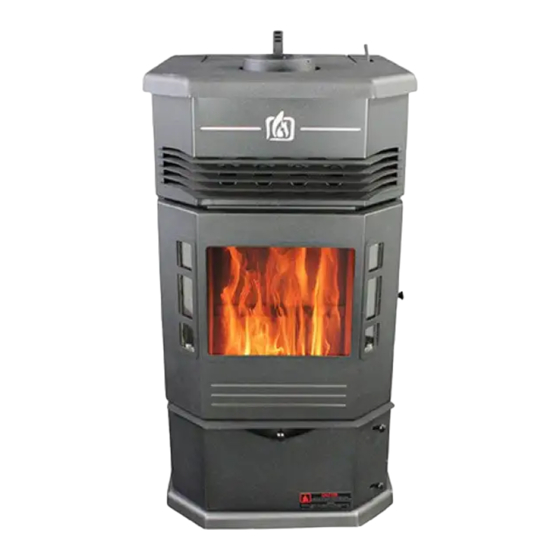
MODELS: SPG9000
PATENT PENDING
Failure
SAVE THESE INSTRUCTIONS
United States Stove Company
227 Industrial Park Road
P.O. Box 151
South Pittsburg, TN 37380
SAFETY NOTICE:
If this heater is not properly installed, a house fire
may result. For your safety, follow the installation
instructions. Never use make-shift compromises
during the installation of this heater. Contact local
building or fire officials about permits, restric-
tions and installation requirements in your area.
®
852016
Advertisement
Table of Contents

Subscribe to Our Youtube Channel
Related Manuals for Breckwell BRECKWELL SPG9000


Summary of Contents for Breckwell BRECKWELL SPG9000
- Page 1 THIS MANUAL WILL HELP YOU TO OBTAIN EFFICIENT, DEPENDABLE SERVICE FROM THE HEATER, AND ENABLE YOU TO ORDER REPAIR PARTS CORRECTLY. KEEP IN A SAFE PLACE FOR FUTURE REFERENCE. United States Stove Company 227 Industrial Park Road P.O. Box 151...
- Page 2 CONGRATULATIONS! You’ve purchased a heater from North America’s oldest manufacturer of wood burning products. By heating with wood pellets, you’re helping to CONSERVE ENERGY! Wood is our only Renewable Energy Resource. Please do your part to preserve our wood supply. Plant at least one tree each year.
- Page 3 WARRANTY INFORMATION CARD Name__________________________________________ Telephone #: (_____)_____________ City____________________________________________ State_______ Zip_________________ Email Address __________________________________________________________________ Model # of Unit________________________________ Serial #___________________________ Fuel Type: qWood qOther _________________________ qCoal qPellet qGas Place of Purchase (Retailer)______________________________________________________ City____________________________________________ State_______ Zip_________________ If internet purchase, please list website address___________________________________ Date of Purchase _______________________________________________________________ Reason for Purchase: qAlternative Heat...
- Page 4 Ê É Fold Here Fold Here Fold Here PLACE STAMP HERE United States Stove Company P.O. Box 151 South Pittsburg, TN 37380 Ussc...
- Page 5 Safety Precautions IMPORTANT: Read this entire manual before Install vent at clearances specified by the vent installing and operating this product. Failure to do manufacturer. so may result in property damage, bodily injury, Do not connect the vent to a vent serving any or even death.
-
Page 6: Installation
Tools and Materials Needed For Installation You will need a drill with a 1/8” bit to install sheet metal screws into connector pipe. A non-combustible floor protector as specified in this manual. All chimney and chimney connector components required for your particular chimney installation. Assembly Flue Collar Assembly: (Factory Installed) 1. -
Page 7: Positioning The Stove
POSITIONING THE STOVE It is very important to position the pellet stove as close as possible to the chimney, and in an area that will favor the most efficient heat distribution possible throughout the house. The stove must therefore be installed in the room where the most time is spent, and in the most spacious room possible. -
Page 8: Clearances To Combustibles
CLEARANCES TO COMBUSTIBLES It is of utmost importance that the clearances to combustible materials be strictly adhered to during installation of the stove. Refer to the tables below : Single Wall Pipe (Double Wall Pipe) Model SPG9000 20(14) 22(20) 22.5(16.5) 32(30) 12(11) 22(21) -
Page 9: Chimney Connector (Stove Pipe)
CHIMNEY CONNECTOR (STOVE PIPE) Your chimney connector and chimney must have the same diameter as the stove outlet (6”). If this is not the case, we recommend you contact your dealer in order to insure there will be no problem with the draft. - Page 10 CHIMNEY Your appliance may be hooked up with a 6” factory built or masonry chimney. If you are using a fac- tory built chimney, it must comply with UL 103 or CSA-B365 standard; therefore it must be a Type HT (2100°F).
-
Page 11: Factory Built Chimney
FACTORY BUILT CHIMNEY : When a metal prefabricated chimney is used, the manufacturer’s installation instructions must be followed. You must also purchase (from the same manufacturer) and install the ceiling support package or wall pass-through and “T” section package, firestops (where needed), insulation shield, roof flashing, chimney cap, etc. -
Page 12: Masonry Chimney
MASONRY CHIMNEY : Ensure that a masonry chimney meets the minimum standards of the National Fire Protection As- sociation (NFPA) by having it inspected by a professional. Make sure there are no cracks, loose mortar or other signs of deterioration and blockage. Have the chimney cleaned before the stove is installed and operated. - Page 13 Combustible Wall Chimney Connector Pass-Throughs Method A. 12” (304.8 mm) Clearance to Combustible Wall Member: Using a minimum thickness 3.5” (89 mm) brick and a 5/8” (15.9 mm) minimum wall thickness clay liner, construct a wall pass-through. The clay liner must conform to ASTM C315 (Standard Specifica- tion for Clay Fire Linings) or its equivalent.
-
Page 14: Outside Combustion Air
OUTSIDE COMBUSTION AIR Your appliance is approved to be installed with an outside air intake which is necessary for a mobile home. This type of in- stallation is also required in air tight houses and houses with negative pressure problems. You can purchase this option through your heater dealer or at your local hardware supply store. - Page 15 OPERATION (A): Fuel Loading Lid. Turn handle clockwise to open and expose the fuel charging system. Fill with pellets and close lid. (B): Fuel Dump Lever. The fuel dump lever is used to dump pellets into the main fuel chamber. Dump the pel- lets into fuel chamber by actuating the lever forward.
- Page 16 THE FIRST FIRES The first few fires in your new appliance needs to be small so as to cure the fresh paint and preserve it’s quality. To do so, fill the pre-chamber with 1/2 charge (approximately 5-7 obs.) of premium wood pellets. Close the fuel lid and dump fuel into main fuel chamber.
- Page 17 WARNINGS • NEVER OVERFIRE YOUR STOVE. IF ANY PART OF THE STOVE STARTS TO GLOW RED, OVER FIRING IS HAPPENING. READJUST THE AIR INTAKE CONTROL AT A LOWER SETTING. RELOADING If you wish to continue burning your heater after the majority of the fuel has been consumed, simply add more fuel to the main fuel chamber.
-
Page 18: Maintenance
MAINTENANCE Your wood pellet stove is a high efficiency stove however, still requires that maintenance be performed on a regular basis. Maintenance is a vital key in maintaining your stove’s efficiency, operation, and longevity. It is important to per- form a visual inspection of the stove every time it is emptied, in order to insure that no parts have been damaged, in which case repairs must be performed immediately. - Page 19 MAINTENANCE ASH DISPOSAL/ ASH PAN AREA Ashes should be removed from the stove every few days or when ashes get to 2 to 3 inches deep. Always empty the stove when it is cold, such as in the morning. Remove any accumulated ash or fallen pellets from the ash pan area. An Ash Vac greatly aids in this process and can be purchased from your local dealer.
-
Page 20: Repair Parts
REPAIR PARTS Part No. Description Qty. 25491 Feed Door, Painted (40484) 25692 Handle, Painted (40515) 83506 3/8 x 1-1/4 Roll Pin 891135 Spring Handle - LG 88066 Rope Gasket - 5/8” 4.6 Ft 88087 Glass Gasket - 1/8 thk x 1” wide 3.7 Ft 891131 Ceramic Glass... - Page 21 NOTES Ussc...
-
Page 22: How To Order Repair Parts
TION AS SHOWN IN THIS LIST: 1. THE PART NUMBER 2. THE PART DESCRIPTION 3. THE MODEL NUMBER: _______________________ 4. THE SERIAL NUMBER: _______________________ UNITED STATES STOVE COMPANY 227 INDUSTRIAL PARK ROAD P.O. BOX 151 SOUTH PITTSBURG, TN 37380 (423) 837-2100 WWW.USSTOVE.COM...
Need help?
Do you have a question about the BRECKWELL SPG9000 and is the answer not in the manual?
Questions and answers