Table of Contents
Advertisement
Certified for installations in
the USA and Canada.
French version is available for download from the U. S. Stove website: http://www.Breckwell.com/
Please read this entire manual before installation and use of this appliance. Failure to follow
these instructions could result in property damage, bodily injury, or even death.
Contact your local building or fire officials about obtaining permits, restrictions and installation
inspection requirements in your area.
Save these instructions.
United States Stove Company • 227 Industrial Park Road • P.O. Box 151 • South Pittsburg, TN 37380 • www.BRECKWELL.com
FOR TECHNICAL ASSISTANCE:
BRECKWELL
Exceptional Heat, Outstanding Value
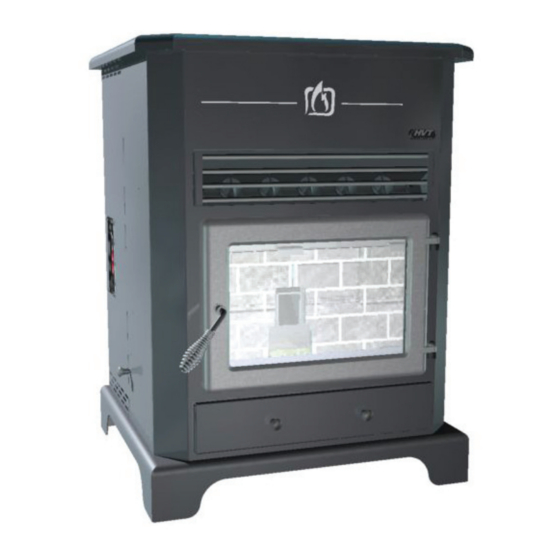
MODEL: SP1002
PATENT PENDING
Owner's Manual
PHONE: (800) 750-2723
FAX: (423) 837-2129
®
Part No.: 851970
Advertisement
Table of Contents

Subscribe to Our Youtube Channel
Related Manuals for Breckwell SP1002


Summary of Contents for Breckwell SP1002
- Page 1 inspection requirements in your area. Save these instructions. United States Stove Company • 227 Industrial Park Road • P.O. Box 151 • South Pittsburg, TN 37380 • www.BRECKWELL.com FOR TECHNICAL ASSISTANCE: PHONE: (800) 750-2723 FAX: (423) 837-2129 Part No.: 851970...
-
Page 2: Table Of Contents
Table of Contents TABLE OF CONTENTS ....................2 WArrANTy rEgiSTrATiON ................3-4 SAFETy PrECAuTiONS ................... 5 SPECiFiCATiONS ....................... 6 Heating Specifications......................... 6 Dimensions ..........................6 Electrical Specifications ......................6 Fuel Considerations ........................6 Safety and EPA Compliance ....................... 6 iNSTALLATiON ......................7 Installation Options........................ -
Page 3: Warranty Registration
Apply a stamp and mail to the address provided. You may use an enve- lope if you choose. You may register online by going to www.breckwell.com All information submitted will be kept strictly confidential. Information provided will not be sold for advertising purposes. - Page 4 Ê É Fold Here Fold Here Fold Here PlACE STAMP HERE Breckwell P.O. Box 151 South Pittsburg, TN 37380...
-
Page 5: Safety Precautions
Safety Precautions IMPORTANT: Read this entire manual before installing Allow the stove to cool before performing any and operating this product. Failure to do so may maintenance or cleaning. Ashes must be disposed result in property damage, bodily injury, or even death. in a metal container with a tight fitting lid. -
Page 6: Specifications
Specifications Heating Specifications Fuel Burn Rate* (lowest setting) 1.0 lbs./hr. (0.5 kg/hr) Burn Time (lowest setting) 120 hrs. (approximate) Hopper Capacity 120 lbs. (55kg) * Pellet size may effect the actual rate of fuel feed and burn times. Fuel feed rates may vary by as much as 20%. Use PFI listed fuel for best results. Dimensions Height 34 in. -
Page 7: Installation
Installation iNSTALLATiON OPTiONS Read this entire manual before you install and use your pellet stove. Failure to follow instructions may result in property damage, bodily injury, or even death! (See specific installation details for clearances and other installation requirements) A Freestanding Unit—supported by pedestal/legs and placed on a non-combustible floor surface in compliance with clearance requirements for a freestanding stove installation. -
Page 8: Clearances
Installation CLEArANCES Your pellet stove has been tested and listed for installation in residential, mobile home, and alcove applications in accordance with the clearances given in FIGURES 3-5 and TABLE 1. For safety reasons, please adhere to the installation clearances and restrictions. Any reduction in clearance to combustibles may only be done by means approved by a regulatory authority. -
Page 9: Venting Requirements
Installation VENTiNg rEquirEmENTS Install vent at clearances specified by the vent manufacturer. Do not connect the pellet vent to a vent serving any other appliance or stove. Do not install a flue damper in the exhaust venting system of this unit. ... -
Page 10: Vent Termination Clearances
Installation VENT TErmiNATiON CLEArANCES: Minimum 4-foot (1.22m) clearance below or beside any door or window that opens. Minimum 1-foot (0.3m) clearance above any door or window that opens. Minimum 3-foot (0.91m) clearance from any adjacent building. Minimum 7-foot (2.13m) clearance from any grade when adjacent to public walkways. Minimum 2-foot (0.61m) clearance above any grass, plants, or other combustible materials. -
Page 11: Through The Wall Installation
Installation ThrOugh ThE WALL iNSTALLATiON (RECOMMENDED INSTALLATION) Canadian installations must conform to CAN/CSA-B365. To vent the unit through the wall, connect the pipe adapter to the exhaust motor adapter. If the exhaust adapter is at least 18 in.(457mm) above ground level, a straight section of pellet vent pipe can be used through the wall. -
Page 12: Outside Air Supply
Installation OuTSiDE Air SuPPLy (optional, unless installing in a mobile home) Depending on your location and home construction, outside air may be necessary for optimal performance. Metal pipe (solid or flexible) must be used for the outside air installation. PVC pipe is NOT approved and should NEVER be used. -
Page 13: Control Panel
Control Panel PANEL CONTROLS The blowers and automatic fuel supply are controlled from a panel on the left side of the appliance. The control panel functions are as follows: A. ON/OFF SWITCH • When pushed the stove will automatically ignite. No other firestarter is necessary. The igniter will stay on for at least 10 and up to 15 minutes, depending on when Proof of Fire is reached. -
Page 14: Operation
High ash content – Poor quality pellets will often create smoke and dirty glass. They will create a need for more frequent maintenance. You will have to empty the burn pot plus vacuum the entire system more often. Poor quality pellets could damage the auger. Breckwell cannot accept responsibility for damage due to poor quality pellets. PRE-START-UP CHECK Remove burn pot, making sure it is clean and none of the air holes are plugged. -
Page 15: The Hot Rod Automatic Fire Starter
Operation DAmPEr CONTrOL The damper control rod on the stove’s lower left side adjusts the combustion air. This control is necessary due to the varied burn characteristics of individual installations, different pellet brands and pellet feed rates. It allows you to improve the efficiency of your stove. -
Page 16: Thermostat Installation
Thermostat Installation OPTiONAL ThErmOSTAT A optional thermostat may help you maintain a constant house On/Off High/Low Manual temperature automatically. A millivolt thermostat is required. A fixed wall mount or hand held model can be used. The control panel can be set up two ways to operate your stove in thermostat mode. -
Page 17: Maintenance
Maintenance Failure to clean and maintain this unit as indicated can result in poor performance and safety hazards. Unplug your stove’s electrical cord prior to removing the back panel or opening the exhaust system for any inspection, cleaning, or maintenance work. ... -
Page 18: Painted Surfaces
Maintenance PAiNTED SurFACES Painted surfaces may be wiped down with a damp cloth. If scratches appear, or you wish to renew your paint, contact your authorized dealer to obtain a can of suitable high-temperature paint. gLASS - Cleaning, Removal and Replacement of broken Door Glass Cleaning - We recommend using a high quality glass cleaner. -
Page 19: Baffle Removal/Cleaning Tools
Maintenance Baffle Removal: When the appliance has cooled and has been turned off, remove the ash pan and dump any accumulative ashes as prescribed previously. Remove the two baffles by lifting up and allowing the bottom to tilt outward, then down. Use a chimney brush or ash vacuum to clean these two areas. -
Page 20: Trouble Shooting
Trouble Shooting Guide When your stove acts out of the ordinary, the first reaction is to call for help. This guide may save time and money by enabling you to solve simple problems yourself. Problems encountered are often the result of only five factors: 1) poor fuel;... - Page 21 Trouble Shooting Guide STOVE ShuTS OFF AND ThE #3 LighT FLAShES Possible Causes: Possible Remedies: (Unplug stove first when possible) The hopper is out of pellets. Refill the hopper. The air damper is too far open for a low feed setting. If burning on the low setting, you may need to close the damper all the way (push the knob in so it touches the side of the stove).
- Page 22 Trouble Shooting Guide STOVE FEEDS PEllETS, bUT WIll NOT IGNITE Possible Causes: Possible Remedies: (Unplug stove first when possible) Air damper open too far for ignition. Push the air damper in closer to the side of the stove for startup. In some situations it may be necessary to have the damper completely closed for ignition to take place.
-
Page 23: High Limit Switch Keeps Tripping
Trouble Shooting Guide STOVE WIll NOT FEED PEllETS, bUT FUEl FEED lIGHT COMES ON AS DESIGNED Possible Causes: Possible Remedies: (Unplug stove first when possible) Fuse on control board blew. Remove the control board. On the back there is one fuse. If it appears to be bad, replace it with a 5 Amp 125 Volt fuse. - Page 24 Trouble Shooting Guide • GlASS “SOOT’S” UP AT A VERy FAST RATE • FlAME IS lAZy, DARK, AND HAS blACK TIPS • AFTER STOVE HAS bEEN ON FOR A WHIlE, THE bURNPOT OVERFIllS Possible Causes: Possible Remedies: (Unplug stove first when possible) Stove or vent pipe is dirty, which restricts airflow through the burnpot.
-
Page 25: Repair Parts Diagram/List
Parts Diagram... - Page 26 Weldment, Right Baffle 25863 Regulator, Manual Feed Rate 892123 Weldment, Left Baffle 25864 Auger Cover, Manual Feed Rate 892061 Decorative Plate, Breckwell Flame 892044 Weldment, Top Lid 892057 Plate, Backing-Flame 25488 Side, Right Cabinet C-E-401 Circ BD All Mod X P22 New Style...
-
Page 27: Wiring Diagram
Wiring Diagram... - Page 28 This lisT: 1. The parT number 2. The parT descripTion 3. The model number: _______________________ 4. The serial number: _______________________ ® BRECKWELL Exceptional Heat, Outstanding Value 227 industrial park road p.o. box 151 south pittsburg, Tn 37380 (800) 750-2723...
Need help?
Do you have a question about the SP1002 and is the answer not in the manual?
Questions and answers