Table of Contents
Advertisement
Quick Links
Advertisement
Table of Contents

Related Manuals for Extech Instruments VIR50


Summary of Contents for Extech Instruments VIR50
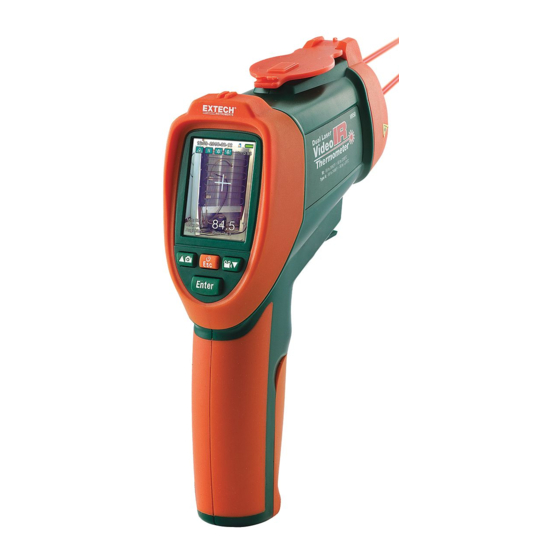
- Page 1 User’s Manual Dual Laser Video IR Video Thermometer MODEL VIR50...
- Page 2 Use extreme caution when the laser pointer beam is on Do not point the beam toward anyone's eye or allow the beam to strike the eye from a reflective surface Do not use the laser near explosive gases or in other potentially explosive areas VIR50-EU-EN v2.3 5/14...
-
Page 3: Meter Description
Power and ESC button ENTER button ▼ and Video button Front View Camera lens IR thermometer lens Measurement trigger Battery Battery cover Laser pointers Micro SD card port Note: A tripod mount is located on the bottom of the handle VIR50-EU-EN v2.3 5/14... -
Page 4: Operation
Datalogging mode: the meter functions as a measurement storage/retrieval device. Display Symbols Symbol Description Symbol Description Video + IR mode High alarm IR-only mode High alarm triggering Dew Point mode Low alarm Laser Low alarm triggering Scan Hold VIR50-EU-EN v2.3 5/14... - Page 5 In the Video + IR mode, press the button to enter the video capture mode and then press the button again to begin recording video. Press the ESC button to exit. Use the ▼button to stop the video. VIR50-EU-EN v2.3 5/14...
-
Page 6: Dew Point Temperature Mode
IR temperature value. Press and hold the measurement trigger to take a measurement. In the Dew Point mode the percentage bargraph indicates how close the IR temperature is to the Dew Point temperature. At 100%, the two values are identical. VIR50-EU-EN v2.3 5/14... -
Page 7: Datalogging Mode
From the Datalogger screen use the arrow keys to select the COLOR parameter and then press the ENTER button. Use the ▲ and ▼ buttons to select a line color and then press the ENTER button to confirm. VIR50-EU-EN v2.3 5/14... - Page 8 Buzzer Set the buzzer on or off Auto screen-off Select the time before the screen automatically turns Auto power-off Select the time before the VIR50 automatically powers off. System Default Setting Restores the VIR50 to its default settings System Upgrade Upgrades the system via the SD card VIR50-EU-EN v2.3 5/14...
- Page 9 Use the ▲ and ▼ buttons to select the desired format for the time, and press the ENTER button to confirm. Once the format has been chosen, use the ▲ and ▼ buttons to select the minute, hour, and AM/PM (where applicable). VIR50-EU-EN v2.3 5/14...
- Page 10 Use the ▲ and ▼ buttons to select either FLASH or SD CARD, and press the ENTER button to confirm. Then select either WORKING SPACE or FORMAT, and press the ENTER button to confirm. If FORMAT was pressed, click YES or NO to confirm. VIR50-EU-EN v2.3 5/14...
- Page 11 Use the ▲ and ▼ buttons to disable or select an auto-power-off time, press the ESC button to exit and save. Setting the Screen Timeout Use the ▲ and ▼ buttons to disable or select a screen auto-off time, press the ESC button to exit and save. VIR50-EU-EN v2.3 5/14...
-
Page 12: System Upgrade
Selecting the Memory Type If there is no SD card present in the VIR50, then only a single blue icon will be displayed on the LCD screen in the top left corner. If there is an SD card present, but the memory is being used by the device, then there will be two icons, a chip (blue i.e. -
Page 13: Measurement Settings
Display Average temperature or Differential IR temperature Ambient TEMP Display the air temperature and relative humidity Dewpoint Wet Bulb Display the dew-point and wet bulb temperature Type K Enable or disable the type-k contact thermocouple input Color Set the color VIR50-EU-EN v2.3 5/14... - Page 14 Use the ▲ and ▼ buttons enable or disable the alarm. If the high alarm is enabled, press the ENTER button to adjust its value; use the ▲ and ▼ buttons to adjust the value. Press the ENTER button to conform and then press the ESC button to exit and save. VIR50-EU-EN v2.3 5/14...
- Page 15 Ambient TEMP/% RH Press the ENTER button to switch the air temperature and relative humidity displays ON or OFF. Dew-point/wet bulb temperature Press the ENTER button to switch the dew-point and wet bulb temperature ON or OFF. VIR50-EU-EN v2.3 5/14...
- Page 16 Use the ENTER button to view a Picture, Video or Data log. Press the ENTER button to delete a picture, video or log. Use the ▲ button to confirm a deletion and press the ▼ button to cancel a deletion. VIR50-EU-EN v2.3 5/14...
- Page 17 Item Description Picture Display saved images Video Playback saved videos Logs Display datalogger data VIR50-EU-EN v2.3 5/14...
-
Page 18: Transfer Files To A Pc
You can hand over your used batteries / accumulators at collection points in your community or wherever batteries / accumulators are sold! Disposal: Follow the valid legal stipulations in respect of the disposal of the device at the end of its lifecycle VIR50-EU-EN v2.3 5/14... -
Page 19: Ir Measurement Notes
Distance to Spot Ratio determines the measured spot size for the distance used. For this meter the ratio is 50:1 or: 1”(2.54cm) spot @ 50” (1.27m), 2”(5.08cm) spot @ 100”(2.54m) or 0.5”(1.27cm) spot @ 25”(0.64m). 50” / 127cm VIR50-EU-EN v2.3 5/14... -
Page 20: Emissivity And Ir Measurement Theory
Emissivity values range from 0.1 for a very reflective object to 1.00 for a flat black finish. For the VIR50, the emissivity is adjustable from 0.1 to 1.00 (see the Measurement Settings section earlier in this User Guide). Most organic materials and painted or oxidized surfaces have an emissivity factor of 0.94. -
Page 21: Specifications
± 3.6°F (2°C) Dew Point Temperature Accuracy Based on temperature and RH specifications Relative Humidity Accuracy 40 to 60% ± 5.0%RH: 20% to 40% and 60% to 80% ± 5.0%RH 0% to 20% and 80% to 100% ± 6.0%RH VIR50-EU-EN v2.3 5/14... -
Page 22: General Specifications
2 hours with AC adaptor or USB connection Automatic Power Off Programmable: OFF, 3, 15, and 60 minutes Weight 0.9 lbs. / 410g Dimensions 8.1 x 2.4 x 6.1” (205 x 62 x 155mm) Copyright © 2014 FLIR Systems, Inc. All rights reserved including the right of reproduction in whole or in part in any form www.extech.com VIR50-EU-EN v2.3 5/14...
Need help?
Do you have a question about the VIR50 and is the answer not in the manual?
Questions and answers