
Related Manuals for Cyclo Vac Tradition E100


Summary of Contents for Cyclo Vac Tradition E100
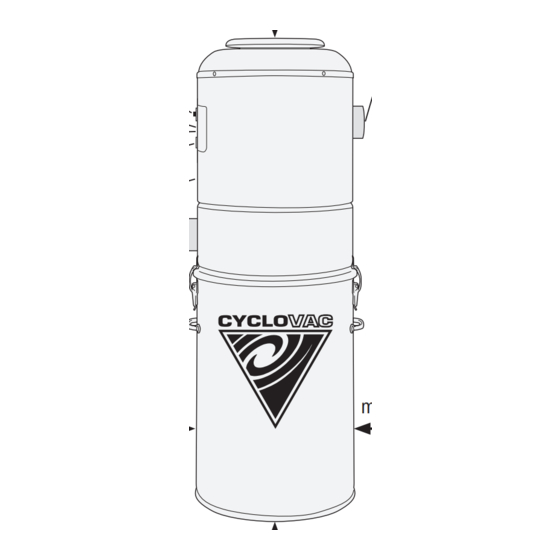
- Page 1 OWNER’S MANUAL FOR HOUSEHOLD USE ONLY Please read this document carefully before installing and/or using your central vacuum cleaning system. MODEL : _______________ SERIAL NO : ______________________...
-
Page 3: Important Safety Instructions
IMPORTANT SAFETY INSTRUCTIONS When using an electrical appliance, basic precautions should always be followed, including the following. Read all instructions before using this appliance WARNING – To reduce the risk of fi re, electric shock, or injury: 1. Do not leave appliance when plugged in. Unplug from outlet when not in use and before servicing. -
Page 5: Table Of Contents
Dirt Receptacle Disposable Bag & Filter Filters Carbon Dust Filter TROUBLESHOOTING General Information Decrease in suction strength Vacuum will not start Vacuum will not stop WARRANTY INFORMATION Limited Lifetime Warranty One Year Satisfaction Guarantee Warranty on Cyclo Vac Attachments WEEE Directive... -
Page 6: Preface
Preface Your new Cyclo Vac central vacuum system was designed and manufactured in Blainville, Quebec, by the largest central vacuum cleaner manufacturer in Canada. With over forty years of experience in the fi eld, we provide a high-quality, state-of- the-art product, and guarantee your complete satisfaction. Our extensive network of qualifi ed professionals ensures fi rst quality service near you. -
Page 7: Schematic - Other Models
Schematic – Other Models 1. Circuit Breaker 2. Reset (DL series only) 3. LEDs (DL series only) 4. Low Voltage Connector 5. Serial Number 6. Air Intake 7. Air Exhaust min. 30 cm (12") With muffl er turned down, min. 30 cm (12") min. -
Page 8: Installation
fi gure 2 Contrary to all other connections in the piping system, do not glue the last fi tting to your unit. Cyclo Vac central vacuums are equipped with an adjustable air intake valve (fi gure 3), which does not require glue. -
Page 9: Dos & Don'ts
Dos & Don’ts INSTALLING CONDUITS Installation... - Page 10 Dos & Don’ts Installation...
- Page 11 Dos & Don’ts INSTALLING INLETS When installing your vacuum inlets, we recommend that the principle of electric polarity be taken into account. Ensure that the wire connected onto contact A on inlet 1 is the same as that connected to contact A on inlet 2, and so on. Do not cross, reverse or interchange wires.
-
Page 12: Muffler Installation
3. Insert the 90° elbow (B) into the rubber coupling, and tighten the clamp collar. 4. Insert the muffl er (C) on the end of the 90° elbow. E100 MODEL A. Rubber coupling B. 90° elbow C. -
Page 13: Electric Connections
Electric Connections There should be an electric outlet within 1 meter (3 feet) of your central vacuum unit. Once the appliance is installed in a suitable location, connect your central unit to an electric outlet on an dedicated* grounded circuit. Do not use extension cords or modify the length of your vacuum cleaner’s power cord. -
Page 14: Grounding Instructions
Grounding Instructions This appliance must be grounded. If it should malfunction or breakdown, grounding provides a path of least resistance for electric current to reduce the risk of electric shock. This appliance is equipped with a cord having an equipment- grounding conductor and grounding plug. -
Page 15: Low Voltage Connections
Low Voltage Connections Connect the low voltage wires to the low voltage inlet on your unit. To do so, simply strip wires over ½ cm (¼ "), remove the terminals from the low voltage inlet on the unit, and proceed according to the types of inlet and wire used. -
Page 16: Installing The Remote Monitor
Installing the Remote Monitor (Optional — DL300 only) Having determined the location of both the central vacuum unit and the Remote System Monitor, run low voltage wiring to connect the Monitor to the central vacuum power unit. Installing the Remote Monitor 1. - Page 17 Installing the Remote Monitor (Optional — DL300 only) Connections on the Vacuum Power Unit 1. Having stripped the exterior casing of the four-stranded wire, strip 0,5 cm (¼") of each color wire. 2. Connect wires to the power unit connector. Insert each wire in the designated inlet, of the corresponding color.
-
Page 18: Operating Instructions
Hose Hook-up & Inlets Before operating your central vacuum… Please verify that it is properly connected to the piping system, and to a grounded electrical outlet, and that the low voltage wires are connected to the unit (see pages 8 to 16). Then read the complete owner’s manual and proceed with a quick verifi cation of your unit’s installation: •... -
Page 19: Speed Variation Hose
Speed Variation Hose (DL Series Only) Exclusive to Cyclo Vac, the Speed Variation hose allows the selection of 4 power levels by the simple slide of a switch on the hose handle. The light emitting diodes on the “Speed Variation” hose indicate the power level chosen. Flashing diodes inform you that the time has come to empty the receptacle or clean the fi lters. -
Page 20: Maintenance Suggestions Module
Maintenance Suggestions Module (DL Series Only) Cyclo Alert Your unit is equipped with an electronic timing board that will suggest, by the color of the blinking LED, the type of maintenance that should be done. These signals are only suggestions and do not indicate a problem with your unit. -
Page 21: Integrated System Monitor
Integrated System Monitor (DL300 only) Your central vacuum unit is equipped with an electronic timing device which will recommend by a series of light emitting diodes (LEDs) proper maintenance of your vacuum system. These signals are only suggestions and will do not indicate a problem with your vacuum system. -
Page 22: Cyclo Vac Attachments
Cyclo Vac Attachments Oval Dusting Brush Use just about anywhere: on lamps & lamp shades, blinds, shelves, decorative trims Upholstery Brush With removable bristles, use to clean all upholstered furniture such as sofas, chairs, and mattresses. Crevice Tool Use in narrow spaces, nooks and crannies, such as heating ducts, between sofa cushions, and between window panes. - Page 23 Cyclo Vac Attachments Hose Holder In addition to conveniently holding your hose, it’s specially designed to allow the storage of your fl oor brush on the telescopic wand, without crushing the brush bristles. Telescopic Wand It’s easily adjusted to the desired height.
-
Page 24: Maintenance
Motor Please note that Cyclo Vac motors do not require lubrication. Each motor contains two carbon brushes which will wear normally, and may eventually require replacement. For warranty purposes, this should be done by an authorized service center. Brush life is affected by the number of hours used, frequency of start-ups and shut-downs, humidity, altitude, and temperature. -
Page 25: Filters
We recommend regular maintenance of the fi ltration system, in order to ensure your central vacuum’s maximum performance. Your Cyclo Vac central vacuum is equipped with two fi lters. An anti-clogging fi lter (thin fabric) stops the larger particles, and a Cyclofi ltre (thick fabric) catches... -
Page 26: Carbon Dust Filter
Carbon Dust Filter (Patent pending) (E300 and DL300 Only) We recommend that you change this fi lter once for every three maintenances of the dirt receptacle (see page 26). For the DL300, the integrated monitor will indicate when to change this fi lter. These indications are provided by an electronic timing board, only as a reference guide. -
Page 27: Troubleshooting
Remember that in order for your warranty to remain valid, maintenance of the motor and repairs to the unit itself must be carried out by an authorized service center, using original Cyclo Vac or Trovac parts. Troubleshooting... -
Page 28: Decrease In Suction Strength
Troubleshooting ROBLEM OSSIBLE CAUSE ORRECTIVE ACTION Decrease in suction Dirt recipient / Bag is full Empty dirt recipient / strength change bag (see page 25). Dirt recipient is not Check clamps holding properly attached dirt recipient, to make sure they are tight, and dirt recipient is aligned. - Page 29 Troubleshooting ROBLEM OSSIBLE CAUSE ORRECTIVE ACTION Decrease in suction Blocked hose Plug the handle end of strength (cont.) the hose into the suction inlet, thus reversing the suction in the hose. Cover the gap around the handle, to ensure suitable suction strength, and ensure contact with inlet contacts to start the unit.
-
Page 30: Vacuum Will Not Start
Troubleshooting ROBLEM OSSIBLE CAUSE ORRECTIVE ACTION Ensure that the Vacuum will not start The electrical power is power cord is plugged not connected properly into a dedicated grounded electrical outlet, according to specifi cations on pages 13 and 14. Verify the low voltage Low voltage wire not wires, make sure they are connected properly... -
Page 31: Vacuum Will Not Stop
Troubleshooting ROBLEM OSSIBLE CAUSE ORRECTIVE ACTION Vacuum will not stop Hose improperly inserted Ensure that the hose into vacuum inlet end is properly placed in the vacuum inlet: the tab on the hose should fi t into the slots on the inlet, to ensure adequate contacts for the hose switch to function (see... -
Page 32: Warranty Information
50 % In order to maintain your warranty, all repairs must be made by an authorized Cyclo Vac service center, with original Cyclo Vac or Trovac parts. Failure to do so could void the warranty. This warranty excludes normal wear and tear of certain parts such as fi lters, damages caused (according to Cyclo Vac) by abusive use (ex.: drywall dust,... -
Page 33: Warranty On Cyclo Vac Attachments
Any other attachment, even if purchased at a Cyclo Vac sales center at the same time as your power unit, is not covered by the 3 year Cyclo Vac warranty. This warranty is valid for domestic use only. This warranty is not a modifi cation but an addition to warranties required by law. -
Page 34: Weee Directive
WEEE Directive Important Environmental Information – European Economic Area only This appliance has been assessed in accordance with the European Parliament Directive on Waste Electrical and Electronic Equipment, usually referred to as the WEEE Directive. The WEEE Directive requires that the appliance be disposed of at the end of its useful life in an environmentally responsible manner. - Page 35 WWW.CYCLOVAC.COM Head Offi ce / Siège social / Ofi cina Central CANADA 3, rue Marcel-Ayotte Blainville (Québec) J7C 5L7 Tel. : (450) 434-2233 • Fax : (450) 434-6111 info@trovac.com 1 888 77CYCLO Distribution Centers / Centres de distribution / Centros de distribución CANADA CANADA 1260, Lakeshore Road...
Need help?
Do you have a question about the Tradition E100 and is the answer not in the manual?
Questions and answers