
Subscribe to Our Youtube Channel
Related Manuals for Euromaid CG6BLS


Summary of Contents for Euromaid CG6BLS
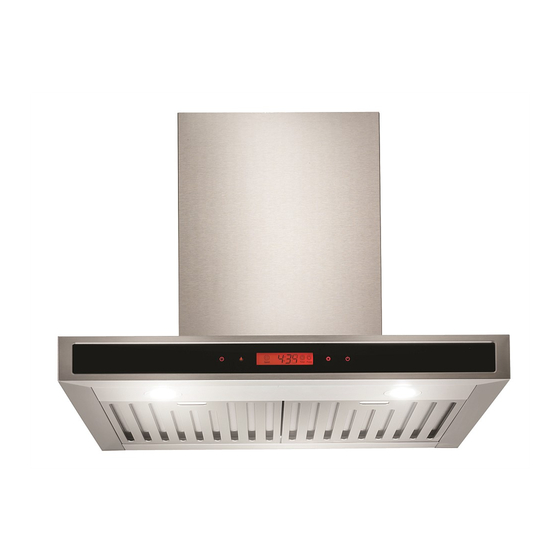
- Page 1 600mm Curved Glass & Stainless Steel Canopy MODEL CG6BLS Installation and Operation...
-
Page 2: Table Of Contents
2 …………………………………………………. Notice 3 …………………………………………………. Caution 4 …………………………………………………. Feature 5-8 ……………………………………………….. Installation 9 ………………………………………………….. Notice of installation 10 ……………………………………………..….. Safety Warning 11-16 …………………………………………..… Use 17 ………………………………………………… Maintenance 18 ………………………………………………… Light Replacing 19 ………………………………………………… Abnormity and Solution Home Appliances – November 2012... -
Page 3: Notice
2. The installation work must be undertaken by a qualified and competent fitter. 3. The manufacturer disclaims all liability for any damage or injury caused as a result of not following instructions for installation contained in the following text. The cooker hood is used on 220/240v, 50Hz. Home Appliances – November 2012... -
Page 4: Caution
Adequate ventilation of the room is required when the cooker hood is used at the same time as appliances burning gas or other fuels. - CAUTION: Accessible parts may become hot when used with cooking appliances. Home Appliances – November 2012... -
Page 5: Feature
3. With the isolated low voltage circuit board control, 12vAC input, the lights are therefore safer. 4. Special wind tunnel construction and oil collector design, free dirt will be absorbed in a second. Home Appliances – November 2012... -
Page 6: Installation
See Pic 9. Note: The two safety vents are positioned on the back casing, with diameter of 6mm. Home Appliances – November 2012... - Page 7 Canopy Installation and Operation Manual Warning: Failure to install the screws or fixing device in accordance with these instructions may result in electrical hazards Home Appliances – November 2012...
- Page 8 See Pic 9. Note: The two safety vents are positioned on the back casing, with diameter of 6mm. Home Appliances – November 2012...
- Page 9 Canopy Installation and Operation Manual Warning: Failure to install the screws or fixing device in accordance with these instructions may result in electrical hazards Home Appliances – November 2012...
-
Page 10: Notice Of Installation
3. The bending of ventilation tube should be≥120°, parallel or above the start point and should be connected to the external wall. 4. After installation, make sure that the extractor is level to avoid grease collection at one end. Home Appliances – November 2012... -
Page 11: Safety Warning
& using, and keep it in a safe place. Ensure that you could get our guarantee for your cooker hood, please provide the warranty card and purchase receipt, or the guarantee will not be offered. Home Appliances – November 2012... -
Page 12: Use
5. Push the light button; the indicating light 4 on, and the two lighting lamps will come on. Push it again and the lamps will turn off, with every push the buzzer will buzz one time. Home Appliances – November 2012... - Page 13 4. Push the High button, the buzzer will buzz once, and the motor runs at high speed. 5. Push the light button and the two lights will come on. Push it again and the light will turn off. pi c6C pi c6C pi c6C Home Appliances – November 2012...
- Page 14 ” button once the number adds by 01. Continue pressing “ ” button; it will display from 01;02… until 59. When LCD shows 59; it doesn’t work by pressing “ ” button. Press “ ” Home Appliances – November 2012...
- Page 15 Next time; if you want to use delay timer function and you press “ ” button without any change on time. The hood will automatically count time down from your previous setting after 5 seconds. Home Appliances – November 2012...
- Page 16 Namely: The variable is 01 each time it is pressed; the hour segment is with the largest digit of 23. If it exceeds 23, Home Appliances – November 2012...
- Page 17 Time segment change over, 5 seconds later, it starts to decrease gradually (example: 15min is changed over to 30min, with a delay of 5 seconds, and 00: 30 on the display screen starts to decrease gradually). Home Appliances – November 2012...
-
Page 18: Maintenance
Please don’t tear open the fixed bar around the carbon filter G. If the supply cord is damaged, it must be replaced by the manufacturer, its service agent or similarly qualified persons in order to avoid a hazard. Home Appliances – November 2012... - Page 19 Remove the filters, and push the light downwards, and unplug the wiring connector. Reverse the procedure to place the new light assembly into position. Home Appliances – November 2012...
-
Page 20: Abnormity And Solution
The machine inclines The fixing screw not tight Tighten the hanging enough screw and make it horizontal The hanging screw not tight Tighten the hanging enough screw and make it horizontal Home Appliances – November 2012... - Page 21 Canopy Installation and Operation Manual Home Appliances – November 2012...
Need help?
Do you have a question about the CG6BLS and is the answer not in the manual?
Questions and answers
Lights flashing on the rangehood. How do I reset on CF9BLS rangehood