Polycom SoundPoint IP 650 User Manual
Sip a full-duplex hands-free phone
Hide thumbs
Also See for SoundPoint IP 650:
- User manual (136 pages) ,
- Instructions manual (29 pages) ,
- Quick reference manual (14 pages)
Table of Contents
Advertisement
Quick Links
User Guide
®
for the SoundPoint
IP 650
SIP 2.2
July, 2007 Edition
1725-12648-001 Rev. B
SIP 2.2
D i t d o c u me n t wo r d t u a a n g e b o d e n d o o r T e l e c o mH u n t e r . D é z a k e l i j k e T e l e c o m we b s h o p .
T 0 8 8 7 4 6 3 4 4 4 | @ s a l e s @T e l e c o mH u n t e r . n l | www. T e l e c o mH u n t e r . n l
Advertisement
Table of Contents

Subscribe to Our Youtube Channel
Related Manuals for Polycom SoundPoint IP 650


Summary of Contents for Polycom SoundPoint IP 650
-
Page 1: User Guide
User Guide ® for the SoundPoint IP 650 SIP 2.2 July, 2007 Edition 1725-12648-001 Rev. B SIP 2.2 D i t d o c u me n t wo r d t u a a n g e b o d e n d o o r T e l e c o mH u n t e r . D é z a k e l i j k e T e l e c o m we b s h o p . T 0 8 8 7 4 6 3 4 4 4 | @ s a l e s @T e l e c o mH u n t e r . - Page 2 As between the parties, Polycom, Inc. retains title to, and ownership of, all proprietary rights with respect to the software contained within its products. The software is protected by United States copyright laws and international treaty provision.
-
Page 3: About This Guide
Regulatory Notices sections in this guide before you set up and use the SoundPoint IP 650 SIP phone. This information can also be found at http://www.polycom.com/support/voip/. D i t d o c u me n t wo r d t u a a n g e b o d e n d o o r T e l e c o mH u n t e r . D é z a k e l i j k e T e l e c o m we b s h o p . - Page 4 User Guide SoundPoint IP 650 D i t d o c u me n t wo r d t u a a n g e b o d e n d o o r T e l e c o mH u n t e r . D é z a k e l i j k e T e l e c o m we b s h o p .
-
Page 5: Table Of Contents
Attaching the Base ......... . 1–6 Features of Your SoundPoint IP 650 SIP Phone ..... 1–9 Using the Navigation Keys . - Page 6 Supporting Shared Lines ........2–19 3 Using the Basic Features of Your SoundPoint IP 650 SIP Phone .
- Page 7 Using the Busy Lamp Field ........5–7 6 Troubleshooting Your SoundPoint IP 650 SIP Phone ..6–1 Power and Startup .
- Page 8 User Guide SoundPoint IP 650 viii D i t d o c u me n t wo r d t u a a n g e b o d e n d o o r T e l e c o mH u n t e r . D é z a k e l i j k e T e l e c o m we b s h o p .
-
Page 9: Getting Started With Your Soundpoint Ip 650 Sip Phone
This chapter provides basic installation instructions and information for obtaining the best performance with the SoundPoint IP 650 phone. The SoundPoint IP 650 provides a powerful, yet flexible IP communications solution, delivering excellent voice quality. The high-resolution graphic display supplies content for call information, multiple languages, directory access, and system status. -
Page 10: Parts List
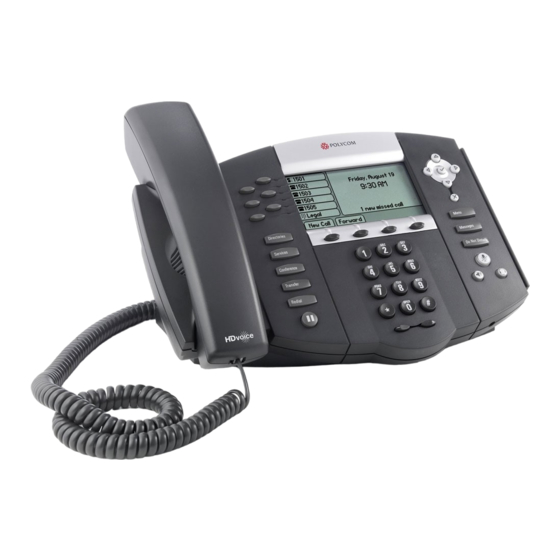
User Guide SoundPoint IP 650 Parts List The following components are included in your SoundPoint IP 650 SIP package: • Polycom SoundPoint IP 650 SIP phone Directories Menu Applications Messages Conference Do Not Disturb Transfer Redial PQRS WXYZ Hold OPER •... -
Page 11: Assembling Your Soundpoint Ip 650 Sip Phone
Check this list before installation to ensure that you have received each item. If you are missing any items, contact your system administrator. Assembling Your SoundPoint IP 650 SIP Phone This section describes how to assemble your SoundPoint IP 650 SIP phone: • Connect network and power source •... - Page 12 Network Port Power over Ethernet Using a regular CAT5 cable (optional accessory from Polycom), the phone can be powered from a PoE (IEEE 802.3af) compliant switch or hub. 1 - 4 D i t d o c u me n t wo r d t u a a n g e b o d e n d o o r T e l e c o mH u n t e r . D é z a k e l i j k e T e l e c o m we b s h o p .
-
Page 13: Connecting The Handset And Optional Headset
Getting Started with Your SoundPoint IP 650 SIP Phone To connect the PoE: • Plug the supplied network cable between the LAN jack on the phone and an available power and data port on the in-line power switch. IEEE 802.3af compliant... -
Page 14: Attaching The Base
For information on supported headsets, go to www.polycom.com/support/voice enter the string “Headset Compatibility List” in the Knowledge Base text box. Attaching the Base The phone base can be attached to the SoundPoint IP 650 in one of two ways: • As a desk mount •... - Page 15 Getting Started with Your SoundPoint IP 650 SIP Phone To attach the base as a desk mount: 1. Place all cords in the recessed area above the modular jacks. 2. Align the two protrusions on the bracket with their corresponding holes in the phone.
- Page 16 3. With mounting tab of the base unit facing up, fasten the base unit to the wall mount using wall anchors (not included). Note The wall mount is not included in SoundPoint IP 650 SIP package. Contact your system administrator if you require one. 1 - 8 D i t d o c u me n t wo r d t u a a n g e b o d e n d o o r T e l e c o mH u n t e r .
-
Page 17: Features Of Your Soundpoint Ip 650 Sip Phone
Getting Started with Your SoundPoint IP 650 SIP Phone Features of Your SoundPoint IP 650 SIP Phone Directories Menu Applications Messages Conference Do Not Disturb Transfer Redial PQRS WXYZ Hold OPER The features of your SoundPoint IP 650 phone are: 1. - Page 18 User Guide SoundPoint IP 650 — —Transfer of current call to third party. — —Dials most recently dialed party. — —Access local (your phone) and global (your organization) features. — —Access and manage text and voice messages. — —Cancels ringing and directs incoming calls to your Voice Mail (if supported).
- Page 19 Getting Started with Your SoundPoint IP 650 SIP Phone 15. Line Indicators—Individual multi-color LEDs display the dynamic call state and remote user status (busy lamp field (BLF) and presence). The mapping is: — Solid green—An active call is in progress.
-
Page 20: Using The Navigation Keys
User Guide SoundPoint IP 650 17. Graphic Display—Shows information about calls, messages, soft keys, time, date, and other relevant data. — Caller display information—first party, second party, number of calls — Information display line (in order of precedence highest to lowest) •... -
Page 21: Customizing Your Soundpoint Ip 650 Sip Phone
Customizing Your SoundPoint IP 650 SIP Phone You can customize your SoundPoint IP 650 phone by adjusting the setting for time and date, display contrast, and ring type, for example. You can add contacts to the phone’s directory manually or from call lists. You can handle incoming calls from different contacts in different ways. -
Page 22: Configuring Basic Settings
You can mute the microphone and adjust the volume using separate keys. Appearance of Time and Date The time and date appears on the graphic display of the SoundPoint IP 650 phone. If the phone cannot obtain a time and date from the call server, the display will flash. -
Page 23: Display Contrast
Customizing Your SoundPoint IP 650 SIP Phone 4. Scroll through the options under each of these selections using the 5. Press the Select soft key to confirm your choice. 6. Press or the Exit soft key repeatedly to return to the idle display. -
Page 24: Backlight Intensity
4. Press the Ok or Cancel soft keys to accept or cancel changes. 5. Press or the Exit soft key repeatedly to return to the idle display. Backlight Intensity Backlight intensity on the SoundPoint IP 650 phone has three modes: • Backlight On • Backlight Idle •... - Page 25 Customizing Your SoundPoint IP 650 SIP Phone • Incoming calls • Ending a call, holding a call, resuming a call by the other party • A voice or instant message received • A USB device plugged in or unplugged If you do not press any keys on the phone, after 20 seconds of the backlight turning on, the backlight dims (or changes) to medium in the following cases: •...
-
Page 26: Headset Memory Mode
User Guide SoundPoint IP 650 5. Select Backlight Idle Intensity. 6. Use the to select high, medium, low, or off and press the Select soft key to modify the Backlight On Intensity. The default level is low. Headset Memory Mode This feature is especially useful for permanent or full-time headset users. -
Page 27: Ring Type
Exit soft key repeatedly to return to the idle display. If you configure your SoundPoint IP 650 phone for silent ring, press the ringing Line Note key or the Answer soft key to answer the call. If your handset is off hook, the call is routed to the handset. -
Page 28: Language Support
User Guide SoundPoint IP 650 Language Support Many languages are supported by the SoundPoint IP 650 phone. To change the language: 1. Press 2. Select Settings > Basic > Preferences > Language. 3. Scroll through the list of available languages. -
Page 29: Adjusting The Volume
Customizing Your SoundPoint IP 650 SIP Phone Adjusting the Volume Press to adjust receiver volume during a call. Pressing these keys in the idle state adjusts the ringer volume. To conform to regulatory requirements, handset and headset volume will return to a... -
Page 30: Managing Contacts
User Guide SoundPoint IP 650 Note Press the Right arrow key from the idle display to access the Placed Calls list. Press the Left arrow key from the idle display to access the Received Calls list. Press the Down arrow from the idle display to access the Missed Calls list. These shortcuts can be used while placing calls or performing transferring and conferencing functions. - Page 31 Customizing Your SoundPoint IP 650 SIP Phone 5. Enter first and/or last name of the contact from the keypad. Use the 1/A/a soft key to select between numeric and upper/lower case alphanumeric modes. Use the Encoding soft key to access special characters in other languages.
-
Page 32: Editing Contacts
User Guide SoundPoint IP 650 11. Press or the Exit soft key repeatedly to return to the idle display. Adding Contacts From Call Lists To add a contact from a call list: 1. Do one of the following steps: Press Select Call Lists >Missed Calls, Received Calls, or Placed Calls as... -
Page 33: Deleting Contacts
Customizing Your SoundPoint IP 650 SIP Phone 2. Select Contact Directory. 3. Use to scroll through the list to find the contact. You can also use the * key to Page Up and the # key to Page Down. 4. Press the Edit soft key 5. -
Page 34: Placing A Call To A Contact
User Guide SoundPoint IP 650 Placing a Call to a Contact To place a call to a contact: 1. Press 2. Select Contact Directory. 3. Use to scroll through the list to find the contact. You can also use the * key to Page Up and the # key to Page Down. -
Page 35: Managing Incoming Calls
Customizing Your SoundPoint IP 650 SIP Phone Managing Incoming Calls You can distinguish incoming calls from contacts in your directory by setting up distinctive rings, sending them directly to your voice mail, or by transferring them directly to another party. -
Page 36: Rejecting Calls
User Guide SoundPoint IP 650 Rejecting Calls You can customize your phone so that incoming calls from a particular party are immediately sent to your voice mail. Rejecting calls is not available on shared lines. Note To send incoming calls from a particular contact directly to voice mail: 1. -
Page 37: System Customizations
The following section details customizations of your SoundPoint IP 650 SIP phone that are performed by your system administrator. Supporting Multiple Lines Your SoundPoint IP 650 SIP phone can support up to 34 lines with or without a SoundPoint IP Expansion Module. For more information, refer to Using the SoundPoint IP Expansion Module on page 5-1. -
Page 38: Supporting Multiple Line Keys Per Line
User Guide SoundPoint IP 650 Depending on how your phone is configured, the display could resemble one of the following figures: Supporting Multiple Line Keys Per Line Each line on the phone can be configured to have more than one Line Key associated with it. -
Page 39: Supporting Shared Lines
Customizing Your SoundPoint IP 650 SIP Phone Supporting Shared Lines Your SoundPoint IP 650 SIP supports shared lines. A shared line is indicated by a different line icon. In the following figure, the line 6721 is private and the line 6723 is shared. - Page 40 User Guide SoundPoint IP 650 2 - 20 D i t d o c u me n t wo r d t u a a n g e b o d e n d o o r T e l e c o mH u n t e r . D é z a k e l i j k e T e l e c o m we b s h o p .
-
Page 41: Using The Basic Features Of Your Soundpoint Ip 650 Sip Phone
Using the Basic Features of Your SoundPoint IP 650 SIP Phone Your SoundPoint IP 650 SIP phone is designed to be used like a regular phone on a public switched telephone network (PSTN). You call place calls, transfer a call to someone else, or conduct a conference call. -
Page 42: Placing A Call
5-1. If you require additional information or assistance with your new phone, contact your system administrator. Placing a Call You can place a call in many ways using your SoundPoint IP 650 SIP phone: • using the handset •... - Page 43 Using the Basic Features of Your SoundPoint IP 650 SIP Phone To place a call using the handset: 1. Do the following steps in any order: — Pick up the handset. — Dial the desired number using the dial pad.
-
Page 44: Answering A Call
To permanently enable your headset, refer to Headset Memory Mode on page 2-6. Answering a Call When you are not in another call, you can answer a call in three basic ways using your SoundPoint IP 650 phone: • using the handset • using the speakerphone •... - Page 45 Dynamic Forwarding on page 3-16. When your SoundPoint IP 650 phone is configured for silent ring, press the ringing Line key or the Answer soft key and you will answer the call. If your handset is off hook, the call is routed to the handset. If your handset is on hook, the call is routed to the speaker.
- Page 46 User Guide SoundPoint IP 650 • If your phone is configured for multiple Line Keys per line: — The second call may cause a call waiting tone to be played, the second Line Key indicator to fast flash green, and an incoming call icon appears.
- Page 47 Using the Basic Features of Your SoundPoint IP 650 SIP Phone Answer the incoming call. This places the original call on hold and refreshes the soft key labels. Incoming calls may be forwarded by pressing the Forward soft key. For more...
-
Page 48: Ending A Call
User Guide SoundPoint IP 650 Ending a Call To end a call: Do one of the following steps: >> — Press the EndCall soft key. — Replace the handset. — Press if in Hands-free Speakerphone Mode, or if in Headset Mode. -
Page 49: Putting A Call On Hold
Using the Basic Features of Your SoundPoint IP 650 SIP Phone — Press and select Call Lists > Placed Calls, and then scroll through the list to find the specific call. 2. Press the Dial soft key. Note These steps also apply to the Missed Call and Received Call lists. -
Page 50: Setting Up A Conference
User Guide SoundPoint IP 650 Multiple Calls on Hold If multiple calls are on hold on a single Line Key, use the switch between the calls, then press the Resume soft key to retrieve the desired call. If more than two calls are on hold on a single Line Key, an indication appears on the graphic display, for example “2/3”, indicating that this is the second... - Page 51 Using the Basic Features of Your SoundPoint IP 650 SIP Phone 2. Press or the Confrnc soft key to create a new call. The active call is placed on hold. 3. Call the second party. 4. When the second party answers, press or the Confrnc soft key again to join all parties in the conference.
-
Page 52: Transferring A Call
User Guide SoundPoint IP 650 Transferring a Call A call can be transferred in one of three ways: • Consultative transfer—The party to whom you want to transfer the call answers their phone before you transfer the call or hang up. You can consult with them before completing the transfer. - Page 53 Using the Basic Features of Your SoundPoint IP 650 SIP Phone 3. As soon as the ring-back sound is heard or after the party answers, press or the Trnsfer soft key to complete the transfer. You can talk privately to the party to which you are transferring the call before the transfer is completed.
-
Page 54: Forwarding Calls
User Guide SoundPoint IP 650 — Press , select Call Lists, select the appropriate list, use to access the number, and then select the Dial soft key. At this point, the call is connected to the number to which you are transferring them. - Page 55 Using the Basic Features of Your SoundPoint IP 650 SIP Phone 3. Using , select the forwarding type you want to change and then press the Select soft key. The options are: — Always—For all incoming calls — No Answer—Once all options to accept calls have been taken —...
- Page 56 User Guide SoundPoint IP 650 Note You can also enter the SIP URL or IP address. For more information on using a SIP URL or IP address, refer to To place a call using the handset: on page 5. Select the Enable soft key to confirm call forwarding.
-
Page 57: Enabling Do Not Disturb
Using the Basic Features of Your SoundPoint IP 650 SIP Phone Enabling Do Not Disturb Press to prevent the phone from ringing on incoming calls. A flashing icon and text on the graphic display indicates that Do Not Disturb is... - Page 58 User Guide SoundPoint IP 650 For example in the figure below, press the fourth Line Key to dial the shipping department. Note Press the Up arrow key from the idle display to access the Speed Dial Index list directly. This shortcut can be used while performing transferring and conferencing functions.
-
Page 59: Using Voice Mail
Using the Basic Features of Your SoundPoint IP 650 SIP Phone 5. Press the Save or Cancel soft keys to accept or cancel changes. 6. Press or the Exit soft key repeatedly to return to the idle display. To assign a new speed dial key: 1. - Page 60 User Guide SoundPoint IP 650 A stutter dial tone in place of normal dial tone is used to indicate that one or more voice messages are waiting at the message center. Note Voice Mail is an optional feature configured on the call server and may not be supported on your particular system.
-
Page 61: Using The Advanced Features Of Your Soundpoint Ip 650 Sip Phone
Using the Basic Features of Your SoundPoint IP 650 SIP Phone on page 3-1. To add a SoundPoint IP Expansion Module to your SoundPoint IP 650 phone, refer to Using the SoundPoint IP Expansion Module on page 5-1. If you require additional information or assistance with your new phone, contact your system administrator. - Page 62 User Guide SoundPoint IP 650 For example, the first figure shows extension 6721 in an outbound call with 6722. The second figure shows an incoming call from 1-800-765-9266. To answer an incoming call when configured for multiple call appearances: Do one of the following steps: >>...
-
Page 63: Using Text Messaging
Using the Advanced Features of Your SoundPoint IP 650 SIP Phone This places the original call on hold and refreshes the soft key labels as indicated in the following figure. If more than two call appearances are in use, two will appear on the display and the total number will be indicated by a counter at the bottom right corner of the display. - Page 64 User Guide SoundPoint IP 650 — Press Select Features > Messages > Instant Messages. — Press the InstMsg soft key to read a message just received. 2. (Optional) If multiple lines are configured on your phone, select from which line messages are to be retrieved from the list using Messages appear first to last in sent order.
-
Page 65: Using Buddy Lists
Your phone can be “watched” by up to 8 other phones. If your SoundPoint IP 650 SIP phone is configured to work with Microsoft Live Communications Server 2005, the behavior of the presence setting and buddy lists is different. -
Page 66: Managing Buddies
User Guide SoundPoint IP 650 Press the MyStat soft key. 2. Use to scroll through the list, and then press the Select soft key to select your new status. This affects information sent to phones watching you. Presence information will also be sent to watching phones when you go off-hook or enable Do Not Disturb. -
Page 67: Integrating With Microsoft Live Communications Server 2005
Using the Advanced Features of Your SoundPoint IP 650 SIP Phone To block or unblock a contact from your buddy list: 1. Press 2. Select Contact Directory. 3. Use to scroll through the list to find the contact. You can also use the * key to Page Up and the # key to Page Down. -
Page 68: Restarting Your Phone
User Guide SoundPoint IP 650 To view and change your privacy list: 1. Press 2. Select Features > Presence > Buddy Status > Privacy List. 3. Use to scroll through the list to find the contact. 4. Press the Edit soft key. - Page 69 Using the Advanced Features of Your SoundPoint IP 650 SIP Phone To restart the phone: Do one of the following steps: >> — Simultaneously press and hold , and for more than 3 seconds or until a beep is heard.
- Page 70 User Guide SoundPoint IP 650 4 - 10 D i t d o c u me n t wo r d t u a a n g e b o d e n d o o r T e l e c o mH u n t e r . D é z a k e l i j k e T e l e c o m we b s h o p .
-
Page 71: Using The Soundpoint Ip Expansion Module
Expansion Module. The SoundPoint IP Expansion Module enhances the user interface of the SoundPoint IP 650 phone with a high-resolution graphic display and 14 Line Keys that can be automatically configured as a line, call appearance, speed dial, or busy lamp field. Up to three SoundPoint IP Expansion Modules can be... -
Page 72: Parts List
If you are missing any items, contact your system administrator. Connecting the SoundPoint IP Expansion Module This section describes how to attach the SoundPoint IP Expansion Module to your SoundPoint IP 650 phone. You can attach up to three SoundPoint IP Expansion Modules. 5 - 2 D i t d o c u me n t wo r d t u a a n g e b o d e n d o o r T e l e c o mH u n t e r . - Page 73 Using the SoundPoint IP Expansion Module To connect a SoundPoint IP Expansion Module to your phone: 1. Remove the rubber plug from the SoundPoint IP 650 or the SoundPoint IP Expansion Module. Menu Messages Do Not Disturb 2. Align the SoundPoint IP Expansion Module at the top of the groove lines on the SoundPoint IP 650 phone and slide it downwards until it clicks into position.
-
Page 74: Features Of The Soundpoint Ip Expansion Module
4. Graphic Display—Shows information about lines or speed dials. 5. Power Contact —Not visible when connected. Power is automatically transferred from the host SoundPoint IP 650 phone to the SoundPoint IP Expansion Module(s) upon connection. Units may be plugged in and unplugged at any time. -
Page 75: Adjusting The Display Contrast
Adjusting the Display Contrast You can adjust the display contrast on a SoundPoint IP Expansion Module through use of the key on the SoundPoint IP 650. To adjust the contrast on the display to a comfortable level: 1. Press 2. Select Settings > Basic > Contrast. -
Page 76: Answering A Call
User Guide SoundPoint IP 650 Answering a Call When a SoundPoint IP Expansion Module is connected to your SoundPoint IP 650 phone, you can answer a call using one of the Line Keys. To answer a call using a SoundPoint IP Expansion Module Line Key:... -
Page 77: Using The Busy Lamp Field
The busy lamp field (BLF) feature allows you to monitor the hook status and remote party information of other users through the BLF LED indicators and display on the SoundPoint IP 650 phone with the attached Expansion Module. For more information, contact your system administrator. - Page 78 User Guide SoundPoint IP 650 The following figure shows the busy status of other users (for example, Jim Brown and Rob Smith are busy on the phone): 5 - 8 D i t d o c u me n t wo r d t u a a n g e b o d e n d o o r T e l e c o mH u n t e r . D é z a k e l i j k e T e l e c o m we b s h o p .
-
Page 79: Troubleshooting Your Soundpoint Ip 650 Sip Phone
Troubleshooting Your SoundPoint IP 650 SIP Phone This chapter presents problems, likely causes, and corrective actions. Problems are grouped as follows: • Power and Startup • Controls • Access to Screens and Systems • Calling • Displays • Audio If you still need assistance, contact your system administrator. -
Page 80: Power And Startup
User Guide SoundPoint IP 650 Power and Startup Symptom Problem Corrective Action There are power issues. The SoundPoint IP 650 phone Do one of the following steps: has no power. • Verify that no lights appear on the unit when it is powered up. -
Page 81: Controls
Troubleshooting Your SoundPoint IP 650 SIP Phone Controls Symptom Problem Corrective Action The dial pad does not work. The dial pad on the SoundPoint Do one of the following steps: IP 650 phone does not respond. • Check for a response from other feature keys or from the dialpad. -
Page 82: Access To Screens And Systems
User Guide SoundPoint IP 650 Access to Screens and Systems Symptom Problem Corrective Action There is no response from The SoundPoint IP 650 phone is Do one of the following steps: feature key presses. not in active state. • Press the keys more slowly. -
Page 83: Calling
Troubleshooting Your SoundPoint IP 650 SIP Phone Calling Symptom Problem Corrective Action There is no dial tone. Power is not correctly applied to Do one of the following steps: the SoundPoint IP 650 phone. • Check that the display is illuminated. - Page 84 User Guide SoundPoint IP 650 Symptom Problem Corrective Action The phone does not ring. Ring setting or volume is low. Do one of the following steps: • Adjust the ringing level from the front panel using the volume up/down keys •...
-
Page 85: Displays
Troubleshooting Your SoundPoint IP 650 SIP Phone Displays Symptom Problem Corrective Action There is no display. Power is not correctly applied to Do one of the following steps: the SoundPoint IP 650 phone. The display is incorrect. • Check that the display is illuminated. - Page 86 User Guide SoundPoint IP 650 6 - 8 D i t d o c u me n t wo r d t u a a n g e b o d e n d o o r T e l e c o mH u n t e r . D é z a k e l i j k e T e l e c o m we b s h o p .
-
Page 87: Regulatory Notices
Polycom, Inc. Do not remove (or allow anybody else to remove) any product identification, copyright or other notices. - Page 88 Replacement products or parts may be new or reconditioned. Polycom is expected to warrant any replaced or repaired product or part for ninety (90) days from shipment, or the remainder of the initial warranty period, whichever is longer. Products returned to Polycom must be sent prepaid and packaged appropriately for safe shipment, and it is recommended that they be insured or sent by a method that provides for tracking of the package.
- Page 89 In accordance with Part 15 of the FCC Rules, the user is cautioned that any changes or modifications not expressly approved by Polycom, Inc. could void the user’s authority to operate the equipment. This equipment may not be used on a coin service or party line.
- Page 90 User Guide SoundPoint IP Regulatory Notices - 4 D i t d o c u me n t wo r d t u a a n g e b o d e n d o o r T e l e c o mH u n t e r . D é z a k e l i j k e T e l e c o m we b s h o p . T 0 8 8 7 4 6 3 4 4 4 | @ s a l e s @T e l e c o mH u n t e r .
- Page 91 # key, page down shortcut 1–12 advanced 4–1 * key, page up shortcut 1–12 basic 3–1 list of 1–9 SoundPoint IP 650 1–9 AC power 1–4 SoundPoint IP Expansion Module 5–1 answering calls 3–4, 3–5 forwarding calls 3–14 assembling your phone 1–3 assigning speed dial keys 3–17...
- Page 92 User Guide SoundPoint IP 650 missed call lists 2–9 basic features 3–1 buddy lists 4–5 multiple call appearances 4–1 call lists, types of 2–9 multiple calls, hold 3–10 calls, on hold 3–9 multiple keys per line 2–18 contact directory 2–10 multiple lines customizing 2–1...
- Page 93 Index up arrow key, Speed Dial Index shortcut 3–18 using SIP URL for calling 3–3 voice mail 3–20 volume 2–9 watch buddies 4–6 Index – 3 D i t d o c u me n t wo r d t u a a n g e b o d e n d o o r T e l e c o mH u n t e r . D é z a k e l i j k e T e l e c o m we b s h o p . T 0 8 8 7 4 6 3 4 4 4 | @ s a l e s @T e l e c o mH u n t e r .
-
Page 94: Index
User Guide SoundPoint IP 650 Index – 4 D i t d o c u me n t wo r d t u a a n g e b o d e n d o o r T e l e c o mH u n t e r . D é z a k e l i j k e T e l e c o m we b s h o p .
Need help?
Do you have a question about the SoundPoint IP 650 and is the answer not in the manual?
Questions and answers