Table of Contents
Advertisement
Quick Links
Advertisement
Table of Contents

Related Manuals for NAD T752


Summary of Contents for NAD T752
- Page 1 Owner’s Manual...
-
Page 2: Safety Information Safety Information
SAFETY INFORMATION PRECAUTIONS PRECAUTIONS PRECAUTIONS PRECAUTIONS PRECAUTIONS Read the Operating Instructions carefully and completely before operating the unit. Be sure to keep the Operating Instructions for future reference. All warnings and cautions in the Operating Instructions and on the unit should be strictly followed, as well as the safety suggestions below. INST INST INST... -
Page 3: Maintenance
ELECTRIC POWER ELECTRIC POWER ELECTRIC POWER ELECTRIC POWER ELECTRIC POWER 1 Power Sources - Connect this unit only to power sources specified in the Operating Instructions, and as marked on the unit. 2 Polarization - As a safety feature, some units are equipped with polarized AC power plugs which can only be inserted one way into a power outlet. -
Page 4: Table Of Contents
TABLE OF CONTENTS Safety Information Safety Information Safety Information ............Safety Information Safety Information Getting the Most from the NAD T 752... -
Page 5: Getting The Most From The Nad T 752
GETTING THE MOST FROM THE NAD T 752 Thank you for choosing NAD. The T 752 A/V Surround Sound Receiver is a technologically advanced and highly capable product — yet we have invested great effort in making it simple and easy to use. The T 752 delivers a range of genuinely useful options for surround sound and stereo listening alike, using powerful digital signal processing and superbly accurate digital-audio circuitry. -
Page 6: Unpacking And Setup
UNPACKING AND SETUP Packed with your T 752 receiver you will find: • An AM loop antenna • A FM ribbon-wire antenna with balun • A removable AC cable (if you wish, any IEC-standard AC cable of suitable wattage may be substituted). •... -
Page 7: About The T 752
2 universal remote control is equally understandable, as are the T 752’s own front-panel and on-screen displays. Its simple yet powerful system of “presets” permits you to fine-tune your listening setup for different conditions, sources, or listeners, and to recall these multiple parameters with a single keypress. INTEGRA INTEGRA INTEGRATION... -
Page 8: Upgradability
ABOUT THE T 752 The T 752 receiver permits flexible system growth via individually accessible pre-out and main-in jacks for all three front channels, enabling external amplifiers to be used for any of these while still maintaining utility of the receiver’s on-board power-amplifier channels for additional channels, remote-room links, or any other suitable purpose. -
Page 9: Quickstart
In case you simply cannot wait to experience the performance of your new NAD T 752 receiver, we provide the following “Quickstart” instructions to get you underway. The steps below connect your DVD player to the T 752’s DVD input; be sure to read “Input Setup”, below. PLAY A DVD MOVIE Y A DVD MOVIE Y A DVD MOVIE... -
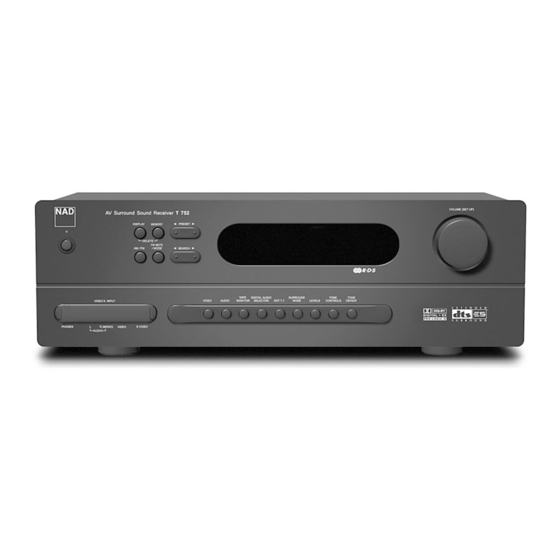
Page 10: Front Panel
FRONT PANEL POWER: Press in to switch the receiver to Standby; the amber indicator (2) above the power button will light, but the main VFL display remains dark, and very little power is consumed. Pressing any other front-panel key, or the HTR 2 remote’s [ON] button, will switch the receiver on, making it operational, changing the amber Standby indicator to green and illuminating the VFL display. - Page 11 NOTE: For headphone listening the front left/right speakers must be set to “Large” on the OSD’s Speaker Settings page, otherwise headphone bass response will be restricted. NOTE: Plugging in headphones will automatically switch the T752 to “Stereo” mode. keys provide direct access to those channels’ relative levels, however in this case the...
-
Page 12: Rear Panel
S-Video connection is superior and should be used if your TV/monitor provides the corresponding input. NOTE: The T752 “transcodes” S-Video to composite-video signals, so that S-Video signals connected to the DVD, SAT, VCR, and VIDEO4-6 inputs will be present at both the S-Video and composite MONITOR OUT jacks when any of these inputs is selected. This provides the convenience of requiring only a single video connection (usually S-Video) between the T 752 and the TV/monitor. - Page 13 DISC: Connect the analog stereo audio output from a second CD player or other line-level audio source to this input. NOTE: Connecting a phonograph turntable to the T 752 requires an outboard magnetic phono-preamp component such as the NAD PP1; you cannot connect turntable directly to the DISC inputs.
-
Page 14: Setting Up The T 752
SETTING UP THE T 752 Before you make the first connection to your T 752, you should have the arrangement of your listening room/ home theater components and furniture mapped out, at least initially. Unfortunately, a discussion of the vital questions of loudspeaker placement and listening/viewing positions is beyond our scope here. -
Page 15: About The On-Screen Displays (Osd) And Front-Panel Readout
ABOUT THE ON-SCREEN DISPLAYS (OSD) AND FRONT-PANEL READOUT The T 752 receiver employs a simple, self-explanatory system of on-screen display "menus" that will appear on the connected video monitor/TV. These are required during the setup process (and are useful in day-to- day operation), so be sure to connect the monitor/TV before proceeding with setup. -
Page 16: Speaker Setup
ABOUT THE ON-SCREEN DISPLAYS (OSD) AND FRONT-PANEL READOUT Every surround-sound system requires "bass-management" to direct low-frequency content from any or all channels to the speakers best able to reproduce it. For this function to operate correctly, it is important that you correctly identify your speakers' capabilities. -
Page 17: Speaker Distance
ABOUT THE ON-SCREEN DISPLAYS (OSD) AND FRONT-PANEL READOUT As the test signal cycles around the speakers, the OSD (and the VFL front panel display) will highlight the currently playing channel. Now use the remote's [ from the currently playing channel to the required level (it’s usually simplest to begin with the left-front). The "level offset"... -
Page 18: Using The T 752
USING THE T 752 You may operate the T 752 receiver from its front panel or via the HTR 2 remote control. Since the remote will be the primary controller for most cases, we will focus on remote-controlled operations. Be sure also to read the section, "Front Panel"... -
Page 19: About Antennas
ABOUT ANTENNAS ABOUT ANTENNAS ABOUT ANTENNAS ABOUT ANTENNAS ABOUT ANTENNAS The supplied ribbon-wire FM antenna can be connected to the rear-panel FM-antenna input using the ‘balun’ included adapter, and should be fully extended to form a “T”. This folded-dipole antenna will usually work best oriented vertically, with the arms of its “T”... -
Page 20: About The T 752'S Listening Modes
The following Surround Sound Modes require a specially encoded signal that must be present in digital format to be decoded by the T752. These modes are automatically switched on when the appropriate data stream is detected selected in the setup menu of the source media. -
Page 21: Displaying The Signal Mode
• Dolby Digital • Dolby Digital EX • DTS • DTS ES 6.1 Digital recordings in Dolby Digital or DTS formats are reproduced via the channels employed in the original recording (up to the maximum channels present in the current <Speaker Settings> setup). NOTE: The DVD player must be sending a Dolby Digital or DTS bit-stream from its digital output. -
Page 22: Adjusting Listening Modes
Use the HTR 2 remote's [Surr. Mode] key, or the front panel SURROUND MODE key, to select the Listening Mode you wish to display and listen to; this will display on the T752’s VFL Display. One can also select variations using the HTR 2 [ Dolby Pro Logic II (PLII) PLII MOVIES is optimized for film soundtracks. -
Page 23: Using The Htr 2 Remote Control
SPECIFICA SPECIFICA SPECIFICATIONS SPECIFICA SPECIFICA TIONS TIONS TIONS TIONS • Controls up to 8 devices. • 44 function keys. • Learns up to 352 commands. • Records up to 44 macros with a maximum of 64 commands each. • Configurable punch-through. •... -
Page 24: Punch-Through
USING THE HTR 2 REMOTE CONTROL PUNCH-THROUGH PUNCH-THROUGH PUNCH-THROUGH PUNCH-THROUGH PUNCH-THROUGH The HTR 2’s “punch-through” function allows you to retain a function key from one Device Select “page” on another, so that, for example, the AMP [SURR MODE] function might still control the T 752 when the DVD Device Selector page is active To set a punch through, after entering the Learning Mode, and pressing the desired key to be punched- through, simply press the device key twice of the device to punch through to. -
Page 25: Key-Illumination Timeout
NOTE: When a macro executes, a 1 second delay is automatically inserted between its commands. If you need more than a 1 second delay between particular commands—for example, to permit a component to power up completely—you can record “empty” steps into the macro by changing Device Selector “pages” without entering actual command functions. -
Page 26: Summary Of Htr 2 Modes
USING THE HTR 2 REMOTE CONTROL SEARCH MODE SEARCH MODE SEARCH MODE SEARCH MODE SEARCH MODE If none of the codes from the table, when entered, turns on the component, and if you are quite sure you have followed the above procedure completely and carefully, you may want to try the “search” method as follows: Enter Library Mode by simultaneously pressing-and-holding for 3 seconds both the desired Device Selector key and the [A/V PRESET] key, until the Learn LED turns green. -
Page 27: Troubleshooting
• Reduce sunlight/room lighting or ambient light • Microprocessor error • Power-down the T 752 via the front-panel • T752 may have over heated • 12V TRIGGER IN/OUT is set to AUTO or • Wait five minutes, re-connect and “on” position •... -
Page 28: Specifications
Physical Specifications Dimensions (W x H x D) Net Weight Shipping Weight Specifications are subject to change without notice. For updated documentation and features please log onto www.nadelectronics.com for the latest information about your T752. T752 T752 T752 T752 T752... - Page 29 A Division of Lenbrook Industries LTD All rights reserved. No part of this publication may be reproduced, stored or transmitted in any form without the written permission of NAD Electronics International A Division of Lenbrook Industries LTD T752 Manual GB/F/D/NL 09/02 China...
Need help?
Do you have a question about the T752 and is the answer not in the manual?
Questions and answers